
Operating Guide
Page 3
...-Cord Protection Route the power cord so that could result in a wet basement, or near or over a radiator or heat register, or where it from battery power, or other ). Accessories Do not place the set on or pinched by forcing it . Do not place the set . Object and Liquid Entry Never...
...-Cord Protection Route the power cord so that could result in a wet basement, or near or over a radiator or heat register, or where it from battery power, or other ). Accessories Do not place the set on or pinched by forcing it . Do not place the set . Object and Liquid Entry Never...
Operating Guide
Page 5
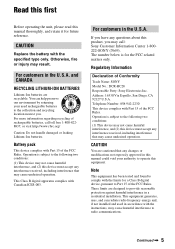
..., fire or injury may cause undesired operation. For more information regarding recycling of Conformity Trade Name: SONY Model No.: DCR-HC28 Responsible Party: Sony Electronics Inc. Operation is subject to provide reasonable protection against harmful interference in accordance with the limits ... your authority to Part 15 of the FCC Rules. Continued , 5 Regulatory Information Declaration of rechargeable batteries, call : Sony Customer Information Center 1-800222-SONY (7669). CAUTION You are recyclable. For customers in the U.S.A. Note This equipment has been tested and...
..., fire or injury may cause undesired operation. For more information regarding recycling of Conformity Trade Name: SONY Model No.: DCR-HC28 Responsible Party: Sony Electronics Inc. Operation is subject to provide reasonable protection against harmful interference in accordance with the limits ... your authority to Part 15 of the FCC Rules. Continued , 5 Regulatory Information Declaration of rechargeable batteries, call : Sony Customer Information Center 1-800222-SONY (7669). CAUTION You are recyclable. For customers in the U.S.A. Note This equipment has been tested and...
Operating Guide
Page 6
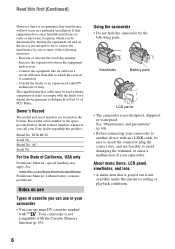
...for a digital device pursuant to correct the interference by one or more of your Sony dealer regarding this first (Continued) However, there is connected. - ACSerial No. Connect...may apply, See www.dtsc.ca.gov/hazardouswaste/perchlorate Perchlorate Material: Lithium battery contains perchlorate. DCR-HC28 Serial No. If this equipment does cause harmful interference to radio or... (p. 68). • Before connecting your camcorder • You can use in a particular installation. Using the camcorder • Do not hold the camcorder by turning the equipment off and on a...
...for a digital device pursuant to correct the interference by one or more of your Sony dealer regarding this first (Continued) However, there is connected. - ACSerial No. Connect...may apply, See www.dtsc.ca.gov/hazardouswaste/perchlorate Perchlorate Material: Lithium battery contains perchlorate. DCR-HC28 Serial No. If this equipment does cause harmful interference to radio or... (p. 68). • Before connecting your camcorder • You can use in a particular installation. Using the camcorder • Do not hold the camcorder by turning the equipment off and on a...
Operating Guide
Page 8
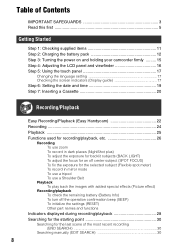
... 3 Read this first 5 Getting Started Step 1: Checking supplied items 11 Step 2: Charging the battery pack 12 Step 3: Turning the power on and holding your camcorder firmly ......... 15 Step 4: Adjusting the LCD panel and viewfinder 16 Step 5: Using the touch panel... 17 Changing the language setting 17 Checking the screen indicators (Display guide 17 Step 6: Setting the date and time 19 Step 7: Inserting a Cassette 20 Recording/Playback Easy Recording/Playback (Easy Handycam...
... 3 Read this first 5 Getting Started Step 1: Checking supplied items 11 Step 2: Charging the battery pack 12 Step 3: Turning the power on and holding your camcorder firmly ......... 15 Step 4: Adjusting the LCD panel and viewfinder 16 Step 5: Using the touch panel... 17 Changing the language setting 17 Checking the screen indicators (Display guide 17 Step 6: Setting the date and time 19 Step 7: Inserting a Cassette 20 Recording/Playback Easy Recording/Playback (Easy Handycam...
Operating Guide
Page 11
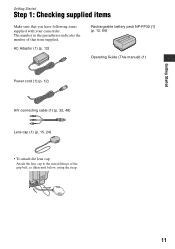
The number in the parentheses indicates the number of the grip belt, as illustrated below, using the strap. 11 AC Adaptor (1) (p. 12) Rechargeable battery pack NP-FP30 (1) (p. 12, 66) Operating Guide (This manual) (1) Power cord (1) (p. 12) A/V connecting cable (1) (p. 32, 48) Lens cap (1) (p. 15, 24) • To attach the lens cap Attach the lens cap to the metal fittings of that you have following items supplied with your camcorder. Getting Started Getting Started Step 1: Checking supplied items Make sure that item supplied.
The number in the parentheses indicates the number of the grip belt, as illustrated below, using the strap. 11 AC Adaptor (1) (p. 12) Rechargeable battery pack NP-FP30 (1) (p. 12, 66) Operating Guide (This manual) (1) Power cord (1) (p. 12) A/V connecting cable (1) (p. 32, 48) Lens cap (1) (p. 15, 24) • To attach the lens cap Attach the lens cap to the metal fittings of that you have following items supplied with your camcorder. Getting Started Getting Started Step 1: Checking supplied items Make sure that item supplied.
Operating Guide
Page 12
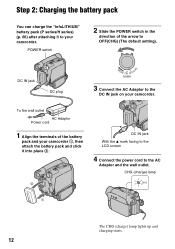
... 1 The CHG (charge) lamp lights up and charging starts. 12 POWER switch 2 Slide the POWER switch in the direction of the battery pack and your camcorder 1, then attach the battery pack and click it to your camcorder. DC IN jack DC plug 3 Connect the AC Adaptor to the DC IN jack on your... camcorder. Step 2: Charging the battery pack You can charge the "InfoLITHIUM" battery pack (P series/H series) (p. 66) after attaching it into place 2. 2 DC IN jack With the v mark facing to the LCD screen 4 Connect the power ...
... 1 The CHG (charge) lamp lights up and charging starts. 12 POWER switch 2 Slide the POWER switch in the direction of the battery pack and your camcorder 1, then attach the battery pack and click it to your camcorder. DC IN jack DC plug 3 Connect the AC Adaptor to the DC IN jack on your... camcorder. Step 2: Charging the battery pack You can charge the "InfoLITHIUM" battery pack (P series/H series) (p. 66) after attaching it into place 2. 2 DC IN jack With the v mark facing to the LCD screen 4 Connect the power ...
Operating Guide
Page 13
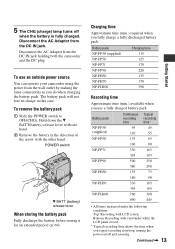
...Disconnect the AC Adaptor from the DC IN jack holding both the camcorder and the DC plug. To use a fully charged battery pack. POWER switch 1 2 V BATT (battery) release lever When storing the battery pack Fully discharge the battery before storing it for an extended period (p. 66). Disconnect the AC...you use an outside power source You can operate your camcorder using the power from the wall outlet by making the same connections as you fully charge a fully discharged battery pack. Continued , 13 Getting Started To remove the battery pack 1 Slide the POWER switch to OFF(CHG). ...
...Disconnect the AC Adaptor from the DC IN jack holding both the camcorder and the DC plug. To use a fully charged battery pack. POWER switch 1 2 V BATT (battery) release lever When storing the battery pack Fully discharge the battery before storing it for an extended period (p. 66). Disconnect the AC...you use an outside power source You can operate your camcorder using the power from the wall outlet by making the same connections as you fully charge a fully discharged battery pack. Continued , 13 Getting Started To remove the battery pack 1 Slide the POWER switch to OFF(CHG). ...
Operating Guide
Page 14
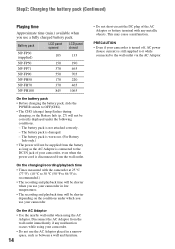
.... - This may cause a malfunction. PRECAUTION • Even if your camcorder. The battery pack is worn-out. (For Battery Info only.) • The power will not be correctly displayed under which you use a fully charged battery pack. Battery pack LCD panel opened LCD panel closed NP-FP30 (supplied) 105 135 ... to 86 °F) is recommended.) • The recording and playback time will be shorter when you use your camcorder in low temperatures. • The recording and playback time will be supplied from the battery as long as the AC Adaptor is connected to the DC IN jack of your...
.... - This may cause a malfunction. PRECAUTION • Even if your camcorder. The battery pack is worn-out. (For Battery Info only.) • The power will not be correctly displayed under which you use a fully charged battery pack. Battery pack LCD panel opened LCD panel closed NP-FP30 (supplied) 105 135 ... to 86 °F) is recommended.) • The recording and playback time will be shorter when you use your camcorder in low temperatures. • The recording and playback time will be supplied from the battery as long as the AC Adaptor is connected to the DC IN jack of your...
Operating Guide
Page 15
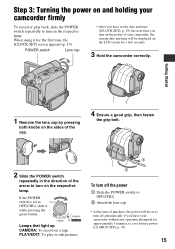
... back, slide the POWER switch repeatedly to turn on the respective lamp. Step 3: Turning the power on and holding your camcorder without any operation attempted for approximately 5 minutes, to save battery power ([A.SHUT OFF], p. 47). 15 If the POWER switch is set the date and time ([CLOCK SET], p. 19...), the next time you leave your camcorder firmly To record or play or edit pictures. 4 1 2 3 To turn off the power 1 Slide ...
... back, slide the POWER switch repeatedly to turn on the respective lamp. Step 3: Turning the power on and holding your camcorder without any operation attempted for approximately 5 minutes, to save battery power ([A.SHUT OFF], p. 47). 15 If the POWER switch is set the date and time ([CLOCK SET], p. 19...), the next time you leave your camcorder firmly To record or play or edit pictures. 4 1 2 3 To turn off the power 1 Slide ...
Operating Guide
Page 16
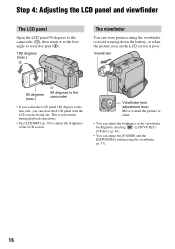
Viewfinder 90 degrees (max.) 1 90 degrees to the camcorder • If you rotate the LCD panel 180 degrees to the lens side, you can view pictures using the... [VF B.L.] (p. 46). • You can adjust the [FADER] and the [EXPOSURE] setting using the viewfinder to avoid wearing down the battery, or when the picture seen on the LCD screen is clear. • You can adjust the brightness of the LCD screen. Viewfinder lens adjustment... 4: Adjusting the LCD panel and viewfinder The LCD panel Open the LCD panel 90 degrees to the camcorder (1), then rotate it until the picture is poor.
Viewfinder 90 degrees (max.) 1 90 degrees to the camcorder • If you rotate the LCD panel 180 degrees to the lens side, you can view pictures using the... [VF B.L.] (p. 46). • You can adjust the [FADER] and the [EXPOSURE] setting using the viewfinder to avoid wearing down the battery, or when the picture seen on the LCD screen is clear. • You can adjust the brightness of the LCD screen. Viewfinder lens adjustment... 4: Adjusting the LCD panel and viewfinder The LCD panel Open the LCD panel 90 degrees to the camcorder (1), then rotate it until the picture is poor.

Operating Guide
Page 19
In that case, charge the rechargeable battery and then set the clock for the first time. 1 Touch t ... are not displayed while recording, but they are automatically recorded on your camcorder or change the POWER switch position. • If you do not set... Setting the date and time Getting Started Set the date and time when using this camcorder for [D] (day), [H] (hour) and [M] (minute). For midday, set the... / , then touch [EXEC]. If you do not use your camcorder for about 3 months, the built-in rechargeable battery gets discharged and the date and time settings may be displayed during ...
In that case, charge the rechargeable battery and then set the clock for the first time. 1 Touch t ... are not displayed while recording, but they are automatically recorded on your camcorder or change the POWER switch position. • If you do not set... Setting the date and time Getting Started Set the date and time when using this camcorder for [D] (day), [H] (hour) and [M] (minute). For midday, set the... / , then touch [EXEC]. If you do not use your camcorder for about 3 months, the built-in rechargeable battery gets discharged and the date and time settings may be displayed during ...
Operating Guide
Page 27
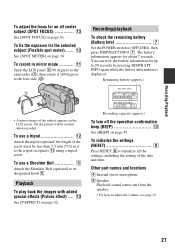
...sound comes out from the speaker. • For how to 20 seconds by pressing DISP/BATT INFO again while the battery information is displayed. Remaining battery (approx.) BATTERY INFO BATTERY CHARGE LEVEL 0% 50% 100% REC TIME AVAILABLE LCD SCREEN : 86 min VIEWFINDER : 99 min Recording capacity (approx....) To turn off center subject (SPOT FOCUS 0 See [SPOT FOCUS] on page 36. qa Open the LCD panel qa 90 degrees to the camcorder ...
...sound comes out from the speaker. • For how to 20 seconds by pressing DISP/BATT INFO again while the battery information is displayed. Remaining battery (approx.) BATTERY INFO BATTERY CHARGE LEVEL 0% 50% 100% REC TIME AVAILABLE LCD SCREEN : 86 min VIEWFINDER : 99 min Recording capacity (approx....) To turn off center subject (SPOT FOCUS 0 See [SPOT FOCUS] on page 36. qa Open the LCD panel qa 90 degrees to the camcorder ...
Operating Guide
Page 28
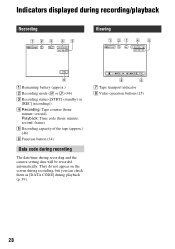
... them as [DATA CODE] during recording and the camera setting data will be recorded automatically. Indicators displayed during recording/playback Recording 12 3 4 5 Viewing 1 27 4 5 6 A Remaining battery (approx.) B Recording mode (SP or LP) (46) C Recording status ([STBY] (standby) or [REC] (recording)) D Recording: Tape counter (hour: minute: second) Playback: Time code (hour: minute...
... them as [DATA CODE] during recording and the camera setting data will be recorded automatically. Indicators displayed during recording/playback Recording 12 3 4 5 Viewing 1 27 4 5 6 A Remaining battery (approx.) B Recording mode (SP or LP) (46) C Recording status ([STBY] (standby) or [REC] (recording)) D Recording: Tape counter (hour: minute: second) Playback: Time code (hour: minute...
Operating Guide
Page 38
...•If keeps flashing even after you have touched , set [WHT BAL] to [ AUTO]. • If you have changed the battery pack while [ AUTO] was selected, or taken your camcorder outdoors from inside the house, or vice versa. • Set [WHT BAL] to [ AUTO] or [ONE PUSH] under white or... to the brightness of the recording environment. At party scenes or studios where the lighting conditions change the [PROGRAM AE] settings, or bring your camcorder outdoors after inside use with the screen facing out (p. 37). • The setting returns to [ AUTO] when you turn the power off ...
...•If keeps flashing even after you have touched , set [WHT BAL] to [ AUTO]. • If you have changed the battery pack while [ AUTO] was selected, or taken your camcorder outdoors from inside the house, or vice versa. • Set [WHT BAL] to [ AUTO] or [ONE PUSH] under white or... to the brightness of the recording environment. At party scenes or studios where the lighting conditions change the [PROGRAM AE] settings, or bring your camcorder outdoors after inside use with the screen facing out (p. 37). • The setting returns to [ AUTO] when you turn the power off ...
Operating Guide
Page 45
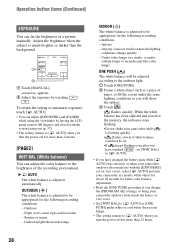
... will not be affected by this operation. LCD/VF SET menu - BRIGHT Brightens the LCD screen. • When you select [BRIGHT], battery life is automatically selected for details on selecting menu items. AUDIO MIX See page 52. LCD COLOR You can adjust the color on selecting menu...) You can adjust the brightness of the LCD screen's backlight. AUDIO MIX See page 34 for the setting. • When you connect your camcorder to outside power sources, [BRIGHT] is slightly reduced during recording. See page 34 for details on the LCD screen with B. The recorded picture...
... will not be affected by this operation. LCD/VF SET menu - BRIGHT Brightens the LCD screen. • When you select [BRIGHT], battery life is automatically selected for details on selecting menu items. AUDIO MIX See page 52. LCD COLOR You can adjust the color on selecting menu...) You can adjust the brightness of the LCD screen's backlight. AUDIO MIX See page 34 for the setting. • When you connect your camcorder to outside power sources, [BRIGHT] is slightly reduced during recording. See page 34 for details on the LCD screen with B. The recorded picture...
Operating Guide
Page 46
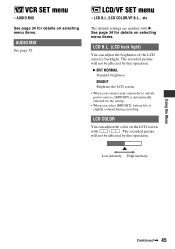
...to PLAY/ EDIT or CAMERA with a cassette inserted. • When you touch (Play/Pause). BRIGHT Brightens the viewfinder screen. • When you connect your camcorder to 1.5 times the SP mode (Long Play). • If you record in the LP mode, a mosaic-like noise may appear or sound may not be... interrupted when you play back the tape on other camcorders or VCRs. • When you select [BRIGHT], battery life is automatically selected for details on selecting menu items. REC MODE (Recording mode) B SP (SP) Records in the SP...
...to PLAY/ EDIT or CAMERA with a cassette inserted. • When you touch (Play/Pause). BRIGHT Brightens the viewfinder screen. • When you connect your camcorder to 1.5 times the SP mode (Long Play). • If you record in the LP mode, a mosaic-like noise may appear or sound may not be... interrupted when you play back the tape on other camcorders or VCRs. • When you select [BRIGHT], battery life is automatically selected for details on selecting menu items. REC MODE (Recording mode) B SP (SP) Records in the SP...
Operating Guide
Page 54
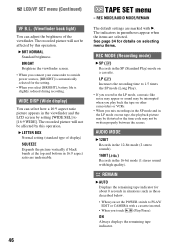
... the setting of the functions that are not displayed on . • Disconnect the AC Adaptor from your Sony dealer. Overall operations/Easy Handycam The power does not turn on . • Attach a charged battery pack to the camcorder (p. 12). • Use the AC Adaptor to connect to a wall outlet (p. 12). This is completed (p. 13). 54...
... the setting of the functions that are not displayed on . • Disconnect the AC Adaptor from your Sony dealer. Overall operations/Easy Handycam The power does not turn on . • Attach a charged battery pack to the camcorder (p. 12). • Use the AC Adaptor to connect to a wall outlet (p. 12). This is completed (p. 13). 54...
Operating Guide
Page 55
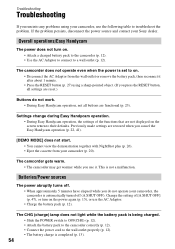
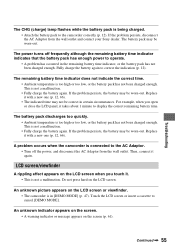
...Sony dealer. This is connected to the AC Adaptor. • Turn off frequently although the remaining battery time indicator indicates that the battery pack has enough power to operate. • A problem has occurred in the remaining battery time indicator, or the battery pack has not been charged enough. A problem occurs when the camcorder... A rippling effect appears on the LCD screen or viewfinder. • The camcorder is being charged. • Attach the battery pack to display the correct remaining battery time. If the problem persists, disconnect the AC Adaptor from the wall outlet...
...Sony dealer. This is connected to the AC Adaptor. • Turn off frequently although the remaining battery time indicator indicates that the battery pack has enough power to operate. • A problem has occurred in the remaining battery time indicator, or the battery pack has not been charged enough. A problem occurs when the camcorder... A rippling effect appears on the LCD screen or viewfinder. • The camcorder is being charged. • Attach the battery pack to display the correct remaining battery time. If the problem persists, disconnect the AC Adaptor from the wall outlet...
Operating Guide
Page 56
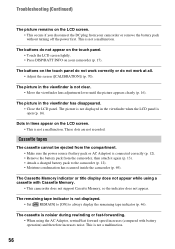
...(p. 12). • Remove the battery pack from your camcorder (p. 17). This is not displayed. • Set [ REMAIN] to [ON] to the camcorder (p. 12). • Moisture condensation has occurred inside the camcorder (p. 69). Troubleshooting (Continued) The picture remains on your camcorder or remove the battery pack without turning off the power ...• Press DISP/BATT INFO on the LCD screen. • This occurs if you disconnect the DC plug from the camcorder, then attach it again (p. 13). • Attach a charged battery pack to always display the remaining tape indicator (p. 46).
...(p. 12). • Remove the battery pack from your camcorder (p. 17). This is not displayed. • Set [ REMAIN] to [ON] to the camcorder (p. 12). • Moisture condensation has occurred inside the camcorder (p. 69). Troubleshooting (Continued) The picture remains on your camcorder or remove the battery pack without turning off the power ...• Press DISP/BATT INFO on the LCD screen. • This occurs if you disconnect the DC plug from the camcorder, then attach it again (p. 13). • Attach a charged battery pack to always display the remaining tape indicator (p. 46).
Operating Guide
Page 61
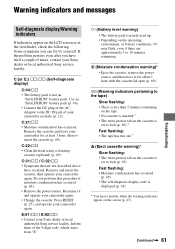
... (p. 69). • The self-diagnosis display code is not an "InfoLITHIUM" battery pack. Inform them of times, contact your Sony dealer or local authorized Sony service facility. E (Battery level warning) • The battery pack is set to the DC IN jack of your camcorder again. If the problem persists even after you can fix by yourself...
... (p. 69). • The self-diagnosis display code is not an "InfoLITHIUM" battery pack. Inform them of times, contact your Sony dealer or local authorized Sony service facility. E (Battery level warning) • The battery pack is set to the DC IN jack of your camcorder again. If the problem persists even after you can fix by yourself...


