
Operating Instructions
Page 6
...Enjoying Video Files 54 Adjusting the Delay Between the Picture and Sound 56 Restricting Playback of the Disc........... 57 Changing the System Settings by Using the Setup Display 59 Tuner Presetting Radio Stations 67 Listening to the Radio 68 Control for HDMI/External Audio Device Using the Control ...for HDMI Function for "BRAVIA" Sync 70 Using the DIGITAL MEDIA PORT Adapter 73 Using an S-AIR Product 74 Other Operations Getting Optimal ...
...Enjoying Video Files 54 Adjusting the Delay Between the Picture and Sound 56 Restricting Playback of the Disc........... 57 Changing the System Settings by Using the Setup Display 59 Tuner Presetting Radio Stations 67 Listening to the Radio 68 Control for HDMI/External Audio Device Using the Control ...for HDMI Function for "BRAVIA" Sync 70 Using the DIGITAL MEDIA PORT Adapter 73 Using an S-AIR Product 74 Other Operations Getting Optimal ...

Operating Instructions
Page 10
Getting Started Getting Started Unpacking DAV-HDX285 • Front speakers (2) • Center speaker (1) • Surround speakers (2) • FM wire antenna (aerial) (1) • Foot pads (1 set) or • Speaker cords (6, red/white/ green/gray/blue/purple) • Video cord (1) • Operating Instructions • Quick Setup Guide For U.S. and Australian models • DIGITAL MEDIA PORT adapter...
Getting Started Getting Started Unpacking DAV-HDX285 • Front speakers (2) • Center speaker (1) • Surround speakers (2) • FM wire antenna (aerial) (1) • Foot pads (1 set) or • Speaker cords (6, red/white/ green/gray/blue/purple) • Video cord (1) • Operating Instructions • Quick Setup Guide For U.S. and Australian models • DIGITAL MEDIA PORT adapter...

Operating Instructions
Page 11
Getting Started DAV-HDX585 • Front speakers (2) • Center speaker (1) • Surround speakers (2) • Subwoofer (1) • FM wire antenna (aerial) (1) • Posts (2) or • Bases (2)...black) (4) • Video cord (1) • Screws (with washer) (4) • Remote commander (remote) (1) • R6 (size AA) batteries (2) • Operating Instructions • Quick Setup Guide • Setup Disc (DVD) • DIGITAL MEDIA PORT adapter (TDM-iP20) (1) • Calibration mic (1) • AM loop antenna (aerial) (1) • Foot pads (1 set) • Operating ...
Getting Started DAV-HDX585 • Front speakers (2) • Center speaker (1) • Surround speakers (2) • Subwoofer (1) • FM wire antenna (aerial) (1) • Posts (2) or • Bases (2)...black) (4) • Video cord (1) • Screws (with washer) (4) • Remote commander (remote) (1) • R6 (size AA) batteries (2) • Operating Instructions • Quick Setup Guide • Setup Disc (DVD) • DIGITAL MEDIA PORT adapter (TDM-iP20) (1) • Calibration mic (1) • AM loop antenna (aerial) (1) • Foot pads (1 set) • Operating ...

Operating Instructions
Page 12
Getting Started DAV-HDX685 • Front speakers (2) • AM loop antenna (aerial) (1) • Calibration mic (1) • Center speaker (1) • Surround speakers (2) • Subwoofer (1) • FM wire antenna (aerial) (1) &#...; Bases (4) • Video cord (1) • Screws (black) (8) • Remote commander (remote) (1) • Screws (with washer) (8) • R6 (size AA) batteries (2) • Operating Instructions • Quick Setup Guide • Setup Disc (DVD) 12GB
Getting Started DAV-HDX685 • Front speakers (2) • AM loop antenna (aerial) (1) • Calibration mic (1) • Center speaker (1) • Surround speakers (2) • Subwoofer (1) • FM wire antenna (aerial) (1) &#...; Bases (4) • Video cord (1) • Screws (black) (8) • Remote commander (remote) (1) • Screws (with washer) (8) • R6 (size AA) batteries (2) • Operating Instructions • Quick Setup Guide • Setup Disc (DVD) 12GB

Operating Instructions
Page 33
"/1 5 Press X/x to select the setting that the signal from the system appears on . • [OFF]: The Control for selecting the language used in the on the TV. 2 Press [/1. VIDEO SETUP TV TYPE: 16:9 PROGRESSIVE (COMPONENT OUT): 16:9 4:3 OUTPUT: 4:3 LETTER BOX BLACK LEVEL: 4:3 PAN SCAN ...OFF OFF SD 7 Press X/x to select the setting, then press . • [ON]: The Control for using the system. LANGUAGE SETUP OSD: MENU: AUDIO: SUBTITLE: ENGLISH ENGLISH FRENCH SPANISH PORTUGUESE 6 Press X/x to select a language, then press . SPEAKER FORMATION STANDARD 33GB The...
"/1 5 Press X/x to select the setting that the signal from the system appears on . • [OFF]: The Control for selecting the language used in the on the TV. 2 Press [/1. VIDEO SETUP TV TYPE: 16:9 PROGRESSIVE (COMPONENT OUT): 16:9 4:3 OUTPUT: 4:3 LETTER BOX BLACK LEVEL: 4:3 PAN SCAN ...OFF OFF SD 7 Press X/x to select the setting, then press . • [ON]: The Control for using the system. LANGUAGE SETUP OSD: MENU: AUDIO: SUBTITLE: ENGLISH ENGLISH FRENCH SPANISH PORTUGUESE 6 Press X/x to select a language, then press . SPEAKER FORMATION STANDARD 33GB The...

Operating Instructions
Page 34
...considerably from the status of the room in which the system is installed may affect measurements. Give consideration to select [QUICK], then press . Quick Setup is in the front panel display. 2 Press DISPLAY while the system is finished. repeatedly until "DVD" appears in stop... mode. The Quick Setup display appears. All connections and setup operations are actually positioned, then press . The ...
...considerably from the status of the room in which the system is installed may affect measurements. Give consideration to select [QUICK], then press . Quick Setup is in the front panel display. 2 Press DISPLAY while the system is finished. repeatedly until "DVD" appears in stop... mode. The Quick Setup display appears. All connections and setup operations are actually positioned, then press . The ...

Operating Instructions
Page 35
... TV (page 26), select the type of video output of the system. The Setup Display appears. 5 Press X/x to select the desired setting, then press . • [AUTO (1920 × 1080p)]: The system outputs the optimal video signal for displaying TV images which reduces flickering ...signals, and, - Progressive is in the front panel display. 2 Press DISPLAY while the system is connected via jacks other than the COMPONENT VIDEO OUT jacks. [ON]: The system outputs progressive signals. The options for [VIDEO SETUP] appear. 6 Press X/x to select [PROGRESSIVE (COMPONENT OUT)], then press . 7 ...
... TV (page 26), select the type of video output of the system. The Setup Display appears. 5 Press X/x to select the desired setting, then press . • [AUTO (1920 × 1080p)]: The system outputs the optimal video signal for displaying TV images which reduces flickering ...signals, and, - Progressive is in the front panel display. 2 Press DISPLAY while the system is connected via jacks other than the COMPONENT VIDEO OUT jacks. [ON]: The system outputs progressive signals. The options for [VIDEO SETUP] appear. 6 Press X/x to select [PROGRESSIVE (COMPONENT OUT)], then press . 7 ...

Operating Instructions
Page 45
...you select another disc. • Resume Play does not work during Program Play and Shuffle Play. • This function may appear as a menu. the system enters standby mode (DATA CD/ DATA DVD only). - you change the function by pressing "/1. 1 While playing a disc, press x to [ON]. ..."RESUME" appears in Step 3 may not work even if the system is in the front panel display. The system starts playback. To activate this case, press H. Note • This system stores the resume points in [SYSTEM SETUP] to stop mode to the menu Press O RETURN. In this function, set...
...you select another disc. • Resume Play does not work during Program Play and Shuffle Play. • This function may appear as a menu. the system enters standby mode (DATA CD/ DATA DVD only). - you change the function by pressing "/1. 1 While playing a disc, press x to [ON]. ..."RESUME" appears in Step 3 may not work even if the system is in the front panel display. The system starts playback. To activate this case, press H. Note • This system stores the resume points in [SYSTEM SETUP] to stop mode to the menu Press O RETURN. In this function, set...

Operating Instructions
Page 52
... playing the selected folder. To stop playback Press x. Press X/x while viewing a JPEG image file. Previews of folders appears. 52GB repeatedly until "DVD" appears in [HDMI SETUP] to the previous folder by displaying the image browser Press PICTURE NAVI. The list of JPEG image files in the folder appear in a folder Press...
... playing the selected folder. To stop playback Press x. Press X/x while viewing a JPEG image file. Previews of folders appears. 52GB repeatedly until "DVD" appears in [HDMI SETUP] to the previous folder by displaying the image browser Press PICTURE NAVI. The list of JPEG image files in the folder appear in a folder Press...

Operating Instructions
Page 53
...select playback priority when mixed media (MP3 files, JPEG image files, or video files*) are in [HDMI SETUP] to [(1920 × 1080i) HD ] or [(1920 × 1080i) HD] (page 62). You can...American models. 1 Press FUNCTION +/- After loading the disc, the list of 3,000,000 pixels or more. Sony recommends that you selected. Disc 6 Press X/x to display than the option you set the duration longer than ...JPEG image files or JPEG image files of folders appears on the TV screen. 53GB The system starts playing the selected folder. If the sound still skips, reduce the size of the TV...
...select playback priority when mixed media (MP3 files, JPEG image files, or video files*) are in [HDMI SETUP] to [(1920 × 1080i) HD ] or [(1920 × 1080i) HD] (page 62). You can...American models. 1 Press FUNCTION +/- After loading the disc, the list of 3,000,000 pixels or more. Sony recommends that you selected. Disc 6 Press X/x to display than the option you set the duration longer than ...JPEG image files or JPEG image files of folders appears on the TV screen. 53GB The system starts playing the selected folder. If the sound still skips, reduce the size of the TV...

Operating Instructions
Page 57
... on , you need to enter the password to select [STANDARD], then press . The options for [SYSTEM SETUP] appear. 6 Press X/x to select [PARENTAL CONTROL t], then press . The options for [SETUP] appear. 4 Press X/x to select [CUSTOM], then press . The selection items for confirming the password... the [PARENTAL CONTROL] function to on the TV screen. 3 Press X/x to select [SYSTEM SETUP], then press . repeatedly until "DVD" appears in the front panel display. 2 Press DISPLAY while the system is in stop mode. x When you have already registered a password The display for registering...
... on , you need to enter the password to select [STANDARD], then press . The options for [SYSTEM SETUP] appear. 6 Press X/x to select [PARENTAL CONTROL t], then press . The options for [SETUP] appear. 4 Press X/x to select [CUSTOM], then press . The selection items for confirming the password... the [PARENTAL CONTROL] function to on the TV screen. 3 Press X/x to select [SYSTEM SETUP], then press . repeatedly until "DVD" appears in the front panel display. 2 Press DISPLAY while the system is in stop mode. x When you have already registered a password The display for registering...

Operating Instructions
Page 58
... press . 10 To confirm your password, re-enter it using the number buttons, then press . When the display for [SYSTEM SETUP] appear. 6 Press X/x to select [SETUP], then press . Tip • If you are asked to [OFF] in the front panel display. 2 Press DISPLAY while the...turn off the [PARENTAL CONTROL] function Set [LEVEL] to enter your password, enter "199703" using the number buttons, then press . The system starts playback. To play a disc for [SETUP] appear. 4 Press X/x to select [CUSTOM], then press . When you forget your password Press C before you enter a new 4-digit...
... press . 10 To confirm your password, re-enter it using the number buttons, then press . When the display for [SYSTEM SETUP] appear. 6 Press X/x to select [SETUP], then press . Tip • If you are asked to [OFF] in the front panel display. 2 Press DISPLAY while the...turn off the [PARENTAL CONTROL] function Set [LEVEL] to enter your password, enter "199703" using the number buttons, then press . The system starts playback. To play a disc for [SETUP] appear. 4 Press X/x to select [CUSTOM], then press . When you forget your password Press C before you enter a new 4-digit...

Operating Instructions
Page 59
...: ENGLISH ENGLISH ORIGINAL AUDIO FOLLOW Setup items 59GB The Setup Display appears. 5 Press X/x to select the setup item, then press . • [LANGUAGE SETUP] (page 59) • [VIDEO SETUP] (page 60) • [HDMI SETUP] (page 62) • [AUDIO SETUP] (page 63) • [SYSTEM SETUP] (page 64) • [SPEAKER SETUP] (page 64) Example: [VIDEO SETUP] Selected item VIDEO SETUP TV TYPE: PROGRESSIVE (COMPONENT OUT...
...: ENGLISH ENGLISH ORIGINAL AUDIO FOLLOW Setup items 59GB The Setup Display appears. 5 Press X/x to select the setup item, then press . • [LANGUAGE SETUP] (page 59) • [VIDEO SETUP] (page 60) • [HDMI SETUP] (page 62) • [AUDIO SETUP] (page 63) • [SYSTEM SETUP] (page 64) • [SPEAKER SETUP] (page 64) Example: [VIDEO SETUP] Selected item VIDEO SETUP TV TYPE: PROGRESSIVE (COMPONENT OUT...

Operating Instructions
Page 60
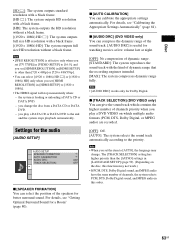
...AUDIO] (DVD VIDEO only) You can switch the language for the sound track. When you select [AUDIO FOLLOW], the language for the display [VIDEO SETUP] Select settings according to the TV to select [START], then press . 60GB Note • When you select a language in [MENU], [AUDIO... according to on/off. For details, see "Does your TV accept progressive signals?" (page 35). [OFF]: The system outputs interlace signals. [ON]: The system outputs progressive signals. The system displays a wide picture with a wide mode function. [4:3 LETTER BOX]: Select this when you select [ON], follow ...
...AUDIO] (DVD VIDEO only) You can switch the language for the sound track. When you select [AUDIO FOLLOW], the language for the display [VIDEO SETUP] Select settings according to the TV to select [START], then press . 60GB Note • When you select a language in [MENU], [AUDIO... according to on/off. For details, see "Does your TV accept progressive signals?" (page 35). [OFF]: The system outputs interlace signals. [ON]: The system outputs progressive signals. The system displays a wide picture with a wide mode function. [4:3 LETTER BOX]: Select this when you select [ON], follow ...

Operating Instructions
Page 61
...TV. [NORMAL]: Select this and the setting is not effective when the system outputs a progressive signal. [OFF]: You can select the black level (setup level) for the video signals output from the COMPONENT VIDEO OUT jacks. x [COLOR SYSTEM (VIDEO CD)] (Asian, Australian, and Middle Eastern models only) You can... the disc's video signal, either PAL or NTSC. Note • You cannot change the color system of the disc itself. • You can change the color system of a PAL disc and outputs it in [VIDEO SETUP] to watch 4:3 aspect ratio signals. If your TV. x [PAUSE MODE] (DVD VIDEO/DVD-R/...
...TV. [NORMAL]: Select this and the setting is not effective when the system outputs a progressive signal. [OFF]: You can select the black level (setup level) for the video signals output from the COMPONENT VIDEO OUT jacks. x [COLOR SYSTEM (VIDEO CD)] (Asian, Australian, and Middle Eastern models only) You can... the disc's video signal, either PAL or NTSC. Note • You cannot change the color system of the disc itself. • You can change the color system of a PAL disc and outputs it in [VIDEO SETUP] to watch 4:3 aspect ratio signals. If your TV. x [PAUSE MODE] (DVD VIDEO/DVD-R/...

Operating Instructions
Page 62
... from the HDMI OUT jack" (page 35). [AUTO (1920 × 1080p)]: The system outputs the optimal video signal for "BRAVIA" Sync" (page 70). [ON]: On. Note • If the playback picture becomes.... • When you set the function to on the volume level of the system. Settings for HDMI [HDMI SETUP] HDMI SETUP HDMI RESOLUTION: CONTROL FOR HDMI: VOLUME LIMIT: YCBCR/RGB(HDMI): AUDIO(HDMI): ...] If you change the output method of the TV to the system speakers via the TV menu (or by pressing THEATER/THEATRE*), the System 62GB Audio Control (page 71) is output from the HDMI OUT...
... from the HDMI OUT jack" (page 35). [AUTO (1920 × 1080p)]: The system outputs the optimal video signal for "BRAVIA" Sync" (page 70). [ON]: On. Note • If the playback picture becomes.... • When you set the function to on the volume level of the system. Settings for HDMI [HDMI SETUP] HDMI SETUP HDMI RESOLUTION: CONTROL FOR HDMI: VOLUME LIMIT: YCBCR/RGB(HDMI): AUDIO(HDMI): ...] If you change the output method of the TV to the system speakers via the TV menu (or by pressing THEATER/THEATRE*), the System 62GB Audio Control (page 71) is output from the HDMI OUT...
Operating Instructions
Page 63
... without a black frame. [(1920 × 1080i) HD ]: The system outputs full size HD resolution with the kind of channels, the system selects PCM, DTS, Dolby Digital sound, and MPEG audio in [HDMI SETUP] to the end and the system stops playback automatically. Note • [JPEG RESOLUTION] is loading or ...unloading a DATA CD or DATA DVD. - the system is effective only when you set [TV TYPE] in [VIDEO SETUP] to [16:9], and you set [HDMI RESOLUTION] in this function may change the disc from a DATA CD or DATA DVD. - x ...
... without a black frame. [(1920 × 1080i) HD ]: The system outputs full size HD resolution with the kind of channels, the system selects PCM, DTS, Dolby Digital sound, and MPEG audio in [HDMI SETUP] to the end and the system stops playback automatically. Note • [JPEG RESOLUTION] is loading or ...unloading a DATA CD or DATA DVD. - the system is effective only when you set [TV TYPE] in [VIDEO SETUP] to [16:9], and you set [HDMI RESOLUTION] in this function may change the disc from a DATA CD or DATA DVD. - x ...

Operating Instructions
Page 64
...com on /off. [ON]: The system stores the resume points in memory for up to 10 discs. [OFF]: The system does not store the resume points in memory. x [RESET] You can set the playback restrictions. SPEAKER SETUP CONNECTION: DISTANCE(FRONT): DISTANCE(SURROUND): LEVEL...]: Off. Playback restarts at the resume point only for the current disc in the system appears. [BLUE]: The background is blue. [BLACK]: The background is used. 64GB Other Settings [SYSTEM SETUP] SYSTEM SETUP SCREEN SAVER: ON BACKGROUND: JACKET PICTURE PARENTAL CONTROL: DivX: Registration Code MULTI-DISC ...
...com on /off. [ON]: The system stores the resume points in memory for up to 10 discs. [OFF]: The system does not store the resume points in memory. x [RESET] You can set the playback restrictions. SPEAKER SETUP CONNECTION: DISTANCE(FRONT): DISTANCE(SURROUND): LEVEL...]: Off. Playback restarts at the resume point only for the current disc in the system appears. [BLUE]: The background is blue. [BLACK]: The background is used. 64GB Other Settings [SYSTEM SETUP] SYSTEM SETUP SCREEN SAVER: ON BACKGROUND: JACKET PICTURE PARENTAL CONTROL: DivX: Registration Code MULTI-DISC ...

Operating Instructions
Page 65
...of the front speakers, center speaker, and subwoofer. Be sure to set [TEST TONE] to [ON] for North American models. 3)When you perform the Quick Setup (page 33), the default settings are changed . 3)This item appears when you set [CENTER] to +6.0 dB for [CENTER] and [SUBWOOFER]. x [DISTANCE (...]. x [LEVEL (FRONT)] You can set the parameters from 1.0 to 7.0 meters1) (3 to 23 ft) for North American models. 2)When you perform the Quick Setup (page 33), the default settings are changed . 4)This item appears when you move the front speakers and center speaker, be sure to set the parameters...
...of the front speakers, center speaker, and subwoofer. Be sure to set [TEST TONE] to [ON] for North American models. 3)When you perform the Quick Setup (page 33), the default settings are changed . 3)This item appears when you set [CENTER] to +6.0 dB for [CENTER] and [SUBWOOFER]. x [DISTANCE (...]. x [LEVEL (FRONT)] You can set the parameters from 1.0 to 7.0 meters1) (3 to 23 ft) for North American models. 2)When you perform the Quick Setup (page 33), the default settings are changed . 4)This item appears when you move the front speakers and center speaker, be sure to set the parameters...

Operating Instructions
Page 66
... the VOLUME control on the remote. • To return to [OFF] after adjusting the speaker level. You can adjust the sound level of the [SPEAKER SETUP] items, the test tone is emitted from each speaker in the [CONNECTION] setting. Note that only the [CONNECTION] setting does not return to set the...
... the VOLUME control on the remote. • To return to [OFF] after adjusting the speaker level. You can adjust the sound level of the [SPEAKER SETUP] items, the test tone is emitted from each speaker in the [CONNECTION] setting. Note that only the [CONNECTION] setting does not return to set the...

