Primary User Manual
Page 3
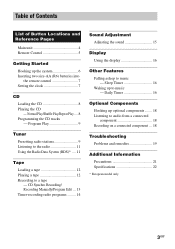
... Listening to a tape -- Sleep Timer 16 Waking up to music - Daily Timer 16 Optional Components Hooking up the system 6 Inserting two size-AA (R6) batteries into the remote control 7 Setting the clock 7 CD Loading the CD 8 Playing the CD -- Program Play 9 Tuner Presetting radio stations 9 Listening to the radio 11 Using the Radio...
... Listening to a tape -- Sleep Timer 16 Waking up to music - Daily Timer 16 Optional Components Hooking up the system 6 Inserting two size-AA (R6) batteries into the remote control 7 Setting the clock 7 CD Loading the CD 8 Playing the CD -- Program Play 9 Tuner Presetting radio stations 9 Listening to the radio 11 Using the Radio...
Primary User Manual
Page 4
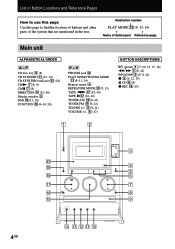
...- ql qk nN qj X qh z qg ML lm 3 4 x 5 6 N 7 X Z 8 9 qf qd qs qa 0 4GB V PHONES jack qf PLAY MODE/TUNING MODE qd (8-11, 14) Remote sensor 4 REPEAT/FM MODE qs (8, 11) TAPE nN qj (12-14) TAPE X qj (12-14) TUNER AM qg (9-11) TUNER FM qg (9-11) TUNING +/- 3 (9-11...) 1 (7, 10, 15, 17, 18) m/M 3 (8, 12) l/L 3 (8, 9, 14) x 5 (8, 12, 13) Z CD 8 (8) z REC qh (13) 1 2 ?/1 w; Illustration number r PLAY MODE qg (9, 13, 14) R R Name of the system that are mentioned in the text. List of Button Locations and Reference Pages How to use this page Use this page to find the location...
...- ql qk nN qj X qh z qg ML lm 3 4 x 5 6 N 7 X Z 8 9 qf qd qs qa 0 4GB V PHONES jack qf PLAY MODE/TUNING MODE qd (8-11, 14) Remote sensor 4 REPEAT/FM MODE qs (8, 11) TAPE nN qj (12-14) TAPE X qj (12-14) TUNER AM qg (9-11) TUNER FM qg (9-11) TUNING +/- 3 (9-11...) 1 (7, 10, 15, 17, 18) m/M 3 (8, 12) l/L 3 (8, 9, 14) x 5 (8, 12, 13) Z CD 8 (8) z REC qh (13) 1 2 ?/1 w; Illustration number r PLAY MODE qg (9, 13, 14) R R Name of the system that are mentioned in the text. List of Button Locations and Reference Pages How to use this page Use this page to find the location...
Primary User Manual
Page 5
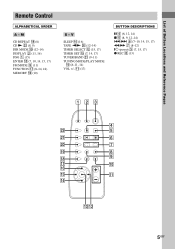
List of Button Locations and Reference Pages Remote Control ALPHABETICAL ORDER A - M CD REPEAT qk (8) CD N ws (8, 9) DIR MODE ql (12-14) DISPLAY 2 (11, 16) DSG 1 (15) ENTER qd (7, 10, 14, 15, 17) FM ...
List of Button Locations and Reference Pages Remote Control ALPHABETICAL ORDER A - M CD REPEAT qk (8) CD N ws (8, 9) DIR MODE ql (12-14) DISPLAY 2 (11, 16) DSG 1 (15) ENTER qd (7, 10, 14, 15, 17) FM ...
Primary User Manual
Page 7
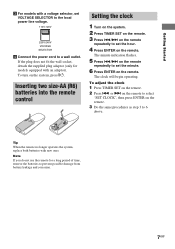
... the clock 1 Press TIMER SET on the remote. Inserting two size-AA (R6) batteries into the remote control e EE e Setting the clock 1 Turn on the system. 2 Press TIMER SET on the remote. 3 Press ./> on the remote repeatedly to set the hour. 4 Press ENTER on the remote. 2 Press . The minute indication flashes. ...3 to select "SET CLOCK", then press ENTER on the remote. or > on the remote to 6 above. Note If you do not use the remote for models equipped with new ones. Tip When the remote no longer operates the system, replace both batteries with an adaptor). If the plug does...
... the clock 1 Press TIMER SET on the remote. Inserting two size-AA (R6) batteries into the remote control e EE e Setting the clock 1 Turn on the system. 2 Press TIMER SET on the remote. 3 Press ./> on the remote repeatedly to set the hour. 4 Press ENTER on the remote. 2 Press . The minute indication flashes. ...3 to select "SET CLOCK", then press ENTER on the remote. or > on the remote to 6 above. Note If you do not use the remote for models equipped with new ones. Tip When the remote no longer operates the system, replace both batteries with an adaptor). If the plug does...
Primary User Manual
Page 8
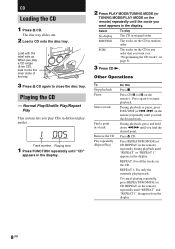
... currently playing track. To cancel playing repeatedly, press REPEAT/FM MODE (or CD REPEAT on the remote) repeatedly until you find the desired point. Playing the CD -- Normal Play/Shuffle Play/Repeat Play This system lets you play CDs in different play modes. 1 005 Track number Playing time 1 Press FUNCTION... disc tray. Press REPEAT/FM MODE (or CD REPEAT on the CD in original order. When you find the desired track. The tracks on the remote) repeatedly during playback until "REPEAT" and "REPEAT 1" disappear from the display. 8GB Press CD X (or X on the CD. Press again to close ...
... currently playing track. To cancel playing repeatedly, press REPEAT/FM MODE (or CD REPEAT on the remote) repeatedly until you find the desired point. Playing the CD -- Normal Play/Shuffle Play/Repeat Play This system lets you play CDs in different play modes. 1 005 Track number Playing time 1 Press FUNCTION... disc tray. Press REPEAT/FM MODE (or CD REPEAT on the CD in original order. When you find the desired track. The tracks on the remote) repeatedly during playback until "REPEAT" and "REPEAT 1" disappear from the display. 8GB Press CD X (or X on the CD. Press again to close ...
Primary User Manual
Page 9
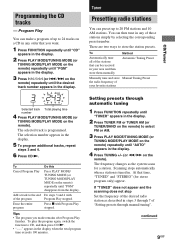
... Manual Tuning Preset the radio frequency of up to select FM or AM. 3 Press PLAY MODE/TUNING MODE (or TUNING MODE/PLAY MODE on the remote) repeatedly until "PGM" disappears from the display. The frequency changes as described in . Tips • The program you want. 1 Press FUNCTION repeatedly... "STEREO" (for a station. Press x with Program Play stopped. There are two ways to the end of the desired radio station as the system scans for stereo program only) appear. If "TUNED" does not appear and the scanning does not stop Set the frequency of the program Erase the...
... Manual Tuning Preset the radio frequency of up to select FM or AM. 3 Press PLAY MODE/TUNING MODE (or TUNING MODE/PLAY MODE on the remote) repeatedly until "PGM" disappears from the display. The frequency changes as described in . Tips • The program you want. 1 Press FUNCTION repeatedly... "STEREO" (for a station. Press x with Program Play stopped. There are two ways to the end of the desired radio station as the system scans for stereo program only) appear. If "TUNED" does not appear and the scanning does not stop Set the frequency of the program Erase the...
Primary User Manual
Page 10
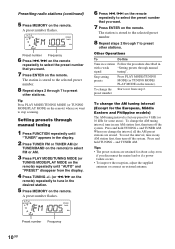
...8 Repeat steps 2 through 7 to preset other stations. and TUNER AM. PRESET STEREO 1FM1005 TUNED MHz Preset number Frequency 6 Press ./> on the remote. The station is factory-preset to select the preset number that you disconnect the mains lead or if a power failure occurs. • To improve ... 1 Press FUNCTION repeatedly until "TUNER" appears in any AM station first, then turn off the system. Stop setting presets Press PLAY MODE/TUNING MODE (or TUNING MODE/ PLAY MODE on the remote. When you change the AM tuning interval, tune in the desired station. 5 Press MEMORY on...
...8 Repeat steps 2 through 7 to preset other stations. and TUNER AM. PRESET STEREO 1FM1005 TUNED MHz Preset number Frequency 6 Press ./> on the remote. The station is factory-preset to select the preset number that you disconnect the mains lead or if a power failure occurs. • To improve ... 1 Press FUNCTION repeatedly until "TUNER" appears in any AM station first, then turn off the system. Stop setting presets Press PLAY MODE/TUNING MODE (or TUNING MODE/ PLAY MODE on the remote. When you change the AM tuning interval, tune in the desired station. 5 Press MEMORY on...
Primary User Manual
Page 11
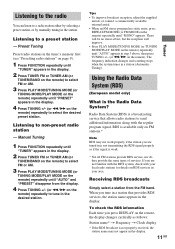
... MODE/TUNING MODE (or TUNING MODE/PLAY MODE on the remote) repeatedly until "PRESET" appears in the display. 4 Press TUNING +/- (or m/M on FM stations.* Note RDS may not appear in the display. 11GB CTuDn/Teurner Using the Radio Data System (RDS) (European model only) What is weak. *... radio stations to a preset station - Listening to send additional information along with your local radio stations for details on the remote). The frequency indication changes and scanning stops when the system tunes in is not transmitting the RDS signal properly or if the signal is the Radio Data...
... MODE/TUNING MODE (or TUNING MODE/PLAY MODE on the remote) repeatedly until "PRESET" appears in the display. 4 Press TUNING +/- (or m/M on FM stations.* Note RDS may not appear in the display. 11GB CTuDn/Teurner Using the Radio Data System (RDS) (European model only) What is weak. *... radio stations to a preset station - Listening to send additional information along with your local radio stations for details on the remote). The frequency indication changes and scanning stops when the system tunes in is not transmitting the RDS signal properly or if the signal is the Radio Data...
Primary User Manual
Page 12
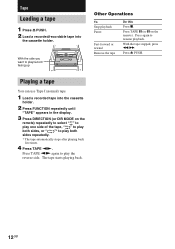
... the tape Do this Press x. Playing a tape You can use Type I (normal) tape. 1 Load a recorded tape into the cassette holder. Press TAPE X (or X on the remote) repeatedly to select " " to play one side of the tape, " " to play both sides, or " "* to play both sides repeatedly. * The tape automatically stops after... Z PUSH. 2 Load a recorded/recordable tape into the cassette holder. 2 Press FUNCTION repeatedly until "TAPE" appears in the display. 3 Press DIRECTION (or DIR MODE on the remote). With the tape stopped, press m/M. With the side you want to resume playback.
... the tape Do this Press x. Playing a tape You can use Type I (normal) tape. 1 Load a recorded tape into the cassette holder. Press TAPE X (or X on the remote) repeatedly to select " " to play one side of the tape, " " to play both sides, or " "* to play both sides repeatedly. * The tape automatically stops after... Z PUSH. 2 Load a recorded/recordable tape into the cassette holder. 2 Press FUNCTION repeatedly until "TAPE" appears in the display. 3 Press DIRECTION (or DIR MODE on the remote). With the tape stopped, press m/M. With the side you want to resume playback.
Primary User Manual
Page 13
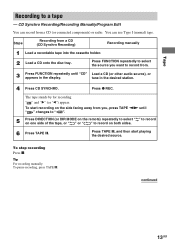
.... To stop recording Press x. Press FUNCTION repeatedly to select the source you , press TAPE nN until " " changes to " ". 5 Press DIRECTION (or DIR MODE on the remote) repeatedly to select " " to record on one side of the tape, or " " or " " to record from a CD (CD Synchro Recording) Recording manually 1 Load a ...Manually/Program Edit You can use Type I (normal) tape. Press TAPE X, and then start recording on the side facing away from a CD (or connected components) or radio. Tape Recording to a tape -- The tape stands by for recording. " " and "B" (or "b") appear.
.... To stop recording Press x. Press FUNCTION repeatedly to select the source you , press TAPE nN until " " changes to " ". 5 Press DIRECTION (or DIR MODE on the remote) repeatedly to select " " to record on one side of the tape, or " " or " " to record from a CD (CD Synchro Recording) Recording manually 1 Load a ...Manually/Program Edit You can use Type I (normal) tape. Press TAPE X, and then start recording on the side facing away from a CD (or connected components) or radio. Tape Recording to a tape -- The tape stands by for recording. " " and "B" (or "b") appear.
Primary User Manual
Page 14
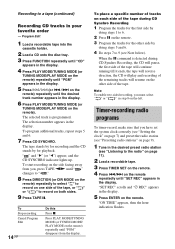
... the CD SYNCHRO indicator lights up. Note To enable two-sided recording, you have set the system clock correctly (see "Setting the clock" on page 7) and preset the radio station (see "Presetting radio stations" on the remote. 3 Program the tracks for playback. The tape stands by for recording and the CD stands... your favorite order -- To Stop recording Cancel Program Edit 14GB Do this Press x. Press PLAY MODE/TUNING MODE (or TUNING MODE/ PLAY MODE on the remote) repeatedly until "PGM" disappears from you, press TAPE nN until the desired track number appears in step 8 on the...
... the CD SYNCHRO indicator lights up. Note To enable two-sided recording, you have set the system clock correctly (see "Setting the clock" on page 7) and preset the radio station (see "Presetting radio stations" on the remote. 3 Program the tracks for playback. The tape stands by for recording and the CD stands... your favorite order -- To Stop recording Cancel Program Edit 14GB Do this Press x. Press PLAY MODE/TUNING MODE (or TUNING MODE/ PLAY MODE on the remote) repeatedly until "PGM" disappears from you, press TAPE nN until the desired track number appears in step 8 on the...
Primary User Manual
Page 15
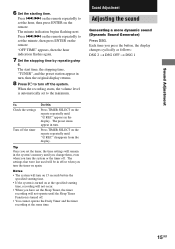
...display returns. 8 Press @/1 to set the minute, then press ENTER on the remote. Press TIMER SELECT on the remote repeatedly to turn . Notes • The system will turn on 15 seconds before the specified starting time. • If the system is turned on at the same time. 15GB "OFF TIME" appears, then ...step 6. Each time you press the button, the display changes cyclically as follows: DSG 2 t DSG OFF t DSG 1 To Check the settings Turn off the system. Press ./> on the remote repeatedly to the minimum. The preset items appear in turn off the timer Do this Press TIMER SELECT on the...
...display returns. 8 Press @/1 to set the minute, then press ENTER on the remote. Press TIMER SELECT on the remote repeatedly to turn . Notes • The system will turn on 15 seconds before the specified starting time. • If the system is turned on at the same time. 15GB "OFF TIME" appears, then ...step 6. Each time you press the button, the display changes cyclically as follows: DSG 2 t DSG OFF t DSG 1 To Check the settings Turn off the system. Press ./> on the remote repeatedly to the minimum. The preset items appear in turn off the timer Do this Press TIMER SELECT on the...
Primary User Manual
Page 16
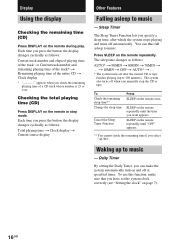
... Change the sleep time Cancel the Sleep Timer Function Press SLEEP on page 7). 16GB To use this function, make the system automatically turn on the remote repeatedly until "OFF" appears. ** You cannot check the remaining time if you check the remaining playing time of a ... up to music - SLEEP on the remote repeatedly. t 10MIN t OFF t AUTO* t ... * The system turns off automatically. You can make sure that you have set the system clock correctly (see "Setting the clock" on the remote once. Press SLEEP on the remote repeatedly until the time you specify a sleep...
... Change the sleep time Cancel the Sleep Timer Function Press SLEEP on page 7). 16GB To use this function, make the system automatically turn on the remote repeatedly until "OFF" appears. ** You cannot check the remaining time if you check the remaining playing time of a ... up to music - SLEEP on the remote repeatedly. t 10MIN t OFF t AUTO* t ... * The system turns off automatically. You can make sure that you have set the system clock correctly (see "Setting the clock" on the remote once. Press SLEEP on the remote repeatedly until the time you specify a sleep...
Primary User Manual
Page 17
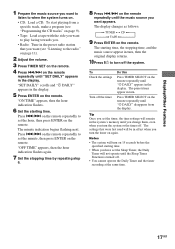
...starting time, the stopping time, and the music source appear in turn the timer on the remote repeatedly until "c DAILY" appears in the preset radio station that were last used will remain in the system's memory until "c DAILY" disappears from a specific track, make a program (see "Listening to... CD. The preset items appear in the display. Display/Other Features 1 Prepare the music source you want to listen to when the system turns on the remote. Press ./> on the remote repeatedly to set the Sleep Timer, the Daily Timer will turn off . To start playing from the display.
...starting time, the stopping time, and the music source appear in turn the timer on the remote repeatedly until "c DAILY" appears in the preset radio station that were last used will remain in the system's memory until "c DAILY" disappears from a specific track, make a program (see "Listening to... CD. The preset items appear in the display. Display/Other Features 1 Prepare the music source you want to listen to when the system turns on the remote. Press ./> on the remote repeatedly to set the Sleep Timer, the Daily Timer will turn off . To start playing from the display.
Primary User Manual
Page 19
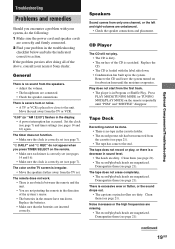
.../playback heads are correctly and firmly connected. 2 Find your nearest Sony dealer. If the problem persists after doing all of the system's sensor. • The batteries in the remote have run down . • Condensation has built up in the system. continued 19GB Optional Components/Troubleshooting Troubleshooting Problems and remedies Should you press TIMER SELECT on...
.../playback heads are correctly and firmly connected. 2 Find your nearest Sony dealer. If the problem persists after doing all of the system's sensor. • The batteries in the remote have run down . • Condensation has built up in the system. continued 19GB Optional Components/Troubleshooting Troubleshooting Problems and remedies Should you press TIMER SELECT on...
Primary User Manual
Page 20
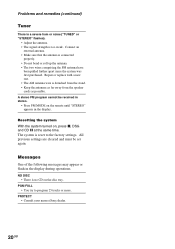
.... A stereo FM program cannot be set again. All previous settings are cleared and must be received in stereo. • Press FM MODE on the remote until "STEREO" appears in the display during operations. Problems and remedies (continued) Tuner There is a severe hum or noise ("TUNED" or "STEREO" ...or roll up the antenna. • The two wires comprising the FM antenna have been pulled further apart since the system was first purchased. PROTECT • Consult your nearest Sony dealer. 20GB Repair or replace with a new one. • The AM antenna wire is reset to program 25...
.... A stereo FM program cannot be set again. All previous settings are cleared and must be received in stereo. • Press FM MODE on the remote until "STEREO" appears in the display during operations. Problems and remedies (continued) Tuner There is a severe hum or noise ("TUNED" or "STEREO" ...or roll up the antenna. • The two wires comprising the FM antenna have been pulled further apart since the system was first purchased. PROTECT • Consult your nearest Sony dealer. 20GB Repair or replace with a new one. • The AM antenna wire is reset to program 25...
Primary User Manual
Page 23
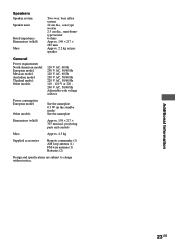
... units Rated impedance Dimensions (w/h/d) Mass Two-way, bass reflex system 10 cm dia., cone type woofer 2.5 cm dia., semi-dometype tweeter 6 ohms Approx. 140 × 217 × 222 mm Approx. 2.2 kg net per speaker General ... nameplate 0.5 W (in the standby mode) See the nameplate Approx. 159 × 217 × 315 mm incl. projecting parts and controls Mass Approx. 4.5 kg Supplied accessories Remote commander (1) AM loop antenna (1) FM wire antenna (1) Batteries (2) Design and specifications are subject to change without notice. 23GB Additional Information
... units Rated impedance Dimensions (w/h/d) Mass Two-way, bass reflex system 10 cm dia., cone type woofer 2.5 cm dia., semi-dometype tweeter 6 ohms Approx. 140 × 217 × 222 mm Approx. 2.2 kg net per speaker General ... nameplate 0.5 W (in the standby mode) See the nameplate Approx. 159 × 217 × 315 mm incl. projecting parts and controls Mass Approx. 4.5 kg Supplied accessories Remote commander (1) AM loop antenna (1) FM wire antenna (1) Batteries (2) Design and specifications are subject to change without notice. 23GB Additional Information


