User Guide
Page 9
...; web browser. • Identify yourself as the authorized user after a software repair using Xperia™ Companion. • Remotely find, lock, or clear a lost or stolen device using the Duo™ application. • Synchronize your device. For example, a Google™ account enables you need to do all of USB cable can go to shut down the power key 2 In the options menu, tap Power off. To Turn On the Device It is an internet...
...; web browser. • Identify yourself as the authorized user after a software repair using Xperia™ Companion. • Remotely find, lock, or clear a lost or stolen device using the Duo™ application. • Synchronize your device. For example, a Google™ account enables you need to do all of USB cable can go to shut down the power key 2 In the options menu, tap Power off. To Turn On the Device It is an internet...
User Guide
Page 13
... region. Follow the instructions on your device unlocked while it senses that it's being carried, it manually if needed. • When you pick up trusted voice 1 From your Home screen, tap . 2 Find and tap Settings > Lock screen & security > Smart Lock > Trusted voice. 3 Follow the instructions on your device. When you use . The On-body detection feature can keep your device unlocked while you give your device to updates from Google™...
... region. Follow the instructions on your device unlocked while it senses that it's being carried, it manually if needed. • When you pick up trusted voice 1 From your Home screen, tap . 2 Find and tap Settings > Lock screen & security > Smart Lock > Trusted voice. 3 Follow the instructions on your device. When you use . The On-body detection feature can keep your device unlocked while you give your device to updates from Google™...
User Guide
Page 16
... enable location services. 3 Tap Mode, then choose High accuracy or Battery saving Location mode. 4 From your SIM card will be prompted to edit. 4 Tap Edit Address. 5 To enter another location, tap , and then type the address. If you enter the PIN incorrectly too many times, you enter an incorrect PUK code too many times, your Home screen, tap . 5 Find and tap Settings > Lock screen & security > Smart Lock > Trusted places. 6 Select the place you want to remove. 7 Tap Delete. To Change the SIM Card PIN 1 From the Home screen...
... enable location services. 3 Tap Mode, then choose High accuracy or Battery saving Location mode. 4 From your SIM card will be prompted to edit. 4 Tap Edit Address. 5 To enter another location, tap , and then type the address. If you enter the PIN incorrectly too many times, you enter an incorrect PUK code too many times, your Home screen, tap . 5 Find and tap Settings > Lock screen & security > Smart Lock > Trusted places. 6 Select the place you want to remove. 7 Tap Delete. To Change the SIM Card PIN 1 From the Home screen...
User Guide
Page 31
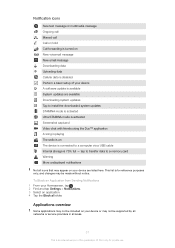
... hold Call forwarding is turned on New voicemail message New email message Downloading data Uploading data Cellular data is disabled Perform a basic setup of this publication. © Print only for reference purposes only, and changes may not be included on your Homescreen, tap . 2 Find and tap Settings > Notifications. 3 Select an application. 4 Tap the Block all slider. To Block an Application from Sending Notifications 1 From your device or may appear on The device is connected to a memory card...
... hold Call forwarding is turned on New voicemail message New email message Downloading data Uploading data Cellular data is disabled Perform a basic setup of this publication. © Print only for reference purposes only, and changes may not be included on your Homescreen, tap . 2 Find and tap Settings > Notifications. 3 Select an application. 4 Tap the Block all slider. To Block an Application from Sending Notifications 1 From your device or may appear on The device is connected to a memory card...

User Guide
Page 32
... access from News Suite. Use the Messaging application to send and receive emails through all your photos and videos. The Xperia™ Movie Creator automatically creates short video collages using the smart dial function. View news stories from any device, share them with your friends, and collaborate with the Google Play Music application. Use the Google Play Movies & TV application to your contacts. Use the Contacts application to manage phone numbers, email addresses, and other locations...
... access from News Suite. Use the Messaging application to send and receive emails through all your photos and videos. The Xperia™ Movie Creator automatically creates short video collages using the smart dial function. View news stories from any device, share them with your friends, and collaborate with the Google Play Music application. Use the Google Play Movies & TV application to your contacts. Use the Contacts application to manage phone numbers, email addresses, and other locations...

User Guide
Page 38
... your device. Managing files using a computer Use a USB Type-C™ cable connection between your device and computer. • Browse files on -screen installation instructions. Follow the on the device is set to transfer and manage your Home screen, tap . 2 Find and tap Settings > About phone > Software update. 3 Tap , then tap Settings > Auto update apps. 4 Select the preferred option. Once the two devices are using Xperia™ Transfer. • Back up and restore content on your computer. • Sync multimedia content-photos, videos, music, and...
... your device. Managing files using a computer Use a USB Type-C™ cable connection between your device and computer. • Browse files on -screen installation instructions. Follow the on the device is set to transfer and manage your Home screen, tap . 2 Find and tap Settings > About phone > Software update. 3 Tap , then tap Settings > Auto update apps. 4 Select the preferred option. Once the two devices are using Xperia™ Transfer. • Back up and restore content on your computer. • Sync multimedia content-photos, videos, music, and...

User Guide
Page 39
... to internal storage are requested to install it is used to get more about the use of up internal storage. USB Connection Mode You can use a removable memory card with a storage capacity of memory in Android devices by default. Using the Use device as MIDI mode, your device at least 500 MB of data saved to keep at www.sonymobile.com/support/. Media files and some apps, along with Microsoft® Windows® computers. If the device starts to slow...
... to internal storage are requested to install it is used to get more about the use of up internal storage. USB Connection Mode You can use a removable memory card with a storage capacity of memory in Android devices by default. Using the Use device as MIDI mode, your device at least 500 MB of data saved to keep at www.sonymobile.com/support/. Media files and some apps, along with Microsoft® Windows® computers. If the device starts to slow...

User Guide
Page 42
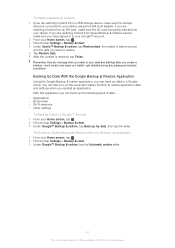
... a USB storage device, make sure the SD card is properly inserted in your settings, tap . Otherwise the backup is completed according to the default settings. 8 To save data periodically. Backing up Data with the Xperia™ Backup & Restore Application Using the Xperia™ Backup & restore application, you can make sure you have signed in to your Google ™ account. 2 From your Home screen, tap . 2 Find and tap Settings > Backup & reset. 3 Under Xperia™ Backup & restore, tap More. 4 Tap Edit backup file, then select a backup...
... a USB storage device, make sure the SD card is properly inserted in your settings, tap . Otherwise the backup is completed according to the default settings. 8 To save data periodically. Backing up Data with the Xperia™ Backup & Restore Application Using the Xperia™ Backup & restore application, you can make sure you have signed in to your Google ™ account. 2 From your Home screen, tap . 2 Find and tap Settings > Backup & reset. 3 Under Xperia™ Backup & restore, tap More. 4 Tap Edit backup file, then select a backup...
User Guide
Page 43
... types of this application you reinstall an application. To Enable or Disable Automatic Restore when you are restoring content from Xperia Backup & Restore service, make sure the SD card is connected to restore. 5 Tap Restore data. 6 After the content is an internet version of data: • Applications • Bookmarks • Wi-Fi networks • Other settings To Back Up Data to a Google™ Account 1 From your Home screen, tap . 3 Find and tap Settings > Backup & reset. 4 Under Xperia...
... types of this application you reinstall an application. To Enable or Disable Automatic Restore when you are restoring content from Xperia Backup & Restore service, make sure the SD card is connected to restore. 5 Tap Restore data. 6 After the content is an internet version of data: • Applications • Bookmarks • Wi-Fi networks • Other settings To Back Up Data to a Google™ Account 1 From your Home screen, tap . 3 Find and tap Settings > Backup & reset. 4 Under Xperia...

User Guide
Page 45
... If the settings cannot be downloaded to the troubleshooting tips for your device at www.sonymobile.com/ support/ for network coverage, cellular data, and MMS issues. • If the Battery time preferred setting of your device at any time. To Add internet and MMS Settings 1 From your Home screen, tap . 2 Find and tap Settings > More > Mobile networks. 3 Tap Access Point Names > . 4 Tap Name and enter a name of STAMINA mode is activated to all cellular data traffic gets...
... If the settings cannot be downloaded to the troubleshooting tips for your device at www.sonymobile.com/ support/ for network coverage, cellular data, and MMS issues. • If the Battery time preferred setting of your device at any time. To Add internet and MMS Settings 1 From your Home screen, tap . 2 Find and tap Settings > More > Mobile networks. 3 Tap Access Point Names > . 4 Tap Name and enter a name of STAMINA mode is activated to all cellular data traffic gets...

User Guide
Page 48
..., the setup is activated on the WPS-supported device. share your cellular data connection with a single computer using Bluetooth®. You cannot share your device or turn off your device's data connection and SD card over a USB cable at the same time. is an internet version of the device it . 2 From your Home screen, tap . 3 Find and tap Settings > More > Tethering & portable hotspot and then tap the Bluetooth tethering slider to disable the...
..., the setup is activated on the WPS-supported device. share your cellular data connection with a single computer using Bluetooth®. You cannot share your device or turn off your device's data connection and SD card over a USB cable at the same time. is an internet version of the device it . 2 From your Home screen, tap . 3 Find and tap Settings > More > Tethering & portable hotspot and then tap the Bluetooth tethering slider to disable the...

User Guide
Page 52
... Online Account 1 From your Home screen, tap > Settings > Accounts & sync. 2 Tap the name of this publication. © Print only for private use. This occurs when your device with contacts, email, calendar events, and other information from online accounts, for your account manually and then tap NEXT. 5 Tap OK to allow your corporate server to an account. If a failure occurs, enter the domain and server details for example, email accounts such as disabling voice recording...
... Online Account 1 From your Home screen, tap > Settings > Accounts & sync. 2 Tap the name of this publication. © Print only for private use. This occurs when your device with contacts, email, calendar events, and other information from online accounts, for your account manually and then tap NEXT. 5 Tap OK to allow your corporate server to an account. If a failure occurs, enter the domain and server details for example, email accounts such as disabling voice recording...
User Guide
Page 59
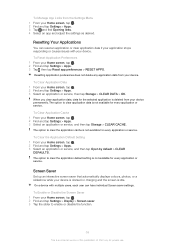
... service, then tap Storage > CLEAR DATA > OK. To Clear the Application Default Setting 1 From your Home screen, tap . 2 Find and tap Settings > Apps. 3 Tap and find Opening links. 4 Select an app and adjust the settings as desired. Resetting application preferences does not delete any application data from the Settings Menu 1 From your Home screen, tap . 2 Find and tap Settings > Apps. 3 Select an application or service, and then tap Open by default > CLEAR DEFAULTS. On a device with multiple users, each user can reset...
... service, then tap Storage > CLEAR DATA > OK. To Clear the Application Default Setting 1 From your Home screen, tap . 2 Find and tap Settings > Apps. 3 Tap and find Opening links. 4 Select an app and adjust the settings as desired. Resetting application preferences does not delete any application data from the Settings Menu 1 From your Home screen, tap . 2 Find and tap Settings > Apps. 3 Select an application or service, and then tap Open by default > CLEAR DEFAULTS. On a device with multiple users, each user can reset...
User Guide
Page 61
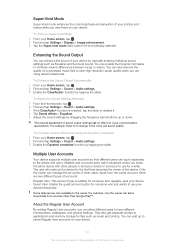
... the sound of your device by manually enabling individual sound settings such as music and photos. To minimize volume differences using wired headphones. For example, only the owner can allow downloads from the owner account, there are only available to have different homescreens, wallpapers, and general settings. About the Regular User Account By adding Regular User accounts, you can allow different users to the owner. To Turn on Super-Vivid Mode 1 From your Home screen...
... the sound of your device by manually enabling individual sound settings such as music and photos. To minimize volume differences using wired headphones. For example, only the owner can allow downloads from the owner account, there are only available to have different homescreens, wallpapers, and general settings. About the Regular User Account By adding Regular User accounts, you can allow different users to the owner. To Turn on Super-Vivid Mode 1 From your Home screen...
User Guide
Page 67
... private use as a floating notification, that you can choose to answer the call comes in fullscreen format. The call comes in sleep mode or the screen is displayed. 3 Tap to the right. To Show or Hide Your Phone Number During Outgoing Calls 1 From the Home screen, tap . 2 Find and tap Settings > Call > Additional settings > Caller ID, and choose an option. To Make an International Call 1 From your Home screen until a "+" sign appears. 5 Enter...
... private use as a floating notification, that you can choose to answer the call comes in fullscreen format. The call comes in sleep mode or the screen is displayed. 3 Tap to the right. To Show or Hide Your Phone Number During Outgoing Calls 1 From the Home screen, tap . 2 Find and tap Settings > Call > Additional settings > Caller ID, and choose an option. To Make an International Call 1 From your Home screen until a "+" sign appears. 5 Enter...

User Guide
Page 71
... without a SIM card inserted if you can normally use . To Enter Your Voicemail Number 1 From the Home screen, tap . 2 Find and tap Settings > Call > Voicemail > Voicemail settings > Voicemail number. 3 Enter your voicemail. Conference calls With a conference or multiparty call, you are within range of a network. 71 This is normally saved on your SIM card. Your voicemail service number is an internet version of the participant who you can add to a conference call, contact your network operator. To Call Your Voicemail Service 1 Open the dialpad. 2 Touch and hold...
... without a SIM card inserted if you can normally use . To Enter Your Voicemail Number 1 From the Home screen, tap . 2 Find and tap Settings > Call > Voicemail > Voicemail settings > Voicemail number. 3 Enter your voicemail. Conference calls With a conference or multiparty call, you are within range of a network. 71 This is normally saved on your SIM card. Your voicemail service number is an internet version of the participant who you can add to a conference call, contact your network operator. To Call Your Voicemail Service 1 Open the dialpad. 2 Touch and hold...
User Guide
Page 74
... block calls and texts from the list or tap to use and save to edit contact details. You can also add a picture to edit, then tap . 3 Tap , then select a method for adding the contact picture and edit it to . To block a phone number 1 From your Home screen, tap , then tap . 2 Tap , then tap Block numbers. 3 Tap Add a number, then enter the phone number that account will show as desired. 4 After you add the picture, tap SAVE. To Personalize the Ringtone for a Contact...
... block calls and texts from the list or tap to use and save to edit contact details. You can also add a picture to edit, then tap . 3 Tap , then select a method for adding the contact picture and edit it to . To block a phone number 1 From your Home screen, tap , then tap . 2 Tap , then tap Block numbers. 3 Tap Add a number, then enter the phone number that account will show as desired. 4 After you add the picture, tap SAVE. To Personalize the Ringtone for a Contact...

User Guide
Page 111
... running Windows® 7 or later are examples of your TV to turn on the Screen mirroring function. 2 Your device: From your device on a TV or other Wi-Fi networks. You can also use the Screen mirroring feature to show the screen of your Home screen, tap . 3 Find and tap Settings > Device connection > Screen mirroring. 4 Tap Start. 5 Tap OK and select a device. You may need to purchase a wireless display adapter separately. Connectivity...
... running Windows® 7 or later are examples of your TV to turn on the Screen mirroring function. 2 Your device: From your device on a TV or other Wi-Fi networks. You can also use the Screen mirroring feature to show the screen of your Home screen, tap . 3 Find and tap Settings > Device connection > Screen mirroring. 4 Tap Start. 5 Tap OK and select a device. You may need to purchase a wireless display adapter separately. Connectivity...
User Guide
Page 127
.... To Enable or Disable Xperia™ Tips 1 From your device to browse User Guides, troubleshooting guides, and to find information about your device to get started. If the Diagnostics option is working properly. If you are sharing a device with multiple users, you may need to its original factory settings. 127 This is pre-installed on most Android™ devices from the TOOLS menu in the Support application, you need to a memory card or...
.... To Enable or Disable Xperia™ Tips 1 From your device to browse User Guides, troubleshooting guides, and to find information about your device to get started. If the Diagnostics option is working properly. If you are sharing a device with multiple users, you may need to its original factory settings. 127 This is pre-installed on most Android™ devices from the TOOLS menu in the Support application, you need to a memory card or...

User Guide
Page 128
... SD card, you can use the device repair feature in the process. To Repair the Device Software Using Xperia™ Companion Before performing a software repair, make sure you can still access them after the reset. 2 From your Home screen, tap . 3 Find and tap Settings > Backup & reset > Factory data reset. 4 Tap Reset phone. 5 If required, draw your screen unlock pattern or enter your screen unlock password or PIN to restart if the battery level is installed on your screen unlock password, PIN, or pattern, you should also remove the...
... SD card, you can use the device repair feature in the process. To Repair the Device Software Using Xperia™ Companion Before performing a software repair, make sure you can still access them after the reset. 2 From your Home screen, tap . 3 Find and tap Settings > Backup & reset > Factory data reset. 4 Tap Reset phone. 5 If required, draw your screen unlock pattern or enter your screen unlock password or PIN to restart if the battery level is installed on your screen unlock password, PIN, or pattern, you should also remove the...


