
Instruction Manual
Page 1
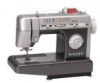
MODEL CG-590 COMMERCIAL GRADE SEWING MACHINE WORKBOOK
MODEL CG-590 COMMERCIAL GRADE SEWING MACHINE WORKBOOK
Instruction Manual
Page 2
... Congratulations on the purchase of your own projects. This commercial grade sewing machine is ideal for learning various sewing techniques, which you will have many hours of the Singer Company Ltd. © 2004 Singer Sewing Company All Rights Reserved. We are certain that your creativity...be inspired, and that you can apply to your new SINGER® Sewing Machine! The SINGER® Education Department SINGER® is designed to -use machine, feature-packed machine! Your machine is a registered trademark of sewing enjoyment with this easy-to deliver the ultimate combination of...
... Congratulations on the purchase of your own projects. This commercial grade sewing machine is ideal for learning various sewing techniques, which you will have many hours of the Singer Company Ltd. © 2004 Singer Sewing Company All Rights Reserved. We are certain that your creativity...be inspired, and that you can apply to your new SINGER® Sewing Machine! The SINGER® Education Department SINGER® is designed to -use machine, feature-packed machine! Your machine is a registered trademark of sewing enjoyment with this easy-to deliver the ultimate combination of...
Instruction Manual
Page 5
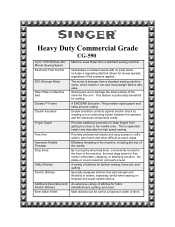
...Commercial Grade CG-590 Up to -reach areas. This provides rigid support and helps prevent rusting. Double insulation protects against electric shock by creating a non-conducting barrier between the operator and the electrical components inside. Provides professional results and easy access to cuffs, collars, pant hems and other difficult-to 1100 Stitches-PerMinute Sewing...of the machine, including the eye of 6mm. Specially designed stitches that allows for fashion sewing, home dec and quilting. This is particularly beneficial for high speed sewing. A SINGER® Exclusive...
...Commercial Grade CG-590 Up to -reach areas. This provides rigid support and helps prevent rusting. Double insulation protects against electric shock by creating a non-conducting barrier between the operator and the electrical components inside. Provides professional results and easy access to cuffs, collars, pant hems and other difficult-to 1100 Stitches-PerMinute Sewing...of the machine, including the eye of 6mm. Specially designed stitches that allows for fashion sewing, home dec and quilting. This is particularly beneficial for high speed sewing. A SINGER® Exclusive...
Instruction Manual
Page 6
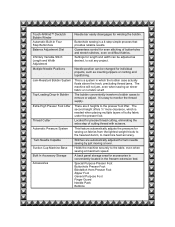
... even stitching of cutting thread with scissors. Twin Needle Capable Suction Cup Machine Base Built In Accessory Storage Accessories Stitches are 2 heights to the table, even when sewing at all! Holds the machine securely to the presser foot lifter. Extra-High Presser Foot Lifter Thread Cutter... height offers ¼" more clearance, which the bobbin case actually floats above the hook, precluding thread jams. The machine will not jam, even when sewing on fabrics from the lightest weight tricots to the heaviest denim, to suit any project. Special Purpose Presser Foot Buttonhole...
... even stitching of cutting thread with scissors. Twin Needle Capable Suction Cup Machine Base Built In Accessory Storage Accessories Stitches are 2 heights to the table, even when sewing at all! Holds the machine securely to the presser foot lifter. Extra-High Presser Foot Lifter Thread Cutter... height offers ¼" more clearance, which the bobbin case actually floats above the hook, precluding thread jams. The machine will not jam, even when sewing on fabrics from the lightest weight tricots to the heaviest denim, to suit any project. Special Purpose Presser Foot Buttonhole...
Instruction Manual
Page 7
All Rights Reserved. Portable Cabinet Mountable Machine has a built-in carry handle, making it easy to oil the machine, and no oil gets on fabric. 25 Year Limited Commercial, Peace of the Singer Company Ltd. © 2004 Singer Sewing Company. Machine can be mounted into a cabinet. \ SINGER® is no need to transport the machine. Self-Lubricating Because the machine is permanently lubricated, there is a registered trademark of mind knowing the machine has a 25 year School and Home Warranty limited warranty.
All Rights Reserved. Portable Cabinet Mountable Machine has a built-in carry handle, making it easy to oil the machine, and no oil gets on fabric. 25 Year Limited Commercial, Peace of the Singer Company Ltd. © 2004 Singer Sewing Company. Machine can be mounted into a cabinet. \ SINGER® is no need to transport the machine. Self-Lubricating Because the machine is permanently lubricated, there is a registered trademark of mind knowing the machine has a 25 year School and Home Warranty limited warranty.
Instruction Manual
Page 8
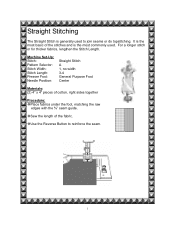
... or do topstitching. For a longer stitch or for thicker fabrics, lengthen the Stitch Length. Sew the length of the stitches and is the most basic of the fabric. It is the most commonly used to reinforce the seam. 1 Machine Set-Up: Stitch: Pattern Selector: Stitch Width: Stitch Length: Presser Foot: Needle Position...
... or do topstitching. For a longer stitch or for thicker fabrics, lengthen the Stitch Length. Sew the length of the stitches and is the most basic of the fabric. It is the most commonly used to reinforce the seam. 1 Machine Set-Up: Stitch: Pattern Selector: Stitch Width: Stitch Length: Presser Foot: Needle Position...
Instruction Manual
Page 9
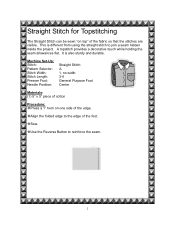
Machine Set-Up: Stitch: Pattern Selector: Stitch Width: Stitch Length: Presser Foot: Needle Position: Straight Stitch A 1, no width 3-4 General Purpose Foot Center Materials: (1) 5" x 5" piece of cotton Procedure: Press a 1" hem on top" of the fabric so that the stitches are visible. Align the folded edge to reinforce the seam. 2 Sew. It is different from...
Machine Set-Up: Stitch: Pattern Selector: Stitch Width: Stitch Length: Presser Foot: Needle Position: Straight Stitch A 1, no width 3-4 General Purpose Foot Center Materials: (1) 5" x 5" piece of cotton Procedure: Press a 1" hem on top" of the fabric so that the stitches are visible. Align the folded edge to reinforce the seam. 2 Sew. It is different from...
Instruction Manual
Page 10
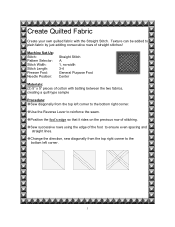
... from the top left corner. 3 Machine Set-Up: Stitch: Pattern Selector: Stitch Width: Stitch Length: Presser Foot: Needle Position: Straight Stitch A 1, no width 3-4 General Purpose Foot Center Materials: (2) 5" x 5" pieces of straight stitches! Sew successive rows using the edge of stitching. Position the foot's ...lines. Create Quilted Fabric Create your own quilted fabric with batting between the two fabrics, creating a quilt-type sample Procedure: Sew diagonally from the top right corner to the bottom left corner to the bottom right corner. Use the Reverse Lever to ...
... from the top left corner. 3 Machine Set-Up: Stitch: Pattern Selector: Stitch Width: Stitch Length: Presser Foot: Needle Position: Straight Stitch A 1, no width 3-4 General Purpose Foot Center Materials: (2) 5" x 5" pieces of straight stitches! Sew successive rows using the edge of stitching. Position the foot's ...lines. Create Quilted Fabric Create your own quilted fabric with batting between the two fabrics, creating a quilt-type sample Procedure: Sew diagonally from the top right corner to the bottom left corner to the bottom right corner. Use the Reverse Lever to ...
Instruction Manual
Page 11
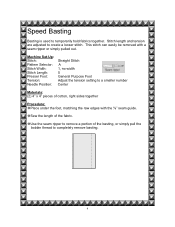
Sew the length of the basting, or simply pull the bobbin thread to completely remove basting. 4 Speed Basting Basting is used to create a looser stitch. Use ... under the foot, matching the raw edges with a seam ripper or simply pulled out. Stitch length and tension are adjusted to temporarily hold fabrics together. Machine Set-Up: Stitch: Pattern Selector: Stitch Width: Stitch Length: Presser Foot: Tension: Needle Position: Straight Stitch A 1, no width 5 General Purpose Foot Adjust the tension setting...
Sew the length of the basting, or simply pull the bobbin thread to completely remove basting. 4 Speed Basting Basting is used to create a looser stitch. Use ... under the foot, matching the raw edges with a seam ripper or simply pulled out. Stitch length and tension are adjusted to temporarily hold fabrics together. Machine Set-Up: Stitch: Pattern Selector: Stitch Width: Stitch Length: Presser Foot: Tension: Needle Position: Straight Stitch A 1, no width 5 General Purpose Foot Adjust the tension setting...
Instruction Manual
Page 12
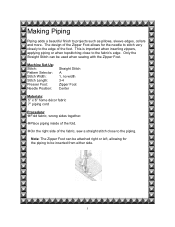
...edge. This is important when inserting zippers, applying piping or when topstitching close to be used when sewing with the Zipper Foot. The design of the Zipper Foot allows for the piping to the piping. Machine Set-Up: Stitch: Pattern Selector: Stitch Width: Stitch Length: Presser Foot: Needle Position: Straight ...Only the Straight Stitch can be attached right or left, allowing for the needle to stitch very closely to the edge of the fabric, sew a straight stitch close to projects such as pillows, sleeve edges, collars and more. On the right side of the foot. Place piping ...
...edge. This is important when inserting zippers, applying piping or when topstitching close to be used when sewing with the Zipper Foot. The design of the Zipper Foot allows for the piping to the piping. Machine Set-Up: Stitch: Pattern Selector: Stitch Width: Stitch Length: Presser Foot: Needle Position: Straight ...Only the Straight Stitch can be attached right or left, allowing for the needle to stitch very closely to the edge of the fabric, sew a straight stitch close to projects such as pillows, sleeve edges, collars and more. On the right side of the foot. Place piping ...
Instruction Manual
Page 13
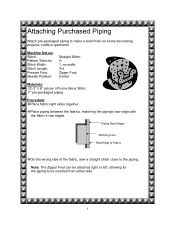
... piping Procedure: Place fabric right sides together. Attaching Purchased Piping Attach pre-packaged piping to make a bold finish on home decorating projects, crafts or garments. Machine Set-up: Stitch: Pattern Selector: Stitch Width: Stitch Length: Presser Foot: Needle Position: Straight Stitch A 1, no width 3-4 Zipper Foot Center Materials: (2) 3" x 6" pieces of the fabric...
... piping Procedure: Place fabric right sides together. Attaching Purchased Piping Attach pre-packaged piping to make a bold finish on home decorating projects, crafts or garments. Machine Set-up: Stitch: Pattern Selector: Stitch Width: Stitch Length: Presser Foot: Needle Position: Straight Stitch A 1, no width 3-4 Zipper Foot Center Materials: (2) 3" x 6" pieces of the fabric...

Instruction Manual
Page 16
... 6" x 6" tear-away stabilizer Procedure: Press the fusible stabilizer onto the appliqué. Machine Set-Up: Stitch: Pattern Selector: Stitch Width: Stitch Length: Presser Foot: Needle Position: Zigzag Stitch A 2-3 0.5-1 Special Purpose Foot (J) Center Materials: 2" x 3" cotton fabric for a smoother looking finish. Sew around the applique. Widen the stitch width to 4 and change the stitch...
... 6" x 6" tear-away stabilizer Procedure: Press the fusible stabilizer onto the appliqué. Machine Set-Up: Stitch: Pattern Selector: Stitch Width: Stitch Length: Presser Foot: Needle Position: Zigzag Stitch A 2-3 0.5-1 Special Purpose Foot (J) Center Materials: 2" x 3" cotton fabric for a smoother looking finish. Sew around the applique. Widen the stitch width to 4 and change the stitch...
Instruction Manual
Page 18
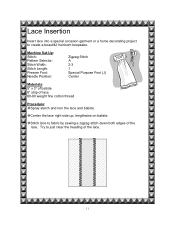
... side up, lengthwise on batiste. Try to fabric by sewing a zigzag stitch down both edges of the lace. Stitch lace to just clear the heading of lace 60-80 weight fine cotton thread Procedure: Spray starch and iron the lace and batiste. Machine Set-Up: Stitch: Pattern Selector: Stitch Width: Stitch Length...
... side up, lengthwise on batiste. Try to fabric by sewing a zigzag stitch down both edges of the lace. Stitch lace to just clear the heading of lace 60-80 weight fine cotton thread Procedure: Spray starch and iron the lace and batiste. Machine Set-Up: Stitch: Pattern Selector: Stitch Width: Stitch Length...

Instruction Manual
Page 20
Position the button on buttons, snaps or hooks with your sewing machine to be attached, such as a shower curtain that the holes in half and place under presser foot. Button Sewing Use your SINGER® Retailer. 13 Machine Set-Up: Stitch: Pattern Selector: Stitch Width: Stitch Length: Feed Dogs: Presser Foot: Needle Position: Zigzag Stitch A Determined...
Position the button on buttons, snaps or hooks with your sewing machine to be attached, such as a shower curtain that the holes in half and place under presser foot. Button Sewing Use your SINGER® Retailer. 13 Machine Set-Up: Stitch: Pattern Selector: Stitch Width: Stitch Length: Feed Dogs: Presser Foot: Needle Position: Zigzag Stitch A Determined...

Instruction Manual
Page 21
... dial to straight stitch. This forms a tie-off on the knots. Apply a liquid fray preventer on the backside of fabric on the back side to sew 5-6 stitches. Turn the hand wheel forward, adjust so that the needle goes into the opposite hole. Before removing the button and fabric from the... machine, set machine to fine tune the swing of the needle into the opposite hole and then use the foot control to secure the button. Lower the presser ...
... dial to straight stitch. This forms a tie-off on the knots. Apply a liquid fray preventer on the backside of fabric on the back side to sew 5-6 stitches. Turn the hand wheel forward, adjust so that the needle goes into the opposite hole. Before removing the button and fabric from the... machine, set machine to fine tune the swing of the needle into the opposite hole and then use the foot control to secure the button. Lower the presser ...

Instruction Manual
Page 23
...knob to 6 stitches, bartacking the bottom of the buttonhole. Stop sewing when the needle reaches the fabric mark which indicates the bottom of the Four-Step buttonhole. Sew 5 to Step One of the buttonhole. Sew, and the machine will stitch the right side of the buttonhole. Turn Pattern Selection ...knob to Step Three of the buttonhole. Stop sewing when the needle reaches the fabric mark which indicates...
...knob to 6 stitches, bartacking the bottom of the buttonhole. Stop sewing when the needle reaches the fabric mark which indicates the bottom of the Four-Step buttonhole. Sew 5 to Step One of the buttonhole. Sew, and the machine will stitch the right side of the buttonhole. Turn Pattern Selection ...knob to Step Three of the buttonhole. Stop sewing when the needle reaches the fabric mark which indicates...

Instruction Manual
Page 24
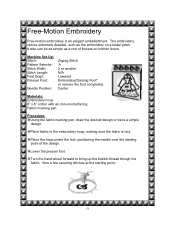
Place the hoop under the foot, positioning the needle over the starting point of the monogram. Machine Set-Up: Stitch: Pattern Selector: Stitch Width: Stitch Length: Feet Dogs: Presser Foot: Needle Position: Zigzag Stitch A 2 N/A Lowered Embroidery/Darning Foot* (or remove the foot ... Monogramming adds a personal and professional touch to garments, home decorating items and craft projects. When monogramming, the feed dogs are covered, allowing for free-motion sewing.
Place the hoop under the foot, positioning the needle over the starting point of the monogram. Machine Set-Up: Stitch: Pattern Selector: Stitch Width: Stitch Length: Feet Dogs: Presser Foot: Needle Position: Zigzag Stitch A 2 N/A Lowered Embroidery/Darning Foot* (or remove the foot ... Monogramming adds a personal and professional touch to garments, home decorating items and craft projects. When monogramming, the feed dogs are covered, allowing for free-motion sewing.
Instruction Manual
Page 26
... as a row of the design. Place the hoop under the foot, positioning the needle over the starting point. 19 Sew a few securing stitches at the starting point of flowers on kitchen linens. Machine Set-Up: Stitch: Pattern Selector: Stitch Width: Stitch Length: Feet Dogs: Presser Foot: Needle Position: Zigzag Stitch A 2 or smaller...
... as a row of the design. Place the hoop under the foot, positioning the needle over the starting point. 19 Sew a few securing stitches at the starting point of flowers on kitchen linens. Machine Set-Up: Stitch: Pattern Selector: Stitch Width: Stitch Length: Feet Dogs: Presser Foot: Needle Position: Zigzag Stitch A 2 or smaller...
Instruction Manual
Page 28
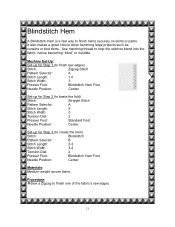
Use matching thread to finish one of the fabric's raw edges. 21 Machine Set-Up: Set-up for Step 1 (to finish raw edges) Stitch: Zigzag Stitch Pattern Selector: A Stitch Length: 1.0 Stitch Width: 3 Presser Foot: ... Pattern Selector: B Stitch Length: 2-3 Stitch Width 3-4 Tension Dial: 2 Presser Foot: Blindstitch Hem Foot Needle Position: Center Materials: Medium weight woven fabric Procedure: Sew a Zigzag to help the stitches blend into the fabric, hence becoming "blind" or invisible. Blindstitch Hem A Blindstitch Hem is a fast way to finish hems securely...
Use matching thread to finish one of the fabric's raw edges. 21 Machine Set-Up: Set-up for Step 1 (to finish raw edges) Stitch: Zigzag Stitch Pattern Selector: A Stitch Length: 1.0 Stitch Width: 3 Presser Foot: ... Pattern Selector: B Stitch Length: 2-3 Stitch Width 3-4 Tension Dial: 2 Presser Foot: Blindstitch Hem Foot Needle Position: Center Materials: Medium weight woven fabric Procedure: Sew a Zigzag to help the stitches blend into the fabric, hence becoming "blind" or invisible. Blindstitch Hem A Blindstitch Hem is a fast way to finish hems securely...
Instruction Manual
Page 38
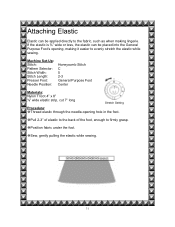
... back of the foot, enough to the fabric, such as when making it easier to evenly stretch the elastic while sewing. Sew, gently pulling the elastic while sewing. 31 Position fabric under the foot. Machine Set-Up: Stitch: Pattern Selector: Stitch Width: Stitch Length: Presser Foot: Needle Position: Honeycomb Stitch C 5 2-3 General Purpose Foot Center...
... back of the foot, enough to the fabric, such as when making it easier to evenly stretch the elastic while sewing. Sew, gently pulling the elastic while sewing. 31 Position fabric under the foot. Machine Set-Up: Stitch: Pattern Selector: Stitch Width: Stitch Length: Presser Foot: Needle Position: Honeycomb Stitch C 5 2-3 General Purpose Foot Center...


