
UP-700 Operation Manual
Page 2
... the unit. CAUTION The socket-outlet should be installed near the equipment and should be required to operate this equipment. These numbers are designed to Part 15 of this equipment in a residential area is provided for easy reference in accordance with the limits for a Class A digital device, pursuant to provide reasonable...
... the unit. CAUTION The socket-outlet should be installed near the equipment and should be required to operate this equipment. These numbers are designed to Part 15 of this equipment in a residential area is provided for easy reference in accordance with the limits for a Class A digital device, pursuant to provide reasonable...

UP-700 Operation Manual
Page 4
... PLU/UPC 32 UPC learning function ...32 Price change function (for UPCs 33 PLU level shift (for Entries ...18 Error Warning ...18 Sample Receipt ...18 5. Part Names and Functions ...8 External View ...8 Front view ...8 Rear view ...8 Printer ...9 Keyboard ...10 Inserting the keyboard sheet ...10 Standard keyboard layout ...10 Optional keys ...11 Keys...
... PLU/UPC 32 UPC learning function ...32 Price change function (for UPCs 33 PLU level shift (for Entries ...18 Error Warning ...18 Sample Receipt ...18 5. Part Names and Functions ...8 External View ...8 Front view ...8 Rear view ...8 Printer ...9 Keyboard ...10 Inserting the keyboard sheet ...10 Standard keyboard layout ...10 Optional keys ...11 Keys...

UP-700 Operation Manual
Page 10
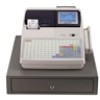
External View Front view Journal cover Receipt paper Customer display (Pop-up type) Operator display Contrast control Power switch Drawer Drawer lock Mode switch Keyboard Rear view Power switch Rear cover 8 1 Part Names and Functions This chapter describes the part names and functions of this POS terminal.
External View Front view Journal cover Receipt paper Customer display (Pop-up type) Operator display Contrast control Power switch Drawer Drawer lock Mode switch Keyboard Rear view Power switch Rear cover 8 1 Part Names and Functions This chapter describes the part names and functions of this POS terminal.

UP-700 Operation Manual
Page 18
... Contrast control Turning the control backwards darkens the display and turning it forwards lightens the display. Consult your authorized SHARP dealer for the first time. The backlight in the display is a consumable part. Display Adjustment (operator display) You can adjust the contrast of the display by using the POS terminal for further...
... Contrast control Turning the control backwards darkens the display and turning it forwards lightens the display. Consult your authorized SHARP dealer for the first time. The backlight in the display is a consumable part. Display Adjustment (operator display) You can adjust the contrast of the display by using the POS terminal for further...

UP-700 Operation Manual
Page 129
... the signature line. 127 Cash keys (continued) • CAT (Use the selective entry) You can select compulsory or non-compulsory CAT2/CAT1. PARTIAL: Prints only part of a card number. • SIGN.LINE PRT. (Use the selective entry) YES: Prints the signature line. RESERVED: CAT#2 COMPUL.: Compulsory CAT2 CAT#1 COMPUL.: Compulsory CAT1...
... the signature line. 127 Cash keys (continued) • CAT (Use the selective entry) You can select compulsory or non-compulsory CAT2/CAT1. PARTIAL: Prints only part of a card number. • SIGN.LINE PRT. (Use the selective entry) YES: Prints the signature line. RESERVED: CAT#2 COMPUL.: Compulsory CAT2 CAT#1 COMPUL.: Compulsory CAT1...

UP-700 Operation Manual
Page 133
...; CARD# FORMAT (Use the selective entry) FULL: Prints the entire card number. NO: Does not print the name of the card holder. PARTIAL: Prints only part of a card number. • SIGN.LINE PRT. (Use the selective entry) YES: Prints the signature line. Check keys (continued) • CAT (Use the selective entry...
...; CARD# FORMAT (Use the selective entry) FULL: Prints the entire card number. NO: Does not print the name of the card holder. PARTIAL: Prints only part of a card number. • SIGN.LINE PRT. (Use the selective entry) YES: Prints the signature line. Check keys (continued) • CAT (Use the selective entry...

UP-700 Operation Manual
Page 137
PARTIAL: Prints only part of the card holder. PRT. (Use the selective entry) YES: Prints the name of a card number. • SIGN.LINE PRT. (Use the selective entry) YES: ...
PARTIAL: Prints only part of the card holder. PRT. (Use the selective entry) YES: Prints the name of a card number. • SIGN.LINE PRT. (Use the selective entry) YES: ...

UP-700 Operation Manual
Page 143
... (Use the numeric entry) Number of the card holder. • EXPIRATION PRT. (Use the selective entry) YES: Prints the card expiration date. PARTIAL: Prints only part of the card holder. PRT. (Use the selective entry) YES: Prints the name of a card number. • SIGN.LINE PRT. (Use the selective entry) YES...
... (Use the numeric entry) Number of the card holder. • EXPIRATION PRT. (Use the selective entry) YES: Prints the card expiration date. PARTIAL: Prints only part of the card holder. PRT. (Use the selective entry) YES: Prints the name of a card number. • SIGN.LINE PRT. (Use the selective entry) YES...

UP-700 Operation Manual
Page 145
...) YES: Prints the name of authorization receipts to be issued (1 digit: 1 to 9) If the number "0" is entered, no authorization receipt is issued. PARTIAL: Prints only part of the card holder. • EXPIRATION PRT. (Use the selective entry) YES: Prints the card expiration date. NO: Does not print the name of a card...
...) YES: Prints the name of authorization receipts to be issued (1 digit: 1 to 9) If the number "0" is entered, no authorization receipt is issued. PARTIAL: Prints only part of the card holder. • EXPIRATION PRT. (Use the selective entry) YES: Prints the card expiration date. NO: Does not print the name of a card...

UP-700 Operation Manual
Page 147
...) Select the transaction type. • CREDIT • RESERVED • CHECK • CARD# PRT. (Use the selective entry) YES: Prints the card number. PARTIAL: Prints only part of a card number. • SIGN.LINE PRT. (Use the selective entry) YES: Prints the signature line. Up to 999999.99 • CAT (Use the selective...
...) Select the transaction type. • CREDIT • RESERVED • CHECK • CARD# PRT. (Use the selective entry) YES: Prints the card number. PARTIAL: Prints only part of a card number. • SIGN.LINE PRT. (Use the selective entry) YES: Prints the signature line. Up to 999999.99 • CAT (Use the selective...

UP-700 Operation Manual
Page 221
... the printed journal roll from the back of the take-up spool. 4. Press the JOURNAL key to cut 1. Press the JOURNAL key until its printed part is out of the way. 3. Remove the printer cover. 2.
... the printed journal roll from the back of the take-up spool. 4. Press the JOURNAL key to cut 1. Press the JOURNAL key until its printed part is out of the way. 3. Remove the printer cover. 2.
Instruction Manual
Page 4
.../OFF function 20 Clerk assignment 20 Error Warning 21 Item Selection from the Menu 22 Starting Cash Memory Entry 23 4. CONTENTS INTRODUCTION 1 IMPORTANT 1 PRECAUTION 1 CONTENTS 2 1. Part Names and Functions 7 External View 7 Front view 7 Rear view 7 Printer 8 Keyboard 9 Inserting the keyboard sheet 9 Standard keyboard layout 9 Optional keys 10 Keys and Switches 12...
.../OFF function 20 Clerk assignment 20 Error Warning 21 Item Selection from the Menu 22 Starting Cash Memory Entry 23 4. CONTENTS INTRODUCTION 1 IMPORTANT 1 PRECAUTION 1 CONTENTS 2 1. Part Names and Functions 7 External View 7 Front view 7 Rear view 7 Printer 8 Keyboard 9 Inserting the keyboard sheet 9 Standard keyboard layout 9 Optional keys 10 Keys and Switches 12...

Instruction Manual
Page 9
External View s Front view Journal cover Receipt paper Customer display (Pop-up type) Operator display Contrast control Power switch Drawer Drawer lock Mode switch Keyboard Clerk switch s Rear view s Front view Power switch Rear cover (The machine with drawer) s Rear view (The machine without drawer) 7 1 Part Names and Functions This chapter describes the part names and functions of this POS terminal.
External View s Front view Journal cover Receipt paper Customer display (Pop-up type) Operator display Contrast control Power switch Drawer Drawer lock Mode switch Keyboard Clerk switch s Rear view s Front view Power switch Rear cover (The machine with drawer) s Rear view (The machine without drawer) 7 1 Part Names and Functions This chapter describes the part names and functions of this POS terminal.

Instruction Manual
Page 16
...the tab, the display will head up type) s Display adjustment (operator display) You can program the time for which the backlight is a consumable part. You can adjust the contrast of time. s Screen save mode When you can turn the LCD backlight off during text programming. This function can ...you should keep the normal status (in the display is "ON") before it forwards lightens the display. The backlight in which your authorized SHARP dealer for an extended period of the display by using the contrast control, and also you want to the normal mode, press any server ...
...the tab, the display will head up type) s Display adjustment (operator display) You can program the time for which the backlight is a consumable part. You can adjust the contrast of time. s Screen save mode When you can turn the LCD backlight off during text programming. This function can ...you should keep the normal status (in the display is "ON") before it forwards lightens the display. The backlight in which your authorized SHARP dealer for an extended period of the display by using the contrast control, and also you want to the normal mode, press any server ...

Instruction Manual
Page 19
... receipt. However, the same receipt will be issued two times. • Double (addition + single) receipt type The contents of this type of the addition receipt part. • The information on multiplication entry will be issued two times. 17
... receipt. However, the same receipt will be issued two times. • Double (addition + single) receipt type The contents of this type of the addition receipt part. • The information on multiplication entry will be issued two times. 17

Instruction Manual
Page 194
... and near the paper roll. Ì 5. Remove the printed journal roll from the back of the take-up spool. 4. Press the key until its printed part is out of the way. 3. Removing the journal paper roll Area to advance the journal paper until the paper remaining in the printer comes out...
... and near the paper roll. Ì 5. Remove the printed journal roll from the back of the take-up spool. 4. Press the key until its printed part is out of the way. 3. Removing the journal paper roll Area to advance the journal paper until the paper remaining in the printer comes out...

Instruction Manual
Page 195
... way forward (after printing, because the head may remain in "Installing the paper roll". 9. Return the paper guide to the tab. 8. Make sure the metal part is at one position, continue pulling forward until it stops again and cannot be pulled forward any shreds of paper that may still be hot...
... way forward (after printing, because the head may remain in "Installing the paper roll". 9. Return the paper guide to the tab. 8. Make sure the metal part is at one position, continue pulling forward until it stops again and cannot be pulled forward any shreds of paper that may still be hot...

Instruction Manual
Page 196
..., pull up the paper guide. 5. Precautions: Never touch the print head with ethyl alcohol or isopropyl alcohol. 7. Remove the printer cover. 3. Make sure the metal part is getting dark or faint, paper dust may damage the head. 194 Clean the print head as it stops again and cannot be stuck to...
..., pull up the paper guide. 5. Precautions: Never touch the print head with ethyl alcohol or isopropyl alcohol. 7. Remove the printer cover. 3. Make sure the metal part is getting dark or faint, paper dust may damage the head. 194 Clean the print head as it stops again and cannot be stuck to...

Programming Guide
Page 1
...MODE PROGRAMMING ("2 SETTING 10 CHAPTER 4. SRV MODE PROGRAMMING ("4 DOWN LOAD 48 CHAPTER 6. SHARP CORPORATION This document has been published to be used for maintaining the safety of the set . READING OF THE SRV MODE PROGRAM 3 CHAPTER 3. Parts marked with specified ones for maintaining the safety and performance of the set . RESET ... PGM2 mode, please refer to change without notice. The contents are important for after sales service only. UP-600 UP-600 MODEL UP-700 (For "U" & "A" version) UP-700 CONTENTS CHAPTER 1. SRV MODE PROGRAMMING ("3 IRC SETTING 45 CHAPTER 5.
...MODE PROGRAMMING ("2 SETTING 10 CHAPTER 4. SRV MODE PROGRAMMING ("4 DOWN LOAD 48 CHAPTER 6. SHARP CORPORATION This document has been published to be used for maintaining the safety of the set . READING OF THE SRV MODE PROGRAM 3 CHAPTER 3. Parts marked with specified ones for maintaining the safety and performance of the set . RESET ... PGM2 mode, please refer to change without notice. The contents are important for after sales service only. UP-600 UP-600 MODEL UP-700 (For "U" & "A" version) UP-700 CONTENTS CHAPTER 1. SRV MODE PROGRAMMING ("3 IRC SETTING 45 CHAPTER 5.

Programming Guide
Page 51
Printed in a retrieval system, or transmitted. No part of the publisher. In any form or by any means, electronic, mechanical, photocopying, recording, or otherwise, without prior written permission of this publication may be reproduced, stored in Japan. SHARP CORPORATION Digital Document Systems Group Quality & Reliability Control Center Yamatokoriyama, Nara 639-1186, Japan 2001 July Printed in Japan COPYRIGHT © 2001 BY SHARP CORPORATION All rights reserved.
Printed in a retrieval system, or transmitted. No part of the publisher. In any form or by any means, electronic, mechanical, photocopying, recording, or otherwise, without prior written permission of this publication may be reproduced, stored in Japan. SHARP CORPORATION Digital Document Systems Group Quality & Reliability Control Center Yamatokoriyama, Nara 639-1186, Japan 2001 July Printed in Japan COPYRIGHT © 2001 BY SHARP CORPORATION All rights reserved.


