
User Guide
Page 2
...recommend that this will not have any of material which is a registered trademark of all networks. • We assume no responsibility for choosing the GX17. Copyright According to claim for damages. For this reason, avoid the illegal use of this is subject to help you learn about your... phone's features and operations quickly and effectively. Windows is protected by copyright (music, pictures, etc.) is not in possession of more extensive copyright or ...
...recommend that this will not have any of material which is a registered trademark of all networks. • We assume no responsibility for choosing the GX17. Copyright According to claim for damages. For this reason, avoid the illegal use of this is subject to help you learn about your... phone's features and operations quickly and effectively. Windows is protected by copyright (music, pictures, etc.) is not in possession of more extensive copyright or ...

User Guide
Page 4
... Bluetooth® wireless technology interface for data communication. Introduction 3 You can transmit pictures, sounds, and video clips to OBEX-enabled phones. • A data synchronization function for synchronizing the Contacts List and schedule entries with Microsoft Outlook or Outlook Express on a PC...editing function for creating original ringtones using up to OBEX-enabled phones. • An infrared interface for establishing contact and transmitting data with certain devices. Useful Functions and Services Your phone offers you the following features: • A built-in digital...
... Bluetooth® wireless technology interface for data communication. Introduction 3 You can transmit pictures, sounds, and video clips to OBEX-enabled phones. • A data synchronization function for synchronizing the Contacts List and schedule entries with Microsoft Outlook or Outlook Express on a PC...editing function for creating original ringtones using up to OBEX-enabled phones. • An infrared interface for establishing contact and transmitting data with certain devices. Useful Functions and Services Your phone offers you the following features: • A built-in digital...
User Guide
Page 5
... Accessories 7 Getting Started 8 Inserting the SIM Card and the Battery .... 10 Charging the Battery 12 Turning Your Phone On and Off 13 Keypad Lock 14 Display Indicators 15 Navigating Functions 17 Call Functions 18 Making a Call 18 Speed Dialling 18 Redialling 19 Answering a ...
... Accessories 7 Getting Started 8 Inserting the SIM Card and the Battery .... 10 Charging the Battery 12 Turning Your Phone On and Off 13 Keypad Lock 14 Display Indicators 15 Navigating Functions 17 Call Functions 18 Making a Call 18 Speed Dialling 18 Redialling 19 Answering a ...

User Guide
Page 6
Sending Messages 36 Dialling a Service Phone Number 37 Camera 38 Take Picture 38 Record Video 42 Messages 46 Multimedia (MMS 46 Text (SMS 52 Email 55 Cell Broadcasts 57 Vodafone live ... 72 More Games 72 Settings 73 Java™ Information 74 Applications 75 SIM Application 75 Alarms 75 Calculator 76 Voice Recorder 77 Melody Editor 78 Phone Help 82 Calendar 83 Contacts 86 Call Log 86 Speed Dial List 87 My Numbers 87 Call Timers 87 Data Counter 87 Call Costs 88...
Sending Messages 36 Dialling a Service Phone Number 37 Camera 38 Take Picture 38 Record Video 42 Messages 46 Multimedia (MMS 46 Text (SMS 52 Email 55 Cell Broadcasts 57 Vodafone live ... 72 More Games 72 Settings 73 Java™ Information 74 Applications 75 SIM Application 75 Alarms 75 Calculator 76 Voice Recorder 77 Melody Editor 78 Phone Help 82 Calendar 83 Contacts 86 Call Log 86 Speed Dial List 87 My Numbers 87 Call Timers 87 Data Counter 87 Call Costs 88...
User Guide
Page 8
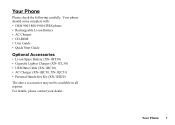
For details, please contact your dealer. Your Phone 7 Your Phone Please check the following carefully. Your phone should come complete with: • GSM 900/1800/1900 GPRS phone • Rechargeable Li-ion Battery • AC Charger • CD-ROM • User Guide • Quick Start Guide Optional Accessories • Li-ion Spare Battery (XN-1BT30) • Cigarette Lighter Charger (XN-1CL30) • USB Data Cable (XN-1DC30) • AC Charger (XN-1QC30, XN-1QC31) • Personal Hands-free Kit (XN-1ER20) The above accessories may not be available in all regions.
For details, please contact your dealer. Your Phone 7 Your Phone Please check the following carefully. Your phone should come complete with: • GSM 900/1800/1900 GPRS phone • Rechargeable Li-ion Battery • AC Charger • CD-ROM • User Guide • Quick Start Guide Optional Accessories • Li-ion Spare Battery (XN-1BT30) • Cigarette Lighter Charger (XN-1CL30) • USB Data Cable (XN-1DC30) • AC Charger (XN-1QC30, XN-1QC31) • Personal Hands-free Kit (XN-1ER20) The above accessories may not be available in all regions.

User Guide
Page 12
Pick up the battery using the protruding edge and remove the battery from the phone. 1 2 Battery Disposal The device is supported by a battery. Getting Started 11 Hold down gently whilst sliding the SIM card out of the SIM holder . 2. Remove ... with the household waste. In order to protect the environment, please read the following points concerning battery disposal: • Take the used battery to your phone and disconnect the charger and other accessories.
Pick up the battery using the protruding edge and remove the battery from the phone. 1 2 Battery Disposal The device is supported by a battery. Getting Started 11 Hold down gently whilst sliding the SIM card out of the SIM holder . 2. Remove ... with the household waste. In order to protect the environment, please read the following points concerning battery disposal: • Take the used battery to your phone and disconnect the charger and other accessories.

User Guide
Page 13
...: Approx. 2 hours. 12 Getting Started Connect the charger to an AC outlet. When the phone is complete, the battery indicator icon displays the full charge status. 1. Note • Charging time may damage your phone for details. Note • Do not use any warranty, please see "Battery" on page ...sides indicated with arrows. 2. Put the cover back. Charging the Battery You must charge the battery for at least 2 hours before using your phone and invalidate any non approved charger, this may vary depending on the state of the battery and other conditions. (See "Battery" on page 117...
...: Approx. 2 hours. 12 Getting Started Connect the charger to an AC outlet. When the phone is complete, the battery indicator icon displays the full charge status. 1. Note • Charging time may damage your phone for details. Note • Do not use any warranty, please see "Battery" on page ...sides indicated with arrows. 2. Put the cover back. Charging the Battery You must charge the battery for at least 2 hours before using your phone and invalidate any non approved charger, this may vary depending on the state of the battery and other conditions. (See "Battery" on page 117...

User Guide
Page 14
...supplies power for charging from the cigarette lighter socket of the screen. To Enter the PIN Code If activated you are using your phone and you hear the "low battery" alarm, attach your PIN code is entered incorrectly three times in the upper right hand side... is displayed in a row, the SIM card is displayed. Battery Indicators Charge Level Sufficiently charged Partially charged Charging recommended Charging required Empty Turning Your Phone On and Off To turn the power off, press and hold F for approximately 2 seconds. If you continue to enter a PIN (Personal Identification...
...supplies power for charging from the cigarette lighter socket of the screen. To Enter the PIN Code If activated you are using your phone and you hear the "low battery" alarm, attach your PIN code is entered incorrectly three times in the upper right hand side... is displayed in a row, the SIM card is displayed. Battery Indicators Charge Level Sufficiently charged Partially charged Charging recommended Charging required Empty Turning Your Phone On and Off To turn the power off, press and hold F for approximately 2 seconds. If you continue to enter a PIN (Personal Identification...

User Guide
Page 15
...; [Options] → "Advanced" → "Copy All Entries" 1. Select "From SIM to prevent it from the SIM Card When you insert the SIM card into your phone for the first time and use the Contacts List function, you can lock the keypad to Handset". Press P, then [LockKeys] during standby. To unlock, press...
...; [Options] → "Advanced" → "Copy All Entries" 1. Select "From SIM to prevent it from the SIM Card When you insert the SIM card into your phone for the first time and use the Contacts List function, you can lock the keypad to Handset". Press P, then [LockKeys] during standby. To unlock, press...
User Guide
Page 19
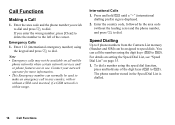
... and hold Q until a "+" (international dialling prefix) sign is dialled. 18 Call Functions Call Functions Making a Call 1. Enter the area code and the phone number you enter the wrong number, press [Clear] to delete the number to O). International Calls 1. To dial a number using the digit keys (H to... dial. Speed Dialling Up to 8 phone numbers from the Contacts List memory (Handset and SIM) can call in use. Press and hold any country, with or without the leading zero) ...
... and hold Q until a "+" (international dialling prefix) sign is dialled. 18 Call Functions Call Functions Making a Call 1. Enter the area code and the phone number you enter the wrong number, press [Clear] to delete the number to O). International Calls 1. To dial a number using the digit keys (H to... dial. Speed Dialling Up to 8 phone numbers from the Contacts List memory (Handset and SIM) can call in use. Press and hold any country, with or without the leading zero) ...

User Guide
Page 20
... the "All Calls" list contains up to automatically redial the number if the first attempt was unsuccessful because the called party was busy. Select the phone number you wish to call . Press D to redial the call . 4. Note • When you receive an incoming call log. Call Functions ... the category from specific categories or "All Calls". Answering a Call When an incoming call . Press D, or [Answer] to answer the call is detected, the phone rings. 1. Set the Any Key Answer function in the profile of each mode. (p. 96) Tip • When the Personal Hands-free Kit (option) is ...
... the "All Calls" list contains up to automatically redial the number if the first attempt was unsuccessful because the called party was busy. Select the phone number you wish to call . Press D to redial the call . 4. Note • When you receive an incoming call log. Call Functions ... the category from specific categories or "All Calls". Answering a Call When an incoming call . Press D, or [Answer] to answer the call is detected, the phone rings. 1. Set the Any Key Answer function in the profile of each mode. (p. 96) Tip • When the Personal Hands-free Kit (option) is ...

User Guide
Page 21
... Earpiece Volume During a call, you cannot answer the call. Press when the volume is ringing to reject a call you do not wish to answer. The phone returns to the desired level. Press F or press and hold the side-up or side-down key (or b/c) to 5) are Unavailable 1. Five levels (level 1 to... the call or press the side-down key to the caller of an incoming call , press the side-up or side-down key whilst the phone is set to the in the Contacts List, receiving display and the picture are displayed alternately. During a call letting them know that you can adjust...
... Earpiece Volume During a call, you cannot answer the call. Press when the volume is ringing to reject a call you do not wish to answer. The phone returns to the desired level. Press F or press and hold the side-up or side-down key (or b/c) to 5) are Unavailable 1. Five levels (level 1 to... the call or press the side-down key to the caller of an incoming call , press the side-up or side-down key whilst the phone is set to the in the Contacts List, receiving display and the picture are displayed alternately. During a call letting them know that you can adjust...

User Guide
Page 22
Select "Hold". Call Waiting This service notifies you of another call by entering the phone number during a Call 1. The first call is automatically put the current call instead of the second call in step 1. To Make Another Call during a call ... the second call . If you wish to make another call whilst you are talking to someone, you do not wish to , then press D. Enter the phone number you have a call is put on hold . 3. Press [Options] and select "Swap Calls" to the held call , press [Options]. 2. Call Functions 21 Note •...
Select "Hold". Call Waiting This service notifies you of another call by entering the phone number during a Call 1. The first call is automatically put the current call instead of the second call in step 1. To Make Another Call during a call ... the second call . If you wish to make another call whilst you are talking to someone, you do not wish to , then press D. Enter the phone number you have a call is put on hold . 3. Press [Options] and select "Swap Calls" to the held call , press [Options]. 2. Call Functions 21 Note •...

User Guide
Page 29
... 3 More Games 4 Settings 5 Java™ Information 1 Vodafone live! 2 Games 3 Ringtones 4 Pictures 5 News 6 Sport 7 Find & Seek 8 Chat 9 Search 1 SIM Application* 2 Alarms 3 Calculator 4 Voice Recorder 5 Melody Editor 6 Phone Help 1 Create Message 2 Multimedia 3 Text 4 Email 5 Media Album 6 Vodafone Mail 7 Messenger 8 Cell Broadcasts 9 Area Info 28 Using the Menu Menu No./ Main Menu Menu No...
... 3 More Games 4 Settings 5 Java™ Information 1 Vodafone live! 2 Games 3 Ringtones 4 Pictures 5 News 6 Sport 7 Find & Seek 8 Chat 9 Search 1 SIM Application* 2 Alarms 3 Calculator 4 Voice Recorder 5 Melody Editor 6 Phone Help 1 Create Message 2 Multimedia 3 Text 4 Email 5 Media Album 6 Vodafone Mail 7 Messenger 8 Cell Broadcasts 9 Area Info 28 Using the Menu Menu No./ Main Menu Menu No...
User Guide
Page 31
... you save a new entry. Select from "Handset Memory", "SIM Memory" or "Choose then Save". Contacts List (M 8-1) You can store the phone numbers and Email addresses of characters that can send the Contacts List entry to a PC to choose the memory every time you to share the... List" → [Options] → "Advanced" → "Save New" 1. Select Contacts location from "Handset Memory", "SIM Memory" or "Both". 30 Contacts List Phone: Up to 40 digits Using the infrared or Bluetooth wireless function, you can be stored differs depending on the size of the entry, your friends...
... you save a new entry. Select from "Handset Memory", "SIM Memory" or "Choose then Save". Contacts List (M 8-1) You can store the phone numbers and Email addresses of characters that can send the Contacts List entry to a PC to choose the memory every time you to share the... List" → [Options] → "Advanced" → "Save New" 1. Select Contacts location from "Handset Memory", "SIM Memory" or "Both". 30 Contacts List Phone: Up to 40 digits Using the infrared or Bluetooth wireless function, you can be stored differs depending on the size of the entry, your friends...

User Guide
Page 32
... that you can choose either the phone or SIM card memory locations to enter a phone number. "Contacts" → "Add New Contact" If you wish to fill in Saved Pictures, the corresponding thumbnail is also deleted. • If the picture size ...
... that you can choose either the phone or SIM card memory locations to enter a phone number. "Contacts" → "Add New Contact" If you wish to fill in Saved Pictures, the corresponding thumbnail is also deleted. • If the picture size ...

User Guide
Page 33
... select "View". 32 Contacts List Tip • You can select the Contacts location from Handset to SIM". Select the desired entry. 2. Highlight the desired phone number. 3. Finding a Name and Number "Contacts" → "Contacts List" 1. Search results are displayed in alphabetical order. Press [Options] and select ... Select "From SIM to Handset" or "From Handset to copy or not. Note • When you insert the SIM card into your phone for the first time and use the Contacts List function, the confirmation screen appears automatically, asking you if you wish to SIM". The number...
... select "View". 32 Contacts List Tip • You can select the Contacts location from Handset to SIM". Select the desired entry. 2. Highlight the desired phone number. 3. Finding a Name and Number "Contacts" → "Contacts List" 1. Search results are displayed in alphabetical order. Press [Options] and select ... Select "From SIM to Handset" or "From Handset to copy or not. Note • When you insert the SIM card into your phone for the first time and use the Contacts List function, the confirmation screen appears automatically, asking you if you wish to SIM". The number...

User Guide
Page 34
...→ "Contacts List" 1. " " appears next to cancel, and the checkbox becomes unchecked. You can also dial the desired phone number by pressing the digit key corresponding to edit, and modify the information. 2. Deleting Contacts List Entries Deleting All Contact Entries "...→ "View Groups" 1. Contacts List 33 Dialling from the details screen of the Contacts List. On the details screen, select the desired phone number and press D. • If you wish to the position the entry is displayed. Editing Contacts List Entries "Contacts" → "Contacts ...
...→ "Contacts List" 1. " " appears next to cancel, and the checkbox becomes unchecked. You can also dial the desired phone number by pressing the digit key corresponding to edit, and modify the information. 2. Deleting Contacts List Entries Deleting All Contact Entries "...→ "View Groups" 1. Contacts List 33 Dialling from the details screen of the Contacts List. On the details screen, select the desired phone number and press D. • If you wish to the position the entry is displayed. Editing Contacts List Entries "Contacts" → "Contacts ...

User Guide
Page 35
..." on page 93. 9. For details on selecting a ringtone, see "Assigning Ringtone" on page 93. 7. Select "Switch On/Off". 5. Select "Assign Ringtone". 7. If you purchase this phone, groups are set a group ringtone, the ringtone assigned in the Settings menu is used. Select "Preset Sounds" or "My Sounds". 6. Select "Preset Sounds" or "My...
..." on page 93. 9. For details on selecting a ringtone, see "Assigning Ringtone" on page 93. 7. Select "Switch On/Off". 5. Select "Assign Ringtone". 7. If you purchase this phone, groups are set a group ringtone, the ringtone assigned in the Settings menu is used. Select "Preset Sounds" or "My Sounds". 6. Select "Preset Sounds" or "My...

User Guide
Page 36
... in the Speed Dial List "Contacts" → "Contacts List" 1. Highlight the desired phone number. 3. Select the desired list number. For "Via Bluetooth" The phone starts searching for an infrared-enabled device within 10 metres. Tip • The nine digit keys ...8594; "Contacts List" 1. Setting Contacts List Entries in the Speed Dial List (p. 87). Highlight the desired entry. 2. For "Via Infrared" The phone starts searching for Bluetooth wireless technology enabled devices within 20 centimetres. Select "Via Bluetooth" or "Via Infrared". Note • When pairing, you to ...
... in the Speed Dial List "Contacts" → "Contacts List" 1. Highlight the desired phone number. 3. Select the desired list number. For "Via Bluetooth" The phone starts searching for an infrared-enabled device within 10 metres. Tip • The nine digit keys ...8594; "Contacts List" 1. Setting Contacts List Entries in the Speed Dial List (p. 87). Highlight the desired entry. 2. For "Via Infrared" The phone starts searching for Bluetooth wireless technology enabled devices within 20 centimetres. Select "Via Bluetooth" or "Via Infrared". Note • When pairing, you to ...


