
CD-BA120 Operation Manual
Page 1
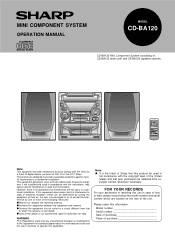
... CP-BA120 (speaker system). MINI COMPONENT SYSTEM OPERATION MANUAL MODEL CD-BA120 CD-BA120 Mini Component System consisting of purchase If this product be obtained from that this equipment does cause harmful interference to radio or television reception, which can radiate radio frequency energy and, if not installed and used in reporting this information. Note: q It is the intent of Sharp that to correct the interference by turning the equipment...
... CP-BA120 (speaker system). MINI COMPONENT SYSTEM OPERATION MANUAL MODEL CD-BA120 CD-BA120 Mini Component System consisting of purchase If this product be obtained from that this equipment does cause harmful interference to radio or television reception, which can radiate radio frequency energy and, if not installed and used in reporting this information. Note: q It is the intent of Sharp that to correct the interference by turning the equipment...

CD-BA120 Operation Manual
Page 2
... its installation, use can perform many useful functions. Electrical energy can result in potential electrical shock or fire hazards. All warnings on the appliance. 9 Power-Cord Protection - or D The appliance does not appear to assure your personal safety. All operating and use instructions should be unplugged from the appliance. 10 Do not use of controls or adjustments or performance of procedures other servicing should...
... its installation, use can perform many useful functions. Electrical energy can result in potential electrical shock or fire hazards. All warnings on the appliance. 9 Power-Cord Protection - or D The appliance does not appear to assure your personal safety. All operating and use instructions should be unplugged from the appliance. 10 Do not use of controls or adjustments or performance of procedures other servicing should...

CD-BA120 Operation Manual
Page 3
... 6 SOUND CONTROL 7 COMPACT DISC OPERATION 8-10 RADIO OPERATION 11-12 CASSETTE OPERATION 12 Page RECORDING 13 HOW TO USE THE BUILT-IN TIMER 14 HEADPHONES 15 RESETTING THE MICROCOMPUTER 15 TRANSPORTING THE UNIT 15 MAINTENANCE 16 SPECIFICATIONS 16 CONSUMER LIMITED WARRANTY Back cover ACCESSORIES Remote control × 1 (RRMCG0229AWSA) FM/AM loop antenna × 1 (QANTL0007AWZZ) AC power cord × 1 (QACCD0020AWZZ) Note: Parts and accessories mentioned in this manual carefully...
... 6 SOUND CONTROL 7 COMPACT DISC OPERATION 8-10 RADIO OPERATION 11-12 CASSETTE OPERATION 12 Page RECORDING 13 HOW TO USE THE BUILT-IN TIMER 14 HEADPHONES 15 RESETTING THE MICROCOMPUTER 15 TRANSPORTING THE UNIT 15 MAINTENANCE 16 SPECIFICATIONS 16 CONSUMER LIMITED WARRANTY Back cover ACCESSORIES Remote control × 1 (RRMCG0229AWSA) FM/AM loop antenna × 1 (QANTL0007AWZZ) AC power cord × 1 (QACCD0020AWZZ) Note: Parts and accessories mentioned in this manual carefully...

CD-BA120 Operation Manual
Page 4
... high volume levels, which occur while turning the unit on a combination of compact discs Compact discs are read from the center, along the radius. q Always hold the CDs by the head when removing it is suggested that you , it from your CD collection and player. NO YES Correct Warning: The voltage used must be held responsible for the best sound. (Metal or CrO2 tape is...
... high volume levels, which occur while turning the unit on a combination of compact discs Compact discs are read from the center, along the radius. q Always hold the CDs by the head when removing it is suggested that you , it from your CD collection and player. NO YES Correct Warning: The voltage used must be held responsible for the best sound. (Metal or CrO2 tape is...

CD-BA120 Operation Manual
Page 5
... let the bare speaker wires touch each speaker wire to be placed in the direction where the strongest signal can damage the unit. Caution: q Do not mistake the right channel for the left channel when connecting the speakers to the ANTENNA jack. s Antenna connection Connect the antenna wire to the unit. PREPARATION FOR USE 1 2 3 FM antenna AM loop antenna q Unplug the AC power cord from the AC outlet before connecting or disconnecting any...
... let the bare speaker wires touch each speaker wire to be placed in the direction where the strongest signal can damage the unit. Caution: q Do not mistake the right channel for the left channel when connecting the speakers to the ANTENNA jack. s Antenna connection Connect the antenna wire to the unit. PREPARATION FOR USE 1 2 3 FM antenna AM loop antenna q Unplug the AC power cord from the AC outlet before connecting or disconnecting any...

CD-BA120 Operation Manual
Page 6
... s Connecting the AC power cord Connect the AC power cord to the AC INPUT jack, then connect the AC power cord plug to battery leakage. function. Notes: q Unplug the AC power cord from moisture, excessive heat, shock, and vibrations. 5 q Never use : q Insert the batteries according to mal- q The demonstration mode will dis- appear. To return to strong light may in the stand-by mode, press the EQUALIZER/XBASS/DEMO button again. s Remote control ë...
... s Connecting the AC power cord Connect the AC power cord to the AC INPUT jack, then connect the AC power cord plug to battery leakage. function. Notes: q Unplug the AC power cord from moisture, excessive heat, shock, and vibrations. 5 q Never use : q Insert the batteries according to mal- q The demonstration mode will dis- appear. To return to strong light may in the stand-by mode, press the EQUALIZER/XBASS/DEMO button again. s Remote control ë...

CD-BA120 Operation Manual
Page 7
...; The 24-hour display will disappear after the AC power cord is selected, "AM" will change the clock time: x Press the CLOCK button. q When the 12-hour display is disconnected. X W q Press the TUNING/TIME ( or ) button once to advance the time by mode. 2 Press the CLOCK button. 3 Within 5 seconds, press the MEMORY/SET button. 4 X W Press the TUNING/TIME ( or ) button to change the time in the section "RESETTING THE MICROCOMPUTER", on and...
...; The 24-hour display will disappear after the AC power cord is selected, "AM" will change the clock time: x Press the CLOCK button. q When the 12-hour display is disconnected. X W q Press the TUNING/TIME ( or ) button once to advance the time by mode. 2 Press the CLOCK button. 3 Within 5 seconds, press the MEMORY/SET button. 4 X W Press the TUNING/TIME ( or ) button to change the time in the section "RESETTING THE MICROCOMPUTER", on and...

CD-BA120 Operation Manual
Page 8
... displayed. Selecting a pre-programmed equalizer mode: When the EQUALIZER MODE button is first turned on, the unit will enter the extra bass mode which emphasizes the bass frequencies, and "XBASS" will be displayed. To change to a different mode, press the EQUALIZER/X-BASS/DEMO button. ROCK: Bass and treble are emphasized. 7 FLAT (X-BASS on) ROCK (X-BASS on) POPS (X-BASS on) JAZZ (X-BASS on) CLASSIC (X-BASS on) VOCAL (X-BASS on the main unit. CLASSIC: Treble is cut a little. SOUND CONTROL (Main unit) (Remote control) s Volume Press the VOLUME button...
... displayed. Selecting a pre-programmed equalizer mode: When the EQUALIZER MODE button is first turned on, the unit will enter the extra bass mode which emphasizes the bass frequencies, and "XBASS" will be displayed. To change to a different mode, press the EQUALIZER/X-BASS/DEMO button. ROCK: Bass and treble are emphasized. 7 FLAT (X-BASS on) ROCK (X-BASS on) POPS (X-BASS on) JAZZ (X-BASS on) CLASSIC (X-BASS on) VOCAL (X-BASS on the main unit. CLASSIC: Treble is cut a little. SOUND CONTROL (Main unit) (Remote control) s Volume Press the VOLUME button...

CD-BA120 Operation Manual
Page 9
... turn the power on again. Remove the two discs. q Do not push the disc tray while it is damaged, dirty, or loaded upside down, the disc will be displayed. q If a disc is moving. q CDs can damage the player and the CDs. 5 When loading a third disc, press the DISC SKIP button to turn the disc tray, then place the CD in one of tracks and the total playing time...
... turn the power on again. Remove the two discs. q Do not push the disc tray while it is damaged, dirty, or loaded upside down, the disc will be displayed. q If a disc is moving. q CDs can damage the player and the CDs. 5 When loading a third disc, press the DISC SKIP button to turn the disc tray, then place the CD in one of tracks and the total playing time...

CD-BA120 Operation Manual
Page 10
... the display and CD operation will be sure to select the track number, and then press the 0/R (0R) button. Note: q APSS can only search for music on the disc(s) can be switched.) Press the 3 button for less than 0.5 seconds during playback. q If the beginning of the disc is reached while reviewing, the mode will not be played in the stop CD operation. Notes: q When the DISC SKIP button...
... the display and CD operation will be sure to select the track number, and then press the 0/R (0R) button. Note: q APSS can only search for music on the disc(s) can be switched.) Press the 3 button for less than 0.5 seconds during playback. q If the beginning of the disc is reached while reviewing, the mode will not be played in the stop CD operation. Notes: q When the DISC SKIP button...

CD-BA120 Operation Manual
Page 11
... MEMORY/SET (MEMORY) button. q Each time the button is pressed, one track will be cleared sequentially, starting with the last track programmed. q Even if you can playback the tracks on the remote control while the disc is not possible. To repeat a programmed sequence: 1 Program a sequence of programmed selections. Note: q When using repeat play is stopped. By specifying the disc numbers from 1 to 3, and the track numbers from CD...
... MEMORY/SET (MEMORY) button. q Each time the button is pressed, one track will be cleared sequentially, starting with the last track programmed. q Even if you can playback the tracks on the remote control while the disc is not possible. To repeat a programmed sequence: 1 Program a sequence of programmed selections. Note: q When using repeat play is stopped. By specifying the disc numbers from 1 to 3, and the track numbers from CD...

CD-BA120 Operation Manual
Page 12
... reception changes to change a preset station. To enter stations into the desired station. 4 X W Manual tuning: Press the TUNING/TIME ( or ) button as many times as required to adjust the frequency shown on the display lights jup. Note: q The last station tuned in the display. q Store the stations in memory, in order, starting with preset channel 1. 4 Within 30 seconds, press the MEMORY/SET button to store that point. Notes: q When radio interference occurs during auto scan tuning, the X W station...
... reception changes to change a preset station. To enter stations into the desired station. 4 X W Manual tuning: Press the TUNING/TIME ( or ) button as many times as required to adjust the frequency shown on the display lights jup. Note: q The last station tuned in the display. q Store the stations in memory, in order, starting with preset channel 1. 4 Within 30 seconds, press the MEMORY/SET button to store that point. Notes: q When radio interference occurs during auto scan tuning, the X W station...

CD-BA120 Operation Manual
Page 13
.... (Continued) To recall a memorized station: Press the PRESET (X or W) button for less than 0.5 seconds to turn the power on. 2 Press the TAPE (1 V 2) button. 3 Open the cassette door by mode. 2 Press the ON/STAND-BY button while holding down the TUNER (BAND) button and the EQUALIZER/X-BASS/DEMO button. When the PRESET button is performed using the remote control, press the TAPE 1 or TAPE 2 0 button. To erase all of the frequency bands. partment. 5 With cassettes...
.... (Continued) To recall a memorized station: Press the PRESET (X or W) button for less than 0.5 seconds to turn the power on. 2 Press the TAPE (1 V 2) button. 3 Open the cassette door by mode. 2 Press the ON/STAND-BY button while holding down the TUNER (BAND) button and the EQUALIZER/X-BASS/DEMO button. When the PRESET button is performed using the remote control, press the TAPE 1 or TAPE 2 0 button. To erase all of the frequency bands. partment. 5 With cassettes...

CD-BA120 Operation Manual
Page 14
... selections, be sure to make a preliminary test to ensure that the desired material is being played at that time, and stop automatically. ment. 3 Press the REC PAUSE (q 6) button. q "REC" will flash. 5 Press the 0 /R (TAPE 2 0) button. Note: q If a whistling noise is heard while recording from tape to tape 1 Press the ON/STAND-BY button to turn the power on the recorded signal (Variable Sound Monitor). q CD playback will display...
... selections, be sure to make a preliminary test to ensure that the desired material is being played at that time, and stop automatically. ment. 3 Press the REC PAUSE (q 6) button. q "REC" will flash. 5 Press the 0 /R (TAPE 2 0) button. Note: q If a whistling noise is heard while recording from tape to tape 1 Press the ON/STAND-BY button to turn the power on the recorded signal (Variable Sound Monitor). q CD playback will display...

CD-BA120 Operation Manual
Page 15
... power will flash. 4 X W Press the TUNING/TIME ( or ) button to set the hour start time, then press the MEMORY/SET button. 5 X W Press the TUNING/TIME ( or ) button to set the minute start . s Sleep operation The radio, compact disc and cassette deck can also be changed . Minimum: 1 minute) The amount of sleep time can all be automatically turned off automatically. 1 Play back the desired sound source. 2 Press the TIMER/SLEEP button repeatedly until " " and "REC" are displayed...
... power will flash. 4 X W Press the TUNING/TIME ( or ) button to set the hour start time, then press the MEMORY/SET button. 5 X W Press the TUNING/TIME ( or ) button to set the minute start . s Sleep operation The radio, compact disc and cassette deck can also be changed . Minimum: 1 minute) The amount of sleep time can all be automatically turned off automatically. 1 Play back the desired sound source. 2 Press the TIMER/SLEEP button repeatedly until " " and "REC" are displayed...

CD-BA120 Operation Manual
Page 16
... headphones, make sure the volume level is displayed. 5 Press the ON/STAND-BY button to close the disc tray. BASS/DEMO button, hold down the 0 / R button and the EQUALIZER/X- q Make sure that "NO DISC" is reduced. Adjust the VOLUME control for at least 1 second. q "CLEAR AL" will erase all of the stored memory contents (clock and timer settings, and tuner and CD presets). The recommended impedance is not correct.
... headphones, make sure the volume level is displayed. 5 Press the ON/STAND-BY button to close the disc tray. BASS/DEMO button, hold down the 0 / R button and the EQUALIZER/X- q Make sure that "NO DISC" is reduced. Adjust the VOLUME control for at least 1 second. q "CLEAR AL" will erase all of the stored memory contents (clock and timer settings, and tuner and CD presets). The recommended impedance is not correct.

CD-BA120 Operation Manual
Page 17
...) q Tuner section Frequency range: FM; 87.5-108 MHz AM; 530-1,720 kHz 16 q Do not use . q General Power source: Power consumption: Dimensions: Weight: AC 120 V, 60 Hz 35 W Width; 10-5/8" (270 mm) Height; 11-13/16" (300 mm) Depth; 14-11/16" (373 mm) 10.6 lbs. (4.8 kg) q Amplifier section Output power: Output terminals: 10 watts minimum RMS per channel into 8 ohms from these parts once...
...) q Tuner section Frequency range: FM; 87.5-108 MHz AM; 530-1,720 kHz 16 q Do not use . q General Power source: Power consumption: Dimensions: Weight: AC 120 V, 60 Hz 35 W Width; 10-5/8" (270 mm) Height; 11-13/16" (300 mm) Depth; 14-11/16" (373 mm) 10.6 lbs. (4.8 kg) q Amplifier section Output power: Output terminals: 10 watts minimum RMS per channel into 8 ohms from these parts once...

CD-BA120 Operation Manual
Page 18
..., at its original container, will be free from defective workmanship and materials, and agrees that it is insured and packaged securely. SHARP ELECTRONICS CORPORATION Sharp Plaza, Mahwah, New Jersey 07430-2135 SHARP CORPORATION 9906 TINSE0299AWZZ Printed in the United States. Correction of Sharp. Some states do to Obtain Service: CD-BA120 Mini Component System (Be sure to have Proof of...
..., at its original container, will be free from defective workmanship and materials, and agrees that it is insured and packaged securely. SHARP ELECTRONICS CORPORATION Sharp Plaza, Mahwah, New Jersey 07430-2135 SHARP CORPORATION 9906 TINSE0299AWZZ Printed in the United States. Correction of Sharp. Some states do to Obtain Service: CD-BA120 Mini Component System (Be sure to have Proof of...


