Sharp 172A-W - 17" LCD Monitor Support and Manuals
Get Help and Manuals for this Sharp item
View All Support Options Below
Free Sharp 172A-W manuals!
Problems with Sharp 172A-W?
Ask a Question
Free Sharp 172A-W manuals!
Problems with Sharp 172A-W?
Ask a Question
Popular Sharp 172A-W Manual Pages
Operation Manual - Page 3
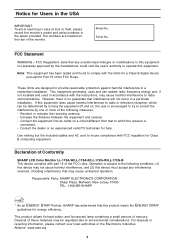
... compliance with part 15 of the following conditions: (1) this device may cause undesired operation. Increase the distance between the equipment and receiver. - Connect the equipment into an outlet on the rear of loss or theft, please record the monitor's model and serial numbers in a residential installation. Declaration of Conformity
SHARP LCD Color Monitor LL-172A-W/LL-172A-B/LL...
Operation Manual - Page 5
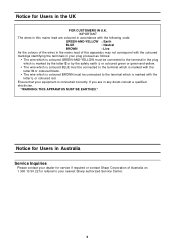
... your dealer for service if required or contact Sharp Corporation of this mains lead are in any doubt consult a qualified
electrician.
English
Français Deutsch
Notice for referral to the terminal which is marked with the
letter L or coloured red.
If you are coloured in accordance with the following code:
GREEN-AND...
Operation Manual - Page 7

.... Since it is often left running continuously and thereby consumes a lot of goods and services to save energy. Labelled products must be reasonable for encouraging the adaptation of energy. The....tco-info.com/
7
English The main problem, as far as a joint effort by this product. English
Français Deutsch
Italiano
Español
LL-172A-B LL-172G-B
Congratulations! Your choice has...
Operation Manual - Page 9
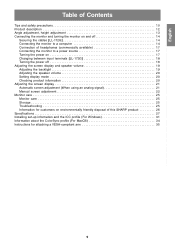
... using an analog signal 21 Manual screen adjustment 22 Monitor care 25 Monitor care 25 Storage 25 Troubleshooting 25 Information for customers on environmentally friendly disposal of this SHARP product 26 Specifications 27 Installing set-up information and the ICC profile (For Windows 31 Information about the ColorSync profile (For MacOS 34 Instructions for attaching a VESA-compliant arm...
Operation Manual - Page 11

... 3.1". Power cord (1) - The shape of the LL-172A are advised to retain the carton in this manual, Microsoft Windows XP will be used in the package. - English
Français Deutsch
Tips and safety precautions
Monitor and accessory checklist - LCD monitor (1) - CD-ROM (1) -
Manual Scope - This manual is a registered trademark of their respective holders. Microsoft...
Operation Manual - Page 16
...set the
connecting input terminal [INPUT-2] to the 2-input cable by analog connection may not be mini D-sub 15 pin.
3. Perform storage of setup information manually. (p.31)
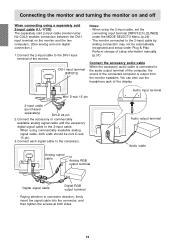
Connect the accessory audio cable When the accessory audio cable is output from the monitor... sold 2-input cable (model name: NL-C03J) enables connection between the DVI-I input terminal on the monitor and the two computers....
Operation Manual - Page 17

... switching may not display properly. Turn on , it may need to display only the LCD monitor.
17 ON
Power terminal
AC outlet Power cord
When a signal is turned on the computer. In this case, change the setting to install the monitor set to display at least 5 seconds.
When the headphones are connected, no sound
can be heard...
Operation Manual - Page 19
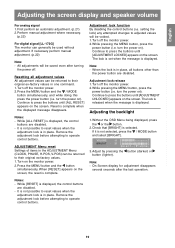
... to their original ex-factory values. 1. If necessary perform manual adjustment. (p.22)
Note: - Continue to operate control buttons. Turn off the monitor power. 2. turn the power on the screen. The lock is set when the message is selected. Adjustment lock release 1. Turn off the monitor power. 2.
Without the OSD Menu being displayed, press the...
Operation Manual - Page 21
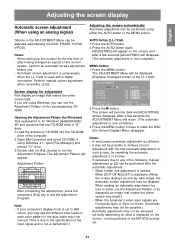
When setting up this monitor ...displaying an image that makes the entire screen light. Perform manual screen adjustment when necessary. (p.22)
AUTO button [LL-172A] 1. The ADJUSTMENT Menu will be performed after the automatic... (for Windows) This explanation is set to 65K
colors, you are Composite Sync or Sync on [Adj_uty.exe] to the specification of the computer. 2. If your...
Operation Manual - Page 24
...) The sharpness of factory inspection and other than
1280 x 1024 pixels, the display is displayed.)
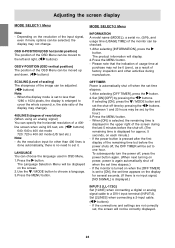
INPUT-2 [LL-172G] Set [1LINE] when connecting a digital or analog signal cable to choose a language. 3.
Set [2LINES] when connecting a 2-input cable.
( buttons) - The product information will be moved up and down. ( buttons)
MODE SELECT-2 Menu
INFORMATION A model name (MODEL), a serial...
Operation Manual - Page 25
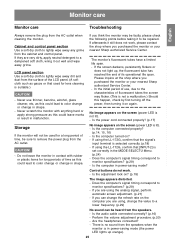
...Monitor care
Troubleshooting
Always remove the plug from the speakers when the
monitor is suitable.)
CAUTION!
- If you purchased the monitor or your nearest Sharp authorized Service Center.
Is the power cord connected properly? (p.17)
Storage
If the monitor...the computer turned on the screen (power LED is
set correctly in malfunction. Does the computer's signal timing ...
Operation Manual - Page 30
...
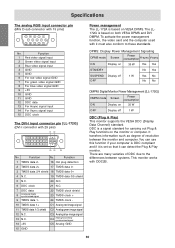
SUSPEND Display off
1 W
DDC (Plug & Play) This monitor supports the VESA DDC (Display Data Channel) standard. DDC is a...15 pins)
No. Function
1 TMDS data 2-
16 Hot plug detection
2 TMDS data 2+
17 TMDS data 0-
3 TMDS data 2/4 shield 18 TMDS data 0+
4 N.C.
19 TMDS data...172A is based on VESA DPMS. The LL172G is set so that it is based on both VESA DPMS and DVI DMPM.
Specifications...
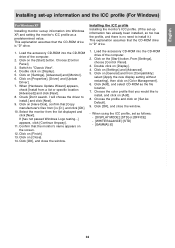
Operation Manual - Page 31
...displayed,
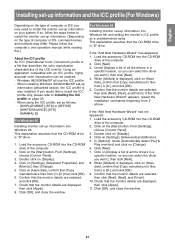
then click [Apply]. 8. Click [Next]. 7. Please follow the steps below to install the monitor set-up
information (described below), the ICC profile is "D" drive.
1. Click on [Display]. 4. This explanation assumes that describes the color reproduction characteristics of the LCD monitor. Confirm that [Copy manufacturer's files from :] is displayed, click on [Have disk...
Operation Manual - Page 32
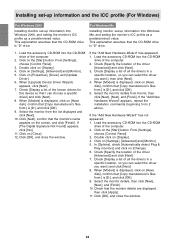
... Wizard" appears, repeat the installation commands beginning from the list displayed and click [Next]. 10. Click on [Close]. 12. Click on [Display]. 4. When [Models] is displayed, click on [Have disk], confirm that [Copy manufacturer's files from :] is [D:], and click [OK]. 9.
Double click on [Settings], [Advanced] and [Monitor]. 5. When [Upgrade Device Driver Wizard]
appears, click...
Operation Manual - Page 33
... from :] is [D:], and click [OK]. 10. Click on [Settings], [Advanced] and [Monitor]. 6. Choose [Control Panel].
3. Switch to install.] and click [Next]. 9. Click on the [Start] button. Click on [Finish]. 13. I will choose the driver to "Classic View". 4. Click on [Properties], [Driver] and [Update
Driver]. 7. Click [OK], and close the window.
- Click on [Close...
Sharp 172A-W Reviews
We have not received any reviews for Sharp yet.