

Owners Manual
Page 3
... Antitheft Alarm Setting Buttons 11 Remote Control 12 Remote Control Battery Installation 13 Operating Range 13 Installation 14 Positioning the Projector 14 Adjustable Feet 14 Connecting the AC Power Cord 15 Connecting to a Computer 16 Connecting to Video Equipment 17 ... Lens Cover 54 Cleaning the Projection Lens 55 Cleaning the Projector Cabinet 55 Lamp Replacement 56 Lamp Replacement Counter 57 Appendix 58 Troubleshooting 58 Menu Tree 60 Indicators and Projector Condition 62 Compatible Computer Specifications 63 Technical Specifications 64 Optional ...
... Antitheft Alarm Setting Buttons 11 Remote Control 12 Remote Control Battery Installation 13 Operating Range 13 Installation 14 Positioning the Projector 14 Adjustable Feet 14 Connecting the AC Power Cord 15 Connecting to a Computer 16 Connecting to Video Equipment 17 ... Lens Cover 54 Cleaning the Projection Lens 55 Cleaning the Projector Cabinet 55 Lamp Replacement 56 Lamp Replacement Counter 57 Appendix 58 Troubleshooting 58 Menu Tree 60 Indicators and Projector Condition 62 Compatible Computer Specifications 63 Technical Specifications 64 Optional ...
Owners Manual
Page 4
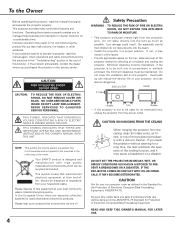
... RISK OF ELECTRIC SHOCK DO NOT OPEN CAUTION : TO REDUCE THE RISK OF ELECTRIC SHOCK, DO NOT REMOVE COVER (OR BACK). Your SANYO product is to operate improperly, read this booklet. Please dispose of Electronic Computer/Data Processing Equipment, ANSI/NFPA 75. Do not stare directly... the product-life, but also malfunctions, fire hazard, or other area of the projector cabinet for the Protection of this manual again, check operations and cable connections and try the solutions in the "Troubleshooting" section in ! 4 Safety Precaution WARNING : TO REDUCE THE RISK OF FIRE OR...
... RISK OF ELECTRIC SHOCK DO NOT OPEN CAUTION : TO REDUCE THE RISK OF ELECTRIC SHOCK, DO NOT REMOVE COVER (OR BACK). Your SANYO product is to operate improperly, read this booklet. Please dispose of Electronic Computer/Data Processing Equipment, ANSI/NFPA 75. Do not stare directly... the product-life, but also malfunctions, fire hazard, or other area of the projector cabinet for the Protection of this manual again, check operations and cable connections and try the solutions in the "Troubleshooting" section in ! 4 Safety Precaution WARNING : TO REDUCE THE RISK OF FIRE OR...

Owners Manual
Page 27
... recognize the connected signal conforming to the provided PC Systems. "Auto" is selected. Check the connection between your computer and the projector. (See " Troubleshooting" p. 58) Mode 1 The preset system is no signal input from computer. PC System Menu The PC System Menu icon Selected ... Adjust Menu. (pp. 28, 30) Computer Input 27 Systems on VGA, SVGA, XGA, SXGA, WXGA, or UXGA with its Multi-scan system and Auto PC Adjustment. The projector selects a proper system provided in the projector and displays it. *Mode 1 and SVGA 1 are examples. Selecting Computer System Manually ...
... recognize the connected signal conforming to the provided PC Systems. "Auto" is selected. Check the connection between your computer and the projector. (See " Troubleshooting" p. 58) Mode 1 The preset system is no signal input from computer. PC System Menu The PC System Menu icon Selected ... Adjust Menu. (pp. 28, 30) Computer Input 27 Systems on VGA, SVGA, XGA, SXGA, WXGA, or UXGA with its Multi-scan system and Auto PC Adjustment. The projector selects a proper system provided in the projector and displays it. *Mode 1 and SVGA 1 are examples. Selecting Computer System Manually ...

Owners Manual
Page 58
...once again. -Make sure you operate the projector with your computer or video equipment and the projector. (See pp. 16-18) - Appendix Troubleshooting Before calling your dealer or service center for monitor output when connecting to a projector. Plug the power cord of the projector. (See p. 23) - Check the... Check the Ceiling function. (See p. 45) - Press the Mute button. (See p. 24) 58 Problem: No power - Adjust focus of the projector into the AC outlet. - Check the projection lens to display an image after turning on p. 20) - See your computer. Solutions - In such cases...
...once again. -Make sure you operate the projector with your computer or video equipment and the projector. (See pp. 16-18) - Appendix Troubleshooting Before calling your dealer or service center for monitor output when connecting to a projector. Plug the power cord of the projector. (See p. 23) - Check the... Check the Ceiling function. (See p. 45) - Press the Mute button. (See p. 24) 58 Problem: No power - Adjust focus of the projector into the AC outlet. - Check the projection lens to display an image after turning on p. 20) - See your computer. Solutions - In such cases...