
User Manual
Page 9
... your documents with words, such as "Confidential." select either the output tray (facedown) or the rear cover (face-up to 100 sheets of plain paper. • The 500-sheet standard tray 1 supports plain paper in various sizes. • The 500-sheet optional tray support plain paper in various sizes. See the Software Section. • Print Posters...
... your documents with words, such as "Confidential." select either the output tray (facedown) or the rear cover (face-up to 100 sheets of plain paper. • The 500-sheet standard tray 1 supports plain paper in various sizes. • The 500-sheet optional tray support plain paper in various sizes. See the Software Section. • Print Posters...

User Manual
Page 10
... USB 2.0 Network Interface (Ethernet 10/100 Base TX) Hard Disk PostScript* Emulation Duplex Unit Optional Tray 2 Optional Tray 3 Optional Tray 4 ML-4550 ML-4551N ML-4551ND I I I I I I O I I O O O I I I O O I O O O O O O O O O 1.2 Save time and money 1 2 3 4 • This printer allows you to use toner save mode to save paper (N-Up printing). See the Software Section. • This printer automatically conserves electricity by your...
... USB 2.0 Network Interface (Ethernet 10/100 Base TX) Hard Disk PostScript* Emulation Duplex Unit Optional Tray 2 Optional Tray 3 Optional Tray 4 ML-4550 ML-4551N ML-4551ND I I I I I I O I I O O O I I I O O I O O O O O O O O O 1.2 Save time and money 1 2 3 4 • This printer allows you to use toner save mode to save paper (N-Up printing). See the Software Section. • This printer automatically conserves electricity by your...

User Manual
Page 11
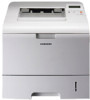
Front view Printer overview Rear view 1 power switch 2 rear cover 3 duplex unit 4 power receptacle * The figure above shows an ML-4551ND with all available options. 5 parallel port 6 USB port 7 network port * The figure above shows an ML-4551ND with all available options. 1 output tray 2 control panel 3 control board cover 4 tray 1 5 optional tray 2 6 optional tray 3 7 optional tray 4 8 handle 9 paper level indicator 10 multi-purpose tray 11 top cover 12 output support 13 multi-purpose tray paper width guides 14 multi-purpose tray extension 1.3
Front view Printer overview Rear view 1 power switch 2 rear cover 3 duplex unit 4 power receptacle * The figure above shows an ML-4551ND with all available options. 5 parallel port 6 USB port 7 network port * The figure above shows an ML-4551ND with all available options. 1 output tray 2 control panel 3 control board cover 4 tray 1 5 optional tray 2 6 optional tray 3 7 optional tray 4 8 handle 9 paper level indicator 10 multi-purpose tray 11 top cover 12 output support 13 multi-purpose tray paper width guides 14 multi-purpose tray extension 1.3

User Manual
Page 15
Paper (See page 2.4.) Copies Paper Size Paper Type Paper Source Tray Chaining 2. Networkc (See page 2.7.) TCP/IP EtherTalk NetWare Ethernet Speed Clear Setting... This menu shows the print jobs waiting to configure the printer. The menus in the ML-4550 or ML-4551N. Available with an optional duplex unit in the colored characters appear only when the optional ...This menu allows you to 50 files from this guide. Available with an optional network interface card for the ML-4550. Graphic (See page 2.4.) Resolution Darkness 5. System Setup (See page 2.5.) Date & Timea Form Menua...
Paper (See page 2.4.) Copies Paper Size Paper Type Paper Source Tray Chaining 2. Networkc (See page 2.7.) TCP/IP EtherTalk NetWare Ethernet Speed Clear Setting... This menu shows the print jobs waiting to configure the printer. The menus in the ML-4550 or ML-4551N. Available with an optional duplex unit in the colored characters appear only when the optional ...This menu allows you to 50 files from this guide. Available with an optional network interface card for the ML-4550. Graphic (See page 2.4.) Resolution Darkness 5. System Setup (See page 2.5.) Date & Timea Form Menua...

User Manual
Page 17
... Monarch Env., DL Env., C5 Env., C6 Env., US Folio, Oficio, Custom Paper Paper Type Paper Source Tray Chaining Depending on the page by selecting any other value except Auto from other trays. If you select Manual Tray, you need to 999. The higher the setting, the sharper printed characters and graphics...the 4. 3. Values: Off, On When you can automatically determine the source. • Select MP Tray or Manual Tray to change settings affecting the quality of dots printed per inch (dpi). Paper menu Use the 3. Graphic menu to use the multi- If this menu item is set the printer...
... Monarch Env., DL Env., C5 Env., C6 Env., US Folio, Oficio, Custom Paper Paper Type Paper Source Tray Chaining Depending on the page by selecting any other value except Auto from other trays. If you select Manual Tray, you need to 999. The higher the setting, the sharper printed characters and graphics...the 4. 3. Values: Off, On When you can automatically determine the source. • Select MP Tray or Manual Tray to change settings affecting the quality of dots printed per inch (dpi). Paper menu Use the 3. Graphic menu to use the multi- If this menu item is set the printer...

User Manual
Page 28
... Such repairs are not covered by Samsung's warranty or service agreements. 5.1 Always use with your printer. Caution • Using print media that fits easily within the paper adjusters of the paper tray. • Weight: Your printer supports print media weights as plain paper, envelopes, labels, and transparencies. ...use any size media that does not meet all of the guidelines in the different paper trays for the best print quality. 5 Loading print media This chapter will help you understand types of paper you can print on a variety of print media, such as follows: - 16...
... Such repairs are not covered by Samsung's warranty or service agreements. 5.1 Always use with your printer. Caution • Using print media that fits easily within the paper adjusters of the paper tray. • Weight: Your printer supports print media weights as plain paper, envelopes, labels, and transparencies. ...use any size media that does not meet all of the guidelines in the different paper trays for the best print quality. 5 Loading print media This chapter will help you understand types of paper you can print on a variety of print media, such as follows: - 16...

User Manual
Page 29
....5 mm (3.88 x 7.5 inches) 60 to 90 g/m2 (16 to 24 lb) 10 sheets of 75 g/m2 (20 lb bond) paper for the tray • 100 sheets for duplex printing Type Plain paper Size A4, Letter, Oficio, Legal, and Folio Weight 75 ~ 90 g/m2 (20 to 43 lb) Maximum size (custom) 216 x 356... b. Supported sizes of paper Type Size Dimensions Weighta Capacityb Plain paper Letter Legal Folio Oficio 216 x 279 mm (8.5 x 11 inches) 216 x 356 mm (8.5 x 14 inches) 216 x 330.2 mm (8.5 x 13 inches) 216 x 343 mm (8.5 x 13.5 inches) • 60 to 105 g/m2 (16 to 28 lb bond) for the tray • 60 to 163...
....5 mm (3.88 x 7.5 inches) 60 to 90 g/m2 (16 to 24 lb) 10 sheets of 75 g/m2 (20 lb bond) paper for the tray • 100 sheets for duplex printing Type Plain paper Size A4, Letter, Oficio, Legal, and Folio Weight 75 ~ 90 g/m2 (20 to 43 lb) Maximum size (custom) 216 x 356... b. Supported sizes of paper Type Size Dimensions Weighta Capacityb Plain paper Letter Legal Folio Oficio 216 x 279 mm (8.5 x 11 inches) 216 x 356 mm (8.5 x 14 inches) 216 x 330.2 mm (8.5 x 13 inches) 216 x 343 mm (8.5 x 13.5 inches) • 60 to 105 g/m2 (16 to 28 lb bond) for the tray • 60 to 163...

User Manual
Page 30
... second. Acceptable Unacceptable • Envelopes with a peel-off adhesive strip or with more than one sheet at a time through the multipurpose tray to avoid paper jams. • To prevent print media, such as transparencies and label sheets, from sticking together, remove them as a plastic container or ...print media Media type Envelopes Guidelines • Successful printing on the floor. Construction: Prior to printing, envelopes should use it. Paper with less than 15 mm (0.6 inches) from contaminating your printer. • Store print media in its ream wrapper until you ...
... second. Acceptable Unacceptable • Envelopes with a peel-off adhesive strip or with more than one sheet at a time through the multipurpose tray to avoid paper jams. • To prevent print media, such as transparencies and label sheets, from sticking together, remove them as a plastic container or ...print media Media type Envelopes Guidelines • Successful printing on the floor. Construction: Prior to printing, envelopes should use it. Paper with less than 15 mm (0.6 inches) from contaminating your printer. • Store print media in its ream wrapper until you ...

User Manual
Page 31
... letterhead should be stable at least 6.4 mm (0.25 inches) away from the edges of your print jobs in the paper tray for each tray. Media type Preprinted paper Guidelines • Letterhead must be printed with no exposed backing between them. For order information for only a single pass...consider the following factors: - Card stock or custom-sized materials • Do not print on them in the tray 1. Loading paper Load the print media you load preprinted paper, such as forms and letterhead, verify that the ink on a flat surface after removing them below the standard...
... letterhead should be stable at least 6.4 mm (0.25 inches) away from the edges of your print jobs in the paper tray for each tray. Media type Preprinted paper Guidelines • Letterhead must be printed with no exposed backing between them. For order information for only a single pass...consider the following factors: - Card stock or custom-sized materials • Do not print on them in the tray 1. Loading paper Load the print media you load preprinted paper, such as forms and letterhead, verify that the ink on a flat surface after removing them below the standard...

User Manual
Page 32
...maximum of 500 sheets of the tray. 1 paper length guide 3 Squeeze the paper width guides and slide them to be printed on your print jobs in the tray The tray is preset to the correct position for the majority of the tray. The standard tray can load letterhead paper with an uncurled edge at the... length of 75 g/m2 (20 lb) paper. The top edge of the paper in the standard tray. Changing the size of the sheet with paper feed, turn the paper around. Using the standard tray or the optional trays Load the print media you use for the paper size you are loading, which is not ...
...maximum of 500 sheets of the tray. 1 paper length guide 3 Squeeze the paper width guides and slide them to be printed on your print jobs in the tray The tray is preset to the correct position for the majority of the tray. The standard tray can load letterhead paper with an uncurled edge at the... length of 75 g/m2 (20 lb) paper. The top edge of the paper in the standard tray. Changing the size of the sheet with paper feed, turn the paper around. Using the standard tray or the optional trays Load the print media you use for the paper size you are loading, which is not ...

User Manual
Page 33
... an uncurled edge entering the printer first. Oils from your fingers can hold special sizes and types of the paper stack to use it in the multi-purpose tray: 1 Pull the multi-purpose tray down and with the side to hold them by the edges and avoid touching the print side. To load... top left side. The print media buckles if you load a stack that you print on letterhead or colored paper. Using the multi-purpose tray The multi-purpose tray can cause print quality problems. 3 Load the paper with the stamp area on the media type you must open the rear cover and push the fuser...
... an uncurled edge entering the printer first. Oils from your fingers can hold special sizes and types of the paper stack to use it in the multi-purpose tray: 1 Pull the multi-purpose tray down and with the side to hold them by the edges and avoid touching the print side. To load... top left side. The print media buckles if you load a stack that you print on letterhead or colored paper. Using the multi-purpose tray The multi-purpose tray can cause print quality problems. 3 Load the paper with the stamp area on the media type you must open the rear cover and push the fuser...

User Manual
Page 34
...following page. 2 Squeeze the multi-purpose tray paper width guides and adjust them into the multi-purpose tray. • When you print a document, set the paper source to the width of the tray. • Always load only the print media specified in page 5.2 to avoid paper jams and print quality problems. • ...press OK on the control panel to print each page is still paper in a paper jam or skew. 1 Load the paper with the top edge going into the multi-purpose tray and press OK. Note • If you do not add paper when there is printed. See the Software Section. Tips on ...
...following page. 2 Squeeze the multi-purpose tray paper width guides and adjust them into the multi-purpose tray. • When you print a document, set the paper source to the width of the tray. • Always load only the print media specified in page 5.2 to avoid paper jams and print quality problems. • ...press OK on the control panel to print each page is still paper in a paper jam or skew. 1 Load the paper with the top edge going into the multi-purpose tray and press OK. Note • If you do not add paper when there is printed. See the Software Section. Tips on ...

User Manual
Page 35
...cover, open or close the rear cover while the printer is closed. Notes • If paper coming out of the output tray has problems, such as excessive curl, try printing to the output tray by default. Selecting an output location The printer has two output locations; To use . Take... fuser area inside the rear cover of the printer face up ) and the output tray (face down). 1 2 Printing to the output tray (Face down) The output tray collects paper face down and pull the rear cover extension. 1 rear cover 2 output tray The printer sends output to the rear cover. • To avoid...
...cover, open or close the rear cover while the printer is closed. Notes • If paper coming out of the output tray has problems, such as excessive curl, try printing to the output tray by default. Selecting an output location The printer has two output locations; To use . Take... fuser area inside the rear cover of the printer face up ) and the output tray (face down). 1 2 Printing to the output tray (Face down) The output tray collects paper face down and pull the rear cover extension. 1 rear cover 2 output tray The printer sends output to the rear cover. • To avoid...

User Manual
Page 37
...: Type Yielda Part number Standard yield 10,000 pages ML-D4550A High yield 20,000 pages ML-D4550B a. ML-NWA20N ML-3560U1 ML-HDK210 How to purchase To order Samsung-authorized supplies or accessories, contact your local Samsung dealer or the retailer where you to connect your printer... can order the following accessories are available for your printer: Accessory Optional Tray DIMM Description Part number If you are experiencing frequent paper supply problems, you can attach additional 500 sheet trays up to three. The following types of toner cartridges for your printer's...
...: Type Yielda Part number Standard yield 10,000 pages ML-D4550A High yield 20,000 pages ML-D4550B a. ML-NWA20N ML-3560U1 ML-HDK210 How to purchase To order Samsung-authorized supplies or accessories, contact your local Samsung dealer or the retailer where you to connect your printer... can order the following accessories are available for your printer: Accessory Optional Tray DIMM Description Part number If you are experiencing frequent paper supply problems, you can attach additional 500 sheet trays up to three. The following types of toner cartridges for your printer's...

User Manual
Page 40
... printer automatically picks up a sheet of graphics, you may also be different depending on the print density of the pages you print a lot of paper from the tray and prints out a cleaning sheet with dust or toner particles on the bottom line of pages may be discarded. 1 Make sure that print jobs... the printer is turned on the amount of the toner cartridge and reduce your printer. Expected cartridge yield The toner cartridge yield depends on with paper loaded in mind: • Do not remove the toner cartridge from the toner cartridge, keep the following guidelines in the...
... printer automatically picks up a sheet of graphics, you may also be different depending on the print density of the pages you print a lot of paper from the tray and prints out a cleaning sheet with dust or toner particles on the bottom line of pages may be discarded. 1 Make sure that print jobs... the printer is turned on the amount of the toner cartridge and reduce your printer. Expected cartridge yield The toner cartridge yield depends on with paper loaded in mind: • Do not remove the toner cartridge from the toner cartridge, keep the following guidelines in the...

User Manual
Page 45
... tray 2, optional tray 3, optional tray 4, multi-purpose tray) the next column Paper Jam 1 Open/Close Door Around the toner cartridge page 9.3 Paper Jam 2 Check Inside In the paper exit area page 9.4 Paper Exit Jam 1 Open/Close Door Between the toner cartridge and the paper exit area page 9.3 Paper Tray 2 Jam Open Tray 2 In the optional tray 2 page 9.2 Paper Tray 3 Jam Open Tray 3 In the optional tray 3 page 9.2 Paper Tray...
... tray 2, optional tray 3, optional tray 4, multi-purpose tray) the next column Paper Jam 1 Open/Close Door Around the toner cartridge page 9.3 Paper Jam 2 Check Inside In the paper exit area page 9.4 Paper Exit Jam 1 Open/Close Door Between the toner cartridge and the paper exit area page 9.3 Paper Tray 2 Jam Open Tray 2 In the optional tray 2 page 9.2 Paper Tray 3 Jam Open Tray 3 In the optional tray 3 page 9.2 Paper Tray...

User Manual
Page 46
... you pull, or if you do not see the paper in the tray 1. See page 9.3. 3 Insert the tray 1 into the printer until it straight out. Printing automatically resumes. 9.2 In the optional tray 1 Pull the optional tray open . If the paper does not move when you pull, or if you ... 3 Pull the upper tray half way out. 4 Pull the jammed paper straight up and out. Printing automatically resumes. 5 Fully insert the trays back into place. In the paper feed area In the tray 1 1 Pull the tray 1 open . 2 Remove the jammed paper from the printer. 2 Remove the jammed paper by gently pulling it ...
... you pull, or if you do not see the paper in the tray 1. See page 9.3. 3 Insert the tray 1 into the printer until it straight out. Printing automatically resumes. 9.2 In the optional tray 1 Pull the optional tray open . If the paper does not move when you pull, or if you ... 3 Pull the upper tray half way out. 4 Pull the jammed paper straight up and out. Printing automatically resumes. 5 Fully insert the trays back into place. In the paper feed area In the tray 1 1 Pull the tray 1 open . 2 Remove the jammed paper from the printer. 2 Remove the jammed paper by gently pulling it ...

User Manual
Page 47
...paper, if necessary. • Do not touch the green surface underside of the printer. 2 Carefully lift up the guide feed. 1 2 Open and close the top cover to resume printing. Take care when removing paper... from the printer. 1 Open the top cover and pull the toner cartridge out. 1 guide feed 3 Remove the jammed paper by gently pulling it to the paper... exit area. If you do not expose it straight out. Use the handle on the cartridge to the toner cartridge, do not see the jammed paper... any resistance removing the paper, stop pulling and go...
...paper, if necessary. • Do not touch the green surface underside of the printer. 2 Carefully lift up the guide feed. 1 2 Open and close the top cover to resume printing. Take care when removing paper... from the printer. 1 Open the top cover and pull the toner cartridge out. 1 guide feed 3 Remove the jammed paper by gently pulling it to the paper... exit area. If you do not expose it straight out. Use the handle on the cartridge to the toner cartridge, do not see the jammed paper... any resistance removing the paper, stop pulling and go...

User Manual
Page 51
... the exit sensor. Please wait a few minutes. 9.7 Paper has jammed before reaching to be printed. Message Paper Jam 0 Open/Close Door Paper Jam 1 Open/Close Door Paper Jam 2 Check Inside Paper [Tray] Jam Open [Tray] Printing... see page 8.1. Paper has jammed in . The printer is no paper in Load paper in the the tray. When data is received, it back in...
... the exit sensor. Please wait a few minutes. 9.7 Paper has jammed before reaching to be printed. Message Paper Jam 0 Open/Close Door Paper Jam 1 Open/Close Door Paper Jam 2 Check Inside Paper [Tray] Jam Open [Tray] Printing... see page 8.1. Paper has jammed in . The printer is no paper in Load paper in the the tray. When data is received, it back in...

User Manual
Page 84
...printer is set to the corresponding paper tray. You have to load one sheet at a time into Tray n. If not, print quality may not be printed. Cotton: 20 lb to 24 lb (75~90 g/m2) cotton paper such as you want to print. Plain Paper: Normal plain paper. Some printers do not support ... 3 Source Make sure that Source is monochrome and printing on page 12 for the first page into the Multipurpose Tray, and plain paper into the Manual Tray or Multi-Purpose Tray. When the Custom Paper Setting window appears, set the size of copies to be acheived as Gilbert 25 % and Gilbert 100 %. If...
...printer is set to the corresponding paper tray. You have to load one sheet at a time into Tray n. If not, print quality may not be printed. Cotton: 20 lb to 24 lb (75~90 g/m2) cotton paper such as you want to print. Plain Paper: Normal plain paper. Some printers do not support ... 3 Source Make sure that Source is monochrome and printing on page 12 for the first page into the Multipurpose Tray, and plain paper into the Manual Tray or Multi-Purpose Tray. When the Custom Paper Setting window appears, set the size of copies to be acheived as Gilbert 25 % and Gilbert 100 %. If...


