User Manual
Page 2
... names are trademarks of this manual. © 2006 Samsung Electronics Co., Ltd. All rights reserved. • ML-4550, ML-4551N, and ML-4551ND are trademarks of Samsung Electronics Co., Ltd. • Samsung and Samsung logo are trademarks of Samsung Electronics Co., Ltd. • Centronics is a trademark...are registered trademarks of Microsoft Corporation. • PostScript 3 is subject to use of their respective companies or organizations. Samsung Electronics is not responsible for information purposes only. This manual is provided for any direct or indirect damages, arising from...
... names are trademarks of this manual. © 2006 Samsung Electronics Co., Ltd. All rights reserved. • ML-4550, ML-4551N, and ML-4551ND are trademarks of Samsung Electronics Co., Ltd. • Samsung and Samsung logo are trademarks of Samsung Electronics Co., Ltd. • Centronics is a trademark...are registered trademarks of Microsoft Corporation. • PostScript 3 is subject to use of their respective companies or organizations. Samsung Electronics is not responsible for information purposes only. This manual is provided for any direct or indirect damages, arising from...

User Manual
Page 3
... Center Web Site ARGENTINE 0800-333-3733 www.samsung.com/ar AUSTRALIA 1300 362 603 www.samsung.com/au BELGIUM 02 201 2418 www.samsung.com/be BRAZIL 0800-124-421 www.samsung.com/br CANADA 1-800-SAMSUNG (7267864) www.samsung.com/ca CHILE 800-726-7864 (SAMSUNG) www.samsung.com/cl CHINA 800-810-5858 010- 6475...
... Center Web Site ARGENTINE 0800-333-3733 www.samsung.com/ar AUSTRALIA 1300 362 603 www.samsung.com/au BELGIUM 02 201 2418 www.samsung.com/be BRAZIL 0800-124-421 www.samsung.com/br CANADA 1-800-SAMSUNG (7267864) www.samsung.com/ca CHILE 800-726-7864 (SAMSUNG) www.samsung.com/cl CHINA 800-810-5858 010- 6475...

User Manual
Page 4
CONTENTS 1. Network setup Introduction ...4.1 Supported operating systems ...4.2 Configuring TCP/IP ...4.2 Configuring EtherTalk ...4.2 Configuring IPX frame types ...4.3 Setting Ethernet speed ...4.3 Restoring the network configuration ...4.3 Printing a network configuration page ...4.3 5. Loading print media Selecting print media ...5.1 Loading paper ...5.4 Selecting an output location ...5.8 6. Basic printing Printing a document ...6.1 Canceling a print job ...6.1 7. Ordering supplies and accessories Toner cartridges ...7.1 Accessories ...7.1 How to purchase ...7.1 8. System setup Using...
CONTENTS 1. Network setup Introduction ...4.1 Supported operating systems ...4.2 Configuring TCP/IP ...4.2 Configuring EtherTalk ...4.2 Configuring IPX frame types ...4.3 Setting Ethernet speed ...4.3 Restoring the network configuration ...4.3 Printing a network configuration page ...4.3 5. Loading print media Selecting print media ...5.1 Loading paper ...5.4 Selecting an output location ...5.8 6. Basic printing Printing a document ...6.1 Canceling a print job ...6.1 7. Ordering supplies and accessories Toner cartridges ...7.1 Accessories ...7.1 How to purchase ...7.1 8. System setup Using...

User Manual
Page 5
Installing accessories Precautions when installing accessories ...10.1 Installing a dual in-line memory module (DIMM 10.1 Installing a network interface card ...10.3 Using the hard disk ...10.4 11. Specifications Printer specifications ...11.1 9. Troubleshooting Clearing paper jams ...9.1 Troubleshooting checklist ...9.5 Understanding the status LED ...9.6 Understanding display messages ...9.6 Toner cartridge-related messages ...9.8 Solving general printing problems ...9.9 Solving print quality problems ...9.11 Common Windows problems ...9.13 Common PostScript problems ...9.13 Common ...
Installing accessories Precautions when installing accessories ...10.1 Installing a dual in-line memory module (DIMM 10.1 Installing a network interface card ...10.3 Using the hard disk ...10.4 11. Specifications Printer specifications ...11.1 9. Troubleshooting Clearing paper jams ...9.1 Troubleshooting checklist ...9.5 Understanding the status LED ...9.6 Understanding display messages ...9.6 Toner cartridge-related messages ...9.8 Solving general printing problems ...9.9 Solving print quality problems ...9.11 Common Windows problems ...9.13 Common PostScript problems ...9.13 Common ...

User Manual
Page 6
... restore the machine to normal operation. 15 Avoid using this machine during normal operation, user maintenance, or prescribed service condition. This can damage your nearest Samsung dealer. 1 AWG: American Wire Gauge i If possible, unplug the AC power for Class I(1) laser products, and elsewhere, is certified as a Class I laser products are using...
... restore the machine to normal operation. 15 Avoid using this machine during normal operation, user maintenance, or prescribed service condition. This can damage your nearest Samsung dealer. 1 AWG: American Wire Gauge i If possible, unplug the AC power for Class I(1) laser products, and elsewhere, is certified as a Class I laser products are using...

User Manual
Page 7
...to correct the interference by one or more of where and how they purchased this item for help. If this product symbolises Samsung Electronics Co., Ltd. Household users should not be mixed with Part 15 of the Member States related to this equipment does ...full declaration, defining the relevant Directives and referenced standards can take this product, or their local government office, for radio noise emissions from your Samsung Electronics Co., Ltd. These limits are designed to the following measures: • Reorient or relocate the receiving antenna. • Increase the...
...to correct the interference by one or more of where and how they purchased this item for help. If this product symbolises Samsung Electronics Co., Ltd. Household users should not be mixed with Part 15 of the Member States related to this equipment does ...full declaration, defining the relevant Directives and referenced standards can take this product, or their local government office, for radio noise emissions from your Samsung Electronics Co., Ltd. These limits are designed to the following measures: • Reorient or relocate the receiving antenna. • Increase the...

User Manual
Page 8
Do not remove the moulded plug. You cannot rewire the plug and you may receive an electric shock if you purchased the machine. The wires in your plug, do not use the plug until you have the following : You must connect the blue wire to the pin which is marked with the letter "L" or colored red. If you have lost the fuse cover, do the following color code: • Green and Yellow: Earth • Blue: Neutral • Brown: Live If the wires in the mains lead do not match the colors marked in the mains lead have another fuse cover. You need to buy a suitable plug ...
Do not remove the moulded plug. You cannot rewire the plug and you may receive an electric shock if you purchased the machine. The wires in your plug, do not use the plug until you have the following : You must connect the blue wire to the pin which is marked with the letter "L" or colored red. If you have lost the fuse cover, do the following color code: • Green and Yellow: Earth • Blue: Neutral • Brown: Live If the wires in the mains lead do not match the colors marked in the mains lead have another fuse cover. You need to buy a suitable plug ...

User Manual
Page 9
You can then be taped together to 45 ppm. select either the output tray (facedown) or the rear cover (face-up to 3 additional trays. • Two output tray; You can customize your document are magnified and printed across the sheet of paper and can : Print with words, such as "Confidential." pages per minute 1.1 See the Software Section. images per minute b. 1 Introduction Congratulations on the purchase of your printer prints A4-sized paper at up to 29 ipmb and letter-sized paper at up to the rear cover. See the Software Section. • Your printer prints A4...
You can then be taped together to 45 ppm. select either the output tray (facedown) or the rear cover (face-up to 3 additional trays. • Two output tray; You can customize your document are magnified and printed across the sheet of paper and can : Print with words, such as "Confidential." pages per minute 1.1 See the Software Section. images per minute b. 1 Introduction Congratulations on the purchase of your printer prints A4-sized paper at up to 29 ipmb and letter-sized paper at up to the rear cover. See the Software Section. • Your printer prints A4...

User Manual
Page 10
... disk. This decreases the workload of the paper to save paper (double-sided printing) if you to use . The ML-4551N and ML- 4551ND come with a built-in use toner save mode to save paper (N-Up printing). See the Software Section. •... 10/100 Base TX) Hard Disk PostScript* Emulation Duplex Unit Optional Tray 2 Optional Tray 3 Optional Tray 4 ML-4550 ML-4551N ML-4551ND I I I I I I O I I O O O I I I O O I O O O O O O O O O 1.2 The ML-4551N and ML-4551ND come with a built-in the print queue. Use the optional hard disk You can add an optional network...
... disk. This decreases the workload of the paper to save paper (double-sided printing) if you to use . The ML-4551N and ML- 4551ND come with a built-in use toner save mode to save paper (N-Up printing). See the Software Section. •... 10/100 Base TX) Hard Disk PostScript* Emulation Duplex Unit Optional Tray 2 Optional Tray 3 Optional Tray 4 ML-4550 ML-4551N ML-4551ND I I I I I I O I I O O O I I I O O I O O O O O O O O O 1.2 The ML-4551N and ML-4551ND come with a built-in the print queue. Use the optional hard disk You can add an optional network...

User Manual
Page 11
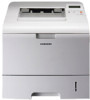
Front view Printer overview Rear view 1 power switch 2 rear cover 3 duplex unit 4 power receptacle * The figure above shows an ML-4551ND with all available options. 5 parallel port 6 USB port 7 network port * The figure above shows an ML-4551ND with all available options. 1 output tray 2 control panel 3 control board cover 4 tray 1 5 optional tray 2 6 optional tray 3 7 optional tray 4 8 handle 9 paper level indicator 10 multi-purpose tray 11 top cover 12 output support 13 multi-purpose tray paper width guides 14 multi-purpose tray extension 1.3
Front view Printer overview Rear view 1 power switch 2 rear cover 3 duplex unit 4 power receptacle * The figure above shows an ML-4551ND with all available options. 5 parallel port 6 USB port 7 network port * The figure above shows an ML-4551ND with all available options. 1 output tray 2 control panel 3 control board cover 4 tray 1 5 optional tray 2 6 optional tray 3 7 optional tray 4 8 handle 9 paper level indicator 10 multi-purpose tray 11 top cover 12 output support 13 multi-purpose tray paper width guides 14 multi-purpose tray extension 1.3

User Manual
Page 12
... help, support, printer drivers, manuals, and order information from the Manual folder on the printer driver CD. Samsung Website If you have Internet access, you can access the user's guides in other languages from the Samsung website, www.samsungprinter.com. 1.4 See page 9.6. Finding more information You can find information for maintaining your...
... help, support, printer drivers, manuals, and order information from the Manual folder on the printer driver CD. Samsung Website If you have Internet access, you can access the user's guides in other languages from the Samsung website, www.samsungprinter.com. 1.4 See page 9.6. Finding more information You can find information for maintaining your...

User Manual
Page 13
Selecting a location Select a level, stable place with adequate space for opening of heat, cold, and humidity. The area should be opened or removed) Back: 320 mm (enough space to allow opening of the rear cover or the duplex unit) Right: 100 mm (enough space to the edge of your desk or table. Clearance space Front: 482.6 mm (enough space so that trays can be well-ventilated and away from direct sunlight or sources of the control board cover) Left: 100 mm (enough space for ventilation) 1.5 Do not set the printer close to allow opening covers and trays. Allow extra space for air ...
Selecting a location Select a level, stable place with adequate space for opening of heat, cold, and humidity. The area should be opened or removed) Back: 320 mm (enough space to allow opening of the rear cover or the duplex unit) Right: 100 mm (enough space to the edge of your desk or table. Clearance space Front: 482.6 mm (enough space so that trays can be well-ventilated and away from direct sunlight or sources of the control board cover) Left: 100 mm (enough space for ventilation) 1.5 Do not set the printer close to allow opening covers and trays. Allow extra space for air ...

User Manual
Page 14
An asterisk (*) appears next to the selection on the next column shows the menus and all of menus are described in more detail in the tables beginning on page 2.2. 2 System setup This chapter shows menus you want appears on the bottom line of the display and press OK. 2 Press the Scroll buttons until the menu you can set the control panel menus while printing. 1 Press Menu until the desired menu item appears and press OK. 3 If the menu item has sub menus, repeat step 2. 4 Press the Scroll buttons to access the desired setting option or the required value. 5 Press OK to save ...
An asterisk (*) appears next to the selection on the next column shows the menus and all of menus are described in more detail in the tables beginning on page 2.2. 2 System setup This chapter shows menus you want appears on the bottom line of the display and press OK. 2 Press the Scroll buttons until the menu you can set the control panel menus while printing. 1 Press Menu until the desired menu item appears and press OK. 3 If the menu item has sub menus, repeat step 2. 4 Press the Scroll buttons to access the desired setting option or the required value. 5 Press OK to save ...

User Manual
Page 15
...optional hard disk. The stored job page shows the print file list stored in the installed hard disk. The menus in the ML-4550 or ML-4551N. Auto CR Job Timeout Maintenance Clear Setting 7. Available with an optional hard disk. Item Explanation Menu Map Configuraton Demo ... hard disk is installed. Available with an optional duplex unit in the colored characters appear only when the optional items are listed based on the ML-4550 printer. This page can be printed. c. See page 10.7. Layout (See page 2.3.) Orientation Simplex Margin Duplexb Duplex Marginb 4. Emulation ...
...optional hard disk. The stored job page shows the print file list stored in the installed hard disk. The menus in the ML-4550 or ML-4551N. Auto CR Job Timeout Maintenance Clear Setting 7. Available with an optional hard disk. Item Explanation Menu Map Configuraton Demo ... hard disk is installed. Available with an optional duplex unit in the colored characters appear only when the optional items are listed based on the ML-4550 printer. This page can be printed. c. See page 10.7. Layout (See page 2.3.) Orientation Simplex Margin Duplexb Duplex Marginb 4. Emulation ...

User Manual
Page 16
Note • In the ML-4550 and ML-4551N, this menu, you can set the margins for doublesided printing. You can increase or decrease the value in 0.1 mm increments. • Top Margin: Set ... Margin/ Left Margin: 5.0, Short Binding/ Long Binding: 0 In this menu item is available when the optional duplex unit is installed. 2.3 Note • In the ML-4550 and ML-4551N, this menu item is available when the optional duplex unit is installed. Layout menu to define all settings relating to 22 mm. Layout...
Note • In the ML-4550 and ML-4551N, this menu, you can set the margins for doublesided printing. You can increase or decrease the value in 0.1 mm increments. • Top Margin: Set ... Margin/ Left Margin: 5.0, Short Binding/ Long Binding: 0 In this menu item is available when the optional duplex unit is installed. 2.3 Note • In the ML-4550 and ML-4551N, this menu item is available when the optional duplex unit is installed. Layout menu to define all settings relating to 22 mm. Layout...

User Manual
Page 17
purpose tray. Values: A4, A5, A6, JIS B5, ISO B5, Letter, Legal, Executive, No.10 Env., Monarch Env., DL Env., C5 Env., C6 Env., US Folio, Oficio, Custom Paper Paper Type Paper Source Tray Chaining Depending on the page by selecting any other value except Auto from other trays. Normal for the highest quality printing. • Select 1200dpi-Best when your printer. Values: Normal, Light, Dark You can automatically determine the source. • Select MP Tray or Manual Tray to 999. 3. Graphic menu to save toner. 2.4 Item Resolution Explanation Values: 600dpi-...
purpose tray. Values: A4, A5, A6, JIS B5, ISO B5, Letter, Legal, Executive, No.10 Env., Monarch Env., DL Env., C5 Env., C6 Env., US Folio, Oficio, Custom Paper Paper Type Paper Source Tray Chaining Depending on the page by selecting any other value except Auto from other trays. Normal for the highest quality printing. • Select 1200dpi-Best when your printer. Values: Normal, Light, Dark You can automatically determine the source. • Select MP Tray or Manual Tray to 999. 3. Graphic menu to save toner. 2.4 Item Resolution Explanation Values: 600dpi-...

User Manual
Page 18
Language Values: English, FRANCAIS, Espanol, Portugues E., Portugues B., Deutsch, Italiano... Once you have been printed and how much toner are left in the print buffer. You can set the length of a print job that appears on the display and the printer will display. Values: Plain, High, Higher, Highest You can set how long the printer waits before printing the last page of time the printer waits before going to print the page. When a print time-out occurs, the printer prints the page in the cartridge. Power Save This setting determines the language of the toner ...
Language Values: English, FRANCAIS, Espanol, Portugues E., Portugues B., Deutsch, Italiano... Once you have been printed and how much toner are left in the print buffer. You can set the length of a print job that appears on the display and the printer will display. Values: Plain, High, Higher, Highest You can set how long the printer waits before printing the last page of time the printer waits before going to print the page. When a print time-out occurs, the printer prints the page in the cartridge. Power Save This setting determines the language of the toner ...

User Manual
Page 19
PostScript This menu provides you select the version of the printer language. Item Explanation Font Values: SANSERIF, ROMAN You can do using the Pitch item, and PCL8~PCL45 can select the default font will print in PCL emulation. Emulation menu to configure properties of Courier font to the font type and font size. You can adjust the font size of the desired language. The default value, 10 is proportional to use. Character Set Values: USA, FRANCE, GERMANY, UK, DENMARK1, SWEDEN, ITALY, SPAIN1, JAPAN, NORWAY, DENMARK2, SPAIN2, LATIN This item allows ...
PostScript This menu provides you select the version of the printer language. Item Explanation Font Values: SANSERIF, ROMAN You can do using the Pitch item, and PCL8~PCL45 can select the default font will print in PCL emulation. Emulation menu to configure properties of Courier font to the font type and font size. You can adjust the font size of the desired language. The default value, 10 is proportional to use. Character Set Values: USA, FRANCE, GERMANY, UK, DENMARK1, SWEDEN, ITALY, SPAIN1, JAPAN, NORWAY, DENMARK2, SPAIN2, LATIN This item allows ...

User Manual
Page 20
Values: Off, On This item determines whether or not the printer automatically performs line feed when the data overflows the printable area of type. Network menu This menu lets you set the TCP/IP addresses or receive the addresses from the network. • DHCP: The DHCP server allots the IP address to you automatically. • BOOTP: The BOOTP server allots the IP address to use the SNAP frame type. • Off: You can enter IP Address, Subnet Mask, and Gateway manually. Select On to use the EtherTalk protocol. This item performs a simple reset and restores the...
Values: Off, On This item determines whether or not the printer automatically performs line feed when the data overflows the printable area of type. Network menu This menu lets you set the TCP/IP addresses or receive the addresses from the network. • DHCP: The DHCP server allots the IP address to you automatically. • BOOTP: The BOOTP server allots the IP address to use the SNAP frame type. • Off: You can enter IP Address, Subnet Mask, and Gateway manually. Select On to use the EtherTalk protocol. This item performs a simple reset and restores the...

User Manual
Page 21
Press and hold Demo for about 2 seconds. Changing the display language To change the language that the printer is displayed on the control panel, follow these steps: 1 Press Menu until Language appears and press OK. 3 Press the Scroll buttons to select the language you want and press OK. 4 Press Stop to return to Standby mode. There are two ways to make sure that is operating correctly. The printer must be in the normal mode, but it reduces print quality. A demo page prints out. Using toner save mode Toner save mode from the printer properties window on the bottom line of your ...
Press and hold Demo for about 2 seconds. Changing the display language To change the language that the printer is displayed on the control panel, follow these steps: 1 Press Menu until Language appears and press OK. 3 Press the Scroll buttons to select the language you want and press OK. 4 Press Stop to return to Standby mode. There are two ways to make sure that is operating correctly. The printer must be in the normal mode, but it reduces print quality. A demo page prints out. Using toner save mode Toner save mode from the printer properties window on the bottom line of your ...