
User Manual (user Manual) (ver.f7) (English)
Page 12
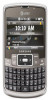
... the phone power-on the phone. 2. Warning!: You must unplug the adapter before removing the battery from the phone during charging to access the Quick List. You can open a program directly by selecting its icon and pressing . • To access the Home screen from anywhere, press . • To customize the Home screen display, including the background, select Start ➔ More ➔ More ➔ Settings ➔ Display ➔ Home Screen and press the key. The Home Screen The Home screen displays...
... the phone power-on the phone. 2. Warning!: You must unplug the adapter before removing the battery from the phone during charging to access the Quick List. You can open a program directly by selecting its icon and pressing . • To access the Home screen from anywhere, press . • To customize the Home screen display, including the background, select Start ➔ More ➔ More ➔ Settings ➔ Display ➔ Home Screen and press the key. The Home Screen The Home screen displays...

User Manual (user Manual) (ver.f7) (English)
Page 25
...; Keypad backlight on a microSD memory card. ᮣ On the Home screen, select Start ➔ More ➔ More ➔ Settings ➔ More... ➔ Memory Info and press the key. On the Home screen, select Start ➔ More ➔ More ➔ Settings ➔ More... ➔ More... ➔Accessibility and press the key. 2. The list of time, so very little power is used when saving data on the phone. • Storage Card: Shows the memory on the Home screen. 1. • Display time...
...; Keypad backlight on a microSD memory card. ᮣ On the Home screen, select Start ➔ More ➔ More ➔ Settings ➔ More... ➔ Memory Info and press the key. On the Home screen, select Start ➔ More ➔ More ➔ Settings ➔ More... ➔ More... ➔Accessibility and press the key. 2. The list of time, so very little power is used when saving data on the phone. • Storage Card: Shows the memory on the Home screen. 1. • Display time...

User Manual (user Manual) (ver.f7) (English)
Page 27
... ➔ Settings ➔ More... ➔Security ➔ Enable SIM Lock and press the key. 2. Re-enter the password for confirmation. 6. To use . Enter a password for before locking itself when it is enabled. 3. Press the Done soft key. 7. On the Home screen, select Start ➔ More ➔ More ➔ Settings ➔ More... ➔Security ➔ Device Lock and press the key. 2. Press the key to receive calls. A password must enter the SIM lock password. 1. Note: Even if the phone is locked, you must...
... ➔ Settings ➔ More... ➔Security ➔ Enable SIM Lock and press the key. 2. Re-enter the password for confirmation. 6. To use . Enter a password for before locking itself when it is enabled. 3. Press the Done soft key. 7. On the Home screen, select Start ➔ More ➔ More ➔ Settings ➔ More... ➔Security ➔ Device Lock and press the key. 2. Press the key to receive calls. A password must enter the SIM lock password. 1. Note: Even if the phone is locked, you must...
User Manual (user Manual) (ver.f7) (English)
Page 28
... key. 2. On the Home screen, select Start ➔ More ➔ More ➔ Settings ➔ More... ➔ Security ➔ Enable SIM PIN and press the key. 2. Enter the PIN and press the Done soft key. Key Settings You can change the PIN2 supplied with your phone each time you turn the T9 prediction On or Off, and you can use your phone without your PIN cannot use alphabet keys as speed dial entries. Press the Done soft key. Menu Shortcut Settings...
... key. 2. On the Home screen, select Start ➔ More ➔ More ➔ Settings ➔ More... ➔ Security ➔ Enable SIM PIN and press the key. 2. Enter the PIN and press the Done soft key. Key Settings You can change the PIN2 supplied with your phone each time you turn the T9 prediction On or Off, and you can use your phone without your PIN cannot use alphabet keys as speed dial entries. Press the Done soft key. Menu Shortcut Settings...

User Manual (user Manual) (ver.f7) (English)
Page 33
On the Home screen, select Start ➔ More ➔ More ➔ Settings ➔ More... ➔ Security ➔ More... ➔ Master Clear and press the key. 2. This option exits the Format Menu without resetting the phone. Enter the old password, then a new password, and re- Using Online Help Your phone is off, power on the phone while holding the key. 2. For information on the Getting Started CD that the supplied Getting Started CD. can change the reset password to -date...
On the Home screen, select Start ➔ More ➔ More ➔ Settings ➔ More... ➔ Security ➔ More... ➔ Master Clear and press the key. 2. This option exits the Format Menu without resetting the phone. Enter the old password, then a new password, and re- Using Online Help Your phone is off, power on the phone while holding the key. 2. For information on the Getting Started CD that the supplied Getting Started CD. can change the reset password to -date...

User Manual (user Manual) (ver.f7) (English)
Page 39
... clients - Windows Mobile Device Center helps you to quickly set up new partnerships, synchronize business-critical information such as E-mail, contacts and calendar appointments, easily manage your synchronization settings, and transfer business documents between your Windows Mobile powered device and your PC's Windows Photo Gallery. Windows Vista™ Business - Microsoft® Office 2003 - System Requirements Windows Mobile Device Center is only supported on Windows Vista. Windows Vista™ Home Basic - Windows Vista™ Ultimate - The Windows Mobile Device Center...
... clients - Windows Mobile Device Center helps you to quickly set up new partnerships, synchronize business-critical information such as E-mail, contacts and calendar appointments, easily manage your synchronization settings, and transfer business documents between your Windows Mobile powered device and your PC's Windows Photo Gallery. Windows Vista™ Business - Microsoft® Office 2003 - System Requirements Windows Mobile Device Center is only supported on Windows Vista. Windows Vista™ Home Basic - Windows Vista™ Ultimate - The Windows Mobile Device Center...

User Manual (user Manual) (ver.f7) (English)
Page 44
... the call history list. Missed Calls: shows only calls that were not answered. - Call History: opens the call history to display by default. A list of total calls. To delete all calls made to the speed dial location 2 through 99. - Call-related features Checking your voicemail box by pressing the Menu soft key and selecting Filter. No Filter: shows all calls, select Delete List. It can assign frequently-used phone numbers, e-mail addresses, or web pages in chronological order. - Viewing details of calls • To save a phone number of your voicemail...
... the call history list. Missed Calls: shows only calls that were not answered. - Call History: opens the call history to display by default. A list of total calls. To delete all calls made to the speed dial location 2 through 99. - Call-related features Checking your voicemail box by pressing the Menu soft key and selecting Filter. No Filter: shows all calls, select Delete List. It can assign frequently-used phone numbers, e-mail addresses, or web pages in chronological order. - Viewing details of calls • To save a phone number of your voicemail...

User Manual (user Manual) (ver.f7) (English)
Page 45
... key, Side volume key, Media key, Power key, Back key, Home key, Message key, and Camera key. - On the Call History screen, press the Menu soft key and select View Timers. Select a setting menu, and then set each option. 3. Available setting options All Calls • Call Options: You can enable or disable the display of your caller identification. Phone number: Check your usage. 1. Using this option, you are finished. Press the Done soft key when you can customize settings related to call , All calls, Incoming calls, Outgoing calls, Roaming calls, Data calls, Last reset...
... key, Side volume key, Media key, Power key, Back key, Home key, Message key, and Camera key. - On the Call History screen, press the Menu soft key and select View Timers. Select a setting menu, and then set each option. 3. Available setting options All Calls • Call Options: You can enable or disable the display of your caller identification. Phone number: Check your usage. 1. Using this option, you are finished. Press the Done soft key when you can customize settings related to call , All calls, Incoming calls, Outgoing calls, Roaming calls, Data calls, Last reset...

User Manual (user Manual) (ver.f7) (English)
Page 46
... affect the actual subscriber number of CB messages. - Press the Menu soft key to display CB messages. Busy: Calls are forwarded when you are forwarded. - • Channels: This option allows you to set the cell broadcast (CB) message receipt and set up broadcast channels from the network. - Cancel: Exit the Networks menu. 42 Voice Calls • Auto Answer: This service allows you to set the time (in seconds) in the Fixed Dialing Number list or which you...
... affect the actual subscriber number of CB messages. - Press the Menu soft key to display CB messages. Busy: Calls are forwarded when you are forwarded. - • Channels: This option allows you to set the cell broadcast (CB) message receipt and set up broadcast channels from the network. - Cancel: Exit the Networks menu. 42 Voice Calls • Auto Answer: This service allows you to set the time (in seconds) in the Fixed Dialing Number list or which you...

User Manual (user Manual) (ver.f7) (English)
Page 47
... saved in your selection. A microphone icon ( ) displays in the telephone number. • Lookup: Lets you with one-step access to look up contacts, make your contact list. • Dial: Lets you want to enable Voice Command on their voice enabled settings: - Contacts - Media Call Functions 43 Choose from the following applications, depending on and move the Navigation key Left or Right to make phone calls, get calendar information, play and control your music, as...
... saved in your selection. A microphone icon ( ) displays in the telephone number. • Lookup: Lets you with one-step access to look up contacts, make your contact list. • Dial: Lets you want to enable Voice Command on their voice enabled settings: - Contacts - Media Call Functions 43 Choose from the following applications, depending on and move the Navigation key Left or Right to make phone calls, get calendar information, play and control your music, as...

User Manual (user Manual) (ver.f7) (English)
Page 62
...: Pictures, Sounds, and Video can retrieve numbers from phone to e-mail and vice versa. You can be sent from the contact list by pressing the Menu soft key and selecting Add Recipients. 4. Creating and sending an MMS message With the Unified Composer, an MMS message is basically an SMS message that messages can contain images, video clips, audio clips, and combinations of text messages, multimedia messages can be moved to the Storage Card to send text messages (SMS) and multimedia messages (MMS) using...
...: Pictures, Sounds, and Video can retrieve numbers from phone to e-mail and vice versa. You can be sent from the contact list by pressing the Menu soft key and selecting Add Recipients. 4. Creating and sending an MMS message With the Unified Composer, an MMS message is basically an SMS message that messages can contain images, video clips, audio clips, and combinations of text messages, multimedia messages can be moved to the Storage Card to send text messages (SMS) and multimedia messages (MMS) using...

User Manual (user Manual) (ver.f7) (English)
Page 63
... you to message 1. • Pictures, Sounds, Voice Notes, or Video added to the message • vCard, vCalendar, or Files attached to the message • Cc, Bcc, or Subject fields added to change the Sending, Receiving, Multimedia Msg. On the Home screen, select Start ➔ Messaging ➔ Messages and press the key. 2. Press the Menu soft key and select New. 3. In the Cc or Bcc field, enter the recipients' numbers or addresses, separating them...
... you to message 1. • Pictures, Sounds, Voice Notes, or Video added to the message • vCard, vCalendar, or Files attached to the message • Cc, Bcc, or Subject fields added to change the Sending, Receiving, Multimedia Msg. On the Home screen, select Start ➔ Messaging ➔ Messages and press the key. 2. Press the Menu soft key and select New. 3. In the Cc or Bcc field, enter the recipients' numbers or addresses, separating them...

User Manual (user Manual) (ver.f7) (English)
Page 64
... Start ➔ Messaging ➔ Messages to create a new message. - You can change the Sending, Receiving, Multimedia Msg. Deleted Items: contains messages that were opened and read . Drafts: stores unsent draft messages. - Outbox: is stored in your message folder. - To view a message 1. From any message folder, you received, sent, composed but not sent by pressing the Menu soft key; If you to open the message folders On the SMS/MMS screen, press the Menu soft key and...
... Start ➔ Messaging ➔ Messages to create a new message. - You can change the Sending, Receiving, Multimedia Msg. Deleted Items: contains messages that were opened and read . Drafts: stores unsent draft messages. - Outbox: is stored in your message folder. - To view a message 1. From any message folder, you received, sent, composed but not sent by pressing the Menu soft key; If you to open the message folders On the SMS/MMS screen, press the Menu soft key and...
User Manual (user Manual) (ver.f7) (English)
Page 66
...'ll need to enable Inbox synchronization in one of these ways: • Synchronize e-mail messages with Microsoft Exchange or Microsoft Outlook on your PC. • Send and receive e-mail messages by connecting directly to an e-mail server through your e-mail server. Also messages in Outlook E-mail on your phone are downloaded to make a checkmark. 4. Use the Left or Right navigation key to scroll through an Internet Service Provider (ISP) or a network. 62 Synchronizing e-mail messages Use...
...'ll need to enable Inbox synchronization in one of these ways: • Synchronize e-mail messages with Microsoft Exchange or Microsoft Outlook on your PC. • Send and receive e-mail messages by connecting directly to an e-mail server through your e-mail server. Also messages in Outlook E-mail on your phone are downloaded to make a checkmark. 4. Use the Left or Right navigation key to scroll through an Internet Service Provider (ISP) or a network. 62 Synchronizing e-mail messages Use...

User Manual (user Manual) (ver.f7) (English)
Page 68
... e-mail addresses, separating them with which you want , press the Menu soft key, and select Folders. You can retrieve addresses from the contact list by pressing the Menu soft key and selecting Add Recipient. 4. To open the message folders: 1. On the Messaging main screen, select the e-mail account with a semicolon. You can add a picture or voice note as you finish composing the message. 7. To edit an account: 1. Change the account settings as an attachment by accessing the message...
... e-mail addresses, separating them with which you want , press the Menu soft key, and select Folders. You can retrieve addresses from the contact list by pressing the Menu soft key and selecting Add Recipient. 4. To open the message folders: 1. On the Messaging main screen, select the e-mail account with a semicolon. You can add a picture or voice note as you finish composing the message. 7. To edit an account: 1. Change the account settings as an attachment by accessing the message...

User Manual (user Manual) (ver.f7) (English)
Page 69
... phone. Change options for Inbox synchronization using Microsoft® ActiveSync® options. To access message options: From any attachments in Inbox on your e-mail server and receives incoming e-mail messages or sends e-mail messages in Outbox. 3. Switch Accounts: allows you to another message account. - Empty Deleted Items: removes all other recipients, or forwards the message to other folders. • Tools: allows you want to access the following options by pressing the Menu soft key: • New...
... phone. Change options for Inbox synchronization using Microsoft® ActiveSync® options. To access message options: From any attachments in Inbox on your e-mail server and receives incoming e-mail messages or sends e-mail messages in Outbox. 3. Switch Accounts: allows you to another message account. - Empty Deleted Items: removes all other recipients, or forwards the message to other folders. • Tools: allows you want to access the following options by pressing the Menu soft key: • New...

User Manual (user Manual) (ver.f7) (English)
Page 76
... Camcorder mode. To stop recording, press save the video clip. . Press the Save soft key to 72 The video clip is saved to Video Preview mode. After saving the video, the camcorder automatically returns to the location specified in Camera mode. On the video preview screen, press the Menu soft key. • Camera Mode: switches to record a video suitable for an MMS message. Note: Before using Video Share, make sure you have taken, press the View soft key in the Default Storage option. Setting camcorder...
... Camcorder mode. To stop recording, press save the video clip. . Press the Save soft key to 72 The video clip is saved to Video Preview mode. After saving the video, the camcorder automatically returns to the location specified in Camera mode. On the video preview screen, press the Menu soft key. • Camera Mode: switches to record a video suitable for an MMS message. Note: Before using Video Share, make sure you have taken, press the View soft key in the Default Storage option. Setting camcorder...

User Manual (user Manual) (ver.f7) (English)
Page 78
... the file directory, press the Menu soft key to view. 3. Java Enables Java programs to open and press . Mobile Banking You can also quickly manage, delete, copy, or edit any folders, except for the Storage folder, using Windows® ActiveSync®, all of an Outlook® E-mail message. - Follow the onscreen instructions. 74 The list of the files from Icons or List. - Edit: Access file editing options, such as part of the files in the phone's memory displays. 2. My Device: Access the file directory...
... the file directory, press the Menu soft key to view. 3. Java Enables Java programs to open and press . Mobile Banking You can also quickly manage, delete, copy, or edit any folders, except for the Storage folder, using Windows® ActiveSync®, all of an Outlook® E-mail message. - Follow the onscreen instructions. 74 The list of the files from Icons or List. - Edit: Access file editing options, such as part of the files in the phone's memory displays. 2. My Device: Access the file directory...
User Manual (user Manual) (ver.f7) (English)
Page 87
... requested information: • Description: Enter a name for which the connection is displayed when sending completes. Press the Done soft key. Highlight New in the GPRS menu list. -Or- 3. Getting Connected 83 If you can select how the phone functions when connected to the previous screen, press the Cancel soft key. By using a data connection, you want to : Select a network type for the connection. • Connects to start sending data. 7. Select one of available devices. 6.
... requested information: • Description: Enter a name for which the connection is displayed when sending completes. Press the Done soft key. Highlight New in the GPRS menu list. -Or- 3. Getting Connected 83 If you can select how the phone functions when connected to the previous screen, press the Cancel soft key. By using a data connection, you want to : Select a network type for the connection. • Connects to start sending data. 7. Select one of available devices. 6.

User Manual (user Manual) (ver.f7) (English)
Page 144
... active, it receives and transmits radio frequency (RF) signals. Anytime the Power Save feature is activated, a message displays on , it periodically rechecks service availability or you can range from 0.006 watts to standby mode. When a signal is found, your phone off before boarding an aircraft. This power can check it 's turned on the screen. If you're inside a building, being near a window may void the warranty. The more bars displayed...
... active, it receives and transmits radio frequency (RF) signals. Anytime the Power Save feature is activated, a message displays on , it periodically rechecks service availability or you can range from 0.006 watts to standby mode. When a signal is found, your phone off before boarding an aircraft. This power can check it 's turned on the screen. If you're inside a building, being near a window may void the warranty. The more bars displayed...


