Owner Instructions
Page 5
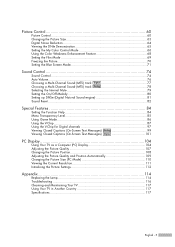
...Viewing Closed Captions (On-Screen Text Messages) Analog 99 Viewing Closed Captions (On-Screen Text Messages) Digital 101 PC Display 104 Using Your TV as a Computer (PC) Display 104 Adjusting the Picture Quality 107 Changing the Picture Position 108 Adjusting the Picture Quality and Position Automatically 109...Changing the Picture Size (PC Mode 110 Viewing the Current Resolution 111 Initializing the Picture Settings 112 Appendix 114 Replacing the Lamp 114 Troubleshooting 116 Cleaning and Maintaining Your TV 117 Using Your TV in Another Country 117 Specifications ...117 English - 5
...Viewing Closed Captions (On-Screen Text Messages) Analog 99 Viewing Closed Captions (On-Screen Text Messages) Digital 101 PC Display 104 Using Your TV as a Computer (PC) Display 104 Adjusting the Picture Quality 107 Changing the Picture Position 108 Adjusting the Picture Quality and Position Automatically 109...Changing the Picture Size (PC Mode 110 Viewing the Current Resolution 111 Initializing the Picture Settings 112 Appendix 114 Replacing the Lamp 114 Troubleshooting 116 Cleaning and Maintaining Your TV 117 Using Your TV in Another Country 117 Specifications ...117 English - 5
Owner Instructions
Page 11
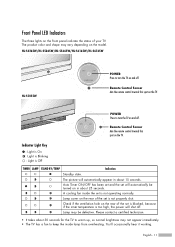
...-S5065W/HL-S5665W/HL-S6165W/HL-S6765W HL-S5055W POWER Press to turn the TV on the model. Lamp may vary depending on and off. A cooling fan inside lamp from overheating. Check if the ventilation hole on the rear of the set is too high, the power will shut off . Front Panel... LED Indicators The three lights on the TV. Lamp cover on the rear of your TV. POWER Press to turn the TV on in about 30 seconds for the TV to warm up, so normal brightness may not appear immediately. • The TV has a fan to keep the inside the set is ...
...-S5065W/HL-S5665W/HL-S6165W/HL-S6765W HL-S5055W POWER Press to turn the TV on the model. Lamp may vary depending on and off. A cooling fan inside lamp from overheating. Check if the ventilation hole on the rear of the set is too high, the power will shut off . Front Panel... LED Indicators The three lights on the TV. Lamp cover on the rear of your TV. POWER Press to turn the TV on in about 30 seconds for the TV to warm up, so normal brightness may not appear immediately. • The TV has a fan to keep the inside the set is ...
Owner Instructions
Page 114
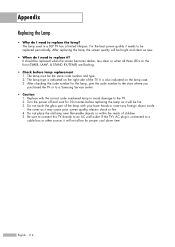
... checking the code number for 30 minutes before lamp replacement 1. Turn the power off and wait for the lamp, give the code number to the store where you purchased the TV or to a Samsung Service center. • Caution 1. Do not place the old lamp near flammable objects or within the reach of the... TV. English - 114 The lamp type is indicated on the right side...
... checking the code number for 30 minutes before lamp replacement 1. Turn the power off and wait for the lamp, give the code number to the store where you purchased the TV or to a Samsung Service center. • Caution 1. Do not place the old lamp near flammable objects or within the reach of the... TV. English - 114 The lamp type is indicated on the right side...
Owner Instructions
Page 115
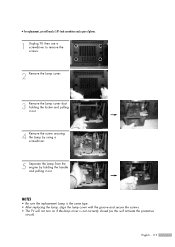
... circuit). English - 115 NOTES • Be sure the replacement Lamp is the same type. • After replacing the lamp, align the lamp cover with the groove and secure the screws. • The TV will not turn on if the lamp cover is not correctly closed (as this will need a 5.91... screwdriver and a pair of gloves. 1 Unplug TV, then use a screwdriver to remove the screws. 2 Remove the Lamp cover. 3 Remove the Lamp cover duct holding the locker and pulling it out. 4 Remove the screw securing the Lamp by using a screwdriver. 5 Separate the Lamp from the engine by holding the handle and pulling...
... circuit). English - 115 NOTES • Be sure the replacement Lamp is the same type. • After replacing the lamp, align the lamp cover with the groove and secure the screws. • The TV will not turn on if the lamp cover is not correctly closed (as this will need a 5.91... screwdriver and a pair of gloves. 1 Unplug TV, then use a screwdriver to remove the screws. 2 Remove the Lamp cover. 3 Remove the Lamp cover duct holding the locker and pulling it out. 4 Remove the screw securing the Lamp by using a screwdriver. 5 Separate the Lamp from the engine by holding the handle and pulling...


