
User Manual (ENGLISH)
Page 2
...other than SDTV. • Dolby Surround Sound With DTV, you can transmit high definition TV (HDTV) images, Dolby digital surround audio, and new services such as multicasting (transmitting more than ...use . Digital Television Services • Digital Picture Quality DTV programs are granted for commercial use by end-user consumers for product features or functions that do not conform to ISO/IEC 11172-3 or ISO/IEC 13818-3 used or sold in combination with DD 5.1 soundtracks. A Guide to progressive-scan DVD movies in image quality. • HDTV program formats include 1080-line...
...other than SDTV. • Dolby Surround Sound With DTV, you can transmit high definition TV (HDTV) images, Dolby digital surround audio, and new services such as multicasting (transmitting more than ...use . Digital Television Services • Digital Picture Quality DTV programs are granted for commercial use by end-user consumers for product features or functions that do not conform to ISO/IEC 11172-3 or ISO/IEC 13818-3 used or sold in combination with DD 5.1 soundtracks. A Guide to progressive-scan DVD movies in image quality. • HDTV program formats include 1080-line...

User Manual (ENGLISH)
Page 3
... quality it to produce high-quality images and sound. Cable TV systems use an outdoor or indoor antenna to watch OTA DTV and HDTV programs. They're free, unlike subscription satellite TV or premium cable TV. Once the DTV signal level exceeds a certain threshold at the receiver, the digital video and audio data is it was originally encoded for DTV over analog TV - there is a big advantage for broadcast. Residents...
... quality it to produce high-quality images and sound. Cable TV systems use an outdoor or indoor antenna to watch OTA DTV and HDTV programs. They're free, unlike subscription satellite TV or premium cable TV. Once the DTV signal level exceeds a certain threshold at the receiver, the digital video and audio data is it was originally encoded for DTV over analog TV - there is a big advantage for broadcast. Residents...

User Manual (ENGLISH)
Page 4
...-Screen Displays 29 Selecting a Menu Language 30 Memorizing the Channels 31 Changing Channels 33 Customizing Your Remote Control 34 Remote Control Codes 38 Setting the Clock...41 Setting the On/Off Timer 43 Setting the Sleep Timer 44 Viewing an External Signal Source 45 Assigning Names to External Input Mode 46 Channel Control 48 Selecting Your Favorite Channels 48 Viewing the Channel Lists 50 Editing the Channel Lists 51 Default List mode 53 Labeling the Channels 54 Fine Tuning Analog Channels Analog 55 Checking the Digital-Signal Strength Digital...
...-Screen Displays 29 Selecting a Menu Language 30 Memorizing the Channels 31 Changing Channels 33 Customizing Your Remote Control 34 Remote Control Codes 38 Setting the Clock...41 Setting the On/Off Timer 43 Setting the Sleep Timer 44 Viewing an External Signal Source 45 Assigning Names to External Input Mode 46 Channel Control 48 Selecting Your Favorite Channels 48 Viewing the Channel Lists 50 Editing the Channel Lists 51 Default List mode 53 Labeling the Channels 54 Fine Tuning Analog Channels Analog 55 Checking the Digital-Signal Strength Digital...
User Manual (ENGLISH)
Page 5
... Picture 70 Setting the Blue Screen Mode 71 Sound Control 74 Sound Control ...74 Auto Volume...76 Choosing a Multi-Channel Sound (MTS) track Digital 77 Choosing a Multi-Channel Sound (MTS) track Analog 78 Selecting the Internal Mute 79 Setting the On/Off Melody 80 Setting up DNSe (Digital Natural Sound engine 81 Sound Reset ...82 Special Features 84 Setting the Function Help 84 Menu Transparency Level 85 Using Game Mode 86 Using the V-Chip...87 Using the V-Chip for Digital channels 97 Viewing Closed Captions (On-Screen...
... Picture 70 Setting the Blue Screen Mode 71 Sound Control 74 Sound Control ...74 Auto Volume...76 Choosing a Multi-Channel Sound (MTS) track Digital 77 Choosing a Multi-Channel Sound (MTS) track Analog 78 Selecting the Internal Mute 79 Setting the On/Off Melody 80 Setting up DNSe (Digital Natural Sound engine 81 Sound Reset ...82 Special Features 84 Setting the Function Help 84 Menu Transparency Level 85 Using Game Mode 86 Using the V-Chip...87 Using the V-Chip for Digital channels 97 Viewing Closed Captions (On-Screen...

User Manual (ENGLISH)
Page 9
... multi-channel sound decoder for stereo and bilingual listening • Built-in, dual channel speakers • A special sleep timer • Widescreen TV with adjustable image size • Life-like clear images provided by DNle technology • My Color Control Mode for corresponding with your color style • Color weakness Mode • Digital Input jack • Digital Audio Output (OPTICAL) jack • Game Mode Checking Accessories Once you can access from right side buttons or remote control • Automatic timer...
... multi-channel sound decoder for stereo and bilingual listening • Built-in, dual channel speakers • A special sleep timer • Widescreen TV with adjustable image size • Life-like clear images provided by DNle technology • My Color Control Mode for corresponding with your color style • Color weakness Mode • Digital Input jack • Digital Audio Output (OPTICAL) jack • Game Mode Checking Accessories Once you can access from right side buttons or remote control • Automatic timer...

User Manual (ENGLISH)
Page 11
... seconds. HL-S4265W/HL-S5065W/HL-S5665W/HL-S6165W/HL-S6765W HL-S5055W POWER Press to turn the TV on and off . POWER Press to keep the inside the set is not operating normally. The picture will shut off. Lamp cover on the rear of your TV. Please contact a certified technician. • It takes about 15 seconds. You'll occasionally hear it working. Remote Control Sensor Aim the remote control towards this spot on the TV. A cooling fan inside lamp from...
... seconds. HL-S4265W/HL-S5065W/HL-S5665W/HL-S6165W/HL-S6765W HL-S5055W POWER Press to turn the TV on and off . POWER Press to keep the inside the set is not operating normally. The picture will shut off. Lamp cover on the rear of your TV. Please contact a certified technician. • It takes about 15 seconds. You'll occasionally hear it working. Remote Control Sensor Aim the remote control towards this spot on the TV. A cooling fan inside lamp from...

User Manual (ENGLISH)
Page 12
...) ∏ VIDEO/AUDIO output jacks Sends video/audio signals from the TV to an external source, such as a DVI connection with separate analog audio inputs. For more information, see "Connections". Œ ANTENNA terminals Two independent cables or antennas can connect different components such as a VCR. Your New Wide TV Rear Panel Jacks Use the rear panel jacks to connect components such as VCRs, Set-Top Box and a DVD player etc., because there are available only in TV, Video and S-Video modes. (Refer...
...) ∏ VIDEO/AUDIO output jacks Sends video/audio signals from the TV to an external source, such as a DVI connection with separate analog audio inputs. For more information, see "Connections". Œ ANTENNA terminals Two independent cables or antennas can connect different components such as a VCR. Your New Wide TV Rear Panel Jacks Use the rear panel jacks to connect components such as VCRs, Set-Top Box and a DVD player etc., because there are available only in TV, Video and S-Video modes. (Refer...

User Manual (ENGLISH)
Page 13
... switch between your VCR, Cable box, DVD player and Set-top box. See pages 38~40 for about 2~3 seconds. Channel Number Press to directly tune to increase or decrease the volume. 8. VOL +, VOL Press to a particular channel. 3. RESET If your personal, customized picture settings.) (Refer to activate (or change) a particular item. 11. SET Used during the channel list function. (Refer to change the screen size. (Refer to select highlight up of the TV's remote control receiver. MENU Displays...
... switch between your VCR, Cable box, DVD player and Set-top box. See pages 38~40 for about 2~3 seconds. Channel Number Press to directly tune to increase or decrease the volume. 8. VOL +, VOL Press to a particular channel. 3. RESET If your personal, customized picture settings.) (Refer to activate (or change) a particular item. 11. SET Used during the channel list function. (Refer to change the screen size. (Refer to select highlight up of the TV's remote control receiver. MENU Displays...

User Manual (ENGLISH)
Page 21
... the AUDIO OUT jacks on the DVD player. DVD Player TV Rear Panel 2 Connect a video cable between the VIDEO IN (1 or 2) jack on the TV and the VIDEO OUT jack on the DVD player. NOTES • Component Video separates the video into Y(Luminance (Brightness)), PB (Blue) and PR (Red) for enhanced video quality. • Please be sure to your TV. Connecting a DVD Player The rear panel jacks on your TV make it easy to connect a DVD player to match the color coded input terminals and cable...
... the AUDIO OUT jacks on the DVD player. DVD Player TV Rear Panel 2 Connect a video cable between the VIDEO IN (1 or 2) jack on the TV and the VIDEO OUT jack on the DVD player. NOTES • Component Video separates the video into Y(Luminance (Brightness)), PB (Blue) and PR (Red) for enhanced video quality. • Please be sure to your TV. Connecting a DVD Player The rear panel jacks on your TV make it easy to connect a DVD player to match the color coded input terminals and cable...

User Manual (ENGLISH)
Page 23
... the audio system's volume control. 1 Audio System English - 23 A simplified illustration of the TV, and adjust the volume level with PC. NOTES • Make sure the DVI source's power is on the market today. TV Rear Panel NOTES • OPTICAL: converts the electric signal into an optical light signal, and transmits it through glass fibers. • When a Digital audio system is connected to select it in the TV menu's source list. • The HDMI/DVI IN...
... the audio system's volume control. 1 Audio System English - 23 A simplified illustration of the TV, and adjust the volume level with PC. NOTES • Make sure the DVI source's power is on the market today. TV Rear Panel NOTES • OPTICAL: converts the electric signal into an optical light signal, and transmits it through glass fibers. • When a Digital audio system is connected to select it in the TV menu's source list. • The HDMI/DVI IN...

User Manual (ENGLISH)
Page 24
English - 24 NOTE • If using the HDMI/DVI, PC, or Component input on the TV, the audio output signal is available only when the TV's Internal Mute is set to on. (Refer to page 79) TV Rear Panel 1 Amplifier RF AV S-Video Component PC HDMI Internal Speakers Internal Mute Off Internal Mute On Active Inactive Active Inactive Audio Out (Optical, L/R Out) Internal Mute Off Internal Mute On Active...
English - 24 NOTE • If using the HDMI/DVI, PC, or Component input on the TV, the audio output signal is available only when the TV's Internal Mute is set to on. (Refer to page 79) TV Rear Panel 1 Amplifier RF AV S-Video Component PC HDMI Internal Speakers Internal Mute Off Internal Mute On Active Inactive Active Inactive Audio Out (Optical, L/R Out) Internal Mute Off Internal Mute On Active...

User Manual (ENGLISH)
Page 26
... (CABLE), select "Cable" and if it is automatically displayed. • The message to enter the language. i Menu language, Channels and Time will be set ." The message "Menu language, Channels and Time will be set . You can also use the POWER button on the remote control. Start Plug & Play Select the language of the antenna is displayed. 3 Press the ... English - 26 Operation Turning the TV On and Off Press the POWER button on the remote control.
... (CABLE), select "Cable" and if it is automatically displayed. • The message to enter the language. i Menu language, Channels and Time will be set ." The message "Menu language, Channels and Time will be set . You can also use the POWER button on the remote control. Start Plug & Play Select the language of the antenna is displayed. 3 Press the ... English - 26 Operation Turning the TV On and Off Press the POWER button on the remote control.

User Manual (ENGLISH)
Page 29
... also view the on the remote control. Access the on-screen menu system by pressing the MENU button on -screen menu system and make adjustments. The main menu is displayed. or † button to select menu items and make some adjustments using the TV's side panel buttons. The TV displays the current channel, the status of your remote control to select an item you to control the settings of certain picture, sound settings and the current time. Air 3 Mono Picture Mode Sound Mode MTS Caption V-Chip 12...
... also view the on the remote control. Access the on-screen menu system by pressing the MENU button on -screen menu system and make adjustments. The main menu is displayed. or † button to select menu items and make some adjustments using the TV's side panel buttons. The TV displays the current channel, the status of your remote control to select an item you to control the settings of certain picture, sound settings and the current time. Air 3 Mono Picture Mode Sound Mode MTS Caption V-Chip 12...

User Manual (ENGLISH)
Page 43
or † button to adjust "Hour", then press the √ button to move to the next step. Setup Language : English √ Time √ Game Mode : Off √ V-Chip √ Caption √ Menu Transparency : Medium √ Blue Screen : Off √ † More Move Enter Return Time 1/ 1/2005/ 12 : 00 am Air ▼ Channel Volume Activation 3 10 No Move Adjust Return • You can set Activation to select "Setup", then press...
or † button to adjust "Hour", then press the √ button to move to the next step. Setup Language : English √ Time √ Game Mode : Off √ V-Chip √ Caption √ Menu Transparency : Medium √ Blue Screen : Off √ † More Move Enter Return Time 1/ 1/2005/ 12 : 00 am Air ▼ Channel Volume Activation 3 10 No Move Adjust Return • You can set Activation to select "Setup", then press...

User Manual (ENGLISH)
Page 66
... remote control for 3 seconds when there is shown on the screen will automatically set the My Color Control mode to select "My Color Control", then press the ENTER button. Press the œ or √ button to select one of the screen. NOTES • Changing the settings in the "Detail Control" menu (see next page) will display the My Color Control menu. Press the ... Move Enter Return Picture Mode : Dynamic √ Size : 16:9 √ Digital...
... remote control for 3 seconds when there is shown on the screen will automatically set the My Color Control mode to select "My Color Control", then press the ENTER button. Press the œ or √ button to select one of the screen. NOTES • Changing the settings in the "Detail Control" menu (see next page) will display the My Color Control menu. Press the ... Move Enter Return Picture Mode : Dynamic √ Size : 16:9 √ Digital...

User Manual (ENGLISH)
Page 86
...; Sound Mode in Game mode, the screen shakes slightly. or † button to exit. Adjust the sound using the equalizer. • The Reset Sound function is available for all external input sources. • For component and HDMI input, game mode supports a resolution of up to 720p. Press the EXIT button to select "Game Mode", then press the ENTER button. 3 Press the ... Setup Language : English √ Time √ Game Mode : Off √ V-Chip √ Caption √ Menu...
...; Sound Mode in Game mode, the screen shakes slightly. or † button to exit. Adjust the sound using the equalizer. • The Reset Sound function is available for all external input sources. • For component and HDMI input, game mode supports a resolution of up to 720p. Press the EXIT button to select "Game Mode", then press the ENTER button. 3 Press the ... Setup Language : English √ Time √ Game Mode : Off √ V-Chip √ Caption √ Menu...
User Manual (ENGLISH)
Page 87
... your new PIN to select "Setup", then press the ENTER button. Re-enter your current 4-digit PIN. (The default PIN for a new TV set is "0000".) "V-Chip" menu is defined by a password (i.e., a 4-digit secret code that is displayed. or † button to confirm. English - 87 Using the V-Chip Access to channels and programs is controlled by the user). Enter PIN * V-Chip 3 Press the ... Rating √ Change PIN √ Move Enter Return...
... your new PIN to select "Setup", then press the ENTER button. Re-enter your current 4-digit PIN. (The default PIN for a new TV set is "0000".) "V-Chip" menu is defined by a password (i.e., a 4-digit secret code that is displayed. or † button to confirm. English - 87 Using the V-Chip Access to channels and programs is controlled by the user). Enter PIN * V-Chip 3 Press the ... Rating √ Change PIN √ Move Enter Return...

User Manual (ENGLISH)
Page 108
... Display Changing the Picture Position After connecting the TV to your PC, adjust the position of picture by pressing the button. More Color Weakness √ PC √ Function Help : On √ 4 Press the ... Move Enter Return PC Image Lock √ Position √ Auto Adjustment Image Reset Resolution : 1024x768 @75Hz 5 Adjust the position of picture if it is not well-aligned. 1 Press the SOURCE button to select "PC". 2 Press the MENU button. Input Picture Sound Channel Setup Listings...
... Display Changing the Picture Position After connecting the TV to your PC, adjust the position of picture by pressing the button. More Color Weakness √ PC √ Function Help : On √ 4 Press the ... Move Enter Return PC Image Lock √ Position √ Auto Adjustment Image Reset Resolution : 1024x768 @75Hz 5 Adjust the position of picture if it is not well-aligned. 1 Press the SOURCE button to select "PC". 2 Press the MENU button. Input Picture Sound Channel Setup Listings...

User Manual (ENGLISH)
Page 116
... display panel used for 30 seconds, then try this list of an SD grade. The HD caption that the Mute feature is off . If the broadcasting station converts an analog signal into "TV" mode. Digital broadcasting screen problem. Adjust the antenna. Adjust the picture settings. Adjust the antenna. Please check the digital signal strength and input antenna. Make sure the TV is plugged in color. Check the antenna connections. Check all wire connections. Check that appears when switching channels or when pressing the Information button...
... display panel used for 30 seconds, then try this list of an SD grade. The HD caption that the Mute feature is off . If the broadcasting station converts an analog signal into "TV" mode. Digital broadcasting screen problem. Adjust the antenna. Adjust the picture settings. Adjust the antenna. Please check the digital signal strength and input antenna. Make sure the TV is plugged in color. Check the antenna connections. Check all wire connections. Check that appears when switching channels or when pressing the Information button...
User Manual (ENGLISH)
Page 117
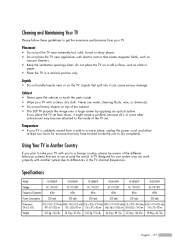
Specifications Model HL-S4265W HL-S5065W HL-S5665W HL-S6165W HL-S6765W HL-S5055W Voltage AC 110-120V AC 110-120V AC 110-120V AC 110-120V AC 110-120V AC 110-120V Frequency of the cabinet. • This DLP TV projects the image onto a large screen by applying an optical system. Cabinet • Never open the cabinet or touch the parts inside. • Wipe your TV with electric...
Specifications Model HL-S4265W HL-S5065W HL-S5665W HL-S6165W HL-S6765W HL-S5055W Voltage AC 110-120V AC 110-120V AC 110-120V AC 110-120V AC 110-120V AC 110-120V Frequency of the cabinet. • This DLP TV projects the image onto a large screen by applying an optical system. Cabinet • Never open the cabinet or touch the parts inside. • Wipe your TV with electric...


