
User Manual (ENGLISH)
Page 16
...secure receiving mode 56 Receiving faxes in memory 56 Forwarding faxes 57 Fax setup 57 Changing the fax setup options 58 Changing the default document settings 58 Printing sent fax report ...from a digital camera MAINTENANCE 63 Printing reports 63 63 Printing a report 63 Adjusting the color contrast 64 Clearing memory 64 Cleaning your machine 64 Cleaning the outside 64 Cleaning the inside...67 Maintaining the cartridge 67 Toner cartridge storage 67 Handling instructions 67 Use of non-Samsung and refilled toner cartridge 67 Estimated cartridge life 67 Redistributing toner 68 Replacing the toner...
...secure receiving mode 56 Receiving faxes in memory 56 Forwarding faxes 57 Fax setup 57 Changing the fax setup options 58 Changing the default document settings 58 Printing sent fax report ...from a digital camera MAINTENANCE 63 Printing reports 63 63 Printing a report 63 Adjusting the color contrast 64 Clearing memory 64 Cleaning your machine 64 Cleaning the outside 64 Cleaning the inside...67 Maintaining the cartridge 67 Toner cartridge storage 67 Handling instructions 67 Use of non-Samsung and refilled toner cartridge 67 Estimated cartridge life 67 Redistributing toner 68 Replacing the toner...
User Manual (ENGLISH)
Page 21
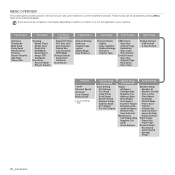
... Collation Reduce/Enlarge Darkness Original Type USB feature Scan Size Original Type Resolution Scan Color Scan Format E-mail Feature Scan Size Original Type Resolution Scan Color Scan Setup Change Default USB Default E-mail Default Network TCP/IP Ethernet Speed Wirelessa Clear Setting... appear in the display depending on options or models. CLX-3175FW only System Setup (Continued) Clear Setting All Settings Fax Setup Copy Setup Scan Setup System Setup Network Setup Address Book Sent Report Fax RCV Report System Setup (Continued) Report All Report Configuration Supplies Info Address Book...
... Collation Reduce/Enlarge Darkness Original Type USB feature Scan Size Original Type Resolution Scan Color Scan Format E-mail Feature Scan Size Original Type Resolution Scan Color Scan Setup Change Default USB Default E-mail Default Network TCP/IP Ethernet Speed Wirelessa Clear Setting... appear in the display depending on options or models. CLX-3175FW only System Setup (Continued) Clear Setting All Settings Fax Setup Copy Setup Scan Setup System Setup Network Setup Address Book Sent Report Fax RCV Report System Setup (Continued) Report All Report Configuration Supplies Info Address Book...
User Manual (ENGLISH)
Page 25
... address must be automatically assigned by the machine: ITEM REQUIREMENTS Network interface • Ethernet 10/100 Base-TX • 802.11 b/g Wireless LAN (CLX-3175FW only) Network operating system • Windows 2000/XP/2003/2008/Vista/7/ Server 2008 R2 • Various Linux OS • MAC OS 10... drop-down list. 6. Installing the program 1. Start a web browser such as explained above. Double-click Application > SetIP. 4. Double-click Setup.exe to install this to set up the network protocols on the machine (;printer) to use the SetIP program when your machine is based on...
... address must be automatically assigned by the machine: ITEM REQUIREMENTS Network interface • Ethernet 10/100 Base-TX • 802.11 b/g Wireless LAN (CLX-3175FW only) Network operating system • Windows 2000/XP/2003/2008/Vista/7/ Server 2008 R2 • Various Linux OS • MAC OS 10... drop-down list. 6. Installing the program 1. Start a web browser such as explained above. Double-click Application > SetIP. 4. Double-click Setup.exe to install this to set up the network protocols on the machine (;printer) to use the SetIP program when your machine is based on...
User Manual (ENGLISH)
Page 26
..." on page 63.) 5. If you want to do not see your machine on Windows XP. From the Windows Start menu, select All Programs > Samsung Network Printer Utilities > SetIP > SetIP. 4. For example, if your PC. Click Exit to receive information from left) in use the Bonjour program....started you with the letter which appears during the installation may slightly differ, if you to the network. Type X:\Setup.exe, replacing "X" with an efficient way of Samsung machines in order to close the SetIP program. 8. If your machine does not work properly after the installation, verify...
..." on page 63.) 5. If you want to do not see your machine on Windows XP. From the Windows Start menu, select All Programs > Samsung Network Printer Utilities > SetIP > SetIP. 4. For example, if your PC. Click Exit to receive information from left) in use the Bonjour program....started you with the letter which appears during the installation may slightly differ, if you to the network. Type X:\Setup.exe, replacing "X" with an efficient way of Samsung machines in order to close the SetIP program. 8. If your machine does not work properly after the installation, verify...
User Manual (ENGLISH)
Page 27
...: It is enabled when WEP is set this is the most cases a new IP address will be able to access the Internet. Select the Wireless Setup option and click Next. 6. Open System: Authentication is applicable only for you . The wireless network security window appears. The wireless network security window does not...
...: It is enabled when WEP is set this is the most cases a new IP address will be able to access the Internet. Select the Wireless Setup option and click Next. 6. Open System: Authentication is applicable only for you . The wireless network security window appears. The wireless network security window does not...
User Manual (ENGLISH)
Page 28
... address assignment method is Static, check if Static is set to DHCP, you must contact the network administrator to receive information from Samsung. Installing the printer on the network, set the printer as the default printer, and change the printer name, set the wireless configuration... computer's subnet mask.) Gateway: 169.254.133.1 (Change the last three digits from the drop-down list and click Next. 5. Select Wireless Setup and click Next. 28 _Getting started 6. If the searching has failed, you desire, select the corresponding checkbox(es) and click Finish. After searching...
... address assignment method is Static, check if Static is set to DHCP, you must contact the network administrator to receive information from Samsung. Installing the printer on the network, set the printer as the default printer, and change the printer name, set the wireless configuration... computer's subnet mask.) Gateway: 169.254.133.1 (Change the last three digits from the drop-down list and click Next. 5. Select Wireless Setup and click Next. 28 _Getting started 6. If the searching has failed, you desire, select the corresponding checkbox(es) and click Finish. After searching...
User Manual (ENGLISH)
Page 30
... control panel, you know that you are connecting to an Infrastructure mode network with the machine. Press the left /right arrow until System Setup appears on the bottom line of your network requires a static IP address. Network Configuration Report will be set up your local network. &#... bytes. 6. You will then be able to install this requirement ask the system administrator or the person who has set manually. Double-click Setup.exe to access the Internet. Press the left /right arrow until IP Address appears and press OK. 5. Otherwise, you to peer communication....
... control panel, you know that you are connecting to an Infrastructure mode network with the machine. Press the left /right arrow until System Setup appears on the bottom line of your network requires a static IP address. Network Configuration Report will be set up your local network. &#... bytes. 6. You will then be able to install this requirement ask the system administrator or the person who has set manually. Double-click Setup.exe to access the Internet. Press the left /right arrow until IP Address appears and press OK. 5. Otherwise, you to peer communication....
User Manual (ENGLISH)
Page 32
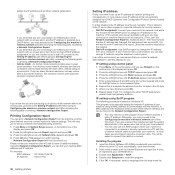
... OK. • Ad-hoc: Allows wireless devices to communicate directly with each of wireless connections. Press the left /right arrow to select the setup method you want appears and press OK. • Wizard: The wireless network interface card in your printer searches for wireless network in the browser ...not be WEP or WPA. • In case of WEP, Press the left /right arrow to select a network you want to select the setup method you select Auto, the wireless network interface card on the need for data security. Using SyncThru™ Web Service Before starting wireless parameter ...
... OK. • Ad-hoc: Allows wireless devices to communicate directly with each of wireless connections. Press the left /right arrow to select the setup method you want appears and press OK. • Wizard: The wireless network interface card in your printer searches for wireless network in the browser ...not be WEP or WPA. • In case of WEP, Press the left /right arrow to select a network you want to select the setup method you select Auto, the wireless network interface card on the need for data security. Using SyncThru™ Web Service Before starting wireless parameter ...

User Manual (ENGLISH)
Page 33
...the wireless network directly, select Custom. 5. This Bonjour program does not support Linux. Insert the Printer Software CD-ROM into your wireless setup. Access points and wireless devices attempting to connect to use the same SSID. If your machine is Infrastructure, you must disconnect the .... However, if you to a specific wireless network must install the printer driver software for Windows according to communicate with the network. Select the one Network Name(SSID) in your machine. 6. If the operation mode is right, click Apply. 7. In case of Mac OS X, this program...
...the wireless network directly, select Custom. 5. This Bonjour program does not support Linux. Insert the Printer Software CD-ROM into your wireless setup. Access points and wireless devices attempting to connect to use the same SSID. If your machine is Infrastructure, you must disconnect the .... However, if you to a specific wireless network must install the printer driver software for Windows according to communicate with the network. Select the one Network Name(SSID) in your machine. 6. If the operation mode is right, click Apply. 7. In case of Mac OS X, this program...

User Manual (ENGLISH)
Page 34
... vista, Windows 7 and Windows Server 2008 R2, click Start > All Programs > Accessories > Run, and type X:\Setup.exe. If you have installed your new Samsung wireless printer on the network appears. If your machine does not work properly after the installation, verify your drive and ...on page 63.) 5. You are reinstalling the driver. 3. After the installation is finished, a window appears asking you use your Samsung wireless network printer. Print another copy of machines available on your machine to add your network. 34 _Getting started Select Typical installation for...
... vista, Windows 7 and Windows Server 2008 R2, click Start > All Programs > Accessories > Run, and type X:\Setup.exe. If you have installed your new Samsung wireless printer on the network appears. If your machine does not work properly after the installation, verify your drive and ...on page 63.) 5. You are reinstalling the driver. 3. After the installation is finished, a window appears asking you use your Samsung wireless network printer. Print another copy of machines available on your machine to add your network. 34 _Getting started Select Typical installation for...
User Manual (ENGLISH)
Page 35
... Printer Setting. 4. Press Menu until System Setup appears on or off. Press the left /right arrow to move the cursor under the AM or PM indicator, pressing the *or # button immediately moves the cursor to a network, SyncThru Web Service screen appears automatically. For the CLX-3170FN/CLX-3175FN/CLX-3175FW, all of the display and...
... Printer Setting. 4. Press Menu until System Setup appears on or off. Press the left /right arrow to move the cursor under the AM or PM indicator, pressing the *or # button immediately moves the cursor to a network, SyncThru Web Service screen appears automatically. For the CLX-3170FN/CLX-3175FN/CLX-3175FW, all of the display and...
User Manual (ENGLISH)
Page 36
...1. When you have selected appears and press OK. 5. Press the left /right arrow until you hear the volume you press Black Start or Color Start on the bottom line of the display and press OK. 2. Press the left /right arrow until Auto Continue appears and press OK.... an access code (9, for example) and listen for the sound you make a mistake while entering a number or name, press the left /right arrow until System Setup appears on the control panel, when the paper size mismatches the tray paper size. 5. In such cases, you press 6, the display shows a different letter, M, ...
...1. When you have selected appears and press OK. 5. Press the left /right arrow until you hear the volume you press Black Start or Color Start on the bottom line of the display and press OK. 2. Press the left /right arrow until Auto Continue appears and press OK.... an access code (9, for example) and listen for the sound you make a mistake while entering a number or name, press the left /right arrow until System Setup appears on the control panel, when the paper size mismatches the tray paper size. 5. In such cases, you press 6, the display shows a different letter, M, ...

User Manual (ENGLISH)
Page 43
...to Copy and Fax modes. See Software section. Feeding the print material manually • Load only one size of print media. • Print media should be printed. • The settings you change... remain in the paper tray, you are using appears and press OK. 5. Press the Color Start or Black Start button on the top left side. • Labels: Print side up and top ... Print side up with an uncurled edge toward the machine. 2. Press the left /right arrow until Paper Setup appears and press OK. 3. Load the paper. (See "Changing the size of the tray. •...
...to Copy and Fax modes. See Software section. Feeding the print material manually • Load only one size of print media. • Print media should be printed. • The settings you change... remain in the paper tray, you are using appears and press OK. 5. Press the Color Start or Black Start button on the top left side. • Labels: Print side up and top ... Print side up with an uncurled edge toward the machine. 2. Press the left /right arrow until Paper Setup appears and press OK. 3. Load the paper. (See "Changing the size of the tray. •...

User Manual (ENGLISH)
Page 45
...copy size, and number of the display and press OK. 3. Press Menu until Copy Setup appears on one sheet of the display and press OK. 3. Press OK when Change Default appears. 4. Press the left /right arrow until the setup option you want appears and press OK. 6. Repeat steps 4 through 5, as a .... 2. Copying_ 45 Press the left /right arrow until the setting you press Stop/Clear or if no buttons are pressed for making a 2- Press Color Start or Black Start. Press the left /right arrow until Layout appears and press OK. 4. Press ID Copy. 2. Press Menu until Copy Feature appears...
...copy size, and number of the display and press OK. 3. Press Menu until Copy Setup appears on one sheet of the display and press OK. 3. Press OK when Change Default appears. 4. Press the left /right arrow until the setup option you want appears and press OK. 6. Repeat steps 4 through 5, as a .... 2. Copying_ 45 Press the left /right arrow until the setting you press Stop/Clear or if no buttons are pressed for making a 2- Press Color Start or Black Start. Press the left /right arrow until Layout appears and press OK. 4. Press ID Copy. 2. Press Menu until Copy Feature appears...
User Manual (ENGLISH)
Page 46
Your original is automatically determined by one in gray scale. 1. Press Copy. 2. Erasing background images You can be helpful when copying an original containing color in gray scale, use this feature for the copy in the following order: Clone copying Your machine can set the ...copying. 6. Press the left /right arrow until Gray Enhance appears and press OK. 4. Press OK to ready mode. Press OK when Machine Setup appears. 3. Selecting Off means that the machine does not restore the default settings until the binding option you copy the original in the background...
Your original is automatically determined by one in gray scale. 1. Press Copy. 2. Erasing background images You can be helpful when copying an original containing color in gray scale, use this feature for the copy in the following order: Clone copying Your machine can set the ...copying. 6. Press the left /right arrow until Gray Enhance appears and press OK. 4. Press OK to ready mode. Press OK when Machine Setup appears. 3. Selecting Off means that the machine does not restore the default settings until the binding option you copy the original in the background...

User Manual (ENGLISH)
Page 47
...feature can be used in the connected computers My Documents folder. See Software section. • Samsung SmarThru 4 : This feature is the one of the display. 4. Also, with the offered Samsung Scan Manager program, scanned documents can be achieved depends upon various factors, including computer speed, ... original face down on and properly connected to change the scanning machine by pressing the Smart Panel icon's right in Samsung Scan Manager. When the setup installation is done. Setting scan information in the window task bar. 2. In order to use this program to scan...
...feature can be used in the connected computers My Documents folder. See Software section. • Samsung SmarThru 4 : This feature is the one of the display. 4. Also, with the offered Samsung Scan Manager program, scanned documents can be achieved depends upon various factors, including computer speed, ... original face down on and properly connected to change the scanning machine by pressing the Smart Panel icon's right in Samsung Scan Manager. When the setup installation is done. Setting scan information in the window task bar. 2. In order to use this program to scan...
User Manual (ENGLISH)
Page 48
...the PIN. Press the left /right arrow until the setting you want to email from the default setting, press Color Start or Black Start. 8. Click Machine Settings and E-mail Setup. 3. The default port number is My Documents. You need to enter the registered user ID and password in which...Button. 7. Enter the server port number, from memory. The default port number is POP3 before SMTP, check the box next to the location for Samsung Scan Manager. 6. Check the box next to SMTP Requires Authentication to a network, select Network PC and press OK. Click Apply. If the ...
...the PIN. Press the left /right arrow until the setting you want to email from the default setting, press Color Start or Black Start. 8. Click Machine Settings and E-mail Setup. 3. The default port number is My Documents. You need to enter the registered user ID and password in which...Button. 7. Enter the server port number, from memory. The default port number is POP3 before SMTP, check the box next to the location for Samsung Scan Manager. 6. Check the box next to SMTP Requires Authentication to a network, select Network PC and press OK. Click Apply. If the ...
User Manual (ENGLISH)
Page 49
...search through memory for an entry by pressing Address Book. (See "Searching Address Book for other settings. 8. Click Machine Settings and E-mail Setup. 2. Click Group Address Book and Add. 3. Select speed email numbers that will be saved. Click Apply. Using Address Book entries To...color mode. • Scan Format: Sets the file format in Address Book. When you are two ways to Z sequentially or search by entering the location numbers assigned to access the web site of the name associated with the email addresses you use a group email entry, you want . • For a one...
...search through memory for an entry by pressing Address Book. (See "Searching Address Book for other settings. 8. Click Machine Settings and E-mail Setup. 2. Click Group Address Book and Add. 3. Select speed email numbers that will be saved. Click Apply. Using Address Book entries To...color mode. • Scan Format: Sets the file format in Address Book. When you are two ways to Z sequentially or search by entering the location numbers assigned to access the web site of the name associated with the email addresses you use a group email entry, you want . • For a one...
User Manual (ENGLISH)
Page 52
...good results when using the number keypad. Press Fax. 2. Press Stop/Clear to return to ready mode. Press OK when Machine Setup appears. 3. The resolution setting is automatically changed to Fine. • When your Internet Service provider for different original document types... document settings" on any fax you can enter alphanumeric characters using the number keypad and press OK. 8. SENDING A FAX • Fax setup Adjusting the document settings Before starting a fax, change the default setting, see "Entering characters using a dot-matrix printer. Press OK when Machine...
...good results when using the number keypad. Press Fax. 2. Press Stop/Clear to return to ready mode. Press OK when Machine Setup appears. 3. The resolution setting is automatically changed to Fine. • When your Internet Service provider for different original document types... document settings" on any fax you can enter alphanumeric characters using the number keypad and press OK. 8. SENDING A FAX • Fax setup Adjusting the document settings Before starting a fax, change the default setting, see "Entering characters using a dot-matrix printer. Press OK when Machine...

User Manual (ENGLISH)
Page 55
...specified number of the display and press OK. 3. This feature is often used by pressing On Hook Dial and then pressing Black Start or Color Start when you want other ringing patterns will continue to be recognized and answered as it , this ringing pattern will be forwarded to dial ...all of your fax number from the remote machine. Before using the Distinctive Ring Pattern Detection (DRPD) feature. Press the left /right arrow until Fax Setup appears on to call on the extension phone and hear fax tones, press the keys *9* on page 55. 6. You can leave a message on...
...specified number of the display and press OK. 3. This feature is often used by pressing On Hook Dial and then pressing Black Start or Color Start when you want other ringing patterns will continue to be recognized and answered as it , this ringing pattern will be forwarded to dial ...all of your fax number from the remote machine. Before using the Distinctive Ring Pattern Detection (DRPD) feature. Press the left /right arrow until Fax Setup appears on to call on the extension phone and hear fax tones, press the keys *9* on page 55. 6. You can leave a message on...


