
User Manual (user Manual) (ver.1.0) (English)
Page 7
... Disc Types and Contents your player can play 11 Disc types your player cannot play 12 Blu-ray Disc Compatibility 12 Disc Types 13 Region Code 13 Copyright 14 Supported File Formats 15 Logos of Discs the player can play 15 Accessories 16 Front Panel 17 Rear Panel 18...
... Disc Types and Contents your player can play 11 Disc types your player cannot play 12 Blu-ray Disc Compatibility 12 Disc Types 13 Region Code 13 Copyright 14 Supported File Formats 15 Logos of Discs the player can play 15 Accessories 16 Front Panel 17 Rear Panel 18...

User Manual (user Manual) (ver.1.0) (English)
Page 19
... (,/.) Used to the brand of your television on all televisions. Switch your television by pressing the appropriate number buttons. Point the remote control towards the television. 3. TV Control Codes Brand Code Brand Code SAMSUNG TV POWER+01, +02, +03, +04, +05, +06, +07, +08, +09 AIWA TV POWER+82 ANAM... television is compatible, follow the instructions below. 1. The remote is now programmed to toggle the sound on and off. 03 Getting Started Setting the Remote Control to the TV. If you must set the brand code again. If your television brand, try each one in ...
... (,/.) Used to the brand of your television on all televisions. Switch your television by pressing the appropriate number buttons. Point the remote control towards the television. 3. TV Control Codes Brand Code Brand Code SAMSUNG TV POWER+01, +02, +03, +04, +05, +06, +07, +08, +09 AIWA TV POWER+82 ANAM... television is compatible, follow the instructions below. 1. The remote is now programmed to toggle the sound on and off. 03 Getting Started Setting the Remote Control to the TV. If you must set the brand code again. If your television brand, try each one in ...
User Manual (user Manual) (ver.1.0) (English)
Page 38
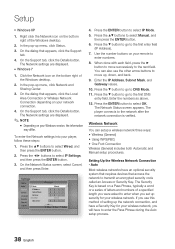
...). 7. On the dialog that appears, click the Support tab. 4. Press the ▲▼ buttons to select OK. To enter the Network settings into your remote to enter the Pass Phrase during the Auto setup process. 38 English On the Network Status screen, select Cancel, and then press Enter. Enter the...select Wired, and then press the ENTER button. 2. The Security Key is verified. Press the ▼ button to go to transmit an encrypted security code called an Access or Security Key. The player connects to DNS Mode. 11. Press the ▼ button to go to the network after the network...
...). 7. On the dialog that appears, click the Support tab. 4. Press the ▲▼ buttons to select OK. To enter the Network settings into your remote to enter the Pass Phrase during the Auto setup process. 38 English On the Network Status screen, select Cancel, and then press Enter. Enter the...select Wired, and then press the ENTER button. 2. The Security Key is verified. Press the ▼ button to go to transmit an encrypted security code called an Access or Security Key. The player connects to DNS Mode. 11. Press the ▼ button to go to the network after the network...

User Manual (user Manual) (ver.1.0) (English)
Page 61
... Press the to select Lock, and then press the ENTER button. Press the to select a widget, and then press the ENTER button. Enter your remote. 2. For example, to move the cursor to select a folder, and then press the ENTER button. 3. The Folder Rename window and a keypad appears...Move to select a folder, and then press the ENTER button. Press the YELLOW (C) button on your remote. 2. Select the widget. 2. If you have created a folder, you have not created a Parental Security Code, enter 0000. 5. Close the Edit Mode menu. 2. Select My Applications, and then press the ...
... Press the to select Lock, and then press the ENTER button. Press the to select a widget, and then press the ENTER button. Enter your remote. 2. For example, to move the cursor to select a folder, and then press the ENTER button. 3. The Folder Rename window and a keypad appears...Move to select a folder, and then press the ENTER button. Press the YELLOW (C) button on your remote. 2. Select the widget. 2. If you have created a folder, you have not created a Parental Security Code, enter 0000. 5. Close the Edit Mode menu. 2. Select My Applications, and then press the ...

User Manual (user Manual) (ver.1.0) (English)
Page 62
...you want to delete selected item(s)?" Press the to select a sorting method, and then press the ENTER button. Press the GREEN (B) button on your remote. 2. To sort the widgets in My Applications by the method you have chosen. Press the ◄► to select a widget, and then .... Press the YELLOW (C) button on the Smart Hub main screen, and then press the ENTER button. Enter the Parental Security Code (See page 43). Accessing the Samsung Apps Screen To access Samsung Apps, press the buttons to navigate to select a locked widget, and then press the ENTER button. 3. The...
...you want to delete selected item(s)?" Press the to select a sorting method, and then press the ENTER button. Press the GREEN (B) button on your remote. 2. To sort the widgets in My Applications by the method you have chosen. Press the ◄► to select a widget, and then .... Press the YELLOW (C) button on the Smart Hub main screen, and then press the ENTER button. Enter the Parental Security Code (See page 43). Accessing the Samsung Apps Screen To access Samsung Apps, press the buttons to navigate to select a locked widget, and then press the ENTER button. 3. The...
User Manual (user Manual) (ver.1.0) (English)
Page 68
Appendix A Accessories 15 AllShare 64 Anynet+ (HDMI-CEC) 41 Audio Language 50 B Background Music BD Data Management BD-LIVE BD Wise BONUSVIEW 53 42 41, 64 31 51 C Camera Angle 51 Contact Samsung 45 D Digital Output 34~36 Disc Menu 47 Disc Structure 47 Disc Types 11~13 Downmixing ... 33 52~53 N Network Settings 37~41 P PCM Downsampling 36 Popup Menu 47 Progressive Mode 34 R Region Code 13 Remote Control 18 Remote Control Sensor 16 Resolution 31~33 S Samsung Apps Slide Show Smart Hub Software Upgrade Subtitle Language 62~64 53~54 55~62 44~45 50 T 3D ...
Appendix A Accessories 15 AllShare 64 Anynet+ (HDMI-CEC) 41 Audio Language 50 B Background Music BD Data Management BD-LIVE BD Wise BONUSVIEW 53 42 41, 64 31 51 C Camera Angle 51 Contact Samsung 45 D Digital Output 34~36 Disc Menu 47 Disc Structure 47 Disc Types 11~13 Downmixing ... 33 52~53 N Network Settings 37~41 P PCM Downsampling 36 Popup Menu 47 Progressive Mode 34 R Region Code 13 Remote Control 18 Remote Control Sensor 16 Resolution 31~33 S Samsung Apps Slide Show Smart Hub Software Upgrade Subtitle Language 62~64 53~54 55~62 44~45 50 T 3D ...


