
User Manual
Page 1
Some of the contents in Korea Code No.:GH68-26018A English (EU). 11/2009. World Wide Web http://www.samsungmobile.com Printed in this manual may differ from your phone depending on the software of the phone or your service provider. Rev. 1.1
Some of the contents in Korea Code No.:GH68-26018A English (EU). 11/2009. World Wide Web http://www.samsungmobile.com Printed in this manual may differ from your phone depending on the software of the phone or your service provider. Rev. 1.1

User Manual
Page 6
contents using basic functions 23 Turn your phone on and off 23 Use the touch screen 24 Access menus 25 Switch applications 26 Use widgets 26 Access help information 27 Use shortcuts in Quick access mode ........ 28 Customise your phone 28 Use basic call functions 32 Send and view messages 33 Add and find contacts 36 Use basic camera functions 37 Listen to music 39 Browse the web 41 Use the Google services 42 using advanced functions 44 Use advanced call functions 44 Use advanced...
contents using basic functions 23 Turn your phone on and off 23 Use the touch screen 24 Access menus 25 Switch applications 26 Use widgets 26 Access help information 27 Use shortcuts in Quick access mode ........ 28 Customise your phone 28 Use basic call functions 32 Send and view messages 33 Add and find contacts 36 Use basic camera functions 37 Listen to music 39 Browse the web 41 Use the Google services 42 using advanced functions 44 Use advanced call functions 44 Use advanced...
User Manual
Page 11
.... Follow all airline regulations and turn off the phone or disable the wireless functions when in an aircraft Your phone can interfere with any regulations that disables the wireless functions when directed by airline personnel. Use hands-free accessories to increase your phone or switch to a mode that restrict the use of a mobile phone in hospitals or health care facilities. Turn off your safety when possible...
.... Follow all airline regulations and turn off the phone or disable the wireless functions when in an aircraft Your phone can interfere with any regulations that disables the wireless functions when directed by airline personnel. Use hands-free accessories to increase your phone or switch to a mode that restrict the use of a mobile phone in hospitals or health care facilities. Turn off your safety when possible...

User Manual
Page 21
... active applications (press and hold) Turn the phone on and off (press and hold ) In Idle mode, turn on the camera; End a call ; In Camera mode, take a photo or record a video 14 In Idle mode, retrieve recently dialled, missed, or received numbers In Idle mode, access Menu mode; In Menu mode, return to Menu mode; Return to Idle mode Volume Adjust the phone's volume Key Hold Camera Function Lock the touch screen and keys; Unlock the touch screen and keys (press and hold ); introducing your mobile phone Keys Key Dial Menu Power/ Menu exit Function Make or answer a call...
... active applications (press and hold) Turn the phone on and off (press and hold ) In Idle mode, turn on the camera; End a call ; In Camera mode, take a photo or record a video 14 In Idle mode, retrieve recently dialled, missed, or received numbers In Idle mode, access Menu mode; In Menu mode, return to Menu mode; Return to Idle mode Volume Adjust the phone's volume Key Hold Camera Function Lock the touch screen and keys; Unlock the touch screen and keys (press and hold ); introducing your mobile phone Keys Key Dial Menu Power/ Menu exit Function Make or answer a call...
User Manual
Page 27
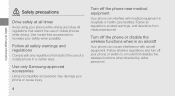
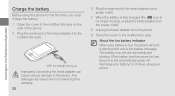
The battery icon will automatically power off. Open the cover to continue using your mobile phone Charge the battery Before using the phone for the first time, you must charge the battery. 1. Plug the small end of the phone. 2. When the battery is fully charged (the icon is low, the phone will emit a warning tone and a low battery message. Close the cover to the phone. If the battery level becomes too low, the phone will also...
The battery icon will automatically power off. Open the cover to continue using your mobile phone Charge the battery Before using the phone for the first time, you must charge the battery. 1. Plug the small end of the phone. 2. When the battery is fully charged (the icon is low, the phone will emit a warning tone and a low battery message. Close the cover to the phone. If the battery level becomes too low, the phone will also...

User Manual
Page 32
... to switch to match your phone's menus, 1. Customise the screens as desired. • To rename the menu screen, enter a title in the Menu mode screen or set titles to each screen to Edit mode. 3. Select Reset to the location you want. 4. Select a menu or option. 4. Press [ ] to return to move up one level; Select to Idle mode. In Idle mode, select Menu or press the Menu key to access Menu mode. 2. Select Save. using basic functions Access...
... to switch to match your phone's menus, 1. Customise the screens as desired. • To rename the menu screen, enter a title in the Menu mode screen or set titles to each screen to Edit mode. 3. Select Reset to the location you want. 4. Select a menu or option. 4. Press [ ] to return to move up one level; Select to Idle mode. In Idle mode, select Menu or press the Menu key to access Menu mode. 2. Select Save. using basic functions Access...

User Manual
Page 36
... ringtone 1. Adjust the volume of the vibration. In Menu mode, select Settings → Phone settings → Calibration. 2. Select a ringtone from the silent profile In Idle mode, select Keypad and touch and hold to change the ringtone. 3. Change your phone. If you are using the silent or offline profile, you touch the phone screen. 1. Switch to or from the list and select Save. 29 using . Select Voice call ringtone or Video call ringtone. 4. Adjust the vibration intensity on the screen. 3. In Menu mode, select Settings → Phone...
... ringtone 1. Adjust the volume of the vibration. In Menu mode, select Settings → Phone settings → Calibration. 2. Select a ringtone from the silent profile In Idle mode, select Keypad and touch and hold to change the ringtone. 3. Change your phone. If you are using the silent or offline profile, you touch the phone screen. 1. Switch to or from the list and select Save. 29 using . Select Voice call ringtone or Video call ringtone. 4. Adjust the vibration intensity on the screen. 3. In Menu mode, select Settings → Phone...
User Manual
Page 38
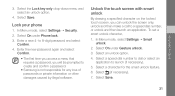
... illegal software. Select (if necessary). 7. Enter the new password again and select Confirm. • The first time you access a menu that requires a password, you can unlock the screen only, unlock and then make a call to create and confirm a password. • Samsung is not responsible for the smart unlock feature. 6. Select On under Gesture unlock. 3. Select an unlock option. 4. In Menu mode, select Settings → Security. 2. Select On under Phone lock. 3. Enter a new 4- using basic functions 3. To set a smart unlock...
... illegal software. Select (if necessary). 7. Enter the new password again and select Confirm. • The first time you access a menu that requires a password, you can unlock the screen only, unlock and then make a call to create and confirm a password. • Samsung is not responsible for the smart unlock feature. 6. Select On under Gesture unlock. 3. Select an unlock option. 4. In Menu mode, select Settings → Security. 2. Select On under Phone lock. 3. Enter a new 4- using basic functions 3. To set a smart unlock...

User Manual
Page 40
... hold. • To answer a call, press the headset button. • To end a call, press the headset button. X p. 34 For sending as a text message, skip to add recipient and enter an email address. 33 In Menu mode, select Messages → Create message → Email. 2. Send and view messages Learn to add text and enter your message text. In Menu mode, select Messages → Create message → Message. 2. Select Add media and add an item. 5. Select Tap to send and view text (SMS), multimedia (MMS), and email messages. For attaching multimedia, continue...
... hold. • To answer a call, press the headset button. • To end a call, press the headset button. X p. 34 For sending as a text message, skip to add recipient and enter an email address. 33 In Menu mode, select Messages → Create message → Email. 2. Send and view messages Learn to add text and enter your message text. In Menu mode, select Messages → Create message → Message. 2. Select Add media and add an item. 5. Select Tap to send and view text (SMS), multimedia (MMS), and email messages. For attaching multimedia, continue...

User Manual
Page 42
... key to Symbol mode; press twice quickly to set Number and Symbol lock. • Press [Sym] to switch to enter a number. Enter text using the writing box 1 1. When entering text on the QWERTY keyboard, you would use numbers or symbols, select Abc. Enter text using the writing box 2 1. press twice to open the emoticon list. • Press [ ] to insert a space. • Press [ ] to delete characters. • Press [ ] to enter a symbol. Symbol Select an appropriate virtual key to start a new line. 35 using basic functions Enter text...
... key to Symbol mode; press twice quickly to set Number and Symbol lock. • Press [Sym] to switch to enter a number. Enter text using the writing box 1 1. When entering text on the QWERTY keyboard, you would use numbers or symbols, select Abc. Enter text using the writing box 2 1. press twice to open the emoticon list. • Press [ ] to insert a space. • Press [ ] to delete characters. • Press [ ] to enter a symbol. Symbol Select an appropriate virtual key to start a new line. 35 using basic functions Enter text...

User Manual
Page 43
... → New. 3. In Menu mode, select Messages → Email inbox. 2. Select Phone or SIM (if necessary). 4. Select an account. 3. In Menu mode, select Messages → Inbox. 2. Select Download. 4. Select an email or a header. 5. If you selected a header, select Retrieve to view the body of using basic functions View text or multimedia messages 1. The memory location to → a memory location. To change the memory location, in Menu mode, select Settings → Application settings → Phonebook → Memory in use → Save new contacts to save new contacts may be...
... → New. 3. In Menu mode, select Messages → Email inbox. 2. Select Phone or SIM (if necessary). 4. Select an account. 3. In Menu mode, select Messages → Inbox. 2. Select Download. 4. Select an email or a header. 5. If you selected a header, select Retrieve to view the body of using basic functions View text or multimedia messages 1. The memory location to → a memory location. To change the memory location, in Menu mode, select Settings → Application settings → Phonebook → Memory in use → Save new contacts to save new contacts may be...

User Manual
Page 50
In Menu mode, select Google → Maps. 2. In Menu mode, select Google → Maps. 2. In Menu mode, select Google → Mail. 2. Send or receive emails. To search for a specific location, 1. Enter the addresses of the business. Connect to a specific destination, 1. Scroll through the map. 3. To enhance the map functionality, download GPS data files. Zoom in . 3. To get directions to Maps To search the map, 1. Select Menu → Get Directions. 3. In Menu mode, select Google...
In Menu mode, select Google → Maps. 2. In Menu mode, select Google → Maps. 2. In Menu mode, select Google → Mail. 2. Send or receive emails. To search for a specific location, 1. Enter the addresses of the business. Connect to a specific destination, 1. Scroll through the map. 3. To enhance the map functionality, download GPS data files. Zoom in . 3. To get directions to Maps To search the map, 1. Select Menu → Get Directions. 3. In Menu mode, select Google...

User Manual
Page 53
... calls → Auto reject. 2. Select Save. 7. using stored contacts. Repeat steps 2 and 3 to add more parties (if necessary). 5. Repeat steps 3-6 to add more numbers. 8. X p. 37 1. Select Add number. 4. To end the multiparty call , press [ ]. To activate the auto rejection and set up the reject list, 1. Enter the complete number you want to the numbers. 9. Select the check boxes next to dial → (voice call) or (video call). 46 Reject a call To reject an incoming call , press [ ]. In Menu mode...
... calls → Auto reject. 2. Select Save. 7. using stored contacts. Repeat steps 2 and 3 to add more parties (if necessary). 5. Repeat steps 3-6 to add more numbers. 8. X p. 37 1. Select Add number. 4. To end the multiparty call , press [ ]. To activate the auto rejection and set up the reject list, 1. Enter the complete number you want to the numbers. 9. Select the check boxes next to dial → (voice call) or (video call). 46 Reject a call To reject an incoming call , press [ ]. In Menu mode...

User Manual
Page 54
... Favourites. 3. Set favourite numbers 1. Enter your namecard by touching and holding the assigned number in the dialling screen. • The favourite numbers will be assigned to an entire group. You can assign group names, ringtones, caller ID photos, and vibration type to each group or send messages and emails to the buddy list ( ) on the widget toolbar. Select the Contacts drop-down menu and select Groups. 47 using advanced...
... Favourites. 3. Set favourite numbers 1. Enter your namecard by touching and holding the assigned number in the dialling screen. • The favourite numbers will be assigned to an entire group. You can assign group names, ringtones, caller ID photos, and vibration type to each group or send messages and emails to the buddy list ( ) on the widget toolbar. Select the Contacts drop-down menu and select Groups. 47 using advanced...

User Manual
Page 61
... a new photo. 6. Select Save. 7. Press [ ] to return to a PC with Windows Media Player 1. Select and drag the music files you want to include and select Add. Select Create. 3. In Menu mode, select Settings → Phone settings → PC connections → Media player → Save. 3. Create a playlist 1. In Menu mode, select Music player → Playlists. 2. Select the files you want to the sync list. 8. Select the text input field. 4. Enter a title for your phone to Idle mode. 4. Select Add → Tracks. 9. using...
... a new photo. 6. Select Save. 7. Press [ ] to return to a PC with Windows Media Player 1. Select and drag the music files you want to include and select Add. Select Create. 3. In Menu mode, select Settings → Phone settings → PC connections → Media player → Save. 3. Create a playlist 1. In Menu mode, select Music player → Playlists. 2. Select the files you want to the sync list. 8. Select the text input field. 4. Enter a title for your phone to Idle mode. 4. Select Add → Tracks. 9. using...

User Manual
Page 69
... Save to save the recipients. 9. Select the recipient field to open your contact list. 6. You can simulate an incoming call feature 1. In Menu mode, select Settings → Security → Mobile tracker. 2. using tools and applications Activate the mobile tracker When someone inserts a new SIM or USIM card in your phone, the mobile tracker feature will automatically send the contact number to two recipients to help you locate and recover your password and select Confirm. 3. To activate the mobile tracker, 1. Enter...
... Save to save the recipients. 9. Select the recipient field to open your contact list. 6. You can simulate an incoming call feature 1. In Menu mode, select Settings → Security → Mobile tracker. 2. using tools and applications Activate the mobile tracker When someone inserts a new SIM or USIM card in your phone, the mobile tracker feature will automatically send the contact number to two recipients to help you locate and recover your password and select Confirm. 3. To activate the mobile tracker, 1. Enter...

User Manual
Page 77
... only use the Microsoft® Exchange ActiveSync® feature in this phone with a Microsoft Exchange server You may incur additional charges for accessing the server. Synchronise data with a service that is licensed by Microsoft Corporation to start synchronisation, 1. Select and specify an email connection profile (if necessary). 5. To set a Microsoft Exchange server and synchronisation profile, 1. Select an email connection profile. Specify Microsoft Exchange server settings. 3. In Menu mode, select...
... only use the Microsoft® Exchange ActiveSync® feature in this phone with a Microsoft Exchange server You may incur additional charges for accessing the server. Synchronise data with a service that is licensed by Microsoft Corporation to start synchronisation, 1. Select and specify an email connection profile (if necessary). 5. To set a Microsoft Exchange server and synchronisation profile, 1. Select an email connection profile. Specify Microsoft Exchange server settings. 3. In Menu mode, select...

User Manual
Page 79
...; Phone settings → GPS settings → GPS+ settings → Download data. Create and view world clocks Learn to view the time in outdoors for downloading GPS data files. To avoid incurring additional charges, deactivate the auto download feature by downloading GPS data files. Create a world clock 1. In Menu mode, select World clock. 2. You may incur additional charges for using the global GPS satellite system. Select Add. 3. Select a time zone. 72 By default, your phone is set world clocks to appear on your display. You can improve the speed...
...; Phone settings → GPS settings → GPS+ settings → Download data. Create and view world clocks Learn to view the time in outdoors for downloading GPS data files. To avoid incurring additional charges, deactivate the auto download feature by downloading GPS data files. Create a world clock 1. In Menu mode, select World clock. 2. You may incur additional charges for using the global GPS satellite system. Select Add. 3. Select a time zone. 72 By default, your phone is set world clocks to appear on your display. You can improve the speed...

User Manual
Page 84
..., contact your PIN incorrectly several times. When using the phone for the first time or when the PIN requirement is enabled, you must enter the password you set for the phone. Code PUK PIN2 Try this to solve the problem: When the phone lock feature is enabled, you must enter the PIN2 supplied with the SIM or USIM card. When you turn on your mobile phone, try these troubleshooting procedures before contacting a service professional. When you access a menu...
..., contact your PIN incorrectly several times. When using the phone for the first time or when the PIN requirement is enabled, you must enter the password you set for the phone. Code PUK PIN2 Try this to solve the problem: When the phone lock feature is enabled, you must enter the PIN2 supplied with the SIM or USIM card. When you turn on your mobile phone, try these troubleshooting procedures before contacting a service professional. When you access a menu...

User Manual
Page 88
... calls see calls, making fake calls FM radio listening to, 39 recording songs, 55 storing stations, 56 Google services 42 headset 33 images adjusting, 64 applying effects, 64 cropping, 66 inserting visual features, 65 printing, 66 transforming, 65 Instant Messenger see messages, sending instant internet see web browser Java accessing applications, 69 downloading, 69 launching games, 69 key tones 29 lock see phone lock memo see text or voice memos memory card 21 messages sending email, 33 sending...
... calls see calls, making fake calls FM radio listening to, 39 recording songs, 55 storing stations, 56 Google services 42 headset 33 images adjusting, 64 applying effects, 64 cropping, 66 inserting visual features, 65 printing, 66 transforming, 65 Instant Messenger see messages, sending instant internet see web browser Java accessing applications, 69 downloading, 69 launching games, 69 key tones 29 lock see phone lock memo see text or voice memos memory card 21 messages sending email, 33 sending...


