User Manual (ENGLISH)
Page 4
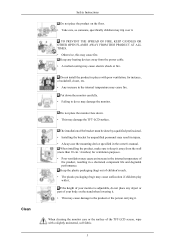
... in a shortened component life and degraded performance. Put down . • This may damage the TFT-LCD surface. When installing the product, make sure to keep it . The installation of your monitor is adjustable, do so may damage the monitor. Do not install the product in places with a slightly moistened, soft fabric. 3 When cleaning...electric shock or fire. If the height of the product, resulting in the owner's manual. Clean Safety Instructions Do not place the product on the stand when lowering it. • This may cause damage to the product or the person carrying it .
... in a shortened component life and degraded performance. Put down . • This may damage the TFT-LCD surface. When installing the product, make sure to keep it . The installation of your monitor is adjustable, do so may damage the monitor. Do not install the product in places with a slightly moistened, soft fabric. 3 When cleaning...electric shock or fire. If the height of the product, resulting in the owner's manual. Clean Safety Instructions Do not place the product on the stand when lowering it. • This may cause damage to the product or the person carrying it .
User Manual (ENGLISH)
Page 7
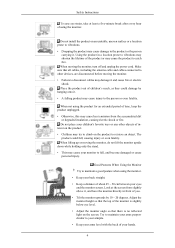
... all cables, including the antenna cable and cables connected to other objects of in- When lifting up or moving the monitor, do not lift the monitor upside down while holding only the stand. • This may cause your arms level with the back of the product or may cause injury to fall , ...causing injury or even fatality. Look at least a five-minute break after every hour of you. • Tilt the monitor upwards by hanging...
... all cables, including the antenna cable and cables connected to other objects of in- When lifting up or moving the monitor, do not lift the monitor upside down while holding only the stand. • This may cause your arms level with the back of the product or may cause injury to fall , ...causing injury or even fatality. Look at least a five-minute break after every hour of you. • Tilt the monitor upwards by hanging...
User Manual (ENGLISH)
Page 9
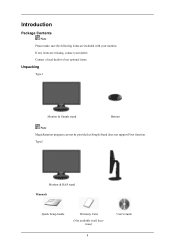
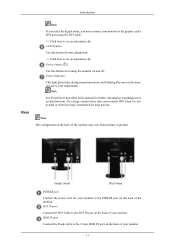
If any items are included with your dealer. Contact a local dealer to buy optional items. Unpacking Type 1 Monitor & Simple stand Bottom Note MagicRotation program can not be provided as Simple Stand does not support Pivot function. Type2 Monitor & HAS stand Manuals Quick Setup Guide Warranty Card (Not available in all loca- tions) 8 User's Guide Introduction Package Contents Note Please make sure the following items are missing, contact your monitor.
If any items are included with your dealer. Contact a local dealer to buy optional items. Unpacking Type 1 Monitor & Simple stand Bottom Note MagicRotation program can not be provided as Simple Stand does not support Pivot function. Type2 Monitor & HAS stand Manuals Quick Setup Guide Warranty Card (Not available in all loca- tions) 8 User's Guide Introduction Package Contents Note Please make sure the following items are missing, contact your monitor.
User Manual (ENGLISH)
Page 12
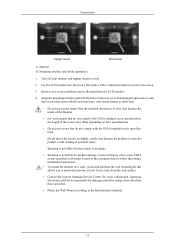
Simple Stand HAS Stand POWER port Connect the power cord for long periods. RGB IN port Connect the D-sub cable to the 15-pin, RGB IN port on the back of your monitor. For energy conservation, turn your monitor OFF when it is not needed or when leaving it unattended for your monitor to the ...Cable to the DVI IN port on and off. Note The configuration at the back of your monitor. 11 Note See PowerSaver described in the manual for turning the monitor on the back of the monitor may vary from product to product. Introduction Rear Note If you select the digital mode, you ...
Simple Stand HAS Stand POWER port Connect the power cord for long periods. RGB IN port Connect the D-sub cable to the 15-pin, RGB IN port on the back of your monitor. For energy conservation, turn your monitor OFF when it is not needed or when leaving it unattended for your monitor to the ...Cable to the DVI IN port on and off. Note The configuration at the back of your monitor. 11 Note See PowerSaver described in the manual for turning the monitor on the back of the monitor may vary from product to product. Introduction Rear Note If you select the digital mode, you ...

User Manual (ENGLISH)
Page 15
Using the Stand Monitor Assembly Connections Simple Stand Monitor and Bottom HAS Stand HAS Stand A. Stand Stopper Attaching a Base This monitor accepts a 75 mm x 75 mm VESA-compliant mounting interface pad. 14
Using the Stand Monitor Assembly Connections Simple Stand Monitor and Bottom HAS Stand HAS Stand A. Stand Stopper Attaching a Base This monitor accepts a 75 mm x 75 mm VESA-compliant mounting interface pad. 14
User Manual (ENGLISH)
Page 16
..., as this may differ depending on a wall, you to protect the screen. 3. Remove two screws and then remove the stand from the wall surface. • Contact the nearest Samsung Service Center for damages caused by using a base other base. • Do not use screws longer than those specified. •... that do not comply with the holes in the rear cover mounting pad and secure it to mount the monitor at least 10 cm away from the LCD monitor. 4. Connections Simple Stand HAS Stand A. Do not fasten the screws too tightly, as they may damage the inside of the screws may damage...
..., as this may differ depending on a wall, you to protect the screen. 3. Remove two screws and then remove the stand from the wall surface. • Contact the nearest Samsung Service Center for damages caused by using a base other base. • Do not use screws longer than those specified. •... that do not comply with the holes in the rear cover mounting pad and secure it to mount the monitor at least 10 cm away from the LCD monitor. 4. Connections Simple Stand HAS Stand A. Do not fasten the screws too tightly, as they may damage the inside of the screws may damage...
User Manual (ENGLISH)
Page 58
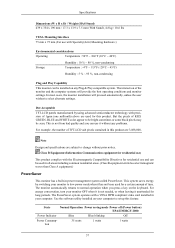
...can be used for long periods. The monitor automatically returns to low-power mode when it without prior notice. For energy conservation, turn your monitor OFF when it unattended for a certain amount of TFT-LCD sub pixels contained in your computer to... select alternate settings. Use the software utility installed on your computer. Specifications Dimensions (W x H x D) / Weight (HAS Stand) 439 x 354 x 190 mm / 17...
...can be used for long periods. The monitor automatically returns to low-power mode when it without prior notice. For energy conservation, turn your monitor OFF when it unattended for a certain amount of TFT-LCD sub pixels contained in your computer to... select alternate settings. Use the software utility installed on your computer. Specifications Dimensions (W x H x D) / Weight (HAS Stand) 439 x 354 x 190 mm / 17...
User Manual (ENGLISH)
Page 61
...the best operating conditions and monitor settings. Dot Acceptable TFT-LCD panels manufactured by switching your monitor OFF when it unattended for long periods. Use the software utility installed on any problems. For example, the number of TFT-LCD sub pixels contained in this ...VESA DPM compliant video card installed in power management system called PowerSaver. Specifications Dimensions (W x H x D) / Weight (HAS Stand) 439 x 354 x 190 mm / 17.3 x 13.9 x 7.5 mm (With Stand), 4.8 kg / 10.6 lbs VESA Mounting Interface 75 mm x 75 mm (For use with Specialty(Arm) Mounting hardware.) ...
...the best operating conditions and monitor settings. Dot Acceptable TFT-LCD panels manufactured by switching your monitor OFF when it unattended for long periods. Use the software utility installed on any problems. For example, the number of TFT-LCD sub pixels contained in this ...VESA DPM compliant video card installed in power management system called PowerSaver. Specifications Dimensions (W x H x D) / Weight (HAS Stand) 439 x 354 x 190 mm / 17.3 x 13.9 x 7.5 mm (With Stand), 4.8 kg / 10.6 lbs VESA Mounting Interface 75 mm x 75 mm (For use with Specialty(Arm) Mounting hardware.) ...


