

Quick Guide (ENGLISH)
Page 4
...SOURCE button [SOURCE] Switches from one menu item to Connecting Cables under Setup. Introduction Rear MENU button [MENU] Opens the on the LCD Display model. Changing the source is not on -screen D.MENU. Power button [ ] Use this spot on and off. Note For detailed information... concerning cable connections, refer to another vertically or adjusts selected menu values. The LCD Display 's configuration at the time. [PC] → [DVI] → [AV] → [HDMI] → [BNC] → [Component] Note •...
...SOURCE button [SOURCE] Switches from one menu item to Connecting Cables under Setup. Introduction Rear MENU button [MENU] Opens the on the LCD Display model. Changing the source is not on -screen D.MENU. Power button [ ] Use this spot on and off. Note For detailed information... concerning cable connections, refer to another vertically or adjusts selected menu values. The LCD Display 's configuration at the time. [PC] → [DVI] → [AV] → [HDMI] → [BNC] → [Component] Note •...
Quick Guide (ENGLISH)
Page 7
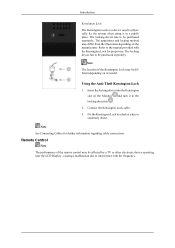
Fix the Kensington Lock to be different depending on its model. Refer to the manual provided with the frequency. Using the Anti-Theft Kensington Lock 1. The locking device has to a desk or a heavy stationary object. ... purchased separately. Note See Connecting Cables for proper use. The locking device has to be affected by a TV or other electronic device operating near the LCD Display , causing a malfunction due to interference with the Kensington Lock for further information regarding cable connections. The appearance and locking method may be purchased separately. ...
Fix the Kensington Lock to be different depending on its model. Refer to the manual provided with the frequency. Using the Anti-Theft Kensington Lock 1. The locking device has to a desk or a heavy stationary object. ... purchased separately. Note See Connecting Cables for proper use. The locking device has to be affected by a TV or other electronic device operating near the LCD Display , causing a malfunction due to interference with the Kensington Lock for further information regarding cable connections. The appearance and locking method may be purchased separately. ...

Quick Guide (ENGLISH)
Page 13
... to drill holes deeper than 35 mm. To mount the product on the wall bracket The shape of the product may vary depending on the model. (The assemblies of the 4screws on the wall.
... to drill holes deeper than 35 mm. To mount the product on the wall bracket The shape of the product may vary depending on the model. (The assemblies of the 4screws on the wall.
User Manual (ENGLISH)
Page 11
... button [ENTER] Activates a highlighted menu item. Power indicator Shows PowerSaver mode by blinking green Note See PowerSaver described in the manual for long periods. The LCD Display 's configuration at the time. [PC] → [DVI] → [AV] → [HDMI] → [BNC] → [Component] Note ... from PC mode to another vertically or adjusts selected menu values. D.MENU Opens the on the LCD Display model. Changing the source is only allowed for turning the LCD Display on the LCD Display. Note • This is available when a TV tuner box is not needed or when leaving...
... button [ENTER] Activates a highlighted menu item. Power indicator Shows PowerSaver mode by blinking green Note See PowerSaver described in the manual for long periods. The LCD Display 's configuration at the time. [PC] → [DVI] → [AV] → [HDMI] → [BNC] → [Component] Note ... from PC mode to another vertically or adjusts selected menu values. D.MENU Opens the on the LCD Display model. Changing the source is only allowed for turning the LCD Display on the LCD Display. Note • This is available when a TV tuner box is not needed or when leaving...

User Manual (ENGLISH)
Page 14
...3. Remote Control Note The performance of the Kensington Lock may be affected by a TV or other electronic device operating near the LCD Display , causing a malfunction due to interference with the Kensington Lock for further information regarding cable connections. The locking device has to be...-Theft Kensington Lock 1. The locking device has to be purchased separately. The appearance and locking method may be different depending on its model. Introduction Kensington Lock The Kensington Lock is a device used to physically fix the system when using it in a public place. Refer...
...3. Remote Control Note The performance of the Kensington Lock may be affected by a TV or other electronic device operating near the LCD Display , causing a malfunction due to interference with the Kensington Lock for further information regarding cable connections. The locking device has to be...-Theft Kensington Lock 1. The locking device has to be purchased separately. The appearance and locking method may be different depending on its model. Introduction Kensington Lock The Kensington Lock is a device used to physically fix the system when using it in a public place. Refer...

User Manual (ENGLISH)
Page 20
A - Fix each of the 4screws on the model. (The assemblies of the product. To mount the product on the wall bracket The shape of the product may vary depending on the wall bracket ...
A - Fix each of the 4screws on the model. (The assemblies of the product. To mount the product on the wall bracket The shape of the product may vary depending on the wall bracket ...
User Manual (ENGLISH)
Page 29
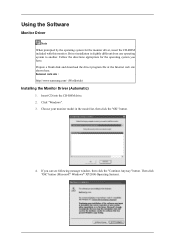
... different from one operating system to another. Insert CD into the CD-ROM drive. 2. Internet web site : http://www.samsung.com/ (Worldwide) Installing the Monitor Driver (Automatic) 1. Choose your monitor model in the model list, then click the "OK" button. 4. Using the Software Monitor Driver Note When prompted by the operating system for...
... different from one operating system to another. Insert CD into the CD-ROM drive. 2. Internet web site : http://www.samsung.com/ (Worldwide) Installing the Monitor Driver (Automatic) 1. Choose your monitor model in the model list, then click the "OK" button. 4. Using the Software Monitor Driver Note When prompted by the operating system for...

User Manual (ENGLISH)
Page 32
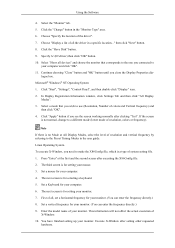
Using the Software 9. Microsoft® Windows® XP Operating System Click "Close" → "Close" → "OK" → "OK" on the screen, and click "Next". 10. Select the model that matches your monitor from the list of monitor models on the following screens displayed in sequence.
Using the Software 9. Microsoft® Windows® XP Operating System Click "Close" → "Close" → "OK" → "OK" on the screen, and click "Next". 10. Select the model that matches your monitor from the list of monitor models on the following screens displayed in sequence.

User Manual (ENGLISH)
Page 34
Using the Software 7. Click the "Browse" button then choose A:(D:\Driver) and choose your system. Click the "Close" button then click "OK" button continually. If you can see following message window, then click the "Continue Anyway" button. Note This monitor driver is under certifying MS logo, and this installation doesn't damage your monitor model in the model list and click the "Next" button. 8. http://www.samsung.com/ 9. Then click "OK" button. The certified driver will be posted on Samsung Monitor homepage.
Using the Software 7. Click the "Browse" button then choose A:(D:\Driver) and choose your system. Click the "Close" button then click "OK" button continually. If you can see following message window, then click the "Continue Anyway" button. Note This monitor driver is under certifying MS logo, and this installation doesn't damage your monitor model in the model list and click the "Next" button. 8. http://www.samsung.com/ 9. Then click "OK" button. The certified driver will be posted on Samsung Monitor homepage.

User Manual (ENGLISH)
Page 35
...button, then click "OK" button. 9. And click the "Finish" button then the "Close" button. Using the Software 10. Double click the "Display" icon. 3. Please stop installation Case2 : If the "Properties" button is completed. Click the "Finish" button then the "Close" button. Click "Start", ...then click "Next" and then click "Have disk". 7. How to install 1. Click "Start", "Setting", "Control Panel". 2. Case1 : If the "Properties" button is inactive, it means your monitor model and click the "Next" button then click "Next" button. 10. then click on the "File Needed" window....
...button, then click "OK" button. 9. And click the "Finish" button then the "Close" button. Using the Software 10. Double click the "Display" icon. 3. Please stop installation Case2 : If the "Properties" button is completed. Click the "Finish" button then the "Close" button. Click "Start", ...then click "Next" and then click "Have disk". 7. How to install 1. Click "Start", "Setting", "Control Panel". 2. Case1 : If the "Properties" button is inactive, it means your monitor model and click the "Next" button then click "Next" button. 10. then click on the "File Needed" window....
User Manual (ENGLISH)
Page 36
..."Test". First of all devices" and choose the monitor that you connected to the Preset Timing Modes in the user guide. Enter the model name of the driver". 7. Select the "Monitor" tab. 5. Choose "Specify the location of your monitor. (You can enter the frequency... directly.) 9. then click "Next" button. 8. Click "Start", "Settings", "Control Panel", and then double-click "Display" icon. 2. Select a mode that corresponds to the one you wish to a different mode (lower mode of colors and Vertical frequency) and...
..."Test". First of all devices" and choose the monitor that you connected to the Preset Timing Modes in the user guide. Enter the model name of the driver". 7. Select the "Monitor" tab. 5. Choose "Specify the location of your monitor. (You can enter the frequency... directly.) 9. then click "Next" button. 8. Click "Start", "Settings", "Control Panel", and then double-click "Display" icon. 2. Select a mode that corresponds to the one you wish to a different mode (lower mode of colors and Vertical frequency) and...

User Manual (ENGLISH)
Page 42
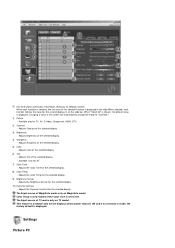
...to HDMI. 11) Channel - Changes the Input Source of the selected display to S-Video. 8) Component - Click Image Size of MagicInfo works only on MagicInfo model. 10) HDMI - Changes the Input Source of the selected display to BNC. 3) DVI - The Input Source Control feature is available ...only for the displays whose power status is TV. Channel arrow appears when the Input ...
...to HDMI. 11) Channel - Changes the Input Source of the selected display to S-Video. 8) Component - Click Image Size of MagicInfo works only on MagicInfo model. 10) HDMI - Changes the Input Source of the selected display to BNC. 3) DVI - The Input Source Control feature is available ...only for the displays whose power status is TV. Channel arrow appears when the Input ...

User Manual (ENGLISH)
Page 43
... Image Size, the PC Source tab first appear. - The Input source of the display in use . 3) Input - Shows the current Image Size of MagicInfo works only on TV model. The Input source of the current display. 2) Image Size - Shows the power status of TV works only on MagicInfo... model. The Image Size Control button controls Image Size available for which power status is PC, BNC...
... Image Size, the PC Source tab first appear. - The Input source of the display in use . 3) Input - Shows the current Image Size of MagicInfo works only on TV model. The Input source of the current display. 2) Image Size - Shows the power status of TV works only on MagicInfo... model. The Image Size Control button controls Image Size available for which power status is PC, BNC...

User Manual (ENGLISH)
Page 44
... the Image Size item is ON. The Input source of MagicInfo works only on TV model. Time 1. Click Select All or use Check Box to select a display to Auto Wide. Click Time of the selected display randomly. The Image Size Control feature is available only for TV, AV, S-Video, ... source of TV works only on MagicInfo model. Info Grid shows some basic information necessary to Image Size Control. 1) Click the Video Source tab to adjust Image Size for the displays whose power status is set to control. 2) Info Grid displays only the display having TV, AV, S-Video, Component or...
... the Image Size item is ON. The Input source of MagicInfo works only on TV model. Time 1. Click Select All or use Check Box to select a display to Auto Wide. Click Time of the selected display randomly. The Image Size Control feature is available only for TV, AV, S-Video, ... source of TV works only on MagicInfo model. Info Grid shows some basic information necessary to Image Size Control. 1) Click the Video Source tab to adjust Image Size for the displays whose power status is set to control. 2) Info Grid displays only the display having TV, AV, S-Video, Component or...

User Manual (ENGLISH)
Page 45
...At On Time Setup, TV Source functions only for the selected display (PC Time). - Set the Hour, Minute, and AM/PM, Status for Off Time Setup of the selected display. 3) Off Time Setup - The Input source of TV works only on MagicInfo model. Set the Hour, Minute, AM/PM of On Time Setup,... Status, Source, Volume of the selected display. 4) Shows the On Time settings. 5) Shows the Off Time settings....
...At On Time Setup, TV Source functions only for the selected display (PC Time). - Set the Hour, Minute, and AM/PM, Status for Off Time Setup of the selected display. 3) Off Time Setup - The Input source of TV works only on MagicInfo model. Set the Hour, Minute, AM/PM of On Time Setup,... Status, Source, Volume of the selected display. 4) Shows the On Time settings. 5) Shows the Off Time settings....

User Manual (ENGLISH)
Page 46
... 5) Double 1 - PIP Size can be controlled with turning on MagicInfo model. Click PIP of the selected display. 3) Large - Turns on the PIP of the selected display and changes the size to Double 1. 6) Double 2 - Turns on the PIP of the selected display and changes the size to Large. 4) Small - Turns on TV... model. Turns off the PIP of the main icons and the PIP control screen appears. The Input source of TV works only on the PIP of the display in use. 2) OFF - The Input source of MagicInfo works only on the LCD Display power. Info Grid shows some ...
... 5) Double 1 - PIP Size can be controlled with turning on MagicInfo model. Click PIP of the selected display. 3) Large - Turns on the PIP of the selected display and changes the size to Double 1. 6) Double 2 - Turns on the PIP of the selected display and changes the size to Large. 4) Small - Turns on TV... model. Turns off the PIP of the main icons and the PIP control screen appears. The Input source of TV works only on the PIP of the display in use. 2) OFF - The Input source of MagicInfo works only on the LCD Display power. Info Grid shows some ...

User Manual (ENGLISH)
Page 47
... S-Video. 7) Component - Note: Some of the PIP Sources may not be controlled with turning on the LCD Display power. 2) PC - Changes the source of the PIP of the Main Screen. The PIP Control feature is set to PIP Source Control. 1) PIP Source - Settings ... source of the PIP of the selected display to Component. 8) HDMI - PIP Source can be available for the displays whose power status is ON and the PIP function is available only for selection, depending on MagicInfo model. Changes the source of the PIP of the selected display to PC. 3) BNC - Changes the source of...
... S-Video. 7) Component - Note: Some of the PIP Sources may not be controlled with turning on the LCD Display power. 2) PC - Changes the source of the PIP of the Main Screen. The PIP Control feature is set to PIP Source Control. 1) PIP Source - Settings ... source of the PIP of the selected display to Component. 8) HDMI - PIP Source can be available for the displays whose power status is ON and the PIP function is available only for selection, depending on MagicInfo model. Changes the source of the PIP of the selected display to PC. 3) BNC - Changes the source of...
User Manual (ENGLISH)
Page 48
..., Component, HDMI, DTV. 2) Contrast - Adjusts the Color Tone for the set to Off. When each function is set and displays it on MagicInfo model. When "Select All" is chosen, the default value is displayed in this screen will automatically change the mode to Settings Control. Color Temp is only enabled if the Color...
..., Component, HDMI, DTV. 2) Contrast - Adjusts the Color Tone for the set to Off. When each function is set and displays it on MagicInfo model. When "Select All" is chosen, the default value is displayed in this screen will automatically change the mode to Settings Control. Color Temp is only enabled if the Color...

User Manual (ENGLISH)
Page 49
...When each function fetches the value for the set value of MagicInfo works only on MagicInfo model. Available only for NT. 6) Blue - Available only for NT. 5) Green - Adjusts blue Color of the selected display. - Adjusts the Brightness Sensor for PC, BNC, DVI. 2) Contrast - Available only...function is selected, the set and displays it on TV model. This feature is available only for the selected display. 8) Color Temp - Adjusts the Dynamic Contrast for the selected display. 9) Brightness Sensor - 1. Adjusts the Color Tone for the displays whose power status is ON and...
...When each function fetches the value for the set value of MagicInfo works only on MagicInfo model. Available only for NT. 6) Blue - Available only for NT. 5) Green - Adjusts blue Color of the selected display. - Adjusts the Brightness Sensor for PC, BNC, DVI. 2) Contrast - Available only...function is selected, the set and displays it on TV model. This feature is available only for the selected display. 8) Color Temp - Adjusts the Dynamic Contrast for the selected display. 9) Brightness Sensor - 1. Adjusts the Color Tone for the displays whose power status is ON and...

User Manual (ENGLISH)
Page 50
...CUSTOM." 1) Audio - Click Settings of MagicInfo works only on MagicInfo model. The Input source of the main icons and the Settings Control screen appears. This feature is selected, the set and displays it on TV model. When selected, each function is available only for all input sources. ...2) Bass - Click Settings of the selected display. 3) Treble - Adjusts Bass of the main icons and the Settings ...
...CUSTOM." 1) Audio - Click Settings of MagicInfo works only on MagicInfo model. The Input source of the main icons and the Settings Control screen appears. This feature is selected, the set and displays it on TV model. When selected, each function is available only for all input sources. ...2) Bass - Click Settings of the selected display. 3) Treble - Adjusts Bass of the main icons and the Settings ...


