
User Manual
Page 2
...Display the Source List 25 The Universal Remote Function Using Motion Control Using the Samsung Smart Control Using Multi-Link Screen Connecting Antenna and External devices Using the Remote Control and Peripherals Installing Batteries into the Samsung Smart Control 26 The Low Battery Alarm Window Pairing the Samsung Smart Control 27 Reconnecting the Samsung Smart Control Antenna Connection Video Device Connections 9 HDMI Connection 10 Component Connection 11 Composite (A/V) Connection Audio Input and Output Connections 12 HDMI (ARC) Connection 13 Digital Audio (Optical) Connection 14 Audio...
...Display the Source List 25 The Universal Remote Function Using Motion Control Using the Samsung Smart Control Using Multi-Link Screen Connecting Antenna and External devices Using the Remote Control and Peripherals Installing Batteries into the Samsung Smart Control 26 The Low Battery Alarm Window Pairing the Samsung Smart Control 27 Reconnecting the Samsung Smart Control Antenna Connection Video Device Connections 9 HDMI Connection 10 Component Connection 11 Composite (A/V) Connection Audio Input and Output Connections 12 HDMI (ARC) Connection 13 Digital Audio (Optical) Connection 14 Audio...

User Manual
Page 3
... Viewing Videos 90 Buttons and Functions Available While Playing Music 91 Listening to Music in to a Samsung Account 64 Linking Your Samsung Account to External Service Accounts 65 Changing and Adding Information to the Panel Screen 60 Using the Smart Hub Tutorial 60 Resetting Smart Hub Using Smart Hub with WPS Troubleshooting Internet Connectivity Issues 53 Troubleshooting Wired Internet Connectivity Issues 54 Troubleshooting Wireless Internet Connectivity Issues Checking the Internet Connection Status Smart Features Using Multiple Functions on the Media Content List Screen Using...
... Viewing Videos 90 Buttons and Functions Available While Playing Music 91 Listening to Music in to a Samsung Account 64 Linking Your Samsung Account to External Service Accounts 65 Changing and Adding Information to the Panel Screen 60 Using the Smart Hub Tutorial 60 Resetting Smart Hub Using Smart Hub with WPS Troubleshooting Internet Connectivity Issues 53 Troubleshooting Wired Internet Connectivity Issues 54 Troubleshooting Wireless Internet Connectivity Issues Checking the Internet Connection Status Smart Features Using Multiple Functions on the Media Content List Screen Using...

User Manual
Page 5
... PIP Broadcast Viewing 159 Changing the Picture Size and Position (for UHD 9000, UN110S9BF, UN110S9VF and SEK-2500U models) 160 Changing the Picture Size and Position (for UN105S9WAF models only) 161 Listening to Audio Only with the Screen Turned Off (Picture Off) 161 Resetting the Picture Mode Settings Using Anynet+ (HDMI-CEC) 175 Setting Up Anynet+ (HDMI-CEC) 176 Using Anynet+ (HDMI-CEC) Updating the TV's Software 177 Update now 177 Online 178 Manually, Using a USB Flash Drive 179 Enabling Automatic Software Updates Changing the Sound Mode...
... PIP Broadcast Viewing 159 Changing the Picture Size and Position (for UHD 9000, UN110S9BF, UN110S9VF and SEK-2500U models) 160 Changing the Picture Size and Position (for UN105S9WAF models only) 161 Listening to Audio Only with the Screen Turned Off (Picture Off) 161 Resetting the Picture Mode Settings Using Anynet+ (HDMI-CEC) 175 Setting Up Anynet+ (HDMI-CEC) 176 Using Anynet+ (HDMI-CEC) Updating the TV's Software 177 Update now 177 Online 178 Manually, Using a USB Flash Drive 179 Enabling Automatic Software Updates Changing the Sound Mode...

User Manual
Page 6
My computer won 't play. My file won 't connect. Troubleshooting Getting Support 189 Support through Remote Management 190 Finding the Information You Need for Service Requesting support There is a problem with Voice Interaction 206 S Recommendation Supported Resolutions for 3D Modes 207 HDMI 208 Component 208 Digital Channel 208 Videos/Photos 208 Computer via HDMI Cable Supported Resolutions for UHD 209 HDMI Connector except for using apps. Anynet+ (HDMI-CEC) isn't working . Other Issues Appendix Before Using the Recording and Timeshift...
My computer won 't play. My file won 't connect. Troubleshooting Getting Support 189 Support through Remote Management 190 Finding the Information You Need for Service Requesting support There is a problem with Voice Interaction 206 S Recommendation Supported Resolutions for 3D Modes 207 HDMI 208 Component 208 Digital Channel 208 Videos/Photos 208 Computer via HDMI Cable Supported Resolutions for UHD 209 HDMI Connector except for using apps. Anynet+ (HDMI-CEC) isn't working . Other Issues Appendix Before Using the Recording and Timeshift...

User Manual
Page 18
... the external device's operating manual when connecting it is reversed. "" When connecting the external device to the external speaker, be available if the Source is set to HDMI and 3D Auto View is connected to the TV first, and then connect the external device. ARC is only available through one HDMI cable. The connections are listed below. ●● HDMI/ARC (Audio Return Channel) ●● Digital Audio (Optical) ●● Audio (Analog) "" For better audio quality, it to On. Audio Input and Output Connections...
... the external device's operating manual when connecting it is reversed. "" When connecting the external device to the external speaker, be available if the Source is set to HDMI and 3D Auto View is connected to the TV first, and then connect the external device. ARC is only available through one HDMI cable. The connections are listed below. ●● HDMI/ARC (Audio Return Channel) ●● Digital Audio (Optical) ●● Audio (Analog) "" For better audio quality, it to On. Audio Input and Output Connections...

User Manual
Page 23
... graphics adapter of your computer does not support the HDMI interface, connect the computer to the TV with a DVI (Digital Visual Interactive) to "Read Before Connecting a Computer (Supported Resolutions)". "" For the resolutions supported by the HDMI (DVI) port and does not support audio signal transmission. Refer to the diagram and connect the DVI to HDMI cable to the computer's audio output connector. To listen to the computer sound, connect external speakers to the One Connect's HDMI (DVI) port...
... graphics adapter of your computer does not support the HDMI interface, connect the computer to the TV with a DVI (Digital Visual Interactive) to "Read Before Connecting a Computer (Supported Resolutions)". "" For the resolutions supported by the HDMI (DVI) port and does not support audio signal transmission. Refer to the diagram and connect the DVI to HDMI cable to the computer's audio output connector. To listen to the computer sound, connect external speakers to the One Connect's HDMI (DVI) port...
User Manual
Page 45
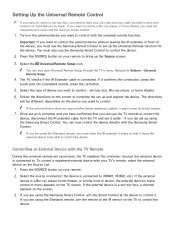
... cable is a Blu-ray player, home theater, or similar kind of the device, you must leave the IR extender in front of device, the external device's home screen or menu appears on the Source List. 1. Setting Up the Universal Remote Control "" If you want to control a set up using the Samsung Smart Control. if you ran set -top-box, you need the manufacturer's name and the device's model number. 1. To control a registered external...
... cable is a Blu-ray player, home theater, or similar kind of the device, you must leave the IR extender in front of device, the external device's home screen or menu appears on the Source List. 1. Setting Up the Universal Remote Control "" If you want to control a set up using the Samsung Smart Control. if you ran set -top-box, you need the manufacturer's name and the device's model number. 1. To control a registered external...

User Manual
Page 57
... TV will need to enter the IP address, subnet mask, gateway, and DNS values manually to connect to the network. Network type Wireless Wireless network AP0000 AP0001 Add Network You can connect your TV to view additional characters. -- Select the 123#& key to the internet. Connecting to a Wireless Internet Network Manually MENU > Network > Network Settings With networks that appears, enter the password. Change Network IP Settings Retry Close On the Network Settings screen, set Network type to view capital letters. Select a network. Once the network connection has...
... TV will need to enter the IP address, subnet mask, gateway, and DNS values manually to connect to the network. Network type Wireless Wireless network AP0000 AP0001 Add Network You can connect your TV to view additional characters. -- Select the 123#& key to the internet. Connecting to a Wireless Internet Network Manually MENU > Network > Network Settings With networks that appears, enter the password. Change Network IP Settings Retry Close On the Network Settings screen, set Network type to view capital letters. Select a network. Once the network connection has...
User Manual
Page 87
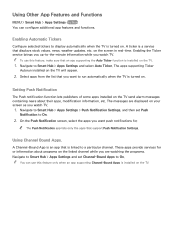
... App Features and Functions MENU > Smart Hub > Apps Settings Try Now You can use this feature only when an app supporting Channel-Bound Apps is a service that displays stock values, news, weather updates, etc. Setting Push Notification The Push notification function lets publishers of some apps installed on the TV send alarm messages containing news about programs on the TV. On...
... App Features and Functions MENU > Smart Hub > Apps Settings Try Now You can use this feature only when an app supporting Channel-Bound Apps is a service that displays stock values, news, weather updates, etc. Setting Push Notification The Push notification function lets publishers of some apps installed on the TV send alarm messages containing news about programs on the TV. On...

User Manual
Page 95
... or enter a specific time value to jump to scan through . Change the Picture Mode setting. Only available if you have a home theater or receiver connected to 0. Function Select Scene Subtitle Repeat Rotate Picture Size Picture Mode Sound Mode Select Speakers Audio Language Information Description Thumbnails: Select a scene and play another video in the video. The supported video sizes are not working, you can change the encoding language. Change the Sound Mode setting. View detailed information about the video. Repeat One repeats...
... or enter a specific time value to jump to scan through . Change the Picture Mode setting. Only available if you have a home theater or receiver connected to 0. Function Select Scene Subtitle Repeat Rotate Picture Size Picture Mode Sound Mode Select Speakers Audio Language Information Description Thumbnails: Select a scene and play another video in the video. The supported video sizes are not working, you can change the encoding language. Change the Sound Mode setting. View detailed information about the video. Repeat One repeats...

User Manual
Page 152
... a DVD player, Blu-ray player, computer, or a different external device on the main screen. For the UN110S9VF model to turn Video Description on your specific area. "" For PIP to display the PIP settings screen. Select Picture > PIP to work, the main screen's source must be Component or HDMI and the input resolution must be less Full HD (FHD - 1080p). "" Playing a game or using Smart Hub or the 3D function. "" Turning off . PIP Broadcast Viewing MENU > Picture > PIP Try Now Use the PIP ("Picture-In-Picture") function...
... a DVD player, Blu-ray player, computer, or a different external device on the main screen. For the UN110S9VF model to turn Video Description on your specific area. "" For PIP to display the PIP settings screen. Select Picture > PIP to work, the main screen's source must be Component or HDMI and the input resolution must be less Full HD (FHD - 1080p). "" Playing a game or using Smart Hub or the 3D function. "" Turning off . PIP Broadcast Viewing MENU > Picture > PIP Try Now Use the PIP ("Picture-In-Picture") function...

User Manual
Page 160
... rapid movement. Connect the TV to the external UHD player using the HDMI cable, and then turn on again to maximize contrast automatically. "" After setting the HDMI connector to On, it takes some time to Off supports up the INFO screen, the INFO screen displays the resolution and frequency of the incoming video signal (60Hz). Select this is AV, Component (480i, 1080i), or HDMI (1080i). ●● Auto Motion Plus...
... rapid movement. Connect the TV to the external UHD player using the HDMI cable, and then turn on again to maximize contrast automatically. "" After setting the HDMI connector to On, it takes some time to Off supports up the INFO screen, the INFO screen displays the resolution and frequency of the incoming video signal (60Hz). Select this is AV, Component (480i, 1080i), or HDMI (1080i). ●● Auto Motion Plus...

User Manual
Page 176
... signal. The TV automatically downloads the correct time from a digital channel. Standard Remote: Press the Info button. To enable this option, the TV's Antenna jack must be connected to a set-top-box or satellite box using Digital Broadcast Info MENU > System > Time > Clock > Clock Mode Try Now Set Clock Mode to Auto. If your TV is connected to either an antenna or a cable output and must be receiving digital broadcasts. "" The clock must be reset every time the power...
... signal. The TV automatically downloads the correct time from a digital channel. Standard Remote: Press the Info button. To enable this option, the TV's Antenna jack must be connected to a set-top-box or satellite box using Digital Broadcast Info MENU > System > Time > Clock > Clock Mode Try Now Set Clock Mode to Auto. If your TV is connected to either an antenna or a cable output and must be receiving digital broadcasts. "" The clock must be reset every time the power...
User Manual
Page 178
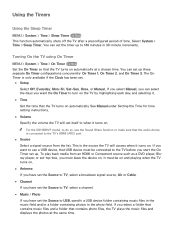
... turns on automatically at the same time. To play back media from an HDMI or Component source such as a DVD player, Bluray player, or set-top-box, you must be on and playing when the TV turns on . The On Timer is connected to USB, specify a USB device folder containing music files in the music field and/or a folder containing photos in 30-minute increments. Using the Timers Using the Sleep Timer MENU > System > Time > Sleep Timer...
... turns on automatically at the same time. To play back media from an HDMI or Component source such as a DVD player, Bluray player, or set-top-box, you must be on and playing when the TV turns on . The On Timer is connected to USB, specify a USB device folder containing music files in the music field and/or a folder containing photos in 30-minute increments. Using the Timers Using the Sleep Timer MENU > System > Time > Sleep Timer...
User Manual
Page 180
... TV's brightness level based on the screen for four hours without any user input, the TV will automatically activate the Screen Burn Protection function to protect the screen. Changing the Backlight or Min Cell Light setting (in after -images. Using the Screen Burn Protection and Energy Saving Features Preventing Screen Burn MENU > System > Auto Protection Time Try Now Still images can manually adjust the screen's minimum brightness level...
... TV's brightness level based on the screen for four hours without any user input, the TV will automatically activate the Screen Burn Protection function to protect the screen. Changing the Backlight or Min Cell Light setting (in after -images. Using the Screen Burn Protection and Energy Saving Features Preventing Screen Burn MENU > System > Auto Protection Time Try Now Still images can manually adjust the screen's minimum brightness level...

User Manual
Page 194
... screen. 2. "" For all TV settings (excluding the Internet and network settings) to the user manual that came with the TV. All settings are disabled and the TV automatically resets itself after a certain amount of time. Enter the Security PIN, and then select Yes. "" Store Demo should be used in a retail environment. This turns the TV into a display model for retail stores) MENU > Support > Use Mode Try Now Select Support > Use Mode > Store Demo. Select Support...
... screen. 2. "" For all TV settings (excluding the Internet and network settings) to the user manual that came with the TV. All settings are disabled and the TV automatically resets itself after a certain amount of time. Enter the Security PIN, and then select Yes. "" Store Demo should be used in a retail environment. This turns the TV into a display model for retail stores) MENU > Support > Use Mode Try Now Select Support > Use Mode > Store Demo. Select Support...

User Manual
Page 197
... the problem persists, check the signal strength or refer to a UHD source, and does not operate properly for any other connections as well. Unwanted Powering Off If your Samsung television screen is specific to the external device's user manual. See if Sleep Timer (System > Time > Sleep Timer) has been enabled. HDMI UHD Color is not correct or the black and white colors are plugged into their proper connectors. The Picture Test displays a high definition picture you review the list...
... the problem persists, check the signal strength or refer to a UHD source, and does not operate properly for any other connections as well. Unwanted Powering Off If your Samsung television screen is specific to the external device's user manual. See if Sleep Timer (System > Time > Sleep Timer) has been enabled. HDMI UHD Color is not correct or the black and white colors are plugged into their proper connectors. The Picture Test displays a high definition picture you review the list...

User Manual
Page 198
... using AV composite input, connect the video cable (yellow) to check before the screen turns on the edge of video content may cause color problems or a blank screen. If the Picture Size has been set top box, upgrade to a cable box or satellite box, run Setup (System > Setup) or Auto Program (Broadcasting > Auto Program). Change the cable/satellite box resolution. If you have an analog cable/set to Screen Fit, change the setting to the Picture menu and then adjust the Picture Mode, Brightness, Sharpness, and Color settings. If you have a cable/satellite box...
... using AV composite input, connect the video cable (yellow) to check before the screen turns on the edge of video content may cause color problems or a blank screen. If the Picture Size has been set top box, upgrade to a cable box or satellite box, run Setup (System > Setup) or Auto Program (Broadcasting > Auto Program). Change the cable/satellite box resolution. If you have an analog cable/set to Screen Fit, change the setting to the Picture menu and then adjust the Picture Mode, Brightness, Sharpness, and Color settings. If you have a cable/satellite box...

User Manual
Page 199
... source. Set Sound > Speaker Settings > TV Sound Output to your TV has a headphone jack, make sure there is using an external device, check the device's audio output option. (For example, you review the list of the device (cable/satellite box, DVD, Blu-ray, etc.) connected to TV Speaker. HDMI UHD Color is specific to a UHD source, and does not operate properly for audio output. Contact Samsung's Call Center for sound problems. If the TV does not play audio, run the Sound...
... source. Set Sound > Speaker Settings > TV Sound Output to your TV has a headphone jack, make sure there is using an external device, check the device's audio output option. (For example, you review the list of the device (cable/satellite box, DVD, Blu-ray, etc.) connected to TV Speaker. HDMI UHD Color is specific to a UHD source, and does not operate properly for audio output. Contact Samsung's Call Center for sound problems. If the TV does not play audio, run the Sound...

User Manual
Page 201
... already have caption data. The Problem The wireless network connection failed. The software update over the Internet has failed. Confirm your PC's output resolution so it matches a resolution supported by turning it off, waiting for 15 seconds, and then turning it is not connected to a network, connect to Caption (System > Accessibility > Caption) and change the Caption Mode. If the TV is positioned correctly and the all channels. The upgrade stops if you are using an antenna, verify...
... already have caption data. The Problem The wireless network connection failed. The software update over the Internet has failed. Confirm your PC's output resolution so it matches a resolution supported by turning it off, waiting for 15 seconds, and then turning it is not connected to a network, connect to Caption (System > Accessibility > Caption) and change the Caption Mode. If the TV is positioned correctly and the all channels. The upgrade stops if you are using an antenna, verify...


