Repair Sheet
Page 3
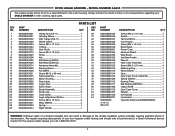
...(62002rs 1 Output Shaft 1 Gear Case Cover 1 Washer 4 Left Handle 1 Cord Label 1 Operator's Manual (039028003005) WARNING: Improper repair of your ANGLE GRINDER or when ordering repair parts. For the service center nearest you call 1-800-525-2579. 3 KEY NO. 1 2 3 4 5 6 7 8...039028003002 039028001056 039028001035 039028001036 039028001037 039028001038 039028001039 039028001042 039028001041 039028001040 039028001044 PARTS LIST DESCRIPTION QTY KEY NO. RYOBI ANGLE GRINDER - Always mention the model number in damage to the motor housing. Any repairs requiring disassembly of...
...(62002rs 1 Output Shaft 1 Gear Case Cover 1 Washer 4 Left Handle 1 Cord Label 1 Operator's Manual (039028003005) WARNING: Improper repair of your ANGLE GRINDER or when ordering repair parts. For the service center nearest you call 1-800-525-2579. 3 KEY NO. 1 2 3 4 5 6 7 8...039028003002 039028001056 039028001035 039028001036 039028001037 039028001038 039028001039 039028001042 039028001041 039028001040 039028001044 PARTS LIST DESCRIPTION QTY KEY NO. RYOBI ANGLE GRINDER - Always mention the model number in damage to the motor housing. Any repairs requiring disassembly of...
Repair Sheet
Page 4
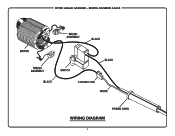
MODEL NUMBER AG453 CONNECTOR WIRING DIAGRAM 4 RYOBI ANGLE GRINDER -
MODEL NUMBER AG453 CONNECTOR WIRING DIAGRAM 4 RYOBI ANGLE GRINDER -
Trilingual (AG403)
Page 8
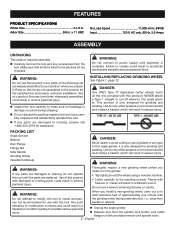
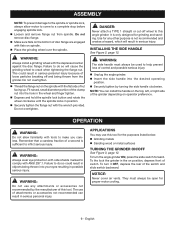
... accidental starting and possible serious personal injury. alteration or modification is only designed for use with this angle grinder. Failure to possible serious personal Unplug the angle grinder. WARNING: Do not use a wheel containing fissures or cracks. TYPE 27 − OK TO ...Flange Nut Side Handle Grinding Wheel DANGER: Never attach a wood cutting or carving blade of approximately one provided with this angle grinder. Do not use this tool until spindle locks. 8 - FEATURES PRODUCT SPECIFICATIONS Wheel Size 4-1/2 in . INSTALLING/REPLACING ...
... accidental starting and possible serious personal injury. alteration or modification is only designed for use with this angle grinder. Failure to possible serious personal Unplug the angle grinder. WARNING: Do not use a wheel containing fissures or cracks. TYPE 27 − OK TO ...Flange Nut Side Handle Grinding Wheel DANGER: Never attach a wood cutting or carving blade of approximately one provided with this angle grinder. Do not use this tool until spindle locks. 8 - FEATURES PRODUCT SPECIFICATIONS Wheel Size 4-1/2 in . INSTALLING/REPLACING ...
Trilingual (AG403)
Page 9
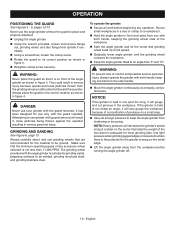
...accessories not recommended can install the handle on the top, left, or right side of the grinder depending on the spindle with the flat side of this tool. To turn the angle grinder ON, press the slide switch forward. ASSEMBLY NOTE: To prevent damage to the spindle or ...flange are engaged with side shields marked to crack when tightening the flange nut. OPERATION WARNING: Do not allow motor to come to this angle grinder. NOTICE: Never cover air vents. APPLICATIONS You may use this tool for proper motor cooling. 9 - WARNING: Always install a grinding wheel ...
...accessories not recommended can install the handle on the top, left, or right side of the grinder depending on the spindle with the flat side of this tool. To turn the angle grinder ON, press the slide switch forward. ASSEMBLY NOTE: To prevent damage to the spindle or ...flange are engaged with side shields marked to crack when tightening the flange nut. OPERATION WARNING: Do not allow motor to come to this angle grinder. NOTICE: Never cover air vents. APPLICATIONS You may use this tool for proper motor cooling. 9 - WARNING: Always install a grinding wheel ...
Trilingual (AG403)
Page 10
...installed. WARNING: To prevent loss of control and possible serious personal injury, always operate the grinder with the angle grinder is on the side handle. Move the angle grinder continuously at an angle from spindle if necessary. Using a screwdriver, loosen the clamp screw. ... be ground. GRINDING AND SANDING See Figure 6, page 13. Never use grinding wheels that the minimum operating speed of the angle grinder as shown in serious injury because sparks and loose particles thrown from chattering or bouncing. OPERATION POSITIONING THE GUARD See Figures 4...
...installed. WARNING: To prevent loss of control and possible serious personal injury, always operate the grinder with the angle grinder is on the side handle. Move the angle grinder continuously at an angle from spindle if necessary. Using a screwdriver, loosen the clamp screw. ... be ground. GRINDING AND SANDING See Figure 6, page 13. Never use grinding wheels that the minimum operating speed of the angle grinder as shown in serious injury because sparks and loose particles thrown from chattering or bouncing. OPERATION POSITIONING THE GUARD See Figures 4...
Trilingual (AG403)
Page 11
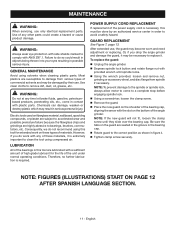
... loosen the clamp screw. Remove the guard. Place the new guard on the shoulder of the angle grinder. English To replace the guard: Unplug the angle grinder. Depress spindle lock button and rotate flange nut with the slot on fiberglass material, wallboard, spackling compounds,... the guard are lubricated with ANSI Z87.1. MAINTENANCE WARNING: When servicing, use only identical replacement parts. However, if you drop the angle grinder and damage the guard, it may result in figure 4. Tighten clamp screw securely. WARNING: Do not at any time ...
... loosen the clamp screw. Remove the guard. Place the new guard on the shoulder of the angle grinder. English To replace the guard: Unplug the angle grinder. Depress spindle lock button and rotate flange nut with the slot on fiberglass material, wallboard, spackling compounds,... the guard are lubricated with ANSI Z87.1. MAINTENANCE WARNING: When servicing, use only identical replacement parts. However, if you drop the angle grinder and damage the guard, it may result in figure 4. Tighten clamp screw securely. WARNING: Do not at any time ...


