User Guide
Page 1
User Guide What You Can Do with This Machine Getting Started Copy Fax Print Scan Document Server Web Image Monitor Adding Paper and Toner Troubleshooting Information for This Machine For information not found in "Read This First" before using the machine. For safe and correct use, be sure to read the Safety Information in paper manuals, see the online manuals available on our web site (http://www.ricoh.com/downloads/) .
User Guide What You Can Do with This Machine Getting Started Copy Fax Print Scan Document Server Web Image Monitor Adding Paper and Toner Troubleshooting Information for This Machine For information not found in "Read This First" before using the machine. For safe and correct use, be sure to read the Safety Information in paper manuals, see the online manuals available on our web site (http://www.ricoh.com/downloads/) .
User Guide
Page 3
... without Fax Unit Installed 21 Using the Facsimile and the Scanner in a Network Environment 22 Embedding Text Information in the Manuals...7 Model-Specific Information...8 Names of the Machine's Control Panel (When Using the Standard Operation Panel)...56 1 TABLE OF CONTENTS How ...to Read the Manuals...7 Symbols Used in Scanned Files 22 Preventing Information Leakage (Security Functions 23 Centrally Controlling Scan Conditions and Distribution 24 Monitoring and ...
... without Fax Unit Installed 21 Using the Facsimile and the Scanner in a Network Environment 22 Embedding Text Information in the Manuals...7 Model-Specific Information...8 Names of the Machine's Control Panel (When Using the Standard Operation Panel)...56 1 TABLE OF CONTENTS How ...to Read the Manuals...7 Symbols Used in Scanned Files 22 Preventing Information Leakage (Security Functions 23 Centrally Controlling Scan Conditions and Distribution 24 Monitoring and ...

User Guide
Page 5
... While the Original Is Being Scanned 116 Canceling a Transmission After the Original Is Scanned 117 Storing a Document...119 Sending Stored Documents...120 Printing the Journal Manually...122 5. Copying onto Custom Size Paper from the Bypass Tray 100 Copying onto Envelopes...101 Copying onto Envelopes from the Bypass Tray 101 Copying onto...
... While the Original Is Being Scanned 116 Canceling a Transmission After the Original Is Scanned 117 Storing a Document...119 Sending Stored Documents...120 Printing the Journal Manually...122 5. Copying onto Custom Size Paper from the Bypass Tray 100 Copying onto Envelopes...101 Copying onto Envelopes from the Bypass Tray 101 Copying onto...
User Guide
Page 6
.../Confirming a Computer's Information...134 Registering an SMB Folder...136 Deleting an SMB Registered Folder...140 Entering the Path to the Destination Manually 141 Basic Procedure for Sending Scan Files by E-mail 142 Registering an E-mail Destination...143 Deleting an E-mail Destination...145 Entering an ...E-mail Address Manually...146 Basic Procedure for Loading Paper...159 Loading Paper into Paper Trays...159 Loading Paper into the Bypass Tray...160 Printing from...
.../Confirming a Computer's Information...134 Registering an SMB Folder...136 Deleting an SMB Registered Folder...140 Entering the Path to the Destination Manually 141 Basic Procedure for Sending Scan Files by E-mail 142 Registering an E-mail Destination...143 Deleting an E-mail Destination...145 Entering an ...E-mail Address Manually...146 Basic Procedure for Loading Paper...159 Loading Paper into Paper Trays...159 Loading Paper into the Bypass Tray...160 Printing from...

User Guide
Page 9
...information indicated by the symbol that corresponds to the region of Region A and Region B models are indicated by two symbols. How to Read the Manuals Symbols Used in the functions of the model you are using . Be sure to the model you are using , see page 8 "Model-Specific ...the machine's display or control panels. (mainly Europe and Asia), (mainly Europe), or (mainly Asia) (mainly North America) Differences in the Manuals This manual uses the following symbols: Indicates points to pay attention to when using the machine, and explanations of likely causes of paper misfeeds, damage to ...
...information indicated by the symbol that corresponds to the region of Region A and Region B models are indicated by two symbols. How to Read the Manuals Symbols Used in the functions of the model you are using . Be sure to the model you are using , see page 8 "Model-Specific ...the machine's display or control panels. (mainly Europe and Asia), (mainly Europe), or (mainly Asia) (mainly North America) Differences in the Manuals This manual uses the following symbols: Indicates points to pay attention to when using the machine, and explanations of likely causes of paper misfeeds, damage to ...

User Guide
Page 10
... the label, see " (mainly Europe)" also. • If your machine is a region B model: • CODE XXXX -57, -58 • 120-127 V • Dimensions in this manual are given in two units of the machine, located in the position shown below. Model-Specific Information This section explains how you can identify the...
... the label, see " (mainly Europe)" also. • If your machine is a region B model: • CODE XXXX -57, -58 • 120-127 V • Dimensions in this manual are given in two units of the machine, located in the position shown below. Model-Specific Information This section explains how you can identify the...

User Guide
Page 11
Names of Major Features In this manual, major features of the machine are referred to as follows: • Auto Reverse Document Feeder ARDF • Auto Document Feeder ADF (in this manual, "ADF" refers to the ARDF and the one-pass duplex scanning ADF) • Large Capacity Tray LCT 9
Names of Major Features In this manual, major features of the machine are referred to as follows: • Auto Reverse Document Feeder ARDF • Auto Document Feeder ADF (in this manual, "ADF" refers to the ARDF and the one-pass duplex scanning ADF) • Large Capacity Tray LCT 9

User Guide
Page 15
... the machine to register destinations from a computer See "Registering Internet Fax Destination Information Using Web Image Monitor", Fax. Downloading destinations registered in the address book manually", Scan. Registering Destinations BRL060S Using the control panel to register destinations in the Address Book See "Registering Entered Destinations to electronic formats (Document Server) See...
... the machine to register destinations from a computer See "Registering Internet Fax Destination Information Using Web Image Monitor", Fax. Downloading destinations registered in the address book manually", Scan. Registering Destinations BRL060S Using the control panel to register destinations in the Address Book See "Registering Entered Destinations to electronic formats (Document Server) See...
User Guide
Page 22
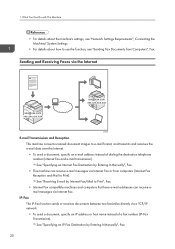
See "Receiving E-mail by Entering It Manually", Fax. • This machine can receive email messages via Internet Fax or from Computers", Fax. See "Specifying an Internet Fax Destination by Internet Fax/Mail ... Fax compatible machines and computers that have e-mail addresses can receive e-mail messages via Internet Fax. See "Specifying an IP-Fax Destination by Entering It Manually", Fax. 20 1. Sending and Receiving Faxes via a TCP/IP network. • To send a document, specify an IP address or host name instead of dialing the...
See "Receiving E-mail by Entering It Manually", Fax. • This machine can receive email messages via Internet Fax or from Computers", Fax. See "Specifying an Internet Fax Destination by Internet Fax/Mail ... Fax compatible machines and computers that have e-mail addresses can receive e-mail messages via Internet Fax. See "Specifying an IP-Fax Destination by Entering It Manually", Fax. 20 1. Sending and Receiving Faxes via a TCP/IP network. • To send a document, specify an IP address or host name instead of dialing the...

User Guide
Page 43
Caster table for Type 1, 2, and 3 13 12 11 15 10 9 Guide to use the machine as a receiver when a fax unit is provided with advanced operativity. 2. Allows you to Functions of paper. 4. External options for lower paper tray To use the lower paper tray, attach the caster table. 41 It also allows you to 550 sheets of the Machine's Options (mainly North America) 1 2 14 8 3 7 6 5 4 DCG033 1. Handset Used as a telephone. 3. Smart Operation Panel This control panel is installed. Lower paper tray Holds up to use the On Hook Dial and Manual Dial functions.
Caster table for Type 1, 2, and 3 13 12 11 15 10 9 Guide to use the machine as a receiver when a fax unit is provided with advanced operativity. 2. Allows you to Functions of paper. 4. External options for lower paper tray To use the lower paper tray, attach the caster table. 41 It also allows you to 550 sheets of the Machine's Options (mainly North America) 1 2 14 8 3 7 6 5 4 DCG033 1. Handset Used as a telephone. 3. Smart Operation Panel This control panel is installed. Lower paper tray Holds up to use the On Hook Dial and Manual Dial functions.

User Guide
Page 49
... them into booklets. Smart Operation Panel This control panel is installed on the finisher. It also allows you to use the On Hook Dial and Manual Dial functions. Handset Used as a telephone. 47 Booklet Finisher SR3170 Sorts, stacks, and staples multiple sheets of the Machine's Options 18. The saddle stitch function...
... them into booklets. Smart Operation Panel This control panel is installed on the finisher. It also allows you to use the On Hook Dial and Manual Dial functions. Handset Used as a telephone. 47 Booklet Finisher SR3170 Sorts, stacks, and staples multiple sheets of the Machine's Options 18. The saddle stitch function...

User Guide
Page 55
... tray • Finisher booklet tray Copies can staple multiple sheets of paper. Handset Used as a telephone. 53 Guide to use the On Hook Dial and Manual Dial functions. The saddle stitch function can be punched if the optional punch unit is installed. Booklet Finisher SR3170 Sorts, stacks, and staples multiple sheets...
... tray • Finisher booklet tray Copies can staple multiple sheets of paper. Handset Used as a telephone. 53 Guide to use the On Hook Dial and Manual Dial functions. The saddle stitch function can be punched if the optional punch unit is installed. Booklet Finisher SR3170 Sorts, stacks, and staples multiple sheets...

User Guide
Page 121
... original will be displayed correctly in the machine. Specify the [Original Orientation] setting correctly. Password You can be selected from the Address Book or entered manually. Select [Send & Store] or [Store Only]. Select [Store Only] to eight digit number can set this function so as a password. Storing a Document Storing a Document You...
... original will be displayed correctly in the machine. Specify the [Original Orientation] setting correctly. Password You can be selected from the Address Book or entered manually. Select [Send & Store] or [Store Only]. Select [Store Only] to eight digit number can set this function so as a password. Storing a Document Storing a Document You...

User Guide
Page 122
If you have selected [Send & Store], specify the receiver. 7. To specify an unregistered user name, press [Manual Entry], and then enter the name. After specifying a user name, press [OK]. • File Name Press [File Name], enter a file name, and then press [OK]. &#... Name], and then select a user name. 4. You cannot use the following transmission methods: • Immediate Transmission • Parallel Memory Transmission • On Hook Dial • Manual Dial 120 The stored documents are deleted.
If you have selected [Send & Store], specify the receiver. 7. To specify an unregistered user name, press [Manual Entry], and then enter the name. After specifying a user name, press [OK]. • File Name Press [File Name], enter a file name, and then press [OK]. &#... Name], and then select a user name. 4. You cannot use the following transmission methods: • Immediate Transmission • Parallel Memory Transmission • On Hook Dial • Manual Dial 120 The stored documents are deleted.

User Guide
Page 124
... No.] in Step 3, enter a 4-digit file number using the number keys. 5. Press [Exit] twice. 122 Press the [Start] key. 7. Fax Printing the Journal Manually To print the Journal manually, select the printing method: [All], [Print per File No.], or [Print per File No. Press [TX/RX Status / Print]. 2. Press [Print Journal]. 3. 4. Select...
... No.] in Step 3, enter a 4-digit file number using the number keys. 5. Press [Exit] twice. 122 Press the [Start] key. 7. Fax Printing the Journal Manually To print the Journal manually, select the printing method: [All], [Print per File No.], or [Print per File No. Press [TX/RX Status / Print]. 2. Press [Print Journal]. 3. 4. Select...

User Guide
Page 140
Locating the SMB folder manually 1. 6. Press [Connection Test] to confirm, and then press [OK]. 15. Close the Address Book screen. • When using the standard operation panel Press the [User ... settings, and then try again. 20. Press [Change] or [Browse Network], and then specify the folder. To specify a folder, you can either enter the path manually or locate the folder by browsing the network. 18. Press [Change] under "Path". 2. For example: if the name of the destination computer is "User", and...
Locating the SMB folder manually 1. 6. Press [Connection Test] to confirm, and then press [OK]. 15. Close the Address Book screen. • When using the standard operation panel Press the [User ... settings, and then try again. 20. Press [Change] or [Browse Network], and then specify the folder. To specify a folder, you can either enter the path manually or locate the folder by browsing the network. 18. Press [Change] under "Path". 2. For example: if the name of the destination computer is "User", and...

User Guide
Page 143
.... A connection test is "desk01": \\desk01\user 5. Check the connection test result, and then press [Exit]. 10. Press [OK]. 141 Press [Manual Entry]. 2. Press [Manual Entry] for logging in to the computer. Press [Manual Entry] on the destination setting, enter the user name for the password to the right of the path field. 4. Depending... folder exists. 9. Press [Connection Test]. In the following example path, the shared folder name is "user" and the computer name is performed to the Destination Manually 1. Press [Manual Entry] to display the soft keyboard. 8.
.... A connection test is "desk01": \\desk01\user 5. Check the connection test result, and then press [Exit]. 10. Press [OK]. 141 Press [Manual Entry]. 2. Press [Manual Entry] for logging in to the computer. Press [Manual Entry] on the destination setting, enter the user name for the password to the right of the path field. 4. Depending... folder exists. 9. Press [Connection Test]. In the following example path, the shared folder name is "user" and the computer name is performed to the Destination Manually 1. Press [Manual Entry] to display the soft keyboard. 8.

User Guide
Page 148
Press [Manual Entry]. 2. Scan Press [User Tools/Counter] ( ) on the top right of the screen. Enter the e-mail address. 3. Press [OK]. 146 Entering an E-mail Address Manually 1. 6.
Press [Manual Entry]. 2. Scan Press [User Tools/Counter] ( ) on the top right of the screen. Enter the e-mail address. 3. Press [OK]. 146 Entering an E-mail Address Manually 1. 6.

User Guide
Page 150
... folder in which to HDD]. 6. If necessary, specify the stored file's information, such as resolution and scan size. 9. To specify an unregistered user name, press [Manual Entry], and then enter the name. After specifying a user name, press [OK]. • File Name Press [File Name], enter a file name, and then press [OK...
... folder in which to HDD]. 6. If necessary, specify the stored file's information, such as resolution and scan size. 9. To specify an unregistered user name, press [Manual Entry], and then enter the name. After specifying a user name, press [OK]. • File Name Press [File Name], enter a file name, and then press [OK...

User Guide
Page 156
... [Target Fldr. to eight digits for the password. 11. Press [User Name]. 6. The user names shown are names that were registered in the screen, press [Manual Entry], and then enter a user name. 7. To specify a name not shown in the Address Book. You can use four to Store]. 4. Press the [Start] key...
... [Target Fldr. to eight digits for the password. 11. Press [User Name]. 6. The user names shown are names that were registered in the screen, press [Manual Entry], and then enter a user name. 7. To specify a name not shown in the Address Book. You can use four to Store]. 4. Press the [Start] key...


