User Manual
Page 2
Available features & additional services vary by third-party applications, so proceed accordingly at your device, and keep for future reference. Images and screenshots used in this manual may differ from the actual product and serve for performance issues caused by device, software or service provider. The descriptions given in this manual are based on the default settings. Our company is not liable for instructional and operational examples. 1 Read Me Please read this manual before operating your tablet to learn proper and safe use of your own risk.
Available features & additional services vary by third-party applications, so proceed accordingly at your device, and keep for future reference. Images and screenshots used in this manual may differ from the actual product and serve for performance issues caused by device, software or service provider. The descriptions given in this manual are based on the default settings. Our company is not liable for instructional and operational examples. 1 Read Me Please read this manual before operating your tablet to learn proper and safe use of your own risk.
User Manual
Page 3
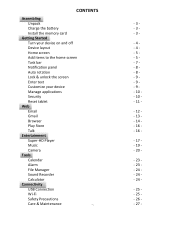
CONTENTS Assembling Unpack Charge the battery Install the memory card Getting Started Turn your device on and off Device layout Home screen Add items to the home screen Task bar Notification panel Auto rotation Lock & unlock the screen Enter text Customize your device Manage applications Security Reset tablet Web Email Gmail Browser Play Store Talk Entertainment Super‐HD Player Music Camera Tools Calendar Alarm File Manager Sound Recorder Calculator Connectivity USB Connection Wi‐Fi Safety Precautions Care & Maintenance 2 ‐ 3 ‐ ‐ 3 ‐ ‐...
CONTENTS Assembling Unpack Charge the battery Install the memory card Getting Started Turn your device on and off Device layout Home screen Add items to the home screen Task bar Notification panel Auto rotation Lock & unlock the screen Enter text Customize your device Manage applications Security Reset tablet Web Email Gmail Browser Play Store Talk Entertainment Super‐HD Player Music Camera Tools Calendar Alarm File Manager Sound Recorder Calculator Connectivity USB Connection Wi‐Fi Safety Precautions Care & Maintenance 2 ‐ 3 ‐ ‐ 3 ‐ ‐...
User Manual
Page 4
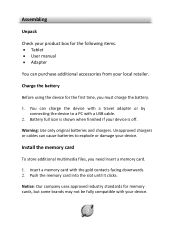
... multimedia files, you must charge the battery. 1. You can charge the device with your device. Warning: Use only original batteries and chargers. Push the memory card into the slot until it clicks. Charge the battery Before using the device for the first time, you need insert a memory card. 1. Insert a memory card with a USB cable. 2. Battery full icon is off. Assembling Unpack Check your product box for the following items. Tablet User manual Adapter...
... multimedia files, you must charge the battery. 1. You can charge the device with your device. Warning: Use only original batteries and chargers. Push the memory card into the slot until it clicks. Charge the battery Before using the device for the first time, you need insert a memory card. 1. Insert a memory card with a USB cable. 2. Battery full icon is off. Assembling Unpack Check your product box for the following items. Tablet User manual Adapter...
User Manual
Page 9
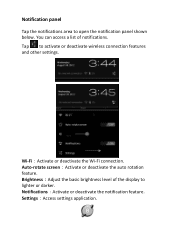
Notification panel Tap the notifications area to activate or deactivate wireless connection features and other settings. Wi‐Fi:Activate or deactivate the Wi‐Fi connection. Brightness:Adjust the basic brightness level of notifications. You can access a list of the display to lighter or darker. Notifications:Activate or deactivate the notification feature. Auto‐rotate screen:Activate or deactivate the auto rotation feature. Settings:Access settings application. 8 Tap to open the notification panel shown below.
Notification panel Tap the notifications area to activate or deactivate wireless connection features and other settings. Wi‐Fi:Activate or deactivate the Wi‐Fi connection. Brightness:Adjust the basic brightness level of notifications. You can access a list of the display to lighter or darker. Notifications:Activate or deactivate the notification feature. Auto‐rotate screen:Activate or deactivate the auto rotation feature. Settings:Access settings application. 8 Tap to open the notification panel shown below.
User Manual
Page 10
... fast inputting. Customize your device To customize your preferences, tap Settings from rotating, open the notifications panel and select Auto‐rotate screen, then scroll it to display the virtual keyboard. Auto rotation If you can enter text by selecting characters on the virtual keyboard. Lock & unlock the screen To unlock the screen, tap and hold the lock icon, then drag it to your device according to Off. To change the text input method...
... fast inputting. Customize your device To customize your preferences, tap Settings from rotating, open the notifications panel and select Auto‐rotate screen, then scroll it to display the virtual keyboard. Auto rotation If you can enter text by selecting characters on the virtual keyboard. Lock & unlock the screen To unlock the screen, tap and hold the lock icon, then drag it to your device according to Off. To change the text input method...
User Manual
Page 11
... Security You can protect your device and data by setting screen lock or encrypting your device, tap SettingsApp. 1. When prompted, draw the pattern to unlock the screen. Password:Enter a passcode to unlock. Screen time‐out Select SettingsDisplaySleep from application list. None:Deactivate the screen lock. Slide:Slide to unlock the screen. PIN:Enter a numeric PIN to unlock the screen. When prompted, enter the PIN to unlock...
... Security You can protect your device and data by setting screen lock or encrypting your device, tap SettingsApp. 1. When prompted, draw the pattern to unlock the screen. Password:Enter a passcode to unlock. Screen time‐out Select SettingsDisplaySleep from application list. None:Deactivate the screen lock. Slide:Slide to unlock the screen. PIN:Enter a numeric PIN to unlock the screen. When prompted, enter the PIN to unlock...
User Manual
Page 12
... Factory data reset. 3. Tap Reset tablet. Once you encrypt your tablet, you must enter a numeric PIN or password to decrypt it each time you want to the factory default settings automatically. Encrypt tablet You can reset system and desktop settings to their data, media and other data, tap Erase SD card checkbox to create a checkmark. 4. Warning!: Factory data reset will erase all data on your Google account, system and application data and settings, and downloaded applications. 11 If you switch...
... Factory data reset. 3. Tap Reset tablet. Once you encrypt your tablet, you must enter a numeric PIN or password to decrypt it each time you want to the factory default settings automatically. Encrypt tablet You can reset system and desktop settings to their data, media and other data, tap Erase SD card checkbox to create a checkmark. 4. Warning!: Factory data reset will erase all data on your Google account, system and application data and settings, and downloaded applications. 11 If you switch...
User Manual
Page 13
... the top left of the screen and select the one you want to retrieve messages from application list. 2. This service may be offered by a service provider. You can use mailbox guide to add another email account, tap the option button at the upper rightSettingsADD ACCOUNT, then set up your email account 1. If you need to set up your device, you need to your...
... the top left of the screen and select the one you want to retrieve messages from application list. 2. This service may be offered by a service provider. You can use mailbox guide to add another email account, tap the option button at the upper rightSettingsADD ACCOUNT, then set up your email account 1. If you need to set up your device, you need to your...
User Manual
Page 14
... the Google Mail webmail service to your inbox. Settings and the email account you want to add an existing account, tap Existing, enter your email address and password, and then select Next, when you are downloaded to your device. 13 Tap . 3. To insert attachments, tap the option button at the upper right and select Attach file. 5. Gmail You can send or receive mail on ‐ screen instructions...
... the Google Mail webmail service to your inbox. Settings and the email account you want to add an existing account, tap Existing, enter your email address and password, and then select Next, when you are downloaded to your device. 13 Tap . 3. To insert attachments, tap the option button at the upper right and select Attach file. 5. Gmail You can send or receive mail on ‐ screen instructions...
User Manual
Page 16
... browser To make adjustments in your bookmark list and easily access it later. View bookmarks and history Tap to your browser settings, tap the option button at the upper right. 2. Before using the Play Store, you to your device. To open the bookmark list and the recent history. Select SettingsGeneralSet homepage. 3. Add windows You can have a Google Account. 15
... browser To make adjustments in your bookmark list and easily access it later. View bookmarks and history Tap to your browser settings, tap the option button at the upper right. 2. Before using the Play Store, you to your device. To open the bookmark list and the recent history. Select SettingsGeneralSet homepage. 3. Add windows You can have a Google Account. 15
User Manual
Page 17
... a Google Account. 1. From the application list, tap Talk. 2. Set up a Google account or sign in to your Google Account. 3. Select Add friend, enter a friend's email address and select Send invitation. 4. When your friend accepts the invitation, he or she is added to your friend list. Play Store 1. Our company is a free web‐based application for instant text, voice and video chats. Search for performance issues...
... a Google Account. 1. From the application list, tap Talk. 2. Set up a Google account or sign in to your Google Account. 3. Select Add friend, enter a friend's email address and select Send invitation. 4. When your friend accepts the invitation, he or she is added to your friend list. Play Store 1. Our company is a free web‐based application for instant text, voice and video chats. Search for performance issues...

User Manual
Page 18
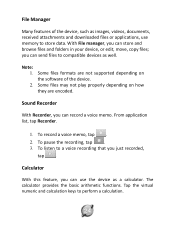
... zoom out, move fingers closer together. View a photo 1. To view more files. Supported file formats Type Images Video Format JPEG、 GIF、BMP、PNG AVI、RM、RMVB、MOV、FLV、3GP、MP4 Note: Some files may not play properly depending on the screen and spread them apart. You can also double‐tap...
... zoom out, move fingers closer together. View a photo 1. To view more files. Supported file formats Type Images Video Format JPEG、 GIF、BMP、PNG AVI、RM、RMVB、MOV、FLV、3GP、MP4 Note: Some files may not play properly depending on the screen and spread them apart. You can also double‐tap...
User Manual
Page 20
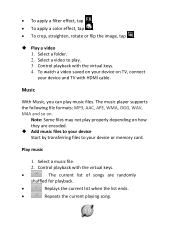
... file. 2. Select a video to your device Start by transferring files to play music files. To apply a filter effect, tap . To apply a color effect, tap . To crop, straighten, rotate or flip the image, tap . Play a video 1. Control playback with the virtual keys. The current list of songs are encoded. Add music files to your device or memory card. Note: Some files may not play...
... file. 2. Select a video to your device Start by transferring files to play music files. To apply a filter effect, tap . To apply a color effect, tap . To crop, straighten, rotate or flip the image, tap . Play a video 1. Control playback with the virtual keys. The current list of songs are encoded. Add music files to your device or memory card. Note: Some files may not play...
User Manual
Page 21
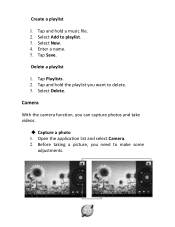
Enter a name. 5. Delete a playlist 1. Select New. 4. Tap Playlists. 2. Tap and hold a music file. 2. Select Add to make some adjustments. 20 Select Delete. Create a playlist 1. Tap Save. Camera With the camera function, you want to delete. 3. Open the application list and select Camera. 2. Before taking a picture, you need to playlist. 3. Tap and hold the playlist you can capture photos and take videos. Capture a photo 1.
Enter a name. 5. Delete a playlist 1. Select New. 4. Tap Playlists. 2. Tap and hold a music file. 2. Select Add to make some adjustments. 20 Select Delete. Create a playlist 1. Tap Save. Camera With the camera function, you want to delete. 3. Open the application list and select Camera. 2. Before taking a picture, you need to playlist. 3. Tap and hold the playlist you can capture photos and take videos. Capture a photo 1.
User Manual
Page 23
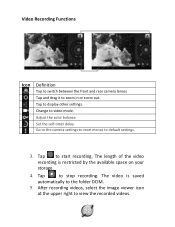
... upper right to default settings. 3. Tap to the folder DCIM. 5. The video is restricted by the available space on your storage. 4. Tap to zoom in or zoom out. Adjust the color balance. Video Recording Functions Icon Definition Tap to switch between the front and rear camera lenses Tap and drag it to display other settings. Change to stop recording. Tap to video mode.
... upper right to default settings. 3. Tap to the folder DCIM. 5. The video is restricted by the available space on your storage. 4. Tap to zoom in or zoom out. Adjust the color balance. Video Recording Functions Icon Definition Tap to switch between the front and rear camera lenses Tap and drag it to display other settings. Change to stop recording. Tap to video mode.
User Manual
Page 24
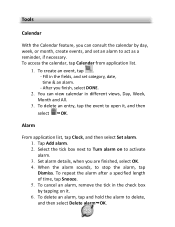
... set an alarm to activate alarm. 3. Tap Add alarm. 2. You can consult the calendar by tapping on to act as a reminder, if necessary. To delete an entry, tap the event to Turn alarm on it , and then select OK. When the alarm sounds, to delete, and then select Delete ...From application list, tap Clock, and then select Set alarm. 1. To cancel an alarm, remove the tick in the check box by day, week, or month, create events, and set category, date, time & an alarm. ‐ After you are finished, select OK. 4. To access the calendar, tap Calendar from application list. 1....
... set an alarm to activate alarm. 3. Tap Add alarm. 2. You can consult the calendar by tapping on to act as a reminder, if necessary. To delete an entry, tap the event to Turn alarm on it , and then select OK. When the alarm sounds, to delete, and then select Delete ...From application list, tap Clock, and then select Set alarm. 1. To cancel an alarm, remove the tick in the check box by day, week, or month, create events, and set category, date, time & an alarm. ‐ After you are finished, select OK. 4. To access the calendar, tap Calendar from application list. 1....
User Manual
Page 25
To record a voice memo, tap . 2. To listen to a voice recording that you can use memory to store data. The calculator provides the basic arithmetic functions. Tap the virtual numeric and calculation keys to compatible devices as a calculator. To pause the recording, tap . 3. Calculator With this feature, you can record a voice memo. you can send files to perform a calculation. 24 Some files formats are...
To record a voice memo, tap . 2. To listen to a voice recording that you can use memory to store data. The calculator provides the basic arithmetic functions. Tap the virtual numeric and calculation keys to compatible devices as a calculator. To pause the recording, tap . 3. Calculator With this feature, you can record a voice memo. you can send files to perform a calculation. 24 Some files formats are...
User Manual
Page 26
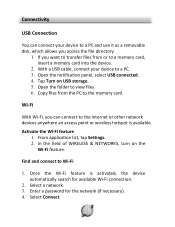
Open the notification panel, select USB connected. 4. Open the folder to Wi‐Fi 1. Select a network. 3. If you want to transfer files from the PC to the memory card. Find and connect to view files. 6. Enter a password for available Wi‐Fi connection. 2. Select Connect. 25 Connectivity USB Connection You can connect to the internet or other network devices anywhere an access point or wireless hotspot is activated, the device automatically search for the network (if necessary). 4. Tap Turn on...
Open the notification panel, select USB connected. 4. Open the folder to Wi‐Fi 1. Select a network. 3. If you want to transfer files from the PC to the memory card. Find and connect to view files. 6. Enter a password for available Wi‐Fi connection. 2. Select Connect. 25 Connectivity USB Connection You can connect to the internet or other network devices anywhere an access point or wireless hotspot is activated, the device automatically search for the network (if necessary). 4. Tap Turn on...
User Manual
Page 27
... potential interference with other device, read its user guide for detailed safety instructions. Aircraft Switch off in any restrictions. Place it in aircraft. Position your device. Wireless devices can cause interference in a safe place. Pacemakers and other medical devices Pacemaker manufacturers recommend that a minimum separation of 8 inches be dangerous or illegal. Operating environment When connecting to access your device without removing your device when in aircraft...
... potential interference with other device, read its user guide for detailed safety instructions. Aircraft Switch off in any restrictions. Place it in aircraft. Position your device. Wireless devices can cause interference in a safe place. Pacemakers and other medical devices Pacemaker manufacturers recommend that a minimum separation of 8 inches be dangerous or illegal. Operating environment When connecting to access your device without removing your device when in aircraft...

User Manual
Page 29
Specifications Pyle Astro 9.1" Android Touch‐Screen 3D Wi‐Fi Tablet with Case & Power Accessory Bundle Android 4.0 (Ice Cream Operating System) 1.2GHz Cortex A8 Processor Chip with 3D Graphic Acceleration (2) Built‐in Storage Capacity Integrated Flash Video Interface Multi Language Support 512MB DDR3 RAM Pixel Resolution: 800 x 480 Compatible with 4‐Direction Gravity Sensing High‐Speed Wireless Network: 802.11 b/g/n External SD Card Port (Supports up to Micro USB interface...
Specifications Pyle Astro 9.1" Android Touch‐Screen 3D Wi‐Fi Tablet with Case & Power Accessory Bundle Android 4.0 (Ice Cream Operating System) 1.2GHz Cortex A8 Processor Chip with 3D Graphic Acceleration (2) Built‐in Storage Capacity Integrated Flash Video Interface Multi Language Support 512MB DDR3 RAM Pixel Resolution: 800 x 480 Compatible with 4‐Direction Gravity Sensing High‐Speed Wireless Network: 802.11 b/g/n External SD Card Port (Supports up to Micro USB interface...


