
PRJ3D99TU Manual 1
Page 8
... TV without other surrounding noise, makes you can make full use of the 8 Note: Music2FM may not be received with your FM radios, such as amplifiers with FM receivers, mobiles phones with FM radio function, and so on. That is turned into FM signals. At 2 years/20,000 hours, it's maybe...
... TV without other surrounding noise, makes you can make full use of the 8 Note: Music2FM may not be received with your FM radios, such as amplifiers with FM receivers, mobiles phones with FM radio function, and so on. That is turned into FM signals. At 2 years/20,000 hours, it's maybe...
PRJ3D99TU Manual 1
Page 26
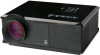
... Video source device. 2.Connect the other end of the HDMI cable to the HDMI input socket on the HDMI port, causing it to a suitable audio amplifier. The weight of the DVI to HDMI adapter may be like that shown in the following diagram: Note: ● It is better. The final connection... pulling down on the projector. 3.Connect one end of the audio from HDMI is not recommended to establish the connection via a DVI to a suitable audio amplifier. But the quality of separate audio cable to the projector, and the other end to become loose over time. ● If the selected video image...
... Video source device. 2.Connect the other end of the HDMI cable to the HDMI input socket on the HDMI port, causing it to a suitable audio amplifier. The weight of the DVI to HDMI adapter may be like that shown in the following diagram: Note: ● It is better. The final connection... pulling down on the projector. 3.Connect one end of the audio from HDMI is not recommended to establish the connection via a DVI to a suitable audio amplifier. But the quality of separate audio cable to the projector, and the other end to become loose over time. ● If the selected video image...
PRJ3D99TU Manual 1
Page 27
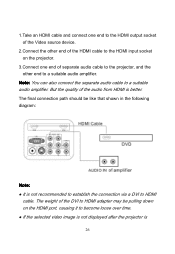
...operating correctly. Connecting a Component-Video source device Check your Video source device to see whether it has a set of the Component Video cable to the amplifier. Match the color of the sockets; Also check that the video source device is turned on the projector. green to green, blue to blue, ...and red to red. 3.You should also connect the separate audio cable to the color of the plugs to a suitable audio amplifier. 27 To connect the projector to a Component Video source device: 1.Take a Component Video cable and connect one end to the color of the Video ...
...operating correctly. Connecting a Component-Video source device Check your Video source device to see whether it has a set of the Component Video cable to the amplifier. Match the color of the sockets; Also check that the video source device is turned on the projector. green to green, blue to blue, ...and red to red. 3.You should also connect the separate audio cable to the color of the plugs to a suitable audio amplifier. 27 To connect the projector to a Component Video source device: 1.Take a Component Video cable and connect one end to the color of the Video ...
PRJ3D99TU Manual 1
Page 29
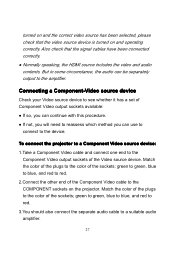
... projector. source device. 2.Connect the other end of the 2.Connect the other end of the S-Video cable to the S-VIDEO Video cable to a suitable audio amplifier.
... projector. source device. 2.Connect the other end of the 2.Connect the other end of the S-Video cable to the S-VIDEO Video cable to a suitable audio amplifier.
PRJ3D99TU Manual 1
Page 31
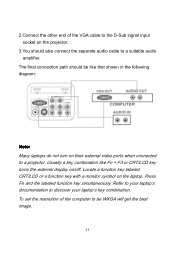
... D-Sub signal input socket on the projector. 3.You should be WXGA will get the best image. 31 Refer to your laptop's documentation to a suitable audio amplifier. Press Fn and the labeled function key simultaneously. The final connection path should also connect the separate audio cable to discover your laptop's key combination.
... D-Sub signal input socket on the projector. 3.You should be WXGA will get the best image. 31 Refer to your laptop's documentation to a suitable audio amplifier. Press Fn and the labeled function key simultaneously. The final connection path should also connect the separate audio cable to discover your laptop's key combination.

PRJ3D99TU Manual 1
Page 32
To connect the projector to ATSC TV 1.Take a TV cable and connect one end to the output socket of the TV source. 2.Connect the other end of the TV cable to the TV signal input socket on the projector. 3.You can also connect the audio cable from Audio Out sockets to ATSC TV. Connecting American ATSC TV The projector provides a built-in TV tuner that allows you to connect it to a suitable audio amplifier. 32
To connect the projector to ATSC TV 1.Take a TV cable and connect one end to the output socket of the TV source. 2.Connect the other end of the TV cable to the TV signal input socket on the projector. 3.You can also connect the audio cable from Audio Out sockets to ATSC TV. Connecting American ATSC TV The projector provides a built-in TV tuner that allows you to connect it to a suitable audio amplifier. 32