User Manual
Page 1
In-Dash AM/FM Receiver with MP3 Playback & USB/SD/AUX Inputs Receiver Models: PLMRB29W/PLMRB29B MIC USER'S MANUAL
In-Dash AM/FM Receiver with MP3 Playback & USB/SD/AUX Inputs Receiver Models: PLMRB29W/PLMRB29B MIC USER'S MANUAL
User Manual
Page 2
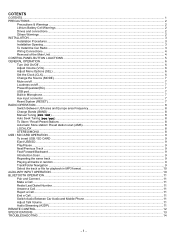
... the Car Radio ...3 Wiring Connections ...4 Removal of the Main Unit ...4 CONTROL PANEL BUTTON LOACTIONS ...5 GENERAL OPERATION ...6 Turn Unit On/Off ...6 Adjust Volume (VOL)...6 Adjust Menu Options (SEL) ...6 Set the Clock (CLK)...6 Change the Source (MODE) ...7 Mute on/off ...7 Loudness on/off...7 Preset Equalizer(EQ) ...7 USB port...7 Built-in Microphone...7 Aux input connector...7 Reset System (RESET)...7 RADIO OPERATION...8 Switch Between USA area and Europe area Frequency 8 Change Bands (BAND) ...8 Manual Tuning ( / ) ...8 Auto Seek Tuning ( / )...8 To Store / Recall Preset Stations...
... the Car Radio ...3 Wiring Connections ...4 Removal of the Main Unit ...4 CONTROL PANEL BUTTON LOACTIONS ...5 GENERAL OPERATION ...6 Turn Unit On/Off ...6 Adjust Volume (VOL)...6 Adjust Menu Options (SEL) ...6 Set the Clock (CLK)...6 Change the Source (MODE) ...7 Mute on/off ...7 Loudness on/off...7 Preset Equalizer(EQ) ...7 USB port...7 Built-in Microphone...7 Aux input connector...7 Reset System (RESET)...7 RADIO OPERATION...8 Switch Between USA area and Europe area Frequency 8 Change Bands (BAND) ...8 Manual Tuning ( / ) ...8 Auto Seek Tuning ( / )...8 To Store / Recall Preset Stations...
User Manual
Page 3
... may cause damage to the remote control. 噝 Do not throw cells into the openings of the car radio (USB jack, card slot, AUX IN connection). Others Warnings Do not switch on and using the unit. 噝 If the battery is disconnected, discharged, or changed, the preset memory of the unit will be installed in a level, horizontal position. This could cause the car battery to discharge and the vehicle...
... may cause damage to the remote control. 噝 Do not throw cells into the openings of the car radio (USB jack, card slot, AUX IN connection). Others Warnings Do not switch on and using the unit. 噝 If the battery is disconnected, discharged, or changed, the preset memory of the unit will be installed in a level, horizontal position. This could cause the car battery to discharge and the vehicle...
User Manual
Page 4
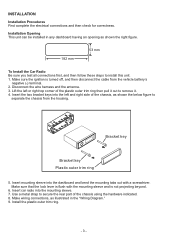
... mm To Install the Car Radio Be sure you test all connections first, and then follow these steps to separate the chassis from the vehicle battery's negative (-) terminal. 2. Installation Opening This unit can be installed in any dashboard having an opening as illustrated in the "Wiring Diagram." 9. Make sure that the lock lever is turned off, and then disconnect the cable from the housing. Use a metal strap...
... mm To Install the Car Radio Be sure you test all connections first, and then follow these steps to separate the chassis from the vehicle battery's negative (-) terminal. 2. Installation Opening This unit can be installed in any dashboard having an opening as illustrated in the "Wiring Diagram." 9. Make sure that the lock lever is turned off, and then disconnect the cable from the housing. Use a metal strap...
User Manual
Page 5
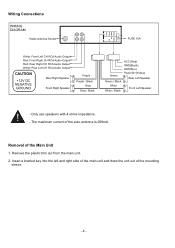
... the auto antenna is 200mA. The maximum current of the mounting sleeve. - 4 - Removal of the Main Unit 1. Only use speakers with 4 ohms impedance. - Remove the plastic trim out from the main unit. 2. Wiring Connections WIRING DIAGRAM Radio Antenna Socket 15A FUSE 15A White: Front Left CH RCA Audio Output Red: Front Right CH RCA Audio Output Red: Rear Right CH RCA Audio Output White: Rear Left CH RCA Audio Output CAUTION +12V DC NEGATIVE GROUND Rear Right Speaker Front Right Speaker Purple Purple / Black Gray Gray / Black ACC (Red) GND(Black) ANT(Blue) Power...
... the auto antenna is 200mA. The maximum current of the mounting sleeve. - 4 - Removal of the Main Unit 1. Only use speakers with 4 ohms impedance. - Remove the plastic trim out from the main unit. 2. Wiring Connections WIRING DIAGRAM Radio Antenna Socket 15A FUSE 15A White: Front Left CH RCA Audio Output Red: Front Right CH RCA Audio Output Red: Rear Right CH RCA Audio Output White: Rear Left CH RCA Audio Output CAUTION +12V DC NEGATIVE GROUND Rear Right Speaker Front Right Speaker Purple Purple / Black Gray Gray / Black ACC (Red) GND(Black) ANT(Blue) Power...
User Manual
Page 6
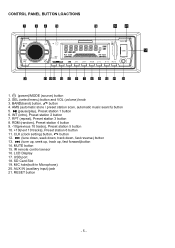
...remote control sensor 16. AUX IN (auxiliary input) jack 21. LCD Display 17. RDM (random), Preset station 4 button 9. -10(previous 10 tracks), Preset station 5 button 10. +10(next 10 tracks), Preset station 6 button 11. CONTROL PANEL BUTTON LOACTIONS 1 2 4 15 16 18 21 17 MIC 3 11 19 12 13 5 6 7 8 9 10 14 20 1. (power)/MODE (source) button 2. USB port 18. BAND(band) button, button 4. RESET button - 5 - MIC hole(built-in Microphone) 20. SEL (select/menu) button and VOL (volume) knob 3. RPT (repeat), Preset station 3 button 8. CLK (clock setting) button, button...
...remote control sensor 16. AUX IN (auxiliary input) jack 21. LCD Display 17. RDM (random), Preset station 4 button 9. -10(previous 10 tracks), Preset station 5 button 10. +10(next 10 tracks), Preset station 6 button 11. CONTROL PANEL BUTTON LOACTIONS 1 2 4 15 16 18 21 17 MIC 3 11 19 12 13 5 6 7 8 9 10 14 20 1. (power)/MODE (source) button 2. USB port 18. BAND(band) button, button 4. RESET button - 5 - MIC hole(built-in Microphone) 20. SEL (select/menu) button and VOL (volume) knob 3. RPT (repeat), Preset station 3 button 8. CLK (clock setting) button, button...
User Manual
Page 7
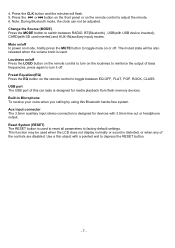
... unit. 噝 Press the power ( ) /MODE button on the front panel to turn on the unit, and long press it again to ) button on the remote control to turn off . BALANCE:L07,L06,~, L01, 00, R01,~,R06,R07 - Stereo/Mono: Switches between USA and Europe frequency. Volume level:00, 01,~,43 噝 Press and hold the CLK button and the hour will change the frequency setting...
... unit. 噝 Press the power ( ) /MODE button on the front panel to turn on the unit, and long press it again to ) button on the remote control to turn off . BALANCE:L07,L06,~, L01, 00, R01,~,R06,R07 - Stereo/Mono: Switches between USA and Europe frequency. Volume level:00, 01,~,43 噝 Press and hold the CLK button and the hour will change the frequency setting...
User Manual
Page 8
... memory devices. USB port The USB port of bass frequencies, press again to toggle between RADIO, BT(Bluetooth) , USB(with USB device inserted), CARD(with 3.5mm line-out or headphone output. Note: During Bluetooth mode, the clock can not be also released when the volume knob is used when the LCD does not display normally or sound is designed for devices with SD card inserted) and AUX-IN(auxiliary input) modes. 4. Preset Equalizer(EQ) Press the EQ button on mode...
... memory devices. USB port The USB port of bass frequencies, press again to toggle between RADIO, BT(Bluetooth) , USB(with USB device inserted), CARD(with 3.5mm line-out or headphone output. Note: During Bluetooth mode, the clock can not be also released when the volume knob is used when the LCD does not display normally or sound is designed for devices with SD card inserted) and AUX-IN(auxiliary input) modes. 4. Preset Equalizer(EQ) Press the EQ button on mode...
User Manual
Page 9
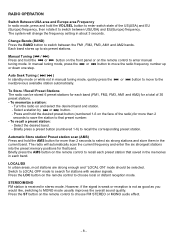
... six preset stations. The radio will change the frequency setting in each band. Press the ST button on the remote control to enter manual tuning mode. LOCAL/DX In urban areas, most stations are strong enough and "LOCAL ON" mode should be stored 6 preset stations for each preset station that preset number. - STEREO/MONO FM station is not as good as you would like, switching to MONO mode usually improves the overall sound...
... six preset stations. The radio will change the frequency setting in each band. Press the ST button on the remote control to enter manual tuning mode. LOCAL/DX In urban areas, most stations are strong enough and "LOCAL ON" mode should be stored 6 preset stations for each preset station that preset number. - STEREO/MONO FM station is not as good as you would like, switching to MONO mode usually improves the overall sound...

User Manual
Page 10
..., then remove the USB device. 噝 To eject an SD card, press the button to stop the introduction scan, and play files on a USB device, open the USB port cover and insert the USB storage device into the SD slot on the number and level of folders. 噝 These buttons have no folders. - 9 - button. Play/Pause Press the (play the previous track, press the button. USB / SD CARD OPERATION To insert USB / SD...
..., then remove the USB device. 噝 To eject an SD card, press the button to stop the introduction scan, and play files on a USB device, open the USB port cover and insert the USB storage device into the SD slot on the number and level of folders. 噝 These buttons have no folders. - 9 - button. Play/Pause Press the (play the previous track, press the button. USB / SD CARD OPERATION To insert USB / SD...
User Manual
Page 11
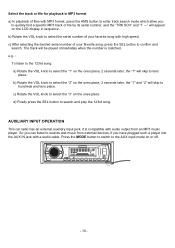
... to sounds and music from an MP3 music player. e.g. : To listen to the 123rd song: a) Rotate the VOL knob to select the "1" on the LCD display in MP3 format a) In playback of files with audio output from external devices, if you to select the serial number of your favorite song, press the SEL button to search and play the 123rd song. Press the MODE button to switch to...
... to sounds and music from an MP3 music player. e.g. : To listen to the 123rd song: a) Rotate the VOL knob to select the "1" on the LCD display in MP3 format a) In playback of files with audio output from external devices, if you to select the serial number of your favorite song, press the SEL button to search and play the 123rd song. Press the MODE button to switch to...
User Manual
Page 12
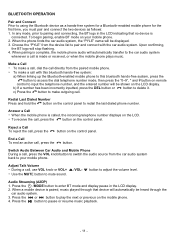
... button to pairing and connecting, the BT logo in the LCD display. 2. When pairing is paired, music played through that no device is made or received, or when the mobile phone plays music. When a mobile device is complete, the mobile phone audio will automatically be heard through the car audio system. 3. BLUETOOTH OPERATION Pair and Connect Prior to delete it. Make a Call 噝 To make a call , use VOL knob or VOL+ 噝 Use the MUTE button to input the telephone number...
... button to pairing and connecting, the BT logo in the LCD display. 2. When pairing is paired, music played through that no device is made or received, or when the mobile phone plays music. When a mobile device is complete, the mobile phone audio will automatically be heard through the car audio system. 3. BLUETOOTH OPERATION Pair and Connect Prior to delete it. Make a Call 噝 To make a call , use VOL knob or VOL+ 噝 Use the MUTE button to input the telephone number...
User Manual
Page 13
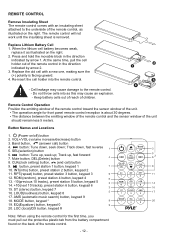
.... Replace Lithium Battery Cell 1. Keep battery cells out of reach of the unit should remain less 5 meters. Track up ; AMS (automatic music search) button, keypad 9 18. EQ(Equalizer) button, keypad 0 20. The remote control will not work until the insulating sheet is facing upward. 4. Mute button, DEL(Delete) button 8. Button Names and Locations 1. (Power on the right. 2. Re-insert the cell holder into as illustrated on /off) button 2. button, preset station 1 button, keypad...
.... Replace Lithium Battery Cell 1. Keep battery cells out of reach of the unit should remain less 5 meters. Track up ; AMS (automatic music search) button, keypad 9 18. EQ(Equalizer) button, keypad 0 20. The remote control will not work until the insulating sheet is facing upward. 4. Mute button, DEL(Delete) button 8. Button Names and Locations 1. (Power on the right. 2. Re-insert the cell holder into as illustrated on /off) button 2. button, preset station 1 button, keypad...
User Manual
Page 15
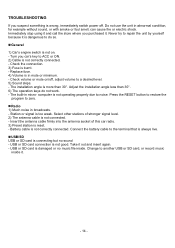
... use the unit in broadcasts. - Turn you car's key to another USB or SD card, or record music inside . Take it . Never try to repair the unit by yourself because it . - 14 - Check volume or mute on . - The built-in mute or minimum. - USB or SD card connection is not operating properly due to do not work. - computer is not good. Battery cable is wrong, immediately switch power off , adjust volume...
... use the unit in broadcasts. - Turn you car's key to another USB or SD card, or record music inside . Take it . Never try to repair the unit by yourself because it . - 14 - Check volume or mute on . - The built-in mute or minimum. - USB or SD card connection is not operating properly due to do not work. - computer is not good. Battery cable is wrong, immediately switch power off , adjust volume...

