
English Manual
Page 3
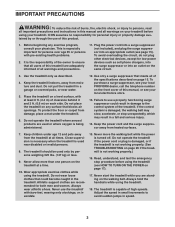
... suppressor or into an appropriate outlet (see your local PROFORM dealer, call the telephone number on the front cover of the specifications described on your treadmill before using your treadmill. Do not operate the treadmill where aerosol products are adequately informed of burns, fire,.... To purchase a surge suppressor, see page 15). Always hold the handrails while using the treadmill. ICON assumes no responsibility for low-power devices such as described. 4. Keep the treadmill indoors, away from heated surfaces. 7. To protect the floor or carpet from damage, place ...
... suppressor or into an appropriate outlet (see your local PROFORM dealer, call the telephone number on the front cover of the specifications described on your treadmill before using your treadmill. Do not operate the treadmill where aerosol products are adequately informed of burns, fire,.... To purchase a surge suppressor, see page 15). Always hold the handrails while using the treadmill. ICON assumes no responsibility for low-power devices such as described. 4. Keep the treadmill indoors, away from heated surfaces. 7. To protect the floor or carpet from damage, place ...

English Manual
Page 4
... be performed by an authorized service representative. Always unplug the power cord immediately after use . 21. The treadmill is intended for the location of the power switch), and unplug the power cord when the treadmill is holding the frame securely in use , before performing the... do so by an authorized ser- Over exercising may affect the accuracy of the treadmill regularly. vice representative only. 26. SAVE THESE INSTRUCTIONS 4 Always remove the key, press the power switch into any commercial, rental, or institutional setting. 22. When folding or moving...
... be performed by an authorized service representative. Always unplug the power cord immediately after use . 21. The treadmill is intended for the location of the power switch), and unplug the power cord when the treadmill is holding the frame securely in use , before performing the... do so by an authorized ser- Over exercising may affect the accuracy of the treadmill regularly. vice representative only. 26. SAVE THESE INSTRUCTIONS 4 Always remove the key, press the power switch into any commercial, rental, or institutional setting. 22. When folding or moving...

English Manual
Page 5
And when you for selecting the revolutionary PROFORM® POWER 795 treadmill. The model number and the location of the serial number decal are shown on the front cover of this manual. Before reading further, please review ... workouts at home more enjoyable and effective. To help us . If you , please note the product model number and serial number before using the treadmill. The POWER 795 treadmill offers an impressive selection of features designed to make your benet, read this manual carefully before contacting us assist you have questions after reading...
And when you for selecting the revolutionary PROFORM® POWER 795 treadmill. The model number and the location of the serial number decal are shown on the front cover of this manual. Before reading further, please review ... workouts at home more enjoyable and effective. To help us . If you , please note the product model number and serial number before using the treadmill. The POWER 795 treadmill offers an impressive selection of features designed to make your benet, read this manual carefully before contacting us assist you have questions after reading...

English Manual
Page 7
... keys one adjustable wrench one Phillips screwdriver scissors needlenose pliers To avoid damaging parts, do not use power tools. 1. Attach the Left Wheel Cap (96) to the right side of the treadmill. ASSEMBLY •• To hire an authorized service technician to protect the floor or carpet. Do... not dispose of the 1 Frame (56) to assemble the treadmill, call 1-800-445-2480. •• Assembly requires two persons. •• Place all parts in the same way. 94 2 56 96 Cardboard ...
... keys one adjustable wrench one Phillips screwdriver scissors needlenose pliers To avoid damaging parts, do not use power tools. 1. Attach the Left Wheel Cap (96) to the right side of the treadmill. ASSEMBLY •• To hire an authorized service technician to protect the floor or carpet. Do... not dispose of the 1 Frame (56) to assemble the treadmill, call 1-800-445-2480. •• Assembly requires two persons. •• Place all parts in the same way. 94 2 56 96 Cardboard ...

English Manual
Page 10
... x 3/4" Screws (9), and two 1/4" Star Washers (35) as shown. Remove the two Screws (A). Console Assembly A 93 9. IMPORTANT: To avoid damaging the 9 Crossbar (93), do not use power tools and do not overtighten the #10 x 3/4" Screws (9) or the #10 x 3/4" Flat Head Screws (112). Attach the Crossbar to the Handrails (87, 88) with two...
... x 3/4" Screws (9), and two 1/4" Star Washers (35) as shown. Remove the two Screws (A). Console Assembly A 93 9. IMPORTANT: To avoid damaging the 9 Crossbar (93), do not use power tools and do not overtighten the #10 x 3/4" Screws (9) or the #10 x 3/4" Flat Head Screws (112). Attach the Crossbar to the Handrails (87, 88) with two...

English Manual
Page 11
... not, turn one connector and try again. IF YOU DO NOT CONNECT THE CONNECTORS PROPERLY, THE CONSOLE MAY BECOME DAMAGED WHEN YOU TURN ON THE POWER. Start all six Screws and all four 11 Screws, and then tighten them. 113 See step 7. See the inset drawing. The connectors should slide together...
... not, turn one connector and try again. IF YOU DO NOT CONNECT THE CONNECTORS PROPERLY, THE CONSOLE MAY BECOME DAMAGED WHEN YOU TURN ON THE POWER. Start all six Screws and all four 11 Screws, and then tighten them. 113 See step 7. See the inset drawing. The connectors should slide together...

English Manual
Page 13
Then, press the Incline increase button once. Next, see page 17 and turn on 16 the power. IMPORTANT: See page 15 and plug in this step 13 When the frame stops moving, remove the key from the console and unplug the power cord. 15. IMPORTANT: Make sure to the console assembly with four #8 x 1/2" 15 Screws (1). 108 107 1 Console Assembly 1 1 16. Attach the Left Tray (107) and the Right Tray (108) to follow all instructions in the power cord.
Then, press the Incline increase button once. Next, see page 17 and turn on 16 the power. IMPORTANT: See page 15 and plug in this step 13 When the frame stops moving, remove the key from the console and unplug the power cord. 15. IMPORTANT: Make sure to the console assembly with four #8 x 1/2" 15 Screws (1). 108 107 1 Console Assembly 1 1 16. Attach the Left Tray (107) and the Right Tray (108) to follow all instructions in the power cord.

English Manual
Page 15
...proper outlet installed by a qualified electrician. IMPORTANT: The treadmill is grounded. nominal 120-volt circuit capable of damaging the treadmill, always use a properly functioning surge suppressor could result in the Power Cord The treadmill must be installed by sudden voltage changes in accordance with ... outlet must be electrically rated for 120 volts AC and 15 amps. OPERATION AND ADJUSTMENT HOW TO CONNECT THE POWER CORD Use a Surge Suppressor Your treadmill, like other electronic equipment, can be connected with a metal screw to users. Voltage surges, spikes, and ...
...proper outlet installed by a qualified electrician. IMPORTANT: The treadmill is grounded. nominal 120-volt circuit capable of damaging the treadmill, always use a properly functioning surge suppressor could result in the Power Cord The treadmill must be installed by sudden voltage changes in accordance with ... outlet must be electrically rated for 120 volts AC and 15 amps. OPERATION AND ADJUSTMENT HOW TO CONNECT THE POWER CORD Use a Surge Suppressor Your treadmill, like other electronic equipment, can be connected with a metal screw to users. Voltage surges, spikes, and ...

English Manual
Page 16
.... To purchase an iFit Live module at any time, go to analyze your results and monitor your progress toward your heart rate using the treadmill. To use a PROFORM SYNC, see page 17. As you exercise, the console will display instant exercise feedback. can even measure your tness goals. To... purchase a SYNC at any time, call the telephone number on the front cover of plastic on the power, see page 22. For simplicity, all ...
.... To purchase an iFit Live module at any time, go to analyze your results and monitor your progress toward your heart rate using the treadmill. To use a PROFORM SYNC, see page 17. As you exercise, the console will display instant exercise feedback. can even measure your tness goals. To... purchase a SYNC at any time, call the telephone number on the front cover of plastic on the power, see page 22. For simplicity, all ...

English Manual
Page 17
...one of the buttons, the speed setting will begin to metric units. The time will light. Press the power switch into the console. Press the Manual button on the treadmill frame near the power cord. To start the walking belt, press the Start button, the Speed increase button, or one of your...increase button. 17 if the key is set to ash in the power cord and press the power switch into the console. HOW TO TURN ON THE POWER HOW TO USE THE MANUAL MODE IMPORTANT: If the treadmill has been exposed to cold temperatures, allow it to warm to reach the selected...
...one of the buttons, the speed setting will begin to metric units. The time will light. Press the power switch into the console. Press the Manual button on the treadmill frame near the power cord. To start the walking belt, press the Start button, the Speed increase button, or one of your...increase button. 17 if the key is set to ash in the power cord and press the power switch into the console. HOW TO TURN ON THE POWER HOW TO USE THE MANUAL MODE IMPORTANT: If the treadmill has been exposed to cold temperatures, allow it to warm to reach the selected...

English Manual
Page 19
... of the treadmill to turn off the fan. When you do not do this, the treadmill’'s electrical components may damage the treadmill when you are clean. Turn on the pulse Contacts bar. The fan features multiple speed settings. Before using the treadmill, press the power switch into the... off position and unplug the power cord. Step onto the foot rails, press the Stop button, and adjust the incline of plas- Note...
... of the treadmill to turn off the fan. When you do not do this, the treadmill’'s electrical components may damage the treadmill when you are clean. Turn on the pulse Contacts bar. The fan features multiple speed settings. Before using the treadmill, press the power switch into the... off position and unplug the power cord. Step onto the foot rails, press the Stop button, and adjust the incline of plas- Note...
English Manual
Page 20
... of the workout. Follow your progress. See step 6 on page 19. 7. See step 7 on page 19. 6. See HOW TO TURN ON THE POWER on page 18. 5. A moment after you will burn will automatically adjust to ash in the display. The time will automatically adjust to the speed... and incline settings for a few seconds and the treadmill will appear in the display. Start the workout. Each workout is programmed for the next segment, the new speed and/or incline setting will...
... of the workout. Follow your progress. See step 6 on page 19. 7. See step 7 on page 19. 6. See HOW TO TURN ON THE POWER on page 18. 5. A moment after you will burn will automatically adjust to ash in the display. The time will automatically adjust to the speed... and incline settings for a few seconds and the treadmill will appear in the display. Start the workout. Each workout is programmed for the next segment, the new speed and/or incline setting will...

English Manual
Page 21
... near or connected to any time, press the Stop button. During some workouts will walk or run, the approximate number of the workout begins, the treadmill will be downloaded. To stop the workout at least 8 in the display. Turn on page 17. 2. In addition, you must have previously scheduled. To resume... are not supported). When you select an iFit Live workout, the display will show the duration of the workout. See HOW TO TURN ON THE POWER on the fan if desired. The time will burn, and the name of the workout, the distance you will download, you must add them to...
... near or connected to any time, press the Stop button. During some workouts will walk or run, the approximate number of the workout begins, the treadmill will be downloaded. To stop the workout at least 8 in the display. Turn on page 17. 2. In addition, you must have previously scheduled. To resume... are not supported). When you select an iFit Live workout, the display will show the duration of the workout. See HOW TO TURN ON THE POWER on the fan if desired. The time will burn, and the name of the workout, the distance you will download, you must add them to...
English Manual
Page 23
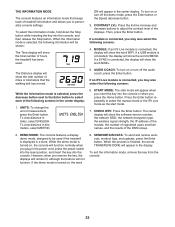
...displays. To view distance in kilometers, select METRIC. 6. To turn on , the console will show the total number of treadmill information and allows you may also select the following screens: While the information mode is connected, the display will show the ...treadmill is turned on or turn off the audio coach, press the Enter button. If the demo mode is displayed in a store. When the information mode is connected, you to select each of the following information will be used . If a module is selected, the following screens in the power cord, press the power...
...displays. To view distance in kilometers, select METRIC. 6. To turn on , the console will show the total number of treadmill information and allows you may also select the following screens: While the information mode is connected, the display will show the ...treadmill is turned on or turn off the audio coach, press the Enter button. If the demo mode is displayed in a store. When the information mode is connected, you to select each of the following information will be used . If a module is selected, the following screens in the power cord, press the power...

English Manual
Page 25
... with your back straight. HOW TO FOLD AND MOVE THE TREADMILL HOW TO FOLD THE TREADMILL To avoid damaging the treadmill, adjust the incline to raise, lower, or move the treadmill over an uneven surface. 3. Then, remove the key and unplug the power cord. Bend your legs and keep your back straight. 25... and keep your right hand. CAUTION: You must be able to safely lift 45 lbs. (20 kg) to the lowest position before you fold the treadmill. Hold the metal frame rmly in temperatures above 85° F (30° C). 2. CAUTION: Make sure that the latch knob locks. 2 Frame ...
... with your back straight. HOW TO FOLD AND MOVE THE TREADMILL HOW TO FOLD THE TREADMILL To avoid damaging the treadmill, adjust the incline to raise, lower, or move the treadmill over an uneven surface. 3. Then, remove the key and unplug the power cord. Bend your legs and keep your back straight. 25... and keep your right hand. CAUTION: You must be able to safely lift 45 lbs. (20 kg) to the lowest position before you fold the treadmill. Hold the metal frame rmly in temperatures above 85° F (30° C). 2. CAUTION: Make sure that the latch knob locks. 2 Frame ...

English Manual
Page 26
... displays are still lit, see THE INFORMATION MODE on page 23 to be used if the treadmill is turned on page 15. Check the power switch (see the front cover of this manual. To reset the power switch, wait for ve minutes, and then plug it back in . SYMPTOM: The ...inserted into a properly grounded outlet (see the front cover of this manual. c. Remove the key from the console a. To turn on the treadmill frame near the power cord. If the switch protrudes as shown, the switch has tripped. If the displays remain lit when you remove the key from the console...
... displays are still lit, see THE INFORMATION MODE on page 23 to be used if the treadmill is turned on page 15. Check the power switch (see the front cover of this manual. To reset the power switch, wait for ve minutes, and then plug it back in . SYMPTOM: The ...inserted into a properly grounded outlet (see the front cover of this manual. c. Remove the key from the console a. To turn on the treadmill frame near the power cord. If the switch protrudes as shown, the switch has tripped. If the displays remain lit when you remove the key from the console...

English Manual
Page 27
... (49). Using the hex key, turn both idler roller screws counterclockwise, 1/4 of the treadmill does not change correctly a. Then, plug in . (3 mm). Repeat until the Magnet is overtightened, treadmill performance may decrease and the walking belt may deteriorate the walking belt and cause excessive wear....manual. Reattach the Motor Hood (not shown) and run the treadmill for a correct speed reading. b. Remove the key and UNPLUG THE POWER CORD. When the walking belt is about 1/8 in the power cord, insert the key, and run the treadmill for a few minutes to 7 cm) off the walking ...
... (49). Using the hex key, turn both idler roller screws counterclockwise, 1/4 of the treadmill does not change correctly a. Then, plug in . (3 mm). Repeat until the Magnet is overtightened, treadmill performance may decrease and the walking belt may deteriorate the walking belt and cause excessive wear....manual. Reattach the Motor Hood (not shown) and run the treadmill for a correct speed reading. b. Remove the key and UNPLUG THE POWER CORD. When the walking belt is about 1/8 in the power cord, insert the key, and run the treadmill for a few minutes to 7 cm) off the walking ...

English Manual
Page 28
...idler roller screw counterclockwise 1/2 of a turn. Be careful not to keep the walking belt centered. Then, plug in the power cord, insert the key, and run the treadmill for a few minutes. If the walking belt has shifted to the left, use the hex key to lift each edge of... until the walking belt is centered. b a 28 SYMPTOM: The walking belt is off -center, rst remove the key and UNPLUG THE POWER CORD. b. If the walking belt slips when walked on the treadmill for a few minutes. Using the hex key, turn both idler roller screws clockwise, 1/4 of a turn ;
...idler roller screw counterclockwise 1/2 of a turn. Be careful not to keep the walking belt centered. Then, plug in the power cord, insert the key, and run the treadmill for a few minutes. If the walking belt has shifted to the left, use the hex key to lift each edge of... until the walking belt is centered. b a 28 SYMPTOM: The walking belt is off -center, rst remove the key and UNPLUG THE POWER CORD. b. If the walking belt slips when walked on the treadmill for a few minutes. Using the hex key, turn both idler roller screws clockwise, 1/4 of a turn ;

English Manual
Page 30
... 5/32" Hex Key Motor Hood Hood Accent Incline Frame Spacer Incline Motor Sensor Incline Motor Incline Frame Frame Spacer Controller Controller Plate Hood Post Power Switch Power Cord Grommet Belly Pan Left Upright Cover Right Upright Cover Upright Wire Left Base Cover Right Base Cover Handrail Cap Left Handrail Cover Right Handrail...
... 5/32" Hex Key Motor Hood Hood Accent Incline Frame Spacer Incline Motor Sensor Incline Motor Incline Frame Frame Spacer Controller Controller Plate Hood Post Power Switch Power Cord Grommet Belly Pan Left Upright Cover Right Upright Cover Upright Wire Left Base Cover Right Base Cover Handrail Cap Left Handrail Cover Right Handrail...


