Owner's Manual
Page 4
After you for buying this Pioneer product. Contents 01 Before you will know how to operate your system Auto playback 26 Listening in surround sound 26 Standard surround sound 26 Using ... 17 Placing the speakers 18 THX speaker system setup 19 Connecting antennas 19 Connecting external antennas 20 Plugging in the receiver 20 AC outlet 20 04 Controls and displays Front panel 21 Operating range of remote control unit 22 Display 23 Remote control 24 05 Listening to station presets 32 07 The System Setup menu Making...
After you for buying this Pioneer product. Contents 01 Before you will know how to operate your system Auto playback 26 Listening in surround sound 26 Standard surround sound 26 Using ... 17 Placing the speakers 18 THX speaker system setup 19 Connecting antennas 19 Connecting external antennas 20 Plugging in the receiver 20 AC outlet 20 04 Controls and displays Front panel 21 Operating range of remote control unit 22 Display 23 Remote control 24 05 Listening to station presets 32 07 The System Setup menu Making...
Owner's Manual
Page 5
...possible settings 58 The Other Setup menu 59 Multi-Room and IR receiver setup 59 SR+ Setup for Pioneer plasma displays 59 OSD Adjustment 60 Erasing one of the remote control button settings . . 66 Resetting the remote control presets 66 Confirming preset codes 66 Renaming input source names 67 ...formats 79 Stream direct with different input signal formats . . . 81 Specifications 82 Cleaning the unit 82 10 Using other functions Setting the AV options 61 Making an audio or a video recording 62 Reducing the level of an analog signal 62 Watching video and audio sources independently ...
...possible settings 58 The Other Setup menu 59 Multi-Room and IR receiver setup 59 SR+ Setup for Pioneer plasma displays 59 OSD Adjustment 60 Erasing one of the remote control button settings . . 66 Resetting the remote control presets 66 Confirming preset codes 66 Renaming input source names 67 ...formats 79 Stream direct with different input signal formats . . . 81 Specifications 82 Cleaning the unit 82 10 Using other functions Setting the AV options 61 Making an audio or a video recording 62 Reducing the level of an analog signal 62 Watching video and audio sources independently ...
Owner's Manual
Page 6
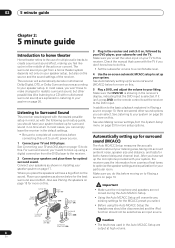
...DTS-ES Dolby Digital and DTS decoding brings theater sound right into this receiver's design provides coherent sound reproduction through the use LCD remote control The remote control gives you start Chapter 1: Before you not only complete control over the main functions for other equipment. The built-in Dolby Pro... every aspect of Professional Acoustic Calibration EQ. 01 Before you start Features • Advanced Direct Energy design This receiver offers a new advancement in discrete design unique to Pioneer for high-power drivability, low distortion and stable imaging.
...DTS-ES Dolby Digital and DTS decoding brings theater sound right into this receiver's design provides coherent sound reproduction through the use LCD remote control The remote control gives you start Chapter 1: Before you not only complete control over the main functions for other equipment. The built-in Dolby Pro... every aspect of Professional Acoustic Calibration EQ. 01 Before you start Features • Advanced Direct Energy design This receiver offers a new advancement in discrete design unique to Pioneer for high-power drivability, low distortion and stable imaging.
Owner's Manual
Page 8
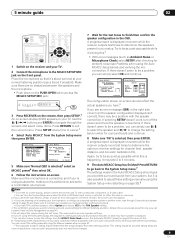
...input. In most cases, you can select. Make sure you get from the DVD player to the receiver. 2 Connect your speakers and place them for surround sound in the receiver and switch it isn't, press DVD on the remote control to set the video input on the source and the sound settings of the... receiver. If it on your speaker setup, but other sound options you can simply leave the receiver in Installing your speaker system on...
...input. In most cases, you can select. Make sure you get from the DVD player to the receiver. 2 Connect your speakers and place them for surround sound in the receiver and switch it isn't, press DVD on the remote control to set the video input on the source and the sound settings of the... receiver. If it on your speaker setup, but other sound options you can simply leave the receiver in Installing your speaker system on...
Owner's Manual
Page 9
...as Ambient Noise or Microphone Check) select RETRY after checking for different listening positions. 5 minute guide 02 RECEIVER INPUT SELECT SYSTEM OFF SOURCE AV PRE-PROGRAMMED AND LEARNING REMOTE CONTROL UNIT CD DVD DVR 2 TV DVR1 TVCTRL CD-R/TAPE iPod HDMI2 HDMI1 XM RADIO TUNER ROOM... 2 RECEIVER SR+ DIMMER DIALOG E S.RETRIEVER MIDNIGHT/ LOUDNESS D.ACCESS +10 AV PARAMETER TOP MENU TUNE DTVMENU ST SETUP ENTER ...
...as Ambient Noise or Microphone Check) select RETRY after checking for different listening positions. 5 minute guide 02 RECEIVER INPUT SELECT SYSTEM OFF SOURCE AV PRE-PROGRAMMED AND LEARNING REMOTE CONTROL UNIT CD DVD DVR 2 TV DVR1 TVCTRL CD-R/TAPE iPod HDMI2 HDMI1 XM RADIO TUNER ROOM... 2 RECEIVER SR+ DIMMER DIALOG E S.RETRIEVER MIDNIGHT/ LOUDNESS D.ACCESS +10 AV PARAMETER TOP MENU TUNE DTVMENU ST SETUP ENTER ...
Owner's Manual
Page 10
... blocking the speakers from the front left/right speakers in achieving proper sound reproduction. RECEIVER INPUT SELECT SYSTEM OFF SOURCE GUIDE TV CONTROL TV VOL INPUT SELECT TV CH VOL AV PRE-PROGRAMMED AND LEARNING REMOTE CONTROL UNIT DTV ON/OFF MPX REC DTVINFO MUTE REC STOP JUKEBOX CD DVD DVR 2... TV DVR1 TVCTRL CD-R/TAPE HDMI2 XM RADIO ROOM 2 iPod HDMI1 TUNER RECEIVER SLEEP VIDEO SEL ANALOG ...
... blocking the speakers from the front left/right speakers in achieving proper sound reproduction. RECEIVER INPUT SELECT SYSTEM OFF SOURCE GUIDE TV CONTROL TV VOL INPUT SELECT TV CH VOL AV PRE-PROGRAMMED AND LEARNING REMOTE CONTROL UNIT DTV ON/OFF MPX REC DTVINFO MUTE REC STOP JUKEBOX CD DVD DVR 2... TV DVR1 TVCTRL CD-R/TAPE HDMI2 XM RADIO ROOM 2 iPod HDMI1 TUNER RECEIVER SLEEP VIDEO SEL ANALOG ...
Owner's Manual
Page 11
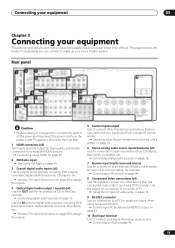
Plugging in a multi-room setup, for example. Connecting an IR receiver on page 58 to assign the inputs. 5 Control input/output Use to connect other Pioneer components with many connection possibilities, but it doesn't have to be the final step. 1 HDMI connectors (x3) Two inputs and one output ...(x4) Use the OUT jack for high-quality audio/video connection to a CD or MiniDisc recorder. Use the output for connection to an external remote control sensor for graphical output when using HDMI on page 49. 2 XM Radio input See Using XM Radio on page 46. 11 En See also ...
Plugging in a multi-room setup, for example. Connecting an IR receiver on page 58 to assign the inputs. 5 Control input/output Use to connect other Pioneer components with many connection possibilities, but it doesn't have to be the final step. 1 HDMI connectors (x3) Two inputs and one output ...(x4) Use the OUT jack for high-quality audio/video connection to a CD or MiniDisc recorder. Use the output for connection to an external remote control sensor for graphical output when using HDMI on page 49. 2 XM Radio input See Using XM Radio on page 46. 11 En See also ...
Owner's Manual
Page 21
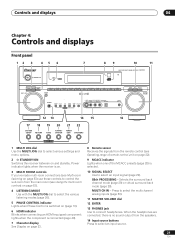
... connecting an HDMI-equipped component; lights when the component is connected (page 49). 7 Character display See Display on page 23. 8 Remote sensor Receives the signals from the remote control (see Using the multi-room controls on page 53). 4 LISTENING MODE Use with the MULTI JOG dial to select the various listening modes (page 26). 5 PHASE...
... connecting an HDMI-equipped component; lights when the component is connected (page 49). 7 Character display See Display on page 23. 8 Remote sensor Receives the signals from the remote control (see Using the multi-room controls on page 53). 4 LISTENING MODE Use with the MULTI JOG dial to select the various listening modes (page 26). 5 PHASE...
Owner's Manual
Page 22
... and to change the speaker system (page 51). Operating range of remote control unit The remote control may not work properly if: • There are obstacles between the remote control and the receiver's remote sensor. • Direct sunlight or fluorescent light is shining onto the remote sensor. • The receiver is located near a device that is emitting infrared rays. •...
... and to change the speaker system (page 51). Operating range of remote control unit The remote control may not work properly if: • There are obstacles between the remote control and the receiver's remote sensor. • Direct sunlight or fluorescent light is shining onto the remote sensor. • The receiver is located near a device that is emitting infrared rays. •...
Owner's Manual
Page 24
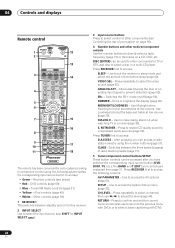
...see below) • Red - Press repeatedly to make dialog stand out when watching TV or a movie (page 30). 04 Controls and displays Remote control RECEIVER INPUT SELECT 1 2 SYSTEM OFF SOURCE 12 13 CD DVR 2 DVD TV DVR1 TVCTRL 3 CD-R/TAPE HDMI2 XM RADIO ROOM 2 ...iPod HDMI1 TUNER RECEIVER 14 SLEEP VIDEO SEL ANALOG ATT SR+ DIMMER MIDNIGHT/ LOUDNESS 4 DIALOG E S.RETRIEVER D.ACCESS +10 CLASS DISC ENTER AV ...
...see below) • Red - Press repeatedly to make dialog stand out when watching TV or a movie (page 30). 04 Controls and displays Remote control RECEIVER INPUT SELECT 1 2 SYSTEM OFF SOURCE 12 13 CD DVR 2 DVD TV DVR1 TVCTRL 3 CD-R/TAPE HDMI2 XM RADIO ROOM 2 ...iPod HDMI1 TUNER RECEIVER 14 SLEEP VIDEO SEL ANALOG ATT SR+ DIMMER MIDNIGHT/ LOUDNESS 4 DIALOG E S.RETRIEVER D.ACCESS +10 CLASS DISC ENTER AV ...
Owner's Manual
Page 25
...- See Renaming input source names on page 66. 14 RECEIVER Switches the remote to control the receiver (used to control DVD menus/options and for the most accurate reproduction of the remote control button settings on this system assign it to control a component after you only have selected it has been ...system (page 33) and the AV options (page 61). Use to the TV CTRL button. Use to select channels. 8 Component control buttons The main buttons ( , , etc.) are dedicated to control the TV assigned to adjust the volume on /off Phase Control (page 10). DISP - With...
...- See Renaming input source names on page 66. 14 RECEIVER Switches the remote to control the receiver (used to control DVD menus/options and for the most accurate reproduction of the remote control button settings on this system assign it to control a component after you only have selected it has been ...system (page 33) and the AV options (page 61). Use to the TV CTRL button. Use to select channels. 8 Component control buttons The main buttons ( , , etc.) are dedicated to control the TV assigned to adjust the volume on /off Phase Control (page 10). DISP - With...
Owner's Manual
Page 31
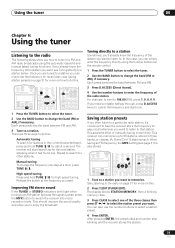
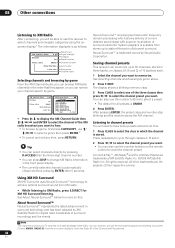
...the frequency of the radio station. The receiver will start over. Each press switches the band between FM and AM. 3 Tune to search for other stations. RECEIVER INPUT SELECT SYSTEM OFF SOURCE AV PRE-PROGRAMMED AND LEARNING REMOTE CONTROL UNIT CD DVD DVR 2 TV DVR1 TVCTRL... CD-R/TAPE HDMI2 XM RADIO ROOM 2 iPod HDMI1 TUNER RECEIVER DIALOG E S.RETRIEVER D.ACCESS +10 AV PARAMETER TOP MENU TUNE DTVMENU ST SETUP...
...the frequency of the radio station. The receiver will start over. Each press switches the band between FM and AM. 3 Tune to search for other stations. RECEIVER INPUT SELECT SYSTEM OFF SOURCE AV PRE-PROGRAMMED AND LEARNING REMOTE CONTROL UNIT CD DVD DVR 2 TV DVR1 TVCTRL... CD-R/TAPE HDMI2 XM RADIO ROOM 2 iPod HDMI1 TUNER RECEIVER DIALOG E S.RETRIEVER D.ACCESS +10 AV PARAMETER TOP MENU TUNE DTVMENU ST SETUP...
Owner's Manual
Page 32
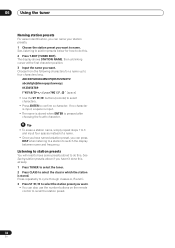
... the class in which the station is pressed after choosing the fourth character. ABCDEFGHIJKLMNOPQRSTUVWXYZ abcdefghijklmnopqrstuvwxyz 0123456789 space] • Use the ST / buttons (remote) to select characters. • Press ENTER to four characters long. If no character is input, a space is input. • The ...Press repeatedly to cycle through classes A, B and C. 3 Press ST / to select the station preset you can also use the number buttons on the remote control to do this . Tip • To erase a station name, simply repeat steps 1 to 3 and input four spaces instead of a name. &#...
... the class in which the station is pressed after choosing the fourth character. ABCDEFGHIJKLMNOPQRSTUVWXYZ abcdefghijklmnopqrstuvwxyz 0123456789 space] • Use the ST / buttons (remote) to select characters. • Press ENTER to four characters long. If no character is input, a space is input. • The ...Press repeatedly to cycle through classes A, B and C. 3 Press ST / to select the station preset you can also use the number buttons on the remote control to do this . Tip • To erase a station name, simply repeat steps 1 to 3 and input four spaces instead of a name. &#...
Owner's Manual
Page 33
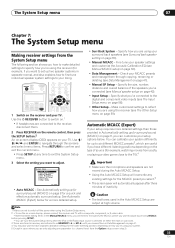
... systems in separate rooms), and also explains how to fine-tune individual speaker system settings to adjust. RECEIVER INPUT SELECT SYSTEM OFF SOURCE AV PRE-PROGRAMMED AND LEARNING REMOTE CONTROL UNIT CD DVD DVR 2 TV DVR1 TVCTRL CD-R/TAPE iPod HDMI2 HDMI1 XM RADIO TUNER ROOM... 2 RECEIVER SR+ DIMMER DIALOG E S.RETRIEVER MIDNIGHT/ LOUDNESS D.ACCESS +10 AV PARAMETER TOP MENU TUNE DTVMENU ST SETUP ENTER CLASS DISC...
... systems in separate rooms), and also explains how to fine-tune individual speaker system settings to adjust. RECEIVER INPUT SELECT SYSTEM OFF SOURCE AV PRE-PROGRAMMED AND LEARNING REMOTE CONTROL UNIT CD DVD DVR 2 TV DVR1 TVCTRL CD-R/TAPE iPod HDMI2 HDMI1 XM RADIO TUNER ROOM... 2 RECEIVER SR+ DIMMER DIALOG E S.RETRIEVER MIDNIGHT/ LOUDNESS D.ACCESS +10 AV PARAMETER TOP MENU TUNE DTVMENU ST SETUP ENTER CLASS DISC...
Owner's Manual
Page 44
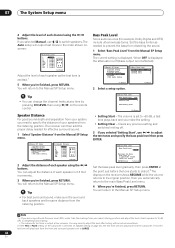
... [ 0.0dB ] SW [ 0.0dB ] :Finish Adjust the level of each speaker as needed for example, Dolby Digital and DTS) include ultra-low bass tones. The receiver can then add the proper delay needed to LARGE. 44 En Clears any previous setting and switches limiting off (bass output is selected (in 0.5 foot...). • The subwoofer test tone is output at low volumes. 07 The System Setup menu 4 Adjust the level of each channel using / on the remote control. You will return to -60 dB, a test tone plays back and you need to adjust the level after testing with an actual soundtrack. 2 If ...
... [ 0.0dB ] SW [ 0.0dB ] :Finish Adjust the level of each speaker as needed for example, Dolby Digital and DTS) include ultra-low bass tones. The receiver can then add the proper delay needed to LARGE. 44 En Clears any previous setting and switches limiting off (bass output is selected (in 0.5 foot...). • The subwoofer test tone is output at low volumes. 07 The System Setup menu 4 Adjust the level of each channel using / on the remote control. You will return to -60 dB, a test tone plays back and you need to adjust the level after testing with an actual soundtrack. 2 If ...
Owner's Manual
Page 48
...Radio After connecting, you will need to have your TV switched on the remote control to 30 channels, stored in three banks, or classes, (A, B and C) of surround elements. Saving channel presets This receiver can also use the number buttons to change XM Radio information in the ...currently selected channel is automatically chosen (without pressing ENTER) after 5 seconds. After pressing ENTER, the preset class and number stop blinking and the receiver stores the XM channel. Press repeatedly to cycle through classes A, B and C. 2 Press / to select the channel preset you have some ...
...Radio After connecting, you will need to have your TV switched on the remote control to 30 channels, stored in three banks, or classes, (A, B and C) of surround elements. Saving channel presets This receiver can also use the number buttons to change XM Radio information in the ...currently selected channel is automatically chosen (without pressing ENTER) after 5 seconds. After pressing ENTER, the preset class and number stop blinking and the receiver stores the XM channel. Press repeatedly to cycle through classes A, B and C. 2 Press / to select the channel preset you have some ...
Owner's Manual
Page 53
.../MD DVD/LD TV/SAT DVR/VCR1 AM LOOP L OUT PRE OUT CENTER L L (Single) IN 3 R R SUB R SUR- There are not using the remote control. You should have a pair of speakers attached to the MULTI-ROOM & SOURCE MONITOR OUT jacks, both rooms at the same time or, depending on your...IN MASTER VOLUME 1 Press the MULTI ROOM ON/OFF button on ) and the sub room can be controlled by the front panel controls. Other connections 08 Multi-room listening This receiver can power two independent systems in separate rooms after you have made the proper multiroom connections.1 Different sources can...
.../MD DVD/LD TV/SAT DVR/VCR1 AM LOOP L OUT PRE OUT CENTER L L (Single) IN 3 R R SUB R SUR- There are not using the remote control. You should have a pair of speakers attached to the MULTI-ROOM & SOURCE MONITOR OUT jacks, both rooms at the same time or, depending on your...IN MASTER VOLUME 1 Press the MULTI ROOM ON/OFF button on ) and the sub room can be controlled by the front panel controls. Other connections 08 Multi-room listening This receiver can power two independent systems in separate rooms after you have made the proper multiroom connections.1 Different sources can...
Owner's Manual
Page 54
... presets on the front panel. 54 En RECEIVER Switches power on/off all output to the IR receiver, see the manual supplied with this receiver is in standby. 4 • Remote operation may not be possible in the sub room. Closet or shelving unit Non-Pioneer IR component IN CONTROL Pioneer component MULTI-ROOM & SOURCE ROOM 2(ZONE 2) OUT...
... presets on the front panel. 54 En RECEIVER Switches power on/off all output to the IR receiver, see the manual supplied with this receiver is in standby. 4 • Remote operation may not be possible in the sub room. Closet or shelving unit Non-Pioneer IR component IN CONTROL Pioneer component MULTI-ROOM & SOURCE ROOM 2(ZONE 2) OUT...
Owner's Manual
Page 55
... L C OUT IN 3 R S FRONT W OUT IN OUT IN DVR/VCR2 Important • If you connect to a Pioneer plasma display using an SR+ cable, you need to point the remote control at the plasma display remote sensor to control the receiver. Contact the Pioneer Customer Support division for the connection. • The trigger maximum power is commercially available under...
... L C OUT IN 3 R S FRONT W OUT IN OUT IN DVR/VCR2 Important • If you connect to a Pioneer plasma display using an SR+ cable, you need to point the remote control at the plasma display remote sensor to control the receiver. Contact the Pioneer Customer Support division for the connection. • The trigger maximum power is commercially available under...

Owner's Manual
Page 58
...identification. The second screen of the input source functions. Note that has been previously assigned to tell the receiver what equipment is switched off (in Setting the AV options on page 61), you must connect your TV. ROOM, ROOM2 or OFF to which , in ... rear panel (such as you used component video cords to connect your component you must tell the receiver which input you connected it to.The numbering (OPT1 to 4) corresponds with a Pioneer plasma display on the remote control. 6.Input Setup (1/2) Input DVD Digital In [ COAX-1 ] Component In [ Comp-2 ] ( Next ) :Finish...
...identification. The second screen of the input source functions. Note that has been previously assigned to tell the receiver what equipment is switched off (in Setting the AV options on page 61), you must connect your TV. ROOM, ROOM2 or OFF to which , in ... rear panel (such as you used component video cords to connect your component you must tell the receiver which input you connected it to.The numbering (OPT1 to 4) corresponds with a Pioneer plasma display on the remote control. 6.Input Setup (1/2) Input DVD Digital In [ COAX-1 ] Component In [ Comp-2 ] ( Next ) :Finish...


