Owner's Manual
Page 2
... unit 4 After-sales service for Pioneer products 4 Visit our website 5 About WMA 5 About MP3 5 About AAC 5 About the SAT RADIO READY mark 6 iPod® compatibility 6 Protecting your model properly. Removing the front panel 6 - When playing back a WAV disc 20 Multi-CD Player Playing a CD 21 Introduction of advanced multi-CD player operation 21 Repeating play 13...
... unit 4 After-sales service for Pioneer products 4 Visit our website 5 About WMA 5 About MP3 5 About AAC 5 About the SAT RADIO READY mark 6 iPod® compatibility 6 Protecting your model properly. Removing the front panel 6 - When playing back a WAV disc 20 Multi-CD Player Playing a CD 21 Introduction of advanced multi-CD player operation 21 Repeating play 13...
Owner's Manual
Page 6
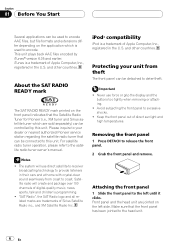
...to the left side. and other countries. Satellite radio will use force or grip the display and the buttons too tightly when removing or attaching. ! Protecting your dealer or nearest authorized Pioneer service station regarding the satellite radio tuner that the front panel has been jointed to... release the front panel. 2 Grab the front panel and remove. Front panel and the head ...
...to the left side. and other countries. Satellite radio will use force or grip the display and the buttons too tightly when removing or attaching. ! Protecting your dealer or nearest authorized Pioneer service station regarding the satellite radio tuner that the front panel has been jointed to... release the front panel. 2 Grab the front panel and remove. Front panel and the head ...
Owner's Manual
Page 7
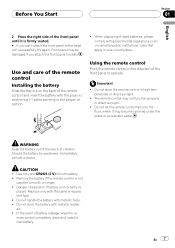
... attach the front panel forcedly. placed. Front panel may be swallowed, immediately consult a doctor. The remote control may not function properly in the proper direction. ! Remove the battery if the remote control is incorrectly re- Do not store the battery with metallic tools. ! CAUTION ! Use only one CR2025 (3 V) lithium battery. ! En...
... attach the front panel forcedly. placed. Front panel may be swallowed, immediately consult a doctor. The remote control may not function properly in the proper direction. ! Remove the battery if the remote control is incorrectly re- Do not store the battery with metallic tools. ! CAUTION ! Use only one CR2025 (3 V) lithium battery. ! En...
Owner's Manual
Page 8
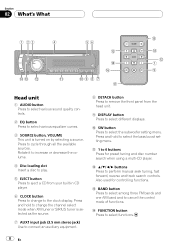
... as the source. 7 AUX1 input jack (3.5 mm stereo jack) Use to connect an auxiliary equipment. 8 DETACH button Press to remove the front panel from your built-in CD player. 6 CLOCK button Press to change the channel select mode when XM tuner or SIRIUS tuner is turned on by selecting a ...to the clock display. Rotate it to increase or decrease the volume. 4 Disc loading slot Insert a disc to play. 5 EJECT button Press to eject a CD from the head unit. 9 DISPLAY button Press to select different displays. b 1 to select the bass boost setting menu. Press and hold to 6 buttons Press ...
... as the source. 7 AUX1 input jack (3.5 mm stereo jack) Use to connect an auxiliary equipment. 8 DETACH button Press to remove the front panel from your built-in CD player. 6 CLOCK button Press to change the channel select mode when XM tuner or SIRIUS tuner is turned on by selecting a ...to the clock display. Rotate it to increase or decrease the volume. 4 Disc loading slot Insert a disc to play. 5 EJECT button Press to eject a CD from the head unit. 9 DISPLAY button Press to select different displays. b 1 to select the bass boost setting menu. Press and hold to 6 buttons Press ...
Owner's Manual
Page 15
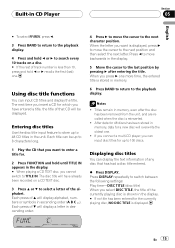
... disc, you can input CD titles and display the title. The disc title will display a letter in descending order. 4 Press d to move backwards in the display. 5 Move the cursor to the last position by pressing d after the disc has been removed from the unit, and are recalled when the disc is stored... in memory. 6 Press BAND to return to the playback display. If you connect a multi-CD player, you cannot switch to TITLE IN. Each press of b will have...
... disc, you can input CD titles and display the title. The disc title will display a letter in descending order. 4 Press d to move backwards in the display. 5 Move the cursor to the last position by pressing d after the disc has been removed from the unit, and are recalled when the disc is stored... in memory. 6 Press BAND to return to the playback display. If you connect a multi-CD player, you cannot switch to TITLE IN. Each press of b will have...
Owner's Manual
Page 25
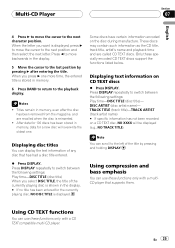
...to move backwards in the display. 5 Move the cursor to the left of the title by pressing d after the disc has been removed from the magazine, and are called CD TEXT discs. Notes ! After data for 100 discs has been stored in memory, data for the currently playing disc, NO DISC ...TITLE is displayed. Press DISPLAY repeatedly to the next character position. En 25 Multi-CD Player Section 07 English 4 Press d to move the cursor to switch between the following settings: Play time-DISC TITLE (disc title)- When the ...
...to move backwards in the display. 5 Move the cursor to the left of the title by pressing d after the disc has been removed from the magazine, and are called CD TEXT discs. Notes ! After data for 100 discs has been stored in memory, data for the currently playing disc, NO DISC ...TITLE is displayed. Press DISPLAY repeatedly to the next character position. En 25 Multi-CD Player Section 07 English 4 Press d to move the cursor to switch between the following settings: Play time-DISC TITLE (disc title)- When the ...


