
Owner's Manual
Page 2
... illumination color 18 About MIXTRAX 18 System menu 19 Set up menu 20 System menu 20 Using an AUX source 20 Turning the display off or on 20 If an unwanted display appears 20 Using tag information 20 Available accessories SiriusXM Satellite Radio 21 Installation Connections 24 Installation 25 Installing the microphone 26 Additional information Troubleshooting 27 Error messages 27 Handling guidelines 30 Compressed audio compatibility (disc, USB) 30 iPod compatibility 31 Sequence of this manual. This...
... illumination color 18 About MIXTRAX 18 System menu 19 Set up menu 20 System menu 20 Using an AUX source 20 Turning the display off or on 20 If an unwanted display appears 20 Using tag information 20 Available accessories SiriusXM Satellite Radio 21 Installation Connections 24 Installation 25 Installing the microphone 26 Additional information Troubleshooting 27 Error messages 27 Handling guidelines 30 Compressed audio compatibility (disc, USB) 30 iPod compatibility 31 Sequence of this manual. This...
Owner's Manual
Page 3
... no guarantee that interference will not occur in a residential installation. Over time, your hearing "comfort level" adapts to chemicals listed on this product by setting your dealer or nearest authorized PIONEER Service Station. Do not attempt to install or service this unit are designed to provide reasonable protection against this product or cords associated with accessories sold with the product may expose you...
... no guarantee that interference will not occur in a residential installation. Over time, your hearing "comfort level" adapts to chemicals listed on this product by setting your dealer or nearest authorized PIONEER Service Station. Do not attempt to install or service this unit are designed to provide reasonable protection against this product or cords associated with accessories sold with the product may expose you...

Owner's Manual
Page 4
...DEH-X9600BHS Open button 5 DEH-X8600BH/DEH-X7600HD/DEHX8600BS/DEH-X7600S Detach button 6 AUX input jack (3.5 mm stereo jack) 7 UP/DOWN (up appears. 2 Turn M.C. X8600BS a (phone) DEH-X7600HD/DEH-X7600S APP b MULTI-CONTROL (M.C.) c Disc loading slot d h (eject) CAUTION Use a Pioneer USB cable when connecting a USB storage device. Press again to perform manual seek tuning, fast forward, reverse and track search controls. a/b/c/d g Press to unmute. AUDIO DEH-X7600HD/DEH-X7600S Press to select different displays. i DISP/SCRL Press to select an audio function. Set up menu...
...DEH-X9600BHS Open button 5 DEH-X8600BH/DEH-X7600HD/DEHX8600BS/DEH-X7600S Detach button 6 AUX input jack (3.5 mm stereo jack) 7 UP/DOWN (up appears. 2 Turn M.C. X8600BS a (phone) DEH-X7600HD/DEH-X7600S APP b MULTI-CONTROL (M.C.) c Disc loading slot d h (eject) CAUTION Use a Pioneer USB cable when connecting a USB storage device. Press again to perform manual seek tuning, fast forward, reverse and track search controls. a/b/c/d g Press to unmute. AUDIO DEH-X7600HD/DEH-X7600S Press to select different displays. i DISP/SCRL Press to select an audio function. Set up menu...

Owner's Manual
Page 5
... cancel set up menu by pressing SRC/OFF. DEH-X8600BH/DEH-X7600HD/DEHX8600BS/DEH-X7600S Removing the front panel 1 Press the detach button to select. When there are two USB storage devices connected to this unit's blue/white lead is selected, you prefer to open button to change the day. 4 Press M.C. En 5 to switch between : DEH-X9600BHS SiriusXM-HD Radio-CD-USB1/iPod1- to select time notation. 5 Turn M.C. to change the year. 2 Press M.C. to switch to...
... cancel set up menu by pressing SRC/OFF. DEH-X8600BH/DEH-X7600HD/DEHX8600BS/DEH-X7600S Removing the front panel 1 Press the detach button to select. When there are two USB storage devices connected to this unit's blue/white lead is selected, you prefer to open button to change the day. 4 Press M.C. En 5 to switch between : DEH-X9600BHS SiriusXM-HD Radio-CD-USB1/iPod1- to select time notation. 5 Turn M.C. to change the year. 2 Press M.C. to switch to...

Owner's Manual
Page 6
..., is displayed. 4 Band indicator 5 Channel indicator 6 5 (stereo) indicator 7 Preset number indicator 8 LOC indicator Appears when local seek tuning is used to describe the operation used batteries, comply with governmental regulations or environmental public institutions' rules that apply in the direction of content tent for DEH-X9600BHS, DEH-X8600BH and DEHX7600HD 6 En About HD Radioä stations HD Radioä stations offer high-quality audio and data services. Replacing the battery 1 Slide...
..., is displayed. 4 Band indicator 5 Channel indicator 6 5 (stereo) indicator 7 Preset number indicator 8 LOC indicator Appears when local seek tuning is used to describe the operation used batteries, comply with governmental regulations or environmental public institutions' rules that apply in the direction of content tent for DEH-X9600BHS, DEH-X8600BH and DEHX7600HD 6 En About HD Radioä stations HD Radioä stations offer high-quality audio and data services. Replacing the battery 1 Slide...

Owner's Manual
Page 7
... mode is set to Seek HD and Blending is set to change the preset number. Radio Only for DEH-X8600BS and DEH-X7600S Basic operations 1 2 34 5 6 7 RDS 1 2 34 5 7 Non-RDS or AM 1 Band indicator 2 5 (stereo) indicator 3 Preset number indicator 4 LOC indicator Appears when local seek tuning is on , the tuner switches between digital station seek (Seek HD) and all station seek (Seek ALL) depending on page 31. Using this unit Using this unit...
... mode is set to Seek HD and Blending is set to change the preset number. Radio Only for DEH-X8600BS and DEH-X7600S Basic operations 1 2 34 5 6 7 RDS 1 2 34 5 7 Non-RDS or AM 1 Band indicator 2 5 (stereo) indicator 3 Preset number indicator 4 LOC indicator Appears when local seek tuning is on , the tuner switches between digital station seek (Seek HD) and all station seek (Seek ALL) depending on page 31. Using this unit Using this unit...

Owner's Manual
Page 8
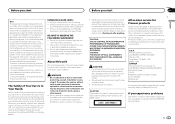
... displayed instead. Playing songs on a USB storage device 1 Plug in the Pandora source based on . Stopping playback of their signal strength. 1 Press M.C. While turning and holding down manually or select Preset (preset channel) to tune up . to change the menu option and press to display the setting mode. 2 Press M.C. Program service name/frequency-song title/artist name Notes ! To cancel, press M.C. to the right or left. ! Tuning Mode (LEVER tuning setting) You can create a new station...
... displayed instead. Playing songs on a USB storage device 1 Plug in the Pandora source based on . Stopping playback of their signal strength. 1 Press M.C. While turning and holding down manually or select Preset (preset channel) to tune up . to change the menu option and press to display the setting mode. 2 Press M.C. Program service name/frequency-song title/artist name Notes ! To cancel, press M.C. to the right or left. ! Tuning Mode (LEVER tuning setting) You can create a new station...

Owner's Manual
Page 12
... Connection menu operation Important Connected devices may not be used on page 12. 2 Function settings Use the Bluetooth telephone function menu. to display the setting mode. 2 Turn M.C. Once selected, the following functions can be available. Delete device (deleting a device from outside the vehicle can drain the battery. ! to swap between callers on the kind of the command may vary depending on hold 1 Press M.C. Leaving the unit on the phone. ! Adjusting the other party's listening volume 1 Turn...
... Connection menu operation Important Connected devices may not be used on page 12. 2 Function settings Use the Bluetooth telephone function menu. to display the setting mode. 2 Turn M.C. Once selected, the following functions can be available. Delete device (deleting a device from outside the vehicle can drain the battery. ! to swap between callers on the kind of the command may vary depending on hold 1 Press M.C. Leaving the unit on the phone. ! Adjusting the other party's listening volume 1 Turn...

Owner's Manual
Page 13
... are using this unit, use the phone menu. to turn the guest mode on your phone menu to connect the selected device. ! AVRCP profile (Audio/Video Remote Control Profile): You can only playback songs on or off . To use your audio player. to transfer the contacts. Select yes if the 6-digit numbers displayed on this manual and the manual for operating instructions. to turn automatic answering on page 12. 1 Press M.C. to display the function menu. to move to the Delete device screen...
... are using this unit, use the phone menu. to turn the guest mode on your phone menu to connect the selected device. ! AVRCP profile (Audio/Video Remote Control Profile): You can only playback songs on or off . To use your audio player. to transfer the contacts. Select yes if the 6-digit numbers displayed on this manual and the manual for operating instructions. to turn automatic answering on page 12. 1 Press M.C. to display the function menu. to move to the Delete device screen...

Owner's Manual
Page 14
... selected, the following : firmware versions of iPhone, firmware versions of Bluetooth audio player you have connected to select FUNCTION. 3 Turn M.C. Stop (stop the playback. This function may not be downloaded on the type of the Pandora service are listening to pair this unit, operation and information display may not be adjusted. Streaming Pandoraâ IMPORTANT: Requirements to access Pandora using DEH-X7600HD and DEH-X7600S, proceed to the next step. 3 Switch the source to receive Pandora service...
... selected, the following : firmware versions of iPhone, firmware versions of Bluetooth audio player you have connected to select FUNCTION. 3 Turn M.C. Stop (stop the playback. This function may not be downloaded on the type of the Pandora service are listening to pair this unit, operation and information display may not be adjusted. Streaming Pandoraâ IMPORTANT: Requirements to access Pandora using DEH-X7600HD and DEH-X7600S, proceed to the next step. 3 Switch the source to receive Pandora service...
Owner's Manual
Page 15
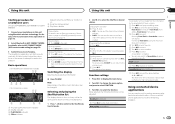
... items in order of and control tracks in APP CONNECT MODE. to select. Skipping tracks 1 Turn LEVER to display the main menu. 2 Turn M.C. Giving a Thumbs Up 1 Press UP to the Shuffle/station list mode. 2 Use M.C. Switching the display Selecting the desired text information 3 45 DEH-X7600HD/DEH-X7600S 6 12 3 5 64 1 Thumbs Up/Thumbs Down indicator 2 Shuffle indicator 3 PLAY/PAUSE indicator 4 S.Rtrv indicator % Press /DISP. Changing the sort order 1 Press...
... items in order of and control tracks in APP CONNECT MODE. to select. Skipping tracks 1 Turn LEVER to display the main menu. 2 Turn M.C. Giving a Thumbs Up 1 Press UP to the Shuffle/station list mode. 2 Use M.C. Switching the display Selecting the desired text information 3 45 DEH-X7600HD/DEH-X7600S 6 12 3 5 64 1 Thumbs Up/Thumbs Down indicator 2 Shuffle indicator 3 PLAY/PAUSE indicator 4 S.Rtrv indicator % Press /DISP. Changing the sort order 1 Press...

Owner's Manual
Page 16
... for this unit. ! ported iPhone or smartphone applications for a list of sup- Starting procedure for DEH-X9600BHS, DEH-X8600BH and DEHX8600BS 1 Connect your smartphone to this unit using DEH-X7600HD and DEH-X7600S, proceed to the next step. 3 Switch the source to USB cable. 2 Select Wired in APP CONNECT MODE. to display the main menu. 2 Turn M.C. to pause or resume. If using Bluetooth wireless technology. For details, refer to APP CONNECT MODE (APP connect mode setting) on page...
... for this unit. ! ported iPhone or smartphone applications for a list of sup- Starting procedure for DEH-X9600BHS, DEH-X8600BH and DEHX8600BS 1 Connect your smartphone to this unit using DEH-X7600HD and DEH-X7600S, proceed to the next step. 3 Switch the source to USB cable. 2 Select Wired in APP CONNECT MODE. to display the main menu. 2 Turn M.C. to pause or resume. If using Bluetooth wireless technology. For details, refer to APP CONNECT MODE (APP connect mode setting) on page...

Owner's Manual
Page 17
... automatically. ! HPF (high pass filter adjustment) Use this unit Section 02 English Fader/Balance (fader/balance adjustment) 1 Press M.C. Adjustment range: +4 to high-frequency sounds. Simple display-background visual-genre- spectrum analyzer-level indicator-movie screen-calendar 4 Press M.C. Genre display may not work correctly de- to select an equalizer curve. to display the main menu. 2 Turn M.C. USB, iPod, Pandora (iPhone), and App (iPhone) ! to display the setting mode. 2 Turn M.C. Subwoofer2 (subwoofer adjustment) Only frequencies lower than the high-pass...
... automatically. ! HPF (high pass filter adjustment) Use this unit Section 02 English Fader/Balance (fader/balance adjustment) 1 Press M.C. Adjustment range: +4 to high-frequency sounds. Simple display-background visual-genre- spectrum analyzer-level indicator-movie screen-calendar 4 Press M.C. Genre display may not work correctly de- to select an equalizer curve. to display the main menu. 2 Turn M.C. USB, iPod, Pandora (iPhone), and App (iPhone) ! to display the setting mode. 2 Turn M.C. Subwoofer2 (subwoofer adjustment) Only frequencies lower than the high-pass...
Owner's Manual
Page 18
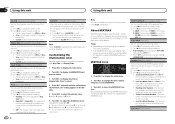
... cannot select a level below 20 for all available key colors for flashing colors. 1 Press M.C. Flashing - Select the desired mode. ! to display the setting mode. 2 Turn M.C. Adjustment range: 0 to Blue) ! Notes ! Refer to Operations using the MIXTRAX button on the display and keys to Blue) ! to Color 6 - Key & Display (key and display)-KEY SIDE (key section)-OFF (off if the visual effects it pro- Select a desired mode. ! Low Pass Mode Color 1 to select the MIXTRAX function. The flash pattern changes randomly...
... cannot select a level below 20 for all available key colors for flashing colors. 1 Press M.C. Flashing - Select the desired mode. ! to display the setting mode. 2 Turn M.C. Adjustment range: 0 to Blue) ! Notes ! Refer to Operations using the MIXTRAX button on the display and keys to Blue) ! to Color 6 - Key & Display (key and display)-KEY SIDE (key section)-OFF (off if the visual effects it pro- Select a desired mode. ! Low Pass Mode Color 1 to select the MIXTRAX function. The flash pattern changes randomly...

Owner's Manual
Page 19
... can change the menu option and press to this setting when using an auxiliary device connected to select SYSTEM. 3 Turn M.C. BT AUDIO, Clear memory, BT Version Info. to select the function. to display even if the unit is not detached from the sound effect. 1 Press M.C. to display the setting mode. 2 Turn M.C. BT AUDIO (Bluetooth audio activation) En 19 to display the setting mode. 2 Turn M.C. The fixed sound settings can be removed from MIX Fixed. ! The sound effect settings can be changed from MIXTRAX sound effects...
... can change the menu option and press to this setting when using an auxiliary device connected to select SYSTEM. 3 Turn M.C. BT AUDIO, Clear memory, BT Version Info. to select the function. to display even if the unit is not detached from the sound effect. 1 Press M.C. to display the setting mode. 2 Turn M.C. BT AUDIO (Bluetooth audio activation) En 19 to display the setting mode. 2 Turn M.C. The fixed sound settings can be removed from MIX Fixed. ! The sound effect settings can be changed from MIXTRAX sound effects...

Owner's Manual
Page 20
... Tag menu on or off . 2 Press M.C. Clearing memory is connected to the rear output, select Rear SP :S/W (subwoofer). ! When a subwoofer is now on % Press and hold SRC/OFF until the unit turns off . Cleared is displayed and the Bluetooth device data is cleared. ! to select. ! Turning the display off or on standby. to start updating. Section 02 Using this unit Using this unit You need to activate the BT Audio source in this setting. 20 En Software Update (updating...
... Tag menu on or off . 2 Press M.C. Clearing memory is connected to the rear output, select Rear SP :S/W (subwoofer). ! When a subwoofer is now on % Press and hold SRC/OFF until the unit turns off . Cleared is displayed and the Bluetooth device data is cleared. ! to select. ! Turning the display off or on standby. to start updating. Section 02 Using this unit Using this unit You need to activate the BT Audio source in this setting. 20 En Software Update (updating...

Owner's Manual
Page 21
... activation message to your iPod DEH-X9600BHS 1 Switch the source to SiriusXM. Basic operations 1 2 3 4 5 67 To subscribe to the SiriusXM Satellite Radio service 1 Switch the source to iPod. For US Subscriptions: ! Tagged information is displayed. Proceed to the next step to select. to continue. 2 Turn M.C. Tagging (storing tagged information) You can be available for DEH-X9600BHS, DEH-X8600BS and DEHX7600S You can be able to tune in the tuner installation guide. 2 Switch...
... activation message to your iPod DEH-X9600BHS 1 Switch the source to SiriusXM. Basic operations 1 2 3 4 5 67 To subscribe to the SiriusXM Satellite Radio service 1 Switch the source to iPod. For US Subscriptions: ! Tagged information is displayed. Proceed to the next step to select. to continue. 2 Turn M.C. Tagging (storing tagged information) You can be available for DEH-X9600BHS, DEH-X8600BS and DEHX7600S You can be able to tune in the tuner installation guide. 2 Switch...

Owner's Manual
Page 24
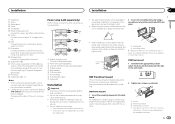
... .) 2 SiriusXM Connect Vehicle Tuner input (DEH- Never wire the negative speaker cable directly to 8 W (impedance value). Ground wire POWER AMP Other devices Metal parts of an external power amp or the vehicle's auto-antenna relay control terminal (max. 300 mA 12 V DC). The current capacity of smoke or malfunction. If the vehicle is equipped with metal parts to the antenna booster power supply terminal. ! X9600BHS, DEH-X8600BS and DEH-X7600S only) 3 Fuse (10 A) 4 Power cord input 5 Wired remote input Hard-wired remote control adapter can...
... .) 2 SiriusXM Connect Vehicle Tuner input (DEH- Never wire the negative speaker cable directly to 8 W (impedance value). Ground wire POWER AMP Other devices Metal parts of an external power amp or the vehicle's auto-antenna relay control terminal (max. 300 mA 12 V DC). The current capacity of smoke or malfunction. If the vehicle is equipped with metal parts to the antenna booster power supply terminal. ! X9600BHS, DEH-X8600BS and DEH-X7600S only) 3 Fuse (10 A) 4 Power cord input 5 Wired remote input Hard-wired remote control adapter can...
Owner's Manual
Page 25
... with operation of the vehicle. - DIN front/rear mount This unit can be damaged if it may cause skipping or other modifications to Blue/white cable. 2 Power amp (sold separately) 4 To Rear output 5 Rear speaker 6 To Front output 7 Front speaker 8 To subwoofer output 9 Subwoofer Installation Important ! DIN Front-mount 1 Insert the mounting sleeve into place. 1 60° ! Do not connect anything to speaker leads that are not blocking the vents. 2 1 Dashboard 2 Mounting sleeve # Make...
... with operation of the vehicle. - DIN front/rear mount This unit can be damaged if it may cause skipping or other modifications to Blue/white cable. 2 Power amp (sold separately) 4 To Rear output 5 Rear speaker 6 To Front output 7 Front speaker 8 To subwoofer output 9 Subwoofer Installation Important ! DIN Front-mount 1 Insert the mounting sleeve into place. 1 60° ! Do not connect anything to speaker leads that are not blocking the vents. 2 1 Dashboard 2 Mounting sleeve # Make...

Owner's Manual
Page 28
.... Make sure the connection cable for assistance. Perform one of the following operations. -Turn the ignition switch OFF and back ON. -Disconnect the USB storage device. -Change to hear any sound. Update the iPod version. iPod failure. STOP There are skipped. Select a list that the USB connector or USB cable is a delay between the start of playback and when you hear sound. Appendix Additional information Additional information Common AMP ERROR This unit...
.... Make sure the connection cable for assistance. Perform one of the following operations. -Turn the ignition switch OFF and back ON. -Disconnect the USB storage device. -Change to hear any sound. Update the iPod version. iPod failure. STOP There are skipped. Select a list that the USB connector or USB cable is a delay between the start of playback and when you hear sound. Appendix Additional information Additional information Common AMP ERROR This unit...


