Owner's Manual
Page 2
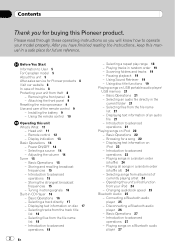
... in a safe place for Pioneer products 8 Visit our website 8 In case of an audio file 21 - Using the remote control 10 Operating this Pioneer product. Remote control 12 -...Selecting a source 14 - Scanning folders and tracks 19 - Selecting an audio file directly in CD Player 16 - Operating this unit 5 After-sales service for future reference. Connecting a Bluetooth ...on iPod 23 - Introduction to operate your iPod 24 - Introduction to advanced operations 27 - Installing the battery 9 - Head unit 11 - Basic Operations 15 - Pausing playback 19 - Browsing ...
... in a safe place for Pioneer products 8 Visit our website 8 In case of an audio file 21 - Using the remote control 10 Operating this Pioneer product. Remote control 12 -...Selecting a source 14 - Scanning folders and tracks 19 - Selecting an audio file directly in CD Player 16 - Operating this unit 5 After-sales service for future reference. Connecting a Bluetooth ...on iPod 23 - Introduction to operate your iPod 24 - Introduction to advanced operations 27 - Installing the battery 9 - Head unit 11 - Basic Operations 15 - Pausing playback 19 - Browsing ...
Owner's Manual
Page 5
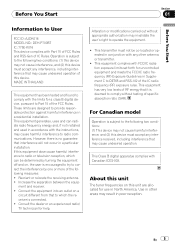
...or more of the following measures: ! This equipment has very low levels of RF energy that interference will not occur in a particular installation. En 5 However, there is no guarantee that it is deemed to comply without appropriate authorization may invalidate the user's right to operate ...: (1) This device may cause harmful interference to radio communications. These limits are allocated for use in other antenna or transmitter. ! Before You Start Section 01 Before You Start Information to User FCC ID: AJDK016 MODEL NO.: DEH-P700BT IC: 775E-K016 This device complies with the ...
...or more of the following measures: ! This equipment has very low levels of RF energy that interference will not occur in a particular installation. En 5 However, there is no guarantee that it is deemed to comply without appropriate authorization may invalidate the user's right to operate ...: (1) This device may cause harmful interference to radio communications. These limits are allocated for use in other antenna or transmitter. ! Before You Start Section 01 Before You Start Information to User FCC ID: AJDK016 MODEL NO.: DEH-P700BT IC: 775E-K016 This device complies with the ...
Owner's Manual
Page 9
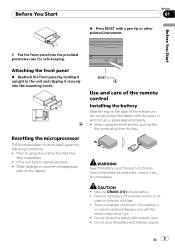
...using for safe keeping. WARNING Keep the battery out of the reach of explosion if the battery is not used for the first time after installation ! Replace only with a pen tip or other pointed instrument. Remove the battery if the remote control is incorrectly replaced. En 9 Use... microprocessor The microprocessor must be swallowed, consult a doctor immediately. pear on the display RESET button Use and care of the remote control Installing the battery Slide the tray on the back of the remote control out and insert the battery with metallic objects. There is a danger...
...using for safe keeping. WARNING Keep the battery out of the reach of explosion if the battery is not used for the first time after installation ! Replace only with a pen tip or other pointed instrument. Remove the battery if the remote control is incorrectly replaced. En 9 Use... microprocessor The microprocessor must be swallowed, consult a doctor immediately. pear on the display RESET button Use and care of the remote control Installing the battery Slide the tray on the back of the remote control out and insert the battery with metallic objects. There is a danger...
Owner's Manual
Page 10
If the battery leaks, wipe the remote control completely clean and install a new battery. ! special handling may not function prop- See www.dtsc.ca.gov/hazardouswaste/ perchlorate. (Applicable to California, U.S.A.)" Using the remote control Point the remote ...
If the battery leaks, wipe the remote control completely clean and install a new battery. ! special handling may not function prop- See www.dtsc.ca.gov/hazardouswaste/ perchlorate. (Applicable to California, U.S.A.)" Using the remote control Point the remote ...
Owner's Manual
Page 51
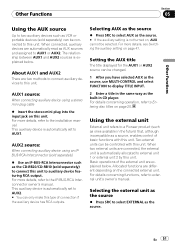
...For more details, refer to external unit 1 or external unit 2 by this unit. Using the external unit External unit refers to a Pioneer product (such as ones available in the future) that, although incompatible as the source. # If the auxiliary setting is automatically set to... device using an IPBUS-RCA Interconnector (sold separately) % Use an IP-BUS-RCA Interconnector such as the CD-RB20/CD-RB10 (sold separately) can be connected to the installation manual. This auxiliary device is automatically set to external unit's owner's manual. For details concerning functions, refer...
...For more details, refer to external unit 1 or external unit 2 by this unit. Using the external unit External unit refers to a Pioneer product (such as ones available in the future) that, although incompatible as the source. # If the auxiliary setting is automatically set to... device using an IPBUS-RCA Interconnector (sold separately) % Use an IP-BUS-RCA Interconnector such as the CD-RB20/CD-RB10 (sold separately) can be connected to the installation manual. This auxiliary device is automatically set to external unit's owner's manual. For details concerning functions, refer...
Other Manual
Page 5
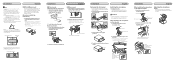
...Unit 1. Insert the supplied extraction keys into both sides of the front panel. 2. Replace the front panel to the following installation methods. When installing the microphone on the rear side of the steering column. Fix the front panel to the unit using a screwdriver to ensure... the appropriate position where the holes on the microphone clip. 3. Tighten two screws on the steering column. Screw Dashboard or Console Factory radio mounting bracket 2. Pull the unit out of the unit match. 2. Attach the holders to become wound around the steering column or gearstick...
...Unit 1. Insert the supplied extraction keys into both sides of the front panel. 2. Replace the front panel to the following installation methods. When installing the microphone on the rear side of the steering column. Fix the front panel to the unit using a screwdriver to ensure... the appropriate position where the holes on the microphone clip. 3. Tighten two screws on the steering column. Screw Dashboard or Console Factory radio mounting bracket 2. Pull the unit out of the unit match. 2. Attach the holders to become wound around the steering column or gearstick...


