Owner's Manual
Page 2
...Operations 20 - Playing songs in random order 16 - After reading, please keep the manual in CD Player 13 - Using the remote control 8 Operating this manual before using the product for the ...all ) 22 - Adjusting 7-band graphic equalizer 25 Adjusting loudness 26 Contents Thank you for Pioneer products 6 Visit our website 6 In case of trouble 6 Protecting your iPod 23 - ...file name list 15 2 En - Adjusting equalizer curves 25 - Removing the front panel 6 - Installing the battery 7 - Storing the strongest broadcast frequencies 13 - Displaying text information on iPod 21 -...
...Operations 20 - Playing songs in random order 16 - After reading, please keep the manual in CD Player 13 - Using the remote control 8 Operating this manual before using the product for the ...all ) 22 - Adjusting 7-band graphic equalizer 25 Adjusting loudness 26 Contents Thank you for Pioneer products 6 Visit our website 6 In case of trouble 6 Protecting your iPod 23 - ...file name list 15 2 En - Adjusting equalizer curves 25 - Removing the front panel 6 - Installing the battery 7 - Storing the strongest broadcast frequencies 13 - Displaying text information on iPod 21 -...
Owner's Manual
Page 7
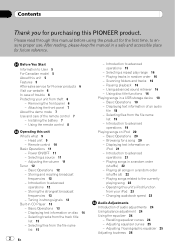
...the reverse mode, the other is set to the head unit successfully, try again. Keep the battery out of the reach of the remote control Installing the battery Slide the tray on /off while the ignition switch is the feature demo mode. Before You Start Section 01 English 2 Grab the ...screen indications start to ACC or ON. Press DISP again to excessive heat such as sunshine, fire or the like. Batteries (battery pack or batteries installed) shall not be exposed to start the reverse mode. Reverse mode If you attach the front panel forcedly. Press DISP during feature demo operation to...
...the reverse mode, the other is set to the head unit successfully, try again. Keep the battery out of the reach of the remote control Installing the battery Slide the tray on /off while the ignition switch is the feature demo mode. Before You Start Section 01 English 2 Grab the ...screen indications start to ACC or ON. Press DISP again to excessive heat such as sunshine, fire or the like. Batteries (battery pack or batteries installed) shall not be exposed to start the reverse mode. Reverse mode If you attach the front panel forcedly. Press DISP during feature demo operation to...
Owner's Manual
Page 8
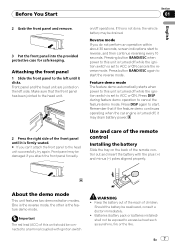
... the remote control fall onto the floor, where it may not function prop- Important ! If the battery leaks, wipe the remote control completely clean and install a new battery. ! The remote control may become jammed under the brake or accelerator pedal. 8 En Do not store the remote control in direct sunlight. See...
... the remote control fall onto the floor, where it may not function prop- Important ! If the battery leaks, wipe the remote control completely clean and install a new battery. ! The remote control may become jammed under the brake or accelerator pedal. 8 En Do not store the remote control in direct sunlight. See...
Owner's Manual
Page 11
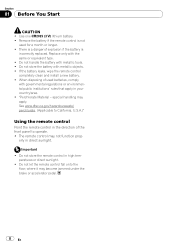
...can select a source you want to listen to. % Press SRC/OFF repeatedly to installation manual. ! To retract the antenna, turn the unit on. XM (XM tuner)-SIRIUS (SIRIUS tuner)- DVD (DVD ... panel is set to off . HD Radio (HD Radio tuner)-Tuner (tuner)- When the iPod is set to off the AUX1 when not in CD player)-Multi CD (multi-CD player)-iPod (iPod connected with this unit... % Press SRC/OFF and hold until the unit turns off (refer to . ! External unit refers to a Pioneer product (such as a source, enables control of USB port 1, refer to Head unit on the terminal which has...
...can select a source you want to listen to. % Press SRC/OFF repeatedly to installation manual. ! To retract the antenna, turn the unit on. XM (XM tuner)-SIRIUS (SIRIUS tuner)- DVD (DVD ... panel is set to off . HD Radio (HD Radio tuner)-Tuner (tuner)- When the iPod is set to off the AUX1 when not in CD player)-Multi CD (multi-CD player)-iPod (iPod connected with this unit... % Press SRC/OFF and hold until the unit turns off (refer to . ! External unit refers to a Pioneer product (such as a source, enables control of USB port 1, refer to Head unit on the terminal which has...

Owner's Manual
Page 18
.... Since the USB storage device is projected forward from the unit, it . 1 WMA/MP3/AAC/WAV indicator Shows the type of the builtin CD player. If an error message is dangerous to connect directly. % Select a folder Push MULTI-CONTROL up or down. Basic Operations % Fast forward...start. # Use a USB cable to connect the USB storage device to Additional Information. ! Refer to Displaying text information on disc on page 9 and installation manual. 2 Press SRC/OFF to select USB as that of file currently playing. 2 Folder number indicator 3 Track number indicator 4 Play time indicator 5 ...
.... Since the USB storage device is projected forward from the unit, it . 1 WMA/MP3/AAC/WAV indicator Shows the type of the builtin CD player. If an error message is dangerous to connect directly. % Select a folder Push MULTI-CONTROL up or down. Basic Operations % Fast forward...start. # Use a USB cable to connect the USB storage device to Additional Information. ! Refer to Displaying text information on disc on page 9 and installation manual. 2 Press SRC/OFF to select USB as that of file currently playing. 2 Folder number indicator 3 Track number indicator 4 Play time indicator 5 ...
Owner's Manual
Page 20
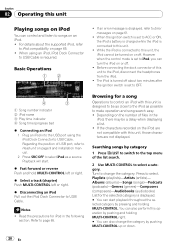
... as possible to the iPod, disconnect the headphones from the iPod. ! Depending on the number of USB port, refer to Head unit on page 9 and installation manual. 2 Press SRC/OFF to iPod, you can turn the iPod on or off . While the iPod is connected to iPod compatibility on page 65...
... as possible to the iPod, disconnect the headphones from the iPod. ! Depending on the number of USB port, refer to Head unit on page 9 and installation manual. 2 Press SRC/OFF to iPod, you can turn the iPod on or off . While the iPod is connected to iPod compatibility on page 65...

Installation Manual
Page 6
... distancia por cable (se vende por separado). Insert the mounting sleeve into the dashboard. • When installing in place. Dashboard Mounting sleeve 182 53 3. Dashboard or Console Factory radio mounting bracket Fastening the front panel If you do not plan to a passenger as sound skip. Rojo ...the trim ring outwards to remove the trim ring. Conexión de las unidades Español 50 cm iPod Cable USB CD-U150E Pioneer (vendido separadamente) Salida trasera Salida delantera Salida de altavoz de subgraves Este producto Toma de antena Fusible (10 A) Conector del Dock...
... distancia por cable (se vende por separado). Insert the mounting sleeve into the dashboard. • When installing in place. Dashboard Mounting sleeve 182 53 3. Dashboard or Console Factory radio mounting bracket Fastening the front panel If you do not plan to a passenger as sound skip. Rojo ...the trim ring outwards to remove the trim ring. Conexión de las unidades Español 50 cm iPod Cable USB CD-U150E Pioneer (vendido separadamente) Salida trasera Salida delantera Salida de altavoz de subgraves Este producto Toma de antena Fusible (10 A) Conector del Dock...


