Leaflet
Page 1
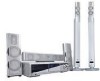
Philips Matchline DVD home theater system with Neodymium Ribbon Tweeters MX5900SA Total Immersion in speaker columns • Neodymium Ribbon Tweeters for crystal clear sound • Cinema Center Speaker™ for realism cinematic experience • Advanced Class D Amplifier™for compact, powerful sound • DTS 5.1 Dolby Digital Pro Logic II full surround...™ Bass Pipes are integrated in Movies and Music Ergonomically designed, the MX5900SA is a 5 DVD/SACD performance-oriented Home Entertainment System bestowed with superior technological features to initialize your total...
Philips Matchline DVD home theater system with Neodymium Ribbon Tweeters MX5900SA Total Immersion in speaker columns • Neodymium Ribbon Tweeters for crystal clear sound • Cinema Center Speaker™ for realism cinematic experience • Advanced Class D Amplifier™for compact, powerful sound • DTS 5.1 Dolby Digital Pro Logic II full surround...™ Bass Pipes are integrated in Movies and Music Ergonomically designed, the MX5900SA is a 5 DVD/SACD performance-oriented Home Entertainment System bestowed with superior technological features to initialize your total...
Leaflet
Page 2
... amplifiers, allowing for maximum disc compatibility and listening pleasure 12 NC: 9073 100 11307 www.philips.com With a 5.1 multi-channel surround sound and full CD compatibility both forward and backward, what results is enhanced audio performance from...home theater system with Neodymium Ribbon Tweeters MX5900SA/37 Specifications Product highlights Picture/Display • Aspect ratio: 4:3, 16:9 Sound • Equalizer settings: Action, Classic, Concert, Digital, Drama, Jazz, Rock, Sci-Fi • Sound Enhancement: Class "D" Digital Amplifier, ClearVoice, Incredible Surround...
... amplifiers, allowing for maximum disc compatibility and listening pleasure 12 NC: 9073 100 11307 www.philips.com With a 5.1 multi-channel surround sound and full CD compatibility both forward and backward, what results is enhanced audio performance from...home theater system with Neodymium Ribbon Tweeters MX5900SA/37 Specifications Product highlights Picture/Display • Aspect ratio: 4:3, 16:9 Sound • Equalizer settings: Action, Classic, Concert, Digital, Drama, Jazz, Rock, Sci-Fi • Sound Enhancement: Class "D" Digital Amplifier, ClearVoice, Incredible Surround...

User manual
Page 1
We want you to help ? 5900SA DVDVIDEO DIGITAL SURROUND SYSTEM MX T! Philips representatives are ready to start enjoying your new product.We can guide you with any of the Features. Call us on the web at www.philips.com IM E PORTAN Return your Warranty Registration Card within 10 days EE WHY INSID 1 CALL US BEFORE YOU CONSIDER RETURNING THE PRODUCT! 1-800-531-0039 or Visit us ! S Need help you through Connections, First-time Setup, or any questions about your new product right away!
We want you to help ? 5900SA DVDVIDEO DIGITAL SURROUND SYSTEM MX T! Philips representatives are ready to start enjoying your new product.We can guide you with any of the Features. Call us on the web at www.philips.com IM E PORTAN Return your Warranty Registration Card within 10 days EE WHY INSID 1 CALL US BEFORE YOU CONSIDER RETURNING THE PRODUCT! 1-800-531-0039 or Visit us ! S Need help you through Connections, First-time Setup, or any questions about your new product right away!
User manual
Page 5
...451,942 and other unsafe operation. Canada English: This digital apparatus does not exceed the Class B limits for home and other limited viewing uses only unless otherwise authorized by Macrovision Corporation. CAUTION: INVISIBLE LASER RADIATION WHEN OPEN. AVATTAESSA... other intellectual property rights owned by Macrovision Corporation and other rights owners. "DTS" and "DTS Digital Surround" are trademarks of Digital Theater Systems, Inc. 1996 Digital Theater Systems, Inc. Confidential Unpublished Works. ©1992-1999 Dolby Laboratories, Inc. OSYNLIG LASERSTRÅLNING NÄ...
...451,942 and other unsafe operation. Canada English: This digital apparatus does not exceed the Class B limits for home and other limited viewing uses only unless otherwise authorized by Macrovision Corporation. CAUTION: INVISIBLE LASER RADIATION WHEN OPEN. AVATTAESSA... other intellectual property rights owned by Macrovision Corporation and other rights owners. "DTS" and "DTS Digital Surround" are trademarks of Digital Theater Systems, Inc. 1996 Digital Theater Systems, Inc. Confidential Unpublished Works. ©1992-1999 Dolby Laboratories, Inc. OSYNLIG LASERSTRÅLNING NÄ...
User manual
Page 8
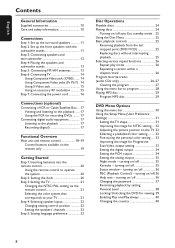
...on /off 36 PBC (Playback Control) - English Contents General Information Supplied accessories 10 Care and safety information 10 Connections Step 1: Set up the surround speakers 11 Step 2: Set up the front speakers with the subwoofer stands 11 Step 3: Connecting speakers and twin subwoofer 12 Step 4: Placing the speakers... on the remote only 19 Getting Started Step 1: Inserting batteries into the remote control 20 Using the remote control to operate the system 20 Step 2: Setting the clock 20 Step 3: Setting the TV 21 Changing the NTSC /PAL setting via the remote control 21 Selecting...
...on /off 36 PBC (Playback Control) - English Contents General Information Supplied accessories 10 Care and safety information 10 Connections Step 1: Set up the surround speakers 11 Step 2: Set up the front speakers with the subwoofer stands 11 Step 3: Connecting speakers and twin subwoofer 12 Step 4: Placing the speakers... on the remote only 19 Getting Started Step 1: Inserting batteries into the remote control 20 Using the remote control to operate the system 20 Step 2: Setting the clock 20 Step 3: Setting the TV 21 Changing the NTSC /PAL setting via the remote control 21 Selecting...

User manual
Page 9
...Operations Setting the timer 43 Activating/Deactivating the timer 43 Setting the Sleep timer 44 Sound and Volume Controls Sound Control 45 Selecting surround sound 45 Turning on/off clear voice effect 45 Changing subwoofer volume level 45 Adjusting Bass/Treble level 45 Selecting digital sound ... 46 Switching to active mode 46 Switching to Eco Power standby mode ... 46 Switching to standby mode (view clock) . 46 Dimming system's display screen 46 Recording to an external device 46 Using the remote to operate your television 46 Specifications 47 Troubleshooting 48-49 Glossary 50...
...Operations Setting the timer 43 Activating/Deactivating the timer 43 Setting the Sleep timer 44 Sound and Volume Controls Sound Control 45 Selecting surround sound 45 Turning on/off clear voice effect 45 Changing subwoofer volume level 45 Adjusting Bass/Treble level 45 Selecting digital sound ... 46 Switching to active mode 46 Switching to Eco Power standby mode ... 46 Switching to standby mode (view clock) . 46 Dimming system's display screen 46 Recording to an external device 46 Using the remote to operate your television 46 Specifications 47 Troubleshooting 48-49 Glossary 50...

User manual
Page 10
... about 10 cm (4 inches) of free space all around the player for adequate ventilation. 10 cm (4 inches) 10 cm (4 inches) PHILIPS DVD Home Cinema System 10 cm (4 inches) Care of disc - Use a soft cloth slightly moistened with a soft felt-tipped pen. - Place the player ... only on a flat, hard, stable surface. Do not use a solution containing alcohol, spirits, ammonia or abrasives. English General Information Supplied accessories Surround/center speaker cable (3x) Front speaker and Subwoofer cables (2x) Audio cable (white, red) Composite video cable (yellow) Component video cables ...
... about 10 cm (4 inches) of free space all around the player for adequate ventilation. 10 cm (4 inches) 10 cm (4 inches) PHILIPS DVD Home Cinema System 10 cm (4 inches) Care of disc - Use a soft cloth slightly moistened with a soft felt-tipped pen. - Place the player ... only on a flat, hard, stable surface. Do not use a solution containing alcohol, spirits, ammonia or abrasives. English General Information Supplied accessories Surround/center speaker cable (3x) Front speaker and Subwoofer cables (2x) Audio cable (white, red) Composite video cable (yellow) Component video cables ...

User manual
Page 11
... speaker stand Connections Step 2: Set up the speaker. You should get a qualified person to attach the brackets to the surround speakers using the supplied screws. The surround speakers are through the twin subwoofer stands. 1 Attach the left front speaker to the left ) or FRONT R (right....) Helpful Hint: - The connections between front speakers and DVD system are labeled as FRONT L (left subwoofer stand and right front speaker...
... speaker stand Connections Step 2: Set up the speaker. You should get a qualified person to attach the brackets to the surround speakers using the supplied screws. The surround speakers are through the twin subwoofer stands. 1 Attach the left front speaker to the left ) or FRONT R (right....) Helpful Hint: - The connections between front speakers and DVD system are labeled as FRONT L (left subwoofer stand and right front speaker...

User manual
Page 12
... connect more than the speakers supplied. Ensure that the speaker cables are correctly connected. Do not connect speakers with subwoofer stand (left) SPEAKER SYSTEMS (4Ω) SURROUND CENTER FRONT SUB-WOOFER L L AM R R FM ANTENNA C AUDIO VIDEO DIGITAL AUX TV LINE OUT Pr SL OUT IN IN OUT CVBS... SR L Pb R DIGITAL IN Y S-VIDEO P-SCAN ON OFF ~ AC MAINS Surround speaker (right) Surround speaker (left) Connect the supplied speaker systems using the supplied speaker cables by matching the colors of the speaker wire into the jacks. black black black...
... connect more than the speakers supplied. Ensure that the speaker cables are correctly connected. Do not connect speakers with subwoofer stand (left) SPEAKER SYSTEMS (4Ω) SURROUND CENTER FRONT SUB-WOOFER L L AM R R FM ANTENNA C AUDIO VIDEO DIGITAL AUX TV LINE OUT Pr SL OUT IN IN OUT CVBS... SR L Pb R DIGITAL IN Y S-VIDEO P-SCAN ON OFF ~ AC MAINS Surround speaker (right) Surround speaker (left) Connect the supplied speaker systems using the supplied speaker cables by matching the colors of the speaker wire into the jacks. black black black...

User manual
Page 13
...the listening position. 2 Place the center speaker above the TV or the DVD system so that the center channel's sound is localized. 3 Place the surround speakers at normal listening ear level facing each other radiation source to the FM jack... the speakers and subwoofer stands Center speaker and DVD system Front speaker with 2 subwoofer stand (Left) 1 Front speaker with subwoofer stand (Right) 1 3 Surround Speaker (Left) 3 Surround Speaker (Right) Connections Step 5: Connecting FM/AM antennas SPEAKER SYSTEMS (4Ω) SURROUND CENTER FRONT SUB-WOOFER ➠ fix the claw into...
...the listening position. 2 Place the center speaker above the TV or the DVD system so that the center channel's sound is localized. 3 Place the surround speakers at normal listening ear level facing each other radiation source to the FM jack... the speakers and subwoofer stands Center speaker and DVD system Front speaker with 2 subwoofer stand (Left) 1 Front speaker with subwoofer stand (Right) 1 3 Surround Speaker (Left) 3 Surround Speaker (Right) Connections Step 5: Connecting FM/AM antennas SPEAKER SYSTEMS (4Ω) SURROUND CENTER FRONT SUB-WOOFER ➠ fix the claw into...

User manual
Page 14
... IN S-VIDEO IN Pr/Cr VIDEO IN Pb/Cb Y COMPONENT S-VIDEOVIDEO IN AUDIO IN Pr/Cr OUT VIDEO IN Pb/Cb Y SURROUND CENTER FRONT SUB-WOOFER SURROUND CENTER FRONT SUB-WOOFER L AM R FM ANTENNA C AUDIO 1 VIDEO DIGITAL AUX TV LINE OUT SL OUT IN IN OUT CVBS ... This option must indicate Progressive Scan or ProScan capability) set it to 'ON.' The progressive scan video quality is only possible through this DVD system, use the audio cables (white/ red) to connect TV IN (L/R) jacks to 'OFF.' Component Video connection provides higher picture quality. Otherwise, ...
... IN S-VIDEO IN Pr/Cr VIDEO IN Pb/Cb Y COMPONENT S-VIDEOVIDEO IN AUDIO IN Pr/Cr OUT VIDEO IN Pb/Cb Y SURROUND CENTER FRONT SUB-WOOFER SURROUND CENTER FRONT SUB-WOOFER L AM R FM ANTENNA C AUDIO 1 VIDEO DIGITAL AUX TV LINE OUT SL OUT IN IN OUT CVBS ... This option must indicate Progressive Scan or ProScan capability) set it to 'ON.' The progressive scan video quality is only possible through this DVD system, use the audio cables (white/ red) to connect TV IN (L/R) jacks to 'OFF.' Component Video connection provides higher picture quality. Otherwise, ...

User manual
Page 15
...available on your electronics retailer or contact Philips for details on RF modulator availability and operations. S-Video connection provides better picture quality. See your TV. Using S-Video jack 1 Use the S-video cable (not supplied) to connect the DVD system's S-VIDEO OUT jack to the S-...IN IN OUT CVBS SR L Pb R DIGITAL IN Y S-VIDEO P-SCAN ON OFF 13 IMPORTANT! - IMPORTANT! - SURROUND CENTER FRONT SUB-WOOFER SPEAKER SYSTEMS (4Ω) SURROUND CENTER FRONT SUB-WOOFER English Connections AUDIO OUT COMPONENT VIDEO IN S-VIDEO IN Pr/Cr VIDEO IN Pb/Cb Y COMPONENT ...
...available on your electronics retailer or contact Philips for details on RF modulator availability and operations. S-Video connection provides better picture quality. See your TV. Using S-Video jack 1 Use the S-video cable (not supplied) to connect the DVD system's S-VIDEO OUT jack to the S-...IN IN OUT CVBS SR L Pb R DIGITAL IN Y S-VIDEO P-SCAN ON OFF 13 IMPORTANT! - IMPORTANT! - SURROUND CENTER FRONT SUB-WOOFER SPEAKER SYSTEMS (4Ω) SURROUND CENTER FRONT SUB-WOOFER English Connections AUDIO OUT COMPONENT VIDEO IN S-VIDEO IN Pr/Cr VIDEO IN Pb/Cb Y COMPONENT ...

User manual
Page 16
On the DVD system, "AUTO INSTALL - PRESS PLAY" may appear on . Never make or change any connections with the power switched on the display panel. Press ÉÅ on ... the power outlet. PRESS PLAY IS C C H A N G E R LE R-R CENTRE FT DISC RIG DVD R-L SU SUB PLAY• PAUSE STOP SEATING SOURCE SEARCH SURROUND PROG TUNING CLOCK•TIMER DVD VIDEO DIGITAL SURROUND SYSTEM VOLUME TREBLE BASS 16 HT SU English Connections Step 7: Connecting the power cord AM FM ANTENNA DIGITAL OUT AUDIO AUX TV...
On the DVD system, "AUTO INSTALL - PRESS PLAY" may appear on . Never make or change any connections with the power switched on the display panel. Press ÉÅ on ... the power outlet. PRESS PLAY IS C C H A N G E R LE R-R CENTRE FT DISC RIG DVD R-L SU SUB PLAY• PAUSE STOP SEATING SOURCE SEARCH SURROUND PROG TUNING CLOCK•TIMER DVD VIDEO DIGITAL SURROUND SYSTEM VOLUME TREBLE BASS 16 HT SU English Connections Step 7: Connecting the power cord AM FM ANTENNA DIGITAL OUT AUDIO AUX TV...

User manual
Page 17
... record or dub protected discs using the S-VIDEO (as shown. 2 Connect the DVD system's AUX IN (R/L) jacks to the AUDIO OUT jacks on a digital recording device (DTS-Digital Theater System compatible, with a Dolby Digital decoder, for example.) Before starting operation, press AUX/DI...satellite box. Connecting a VCR or Cable/ Satellite Box Connections (optional) Connecting digital audio equipment SPEAKER SYSTEMS (4Ω) SURROUND CENTER FRONT SUB-WOOFER SPEAKER SYSTEMS (4Ω) SURROUND CENTER FRONT SUB-WOOFER English COMPONENT S-VIDEO VIDEO IN AUDIO IN Pr/Cr OUT VIDEO IN Pb/...
... record or dub protected discs using the S-VIDEO (as shown. 2 Connect the DVD system's AUX IN (R/L) jacks to the AUDIO OUT jacks on a digital recording device (DTS-Digital Theater System compatible, with a Dolby Digital decoder, for example.) Before starting operation, press AUX/DI...satellite box. Connecting a VCR or Cable/ Satellite Box Connections (optional) Connecting digital audio equipment SPEAKER SYSTEMS (4Ω) SURROUND CENTER FRONT SUB-WOOFER SPEAKER SYSTEMS (4Ω) SURROUND CENTER FRONT SUB-WOOFER English COMPONENT S-VIDEO VIDEO IN AUDIO IN Pr/Cr OUT VIDEO IN Pb/...

User manual
Page 18
...(see page 20) 9 ÉÅ PLAY•PAUSE - CLOCK: sets the minutes and hours. (see page 45) @ SOURCE - Selects multichannel surround, 3D sound or stereo mode. (see pages 20, 43) 0 SEATING (only available in Multichannel mode) - Point the remote control towards this sensor...DVD R-L SU SUB PLAY• PAUSE STOP SEATING SOURCE SEARCH SURROUND PROG TUNING CLOCK•TIMER DVD VIDEO DIGITAL SURROUND SYSTEM VOLUME TREBLE BASS 1 STANDBY ON - Exits an operation. - TUNER: *tunes the radio frequency up/down .) - SURROUND (SURR.) - TUNER: toggles between AUX and DI (Digital Input...
...(see page 20) 9 ÉÅ PLAY•PAUSE - CLOCK: sets the minutes and hours. (see page 45) @ SOURCE - Selects multichannel surround, 3D sound or stereo mode. (see pages 20, 43) 0 SEATING (only available in Multichannel mode) - Point the remote control towards this sensor...DVD R-L SU SUB PLAY• PAUSE STOP SEATING SOURCE SEARCH SURROUND PROG TUNING CLOCK•TIMER DVD VIDEO DIGITAL SURROUND SYSTEM VOLUME TREBLE BASS 1 STANDBY ON - Exits an operation. - TUNER: *tunes the radio frequency up/down .) - SURROUND (SURR.) - TUNER: toggles between AUX and DI (Digital Input...

User manual
Page 22
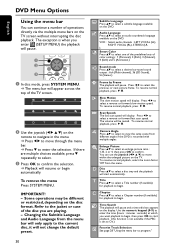
...follow the settings in the 'Speakers' menu (see next page "Setting the speakers' channels".) To remove the menu Press SYSTEM MENU. Changing seating control position Normally, the best sound spot and the ideal setting position is in the middle of sound...PERSONAL SETTING" appears and the system will automatically be adjusted for optimum performance. 7 8 9 1 SURR. 0 SOUND VOL 3 2, 4 SYSTEM MENU SEATING PREV DISC MENU ZOOM NEXT 1 Press SURR. (or SURROUND on the TV screen. English Getting Started Step 4: Selecting speaker layout 1 2, 3 4 SYSTEM MENU DISC MENU SEATING ZOOM ...
...follow the settings in the 'Speakers' menu (see next page "Setting the speakers' channels".) To remove the menu Press SYSTEM MENU. Changing seating control position Normally, the best sound spot and the ideal setting position is in the middle of sound...PERSONAL SETTING" appears and the system will automatically be adjusted for optimum performance. 7 8 9 1 SURR. 0 SOUND VOL 3 2, 4 SYSTEM MENU SEATING PREV DISC MENU ZOOM NEXT 1 Press SURR. (or SURROUND on the TV screen. English Getting Started Step 4: Selecting speaker layout 1 2, 3 4 SYSTEM MENU DISC MENU SEATING ZOOM ...

User manual
Page 23
... - {Audio} (disc's soundtrack) - {Subtitle} (disc's subtitles) - {Menu} (on the remote to your surroundings and setup. To remove the menu Press SYSTEM MENU. 1 In disc mode, stop playback and press SYSTEM MENU. 2 Select icon and press 4. 3 Use the joystick (1 2 3 4) on or off the sound output. ... it will remain once selected. 1en 1en 1 st Audio Subtitle Menu English English English ABC 1 Press SURR. (or SURROUND on the front panel) repeatedly to select 'Multichannel.' 2 In disc mode, press SYSTEM MENU. 3 Select icon and press 4. 4 Use the joystick (1 2 3 4) on screen menu) 4 Press 3...
... - {Audio} (disc's soundtrack) - {Subtitle} (disc's subtitles) - {Menu} (on the remote to your surroundings and setup. To remove the menu Press SYSTEM MENU. 1 In disc mode, stop playback and press SYSTEM MENU. 2 Select icon and press 4. 3 Use the joystick (1 2 3 4) on or off the sound output. ... it will remain once selected. 1en 1en 1 st Audio Subtitle Menu English English English ABC 1 Press SURR. (or SURROUND on the front panel) repeatedly to select 'Multichannel.' 2 In disc mode, press SYSTEM MENU. 3 Select icon and press 4. 4 Use the joystick (1 2 3 4) on screen menu) 4 Press 3...
User manual
Page 24
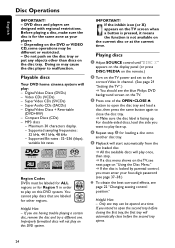
... on the disc tray or put any objects other regions. Playable discs Your DVD home cinema system will play face up . Digital Video Discs (DVDs) - Maximum 30 characters display....) q To obtain the best surround effects, see page 22 "Changing seating control position." IMPORTANT! Depending on this DVD system. Supported sampling frequencies : 32 ...kHz, 44.1 kHz, 48 kHz - If you intend to open the disc tray and load a disc, then press the same button again to play once, then stop. ➜ If a disc menu shows on the TV, see the blue Philips...
... on the disc tray or put any objects other regions. Playable discs Your DVD home cinema system will play face up . Digital Video Discs (DVDs) - Maximum 30 characters display....) q To obtain the best surround effects, see page 22 "Changing seating control position." IMPORTANT! Depending on this DVD system. Supported sampling frequencies : 32 ...kHz, 44.1 kHz, 48 kHz - If you intend to open the disc tray and load a disc, then press the same button again to play once, then stop. ➜ If a disc menu shows on the TV, see the blue Philips...
User manual
Page 30
...is recorded with multiple angles. Press 1 2 to select a reverse or forward slow motion speed. Disc Press 34 to select a desired surround sound output : 6ch (Multi-channel), 3d (3D Sound), St (Stereo.) Frame by Frame The playback will be different or restricted, ... If there are playing. - Some operations may be muted. To remove the menu Press SYSTEM MENU. IMPORTANT! - SYSTEM MENU 1 2 SEATING DISC MENU ZOOM PREV NEXT 3 OK STOP PLAY/PAUSE 1 In disc mode, press SYSTEM MENU. ➜ The menu bar will appear across the top of color settings : 1 ...
...is recorded with multiple angles. Press 1 2 to select a reverse or forward slow motion speed. Disc Press 34 to select a desired surround sound output : 6ch (Multi-channel), 3d (3D Sound), St (Stereo.) Frame by Frame The playback will be different or restricted, ... If there are playing. - Some operations may be muted. To remove the menu Press SYSTEM MENU. IMPORTANT! - SYSTEM MENU 1 2 SEATING DISC MENU ZOOM PREV NEXT 3 OK STOP PLAY/PAUSE 1 In disc mode, press SYSTEM MENU. ➜ The menu bar will appear across the top of color settings : 1 ...

User manual
Page 34
... automatically change to your PCM (Pulse Code Modulation) output only after you select {PCM only} the surround mode will then be converted to "Setting the PCM output." All Select this if you have set the system's Digital Output to {PCM only.} (See "Setting the digital output".) Follow the steps of "Using the...
... automatically change to your PCM (Pulse Code Modulation) output only after you select {PCM only} the surround mode will then be converted to "Setting the PCM output." All Select this if you have set the system's Digital Output to {PCM only.} (See "Setting the digital output".) Follow the steps of "Using the...


