

Leaflet
Page 1
... enhancement • Total 100W RMS Design that lets you enjoy your interior(s) • Wall-mountable option for flexible placement • High quality remote control for comfortable use Philips DVD Micro Theater MCD288 Super-sleek design with superb movie enjoyment Pure power meets ultra-sleek chic with option of table-stand or wall-mounted. This...
... enhancement • Total 100W RMS Design that lets you enjoy your interior(s) • Wall-mountable option for flexible placement • High quality remote control for comfortable use Philips DVD Micro Theater MCD288 Super-sleek design with superb movie enjoyment Pure power meets ultra-sleek chic with option of table-stand or wall-mounted. This...

Leaflet
Page 3
...197 x 302 mm • Weight incl. Specifications are the property of Koninklijke Philips Electronics N.V. or their respective owners. Analog: Component Y Pb Pr (cinch), ... Remote control: 47-key with Digital Right Management not supported. DVD Micro Theater Specifications MCD288.../37 Sound • Output Power: Total 100W RMS • Sound Enhancement: Digital Sound Control 4 modes, Dynamic Bass Boost, Loudness, Class "D" Digital Amplifier • Sound System: Dolby Digital Loudspeakers • Main Speaker: 3" woofer, Bass Reflex Speaker System...
...197 x 302 mm • Weight incl. Specifications are the property of Koninklijke Philips Electronics N.V. or their respective owners. Analog: Component Y Pb Pr (cinch), ... Remote control: 47-key with Digital Right Management not supported. DVD Micro Theater Specifications MCD288.../37 Sound • Output Power: Total 100W RMS • Sound Enhancement: Digital Sound Control 4 modes, Dynamic Bass Boost, Loudness, Class "D" Digital Amplifier • Sound System: Dolby Digital Loudspeakers • Main Speaker: 3" woofer, Bass Reflex Speaker System...

User manual
Page 9
... for recording DVDs Recording (digital) Connecting a USB device or memory card Controls Controls on the system 20 Controls on the remote control 20-21 Preparations Step 1: Inserting batteries into the remote control 22 Using the remote control to operate the system Step 2: Setting the clock 22 Step 3: Setting video preference 23 Setting up Progressive Scan...
... for recording DVDs Recording (digital) Connecting a USB device or memory card Controls Controls on the system 20 Controls on the remote control 20-21 Preparations Step 1: Inserting batteries into the remote control 22 Using the remote control to operate the system Step 2: Setting the clock 22 Step 3: Setting video preference 23 Setting up Progressive Scan...
User manual
Page 12
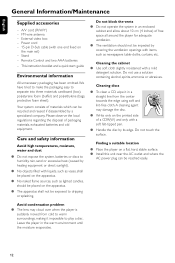
...Remote Control and two AAA batteries - This instruction booklet and a quick start guide Environmental information All unnecessary packaging has been omitted.We have tried to make the packaging easy to play a disc. Care and safety information Avoid high temperatures, moisture, water and dust ● Do not expose the system...). ● No objects filled with a mild detergent solution. Do not use a solution containing alcohol, spirits, ammonia or abrasives. Your system consists of a CDR(W) and only with one end fixed on a flat, hard, stable surface. ● Install this unit near the...
...Remote Control and two AAA batteries - This instruction booklet and a quick start guide Environmental information All unnecessary packaging has been omitted.We have tried to make the packaging easy to play a disc. Care and safety information Avoid high temperatures, moisture, water and dust ● Do not expose the system...). ● No objects filled with a mild detergent solution. Do not use a solution containing alcohol, spirits, ammonia or abrasives. Your system consists of a CDR(W) and only with one end fixed on a flat, hard, stable surface. ● Install this unit near the...

User manual
Page 16
...video quality is only possible when usingY Pb Pr, and a progressive scan TV is used for DVD playback connection, the system's VIDEO OUT setting will not be changed accordingly. Press SYSTEM MENU on the TV. R R 1 Use component video cables (red/blue/green - If S-Video is required. not...VIDEO OUTPUT (Pr/Cr Pb/Cb Y) jacks to the corresponding Component video input jacks (or labeled as Y/C or S-VHS) on the remote to exit the system menu and then DISC to view the picture. Using S-Video jack IMPORTANT! - English Installation Using Component Video jacks (Y Pb Pr) IMPORTANT! ...
...video quality is only possible when usingY Pb Pr, and a progressive scan TV is used for DVD playback connection, the system's VIDEO OUT setting will not be changed accordingly. Press SYSTEM MENU on the TV. R R 1 Use component video cables (red/blue/green - If S-Video is required. not...VIDEO OUTPUT (Pr/Cr Pb/Cb Y) jacks to the corresponding Component video input jacks (or labeled as Y/C or S-VHS) on the remote to exit the system menu and then DISC to view the picture. Using S-Video jack IMPORTANT! - English Installation Using Component Video jacks (Y Pb Pr) IMPORTANT! ...

User manual
Page 20
... gradually. - Tuner: selects a preset radio station. to Eco power/normal standby mode. 2 iR sensor - VCD2.0: switches the playback control mode on the remote control 1 STANDBY y - searches fast backward/forward. - selects different slow playback modes for a VCD/ SVCD/DVD. * = Press and hold , then ... mode, to view the current status of the disc. 3 PROGRAM - to stop playback or clear a program. jack for remote control. 3 PROGRAM - to switch the system on or to expose some buttons and jacks on or to select the respective sound source :TUNER, DISC, USB/CARD or ...
... gradually. - Tuner: selects a preset radio station. to Eco power/normal standby mode. 2 iR sensor - VCD2.0: switches the playback control mode on the remote control 1 STANDBY y - searches fast backward/forward. - selects different slow playback modes for a VCD/ SVCD/DVD. * = Press and hold , then ... mode, to view the current status of the disc. 3 PROGRAM - to stop playback or clear a program. jack for remote control. 3 PROGRAM - to switch the system on or to expose some buttons and jacks on or to select the respective sound source :TUNER, DISC, USB/CARD or ...

User manual
Page 21
.../TIMER Standby mode - sets time for example). - sets the sleep timer function (auto off). & LOUDNESS - displays information on the system automatically. sets the system clock. ejects a disc from the disc loader. º CH.LEVEL (unavailable for this version) ⁄ SURROUND (unavailable for this version...) Notes for DVD - Tuner: selects a preset radio station. !9 - Power-on the remote control (DISC or TUNER, for switching on...
.../TIMER Standby mode - sets time for example). - sets the sleep timer function (auto off). & LOUDNESS - displays information on the system automatically. sets the system clock. ejects a disc from the disc loader. º CH.LEVEL (unavailable for this version) ⁄ SURROUND (unavailable for this version...) Notes for DVD - Tuner: selects a preset radio station. !9 - Power-on the remote control (DISC or TUNER, for switching on...

User manual
Page 22
.... - Remove batteries if they should be erased when the system is not being used for a long time. - Using the Remote Control to operate the Player 1 Aim the Remote Control directly at the remote sensor (IR) on the remote) to complete the preparation procedures before operating the system. on the front panel. 2 Do not put any objects...
.... - Remove batteries if they should be erased when the system is not being used for a long time. - Using the Remote Control to operate the Player 1 Aim the Remote Control directly at the remote sensor (IR) on the remote) to complete the preparation procedures before operating the system. on the front panel. 2 Do not put any objects...
User manual
Page 23
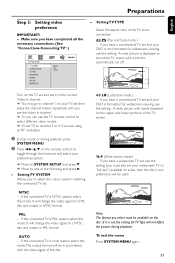
... 1 on your DVD is formatted for widescreen viewing, use the TV remote control to select different video modes. ➜ Or, set TV to one of a NTSC disc and output in NTSC format. If the connected TV is multi system, select this mode.The output format will be connected. 4:3 PS (... you have a widescreen TV set, use this setting. If you to select the colour system matching the connected TV set your widescreen TV to "full size") available on the remote control to toggle through the functions and select your DVD is not formatted for widescreen viewing, use this setting (you...
... 1 on your DVD is formatted for widescreen viewing, use the TV remote control to select different video modes. ➜ Or, set TV to one of a NTSC disc and output in NTSC format. If the connected TV is multi system, select this mode.The output format will be connected. 4:3 PS (... you have a widescreen TV set, use this setting. If you to select the colour system matching the connected TV set your widescreen TV to "full size") available on the remote control to toggle through the functions and select your DVD is not formatted for widescreen viewing, use this setting (you...

User manual
Page 24
... turn on the progressive scan mode on your TV. 9 Turn on your TV user manual). ➜ The below menu appears on the remote to exit the system menu and then DISC to exit progressive scan. ➜ The DVD blue background screen will be a distorted picture on your TV at this state ...until you turn on the DVD player. 4 Select the correct Video Input channel. ➜ The DVD background screen appears on the TV. 5 Press SYSTEM MENU. 6 Press 1 2 repeatedly to select "VIDEO SETUP". 7 Select "TV MODE" to "P-SCAN", then OK to confirm. ➜ The instruction menu appears on the TV, ...
... turn on the progressive scan mode on your TV. 9 Turn on your TV user manual). ➜ The below menu appears on the remote to exit the system menu and then DISC to exit progressive scan. ➜ The DVD blue background screen will be a distorted picture on your TV at this state ...until you turn on the DVD player. 4 Select the correct Video Input channel. ➜ The DVD background screen appears on the TV. 5 Press SYSTEM MENU. 6 Press 1 2 repeatedly to select "VIDEO SETUP". 7 Select "TV MODE" to "P-SCAN", then OK to confirm. ➜ The instruction menu appears on the TV, ...
User manual
Page 25
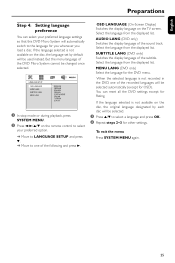
...selected is not available on the remote control to select your preferred language settings so that this DVD Micro System will be selected. 3 Press 5/4 to select a language and press OK. 4 Repeat steps 2~3 for other settings. But the menu language of the DVD Micro System cannot be changed once selected.... 1 In stop mode or during playback, press SYSTEM MENU. 2 Press 2/3/5/4 on the disc, the language set by each disc will be used instead. OSD LANGUAGE...
...selected is not available on the remote control to select your preferred language settings so that this DVD Micro System will be selected. 3 Press 5/4 to select a language and press OK. 4 Repeat steps 2~3 for other settings. But the menu language of the DVD Micro System cannot be changed once selected.... 1 In stop mode or during playback, press SYSTEM MENU. 2 Press 2/3/5/4 on the disc, the language set by each disc will be used instead. OSD LANGUAGE...

User manual
Page 26
...XX" is displayed on the display panel. Volume control Press VOLUME -/+ (VOL +/- on the remote) to enable or disable LOUDNESS feature. ➜ icon appears/disappears after a disc has stopped playing. Switching the system to Eco Power Standby mode ● Press ECO POWER/STANDBY-ON B in the active mode...the last selected source. ● Press DISC, TUNER or AUX on the remote. ➜ The system will switch to Standby mode if you can: - Power-saving automatic standby As a power-saving feature, the system will continue without sound and "MUTING" flashes. ● To activate sound ...
...XX" is displayed on the display panel. Volume control Press VOLUME -/+ (VOL +/- on the remote) to enable or disable LOUDNESS feature. ➜ icon appears/disappears after a disc has stopped playing. Switching the system to Eco Power Standby mode ● Press ECO POWER/STANDBY-ON B in the active mode...the last selected source. ● Press DISC, TUNER or AUX on the remote. ➜ The system will switch to Standby mode if you can: - Power-saving automatic standby As a power-saving feature, the system will continue without sound and "MUTING" flashes. ● To activate sound ...

User manual
Page 27
...pause and sound will start automatically (depending on the disc type). ➜ If a disc menu appears on the TV, see the blue Philips DVD background screen on the remote). ➜ You should see "Using the Disc Menu". ➜ If the disc is facing you. ➜ Make sure you have... playback from the slot loader. 5 Playback will switch to stop mode, press 9 again. 27 To cancel resume mode ● In stop playback. This system is not available on the display. ● During playback, press DISC MENU. ➜ If PBC was ON, it will start automatically. Using the disc...
...pause and sound will start automatically (depending on the disc type). ➜ If a disc menu appears on the TV, see the blue Philips DVD background screen on the remote). ➜ You should see "Using the Disc Menu". ➜ If the disc is facing you. ➜ Make sure you have... playback from the slot loader. 5 Playback will switch to stop mode, press 9 again. 27 To cancel resume mode ● In stop playback. This system is not available on the display. ● During playback, press DISC MENU. ➜ If PBC was ON, it will start automatically. Using the disc...

User manual
Page 28
... only within the same chapter/track. ➜ The section will now repeat continuously. 3 To exit the sequence, press A-B again. ➜ "A-B CANCEL" is displayed on the remote during playback to select the required forward speed: 1/2, 1/3, 1/4, 1/5, 1/6 or 1/7. ➜ Sound will be muted. 2 To return to normal speed, press 2;. For DVD CHAPTER - to pan...
... only within the same chapter/track. ➜ The section will now repeat continuously. 3 To exit the sequence, press A-B again. ➜ "A-B CANCEL" is displayed on the remote during playback to select the required forward speed: 1/2, 1/3, 1/4, 1/5, 1/6 or 1/7. ➜ Sound will be muted. 2 To return to normal speed, press 2;. For DVD CHAPTER - to pan...

User manual
Page 29
... the whole disc. ➜ Display off . OR Enter your desired chapter/track number in the time edit box using the Numeric Keypad (0-9) on the remote. Information display during playback to select the required speed: X2, X4, X8 or X20 (backward or forward). ➜ Sound will be muted. 2 .../track edit box appears. 2 Enter hours, minutes and seconds from left to right in the chapter/track edit box using the Numeric Keypad (0-9) on the remote. For MP3 CD ➜ Elapsed playback time of the current track. ➜ Remaining playback time of the whole disc. ➜ Display off . Subtitles ...
... the whole disc. ➜ Display off . OR Enter your desired chapter/track number in the time edit box using the Numeric Keypad (0-9) on the remote. Information display during playback to select the required speed: X2, X4, X8 or X20 (backward or forward). ➜ Sound will be muted. 2 .../track edit box appears. 2 Enter hours, minutes and seconds from left to right in the chapter/track edit box using the Numeric Keypad (0-9) on the remote. For MP3 CD ➜ Elapsed playback time of the current track. ➜ Remaining playback time of the whole disc. ➜ Display off . Subtitles ...

User manual
Page 30
... confirm. ➜ The playback will start from the selected picture to the end of the folder. 3 Press 3 to move to the folder column on the remote to select another track in the current folder. ● Use 2/3/5/4 on the left of the TV screen, then use the Numeric Keypad (09) to input...
... confirm. ➜ The playback will start from the selected picture to the end of the folder. 3 Press 3 to move to the folder column on the remote to select another track in the current folder. ● Use 2/3/5/4 on the left of the TV screen, then use the Numeric Keypad (09) to input...

User manual
Page 31
... player supports the DivX movie playback that you download from your computer onto a CD-R/RW (see "System Menu Options-DIVX(R) VOD registration code" for your selection. ● In this case, pressing SUBTITLE on the remote control will turn on or off the subtitle. ● If multilingual subtitles are supported but do not...
... player supports the DivX movie playback that you download from your computer onto a CD-R/RW (see "System Menu Options-DIVX(R) VOD registration code" for your selection. ● In this case, pressing SUBTITLE on the remote control will turn on or off the subtitle. ● If multilingual subtitles are supported but do not...

User manual
Page 33
... to highlight a rating level for adults only; Parental Guidance suggested . 4 PG 13 - RATING Some DVDs may be reset to factory defaults. 33 CLOSED CAPTIONS System Menu Options Rating explanations 1 KID SAFE - Suitable for children under age 17. 8 ADULT - General Audience; Restricted; No children under 17 from 1 to 8 ... rating level feature does not work for your children or have a parental level assigned to the complete disc or to certain scenes on the remote. 4 Press OK to unlock. ● If " " is always active even if the password has been changed. DEFAULT Setting the "...
... to highlight a rating level for adults only; Parental Guidance suggested . 4 PG 13 - RATING Some DVDs may be reset to factory defaults. 33 CLOSED CAPTIONS System Menu Options Rating explanations 1 KID SAFE - Suitable for children under age 17. 8 ADULT - General Audience; Restricted; No children under 17 from 1 to 8 ... rating level feature does not work for your children or have a parental level assigned to the complete disc or to certain scenes on the remote. 4 Press OK to unlock. ● If " " is always active even if the password has been changed. DEFAULT Setting the "...

User manual
Page 36
...memory. Radio Reception English Tuning to radio stations 1 Press SOURCE on the set repeatedly or TUNER on the remote to select FM tuner source. 2 Press and hold TUNING 22/33 (2/3 on the remote) and release the button. ➜ The radio automatically tunes to a station with sufficient reception. 3 Repeat...Tune to your desired station (refer to "Tuning to radio stations"). 2 Press PROGRAM to activate programming. ➜ PROG flashes on the remote) briefly and repeatedly until the desired preset station is displayed and available stations are programmed. ➜ AUTO is displayed. 36
...memory. Radio Reception English Tuning to radio stations 1 Press SOURCE on the set repeatedly or TUNER on the remote to select FM tuner source. 2 Press and hold TUNING 22/33 (2/3 on the remote) and release the button. ➜ The radio automatically tunes to a station with sufficient reception. 3 Repeat...Tune to your desired station (refer to "Tuning to radio stations"). 2 Press PROGRAM to activate programming. ➜ PROG flashes on the remote) briefly and repeatedly until the desired preset station is displayed and available stations are programmed. ➜ AUTO is displayed. 36

User manual
Page 38
... organized MP3/WMA files into any albums on your disc, an album "00" will be displayed as you do with the albums/tracks on the remote control). -NO AUDIO appears if no audio file is displayed through flash players' music management software. - For DRM protected WMA files, use Windows Media...of MP3 files end with .wma. - English External Sources How to organize your MP3/WMA files on the USB mass storage device This Hi-Fi system will be automatically assigned for details about Windows Media Player and WM DRM (Windows Media Digital Rights Management). 1 Check the USB device has been ...
... organized MP3/WMA files into any albums on your disc, an album "00" will be displayed as you do with the albums/tracks on the remote control). -NO AUDIO appears if no audio file is displayed through flash players' music management software. - For DRM protected WMA files, use Windows Media...of MP3 files end with .wma. - English External Sources How to organize your MP3/WMA files on the USB mass storage device This Hi-Fi system will be automatically assigned for details about Windows Media Player and WM DRM (Windows Media Digital Rights Management). 1 Check the USB device has been ...


