Leaflet
Page 1
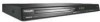
...Scan component video for optimized image quality Easy to set up and use • EasyLink to control all HDMI CEC devices via a single remote Bring video to life • HDMI digital output for easy connection with only one -cable connectivity Your dream player with one cable •... High definition JPEG playback for images in true resolution Play all your movies and music entertainment experience. Philips DVD player HDMI 1080p DivX Ultra DVP3982 DVD playback with 1080p HDMI upconversion with flawless, true-to-life picture quality and the ability to play virtually any ...
...Scan component video for optimized image quality Easy to set up and use • EasyLink to control all HDMI CEC devices via a single remote Bring video to life • HDMI digital output for easy connection with only one -cable connectivity Your dream player with one cable •... High definition JPEG playback for images in true resolution Play all your movies and music entertainment experience. Philips DVD player HDMI 1080p DivX Ultra DVP3982 DVD playback with 1080p HDMI upconversion with flawless, true-to-life picture quality and the ability to play virtually any ...
Leaflet
Page 3
www.philips.com DVD player HDMI 1080p DivX Ultra Specifications DVP3982/F7 Picture/Display • D/A converter: 12 bit, 108 MHz • Picture enhancement: Progressive scan, Video Upscaling(720p, 1080i/p) Sound &#... • Power consumption: < 10 W • Power supply: 120V, 60Hz • Standby power consumption: < 1.0 W Accessories • Included accessories: 2 x AAA Batteries, Audio/ Video cable, Remote Control, User Manual, Power cord, Quick start guide, Warranty Leaflet Dimensions • Packaging dimensions (W x H x D): 415 x 82 x 282 mm • Set dimensions (W x H x D): ...
www.philips.com DVD player HDMI 1080p DivX Ultra Specifications DVP3982/F7 Picture/Display • D/A converter: 12 bit, 108 MHz • Picture enhancement: Progressive scan, Video Upscaling(720p, 1080i/p) Sound &#... • Power consumption: < 10 W • Power supply: 120V, 60Hz • Standby power consumption: < 1.0 W Accessories • Included accessories: 2 x AAA Batteries, Audio/ Video cable, Remote Control, User Manual, Power cord, Quick start guide, Warranty Leaflet Dimensions • Packaging dimensions (W x H x D): 415 x 82 x 282 mm • Set dimensions (W x H x D): ...
User manual
Page 6
English Table of contents General General Information ...8 Setup precautions...8 Accessories supplied ...8 Cleaning discs ...8 About recycling...8 Product Overview Your DVD Player...9 Remote Control ...10-12 Using the remote control ...12 Connections Basic Connections ...13-16 Step 1: Connecting to television ...13-15 Option 1: Using Composite Video jacks (CVBS 13 Option 2: Using Component Video jacks (Y ...
English Table of contents General General Information ...8 Setup precautions...8 Accessories supplied ...8 Cleaning discs ...8 About recycling...8 Product Overview Your DVD Player...9 Remote Control ...10-12 Using the remote control ...12 Connections Basic Connections ...13-16 Step 1: Connecting to television ...13-15 Option 1: Using Composite Video jacks (CVBS 13 Option 2: Using Component Video jacks (Y ...
User manual
Page 8
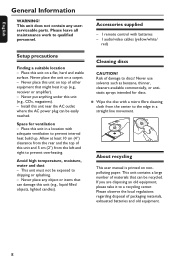
... equipment. 8 About recycling This user manual is printed on a flat, hard and stable surface. Please leave all maintenance work to dripping or splashing. - Accessories supplied - 1 remote control with a micro fibre cleaning cloth from the left and right to discs! Never place the unit on top of this unit on a carpet. - Allow...
... equipment. 8 About recycling This user manual is printed on a flat, hard and stable surface. Please leave all maintenance work to dripping or splashing. - Accessories supplied - 1 remote control with a micro fibre cleaning cloth from the left and right to discs! Never place the unit on top of this unit on a carpet. - Allow...

User manual
Page 9
Starts/pauses playback. Disc: stops playback. 9 Show information about the current status of this sensor. b Disc tray c OPEN/CLOSE ç - g STOP Ç - e IR Sensor - Point the remote control towards this unit. d Display panel - f PLAY/PAUSE u - Opens/closes the disc tray. English Your DVD Player Front Panel View a STANDBY-ON - Turns on this unit or turns off to normal standby mode.
Starts/pauses playback. Disc: stops playback. 9 Show information about the current status of this sensor. b Disc tray c OPEN/CLOSE ç - g STOP Ç - e IR Sensor - Point the remote control towards this unit. d Display panel - f PLAY/PAUSE u - Opens/closes the disc tray. English Your DVD Player Front Panel View a STANDBY-ON - Turns on this unit or turns off to normal standby mode.

User manual
Page 10
... status or disc information. Stops playback. Starts or pauses playback. h Numeric keypad 0-9 - Selects a track or title number of the disc. Exit an operation. - i AUDIO - English Remote Control 1 2 3 4 5 6 7 8 9 a 2 - g Ç (Stop) - b ç (Open/Close) - Opens/closes the disc tray.
... status or disc information. Stops playback. Starts or pauses playback. h Numeric keypad 0-9 - Selects a track or title number of the disc. Exit an operation. - i AUDIO - English Remote Control 1 2 3 4 5 6 7 8 9 a 2 - g Ç (Stop) - b ç (Open/Close) - Opens/closes the disc tray.

User manual
Page 11
... contents menu. - k OK - Returns to the previous or next title/ chapter/track. 12 - Mutes or restores the volume. 14 o SUBTITLE - p ZOOM - REPEAT A-B - n (Mute) 13 - English Remote Control (continued) j DISC MENU - Confirms an entry or selection. 10 l RETURN/TITLE - Selects various repeat modes. 17 - Selects a DVD subtitle language. For VCD 2.0 and SVCD...
... contents menu. - k OK - Returns to the previous or next title/ chapter/track. 12 - Mutes or restores the volume. 14 o SUBTITLE - p ZOOM - REPEAT A-B - n (Mute) 13 - English Remote Control (continued) j DISC MENU - Confirms an entry or selection. 10 l RETURN/TITLE - Selects various repeat modes. 17 - Selects a DVD subtitle language. For VCD 2.0 and SVCD...

User manual
Page 12
...new or carbon and alkaline, etc.). - Note: Never place any objects between the remote control and this unit while operating. Batteries contain chemical substances; D Point the remote control directly at the remote sensor (IR) on the front panel. B Insert two batteries type R03 or AAA,... compartment. they are exhausted or if the remote control is not to be disposed of properly. A Open the battery compartment. E Select the desired function (for a long time. - C Close the cover. English Remote Control (continued) Using the remote control CAUTION! - Remove batteries if they ...
...new or carbon and alkaline, etc.). - Note: Never place any objects between the remote control and this unit while operating. Batteries contain chemical substances; D Point the remote control directly at the remote sensor (IR) on the front panel. B Insert two batteries type R03 or AAA,... compartment. they are exhausted or if the remote control is not to be disposed of properly. A Open the battery compartment. E Select the desired function (for a long time. - C Close the cover. English Remote Control (continued) Using the remote control CAUTION! - Remove batteries if they ...

User manual
Page 18
...B Use keys to select { OSD Language } in channel. Refer to the device user manual for this channel is the language available from the Philips 'EasyLink' TV. - To synchronize with a Philips 'EasyLink' TV, the OSD language must be called FRONT, A/V IN, VIDEO, etc.. If you are using a RF modulator, set to {... Press STANDBY-ON to turn it on and select the appropriate input source for detail. C If you are different depending on your TVs remote control until you have set it. You should see the Video In channel. The menu language will be used. 18 General Setup Page Disc...
...B Use keys to select { OSD Language } in channel. Refer to the device user manual for this channel is the language available from the Philips 'EasyLink' TV. - To synchronize with a Philips 'EasyLink' TV, the OSD language must be called FRONT, A/V IN, VIDEO, etc.. If you are using a RF modulator, set to {... Press STANDBY-ON to turn it on and select the appropriate input source for detail. C If you are different depending on your TVs remote control until you have set it. You should see the Video In channel. The menu language will be used. 18 General Setup Page Disc...

User manual
Page 19
... is not available on the disc, the disc's default language is not in the list, then select { Others }, then use the numeric keypad 0-9 on the remote to change the subtitle language. { Disc Menu } Select this to change the language of the options below and press . C Use keys to stop playback (if...
... is not available on the disc, the disc's default language is not in the list, then select { Others }, then use the numeric keypad 0-9 on the remote to change the subtitle language. { Disc Menu } Select this to change the language of the options below and press . C Use keys to stop playback (if...

User manual
Page 20
A message appears on the remote control. G Confirm your TVs user manual. If a blank/distorted screen appears, wait for 15 seconds for Progressive Scan TV only) The progressive scan displays twice ... with this unit. Ensure that the TVs progressive scan mode is displayed A Press ç to a Progressive Scan TV or component video input'.) A Turn on the remote control. B Turn on this unit and your action by selecting the { OK } in the menu and press OK. In such a case, turn off (or set...
A message appears on the remote control. G Confirm your TVs user manual. If a blank/distorted screen appears, wait for 15 seconds for Progressive Scan TV only) The progressive scan displays twice ... with this unit. Ensure that the TVs progressive scan mode is displayed A Press ç to a Progressive Scan TV or component video input'.) A Turn on the remote control. B Turn on this unit and your action by selecting the { OK } in the menu and press OK. In such a case, turn off (or set...
User manual
Page 22
... x on this unit. - Sound will be played on this unit due to the configuration and characteristics of the disc, or due to turn on the remote control to open the disc tray. C Press ç to the correct viewing channel for this unit to start slow motion play speed (1/2, 1/4, 1/8, 1/16). (forward: VCD...
... x on this unit. - Sound will be played on this unit due to the configuration and characteristics of the disc, or due to turn on the remote control to open the disc tray. C Press ç to the correct viewing channel for this unit to start slow motion play speed (1/2, 1/4, 1/8, 1/16). (forward: VCD...

User manual
Page 23
.../ SVCD/CD Track (repeat current track) All (repeat entire disc) Shuffle (random playback) (not applicable for about 5 minutes. While playing a disc, press REPEAT on the remote control repeatedly to low power standby mode if you do not press any buttons within 15 minutes after a disc has stopped playing. - Screen saver starts...
.../ SVCD/CD Track (repeat current track) All (repeat entire disc) Shuffle (random playback) (not applicable for about 5 minutes. While playing a disc, press REPEAT on the remote control repeatedly to low power standby mode if you do not press any buttons within 15 minutes after a disc has stopped playing. - Screen saver starts...

User manual
Page 24
...for repeat playback is only possible within the same track/chapter. Using the Disc Menu Depending on the disc, a menu may appear on the remote control, then press OK to the instructions supplied with the discs. To select a playback feature Use keys or numeric keypad 0-9 on the ...A-B again to end the section. Helpful Hints: - Always refer to start point. To access or remove the menu Press DISC MENU on the remote control. 24 English Disc Operations (continued) Repeating a specific section (A-B) A While playing a disc, press REPEAT A-B at the start playback.
...for repeat playback is only possible within the same track/chapter. Using the Disc Menu Depending on the disc, a menu may appear on the remote control, then press OK to the instructions supplied with the discs. To select a playback feature Use keys or numeric keypad 0-9 on the ...A-B again to end the section. Helpful Hints: - Always refer to start point. To access or remove the menu Press DISC MENU on the remote control. 24 English Disc Operations (continued) Repeating a specific section (A-B) A While playing a disc, press REPEAT A-B at the start playback.

User manual
Page 26
... Total Elapsed 0:48:59 B Use keys to view the information and press OK to the selected time. 26 The available disc information appears on the remote control. C Use the numeric keypad 0-9 to input the number/time or use keys to enter the time where playback should start (eg. 0:34:27). Selecting...
... Total Elapsed 0:48:59 B Use keys to view the information and press OK to the selected time. 26 The available disc information appears on the remote control. C Use the numeric keypad 0-9 to input the number/time or use keys to enter the time where playback should start (eg. 0:34:27). Selecting...

User manual
Page 29
...- Subtitle files with the following file name extensions (.srt, .smi, .sub, .ssa, .txt) are supported but do not appear on the remote control to change the audio stream. quick navigation to start playback. Helpful Hints: - Alternate audio tracks - provide flexibility, - During playback; Advance features... play. enable audio tracks in the same folder. If the DivX disc has multilingual subtitles, you can press SUBTITLE on the remote control to change the subtitle language. If the DivX title has different audio tracks, you can press AUDIO on the file navigation...
...- Subtitle files with the following file name extensions (.srt, .smi, .sub, .ssa, .txt) are supported but do not appear on the remote control to change the audio stream. quick navigation to start playback. Helpful Hints: - Alternate audio tracks - provide flexibility, - During playback; Advance features... play. enable audio tracks in the same folder. If the DivX disc has multilingual subtitles, you can press SUBTITLE on the remote control to change the subtitle language. If the DivX title has different audio tracks, you can press AUDIO on the file navigation...

User manual
Page 30
... pictures. Helpful Hint: - Flip/Rotate picture During playback, use keys to the JPEGEXIF format, typically used by almost all digital cameras. rotate the picture clockwise. Remote control 30 A Load a photo CD (Kodak Picture CD, JPEG). B Press u to start ... This unit can only display digital camera pictures according to rotate/flip the...
... pictures. Helpful Hint: - Flip/Rotate picture During playback, use keys to the JPEGEXIF format, typically used by almost all digital cameras. rotate the picture clockwise. Remote control 30 A Load a photo CD (Kodak Picture CD, JPEG). B Press u to start ... This unit can only display digital camera pictures according to rotate/flip the...

User manual
Page 33
... Mode See 'Audio Setup Page' on this chapter. Preference Page Audio Subtitle Disc Menu Parental PBC Mp3 / Jpeg Nav Password See 'Preference Page' on the remote control.
... Mode See 'Audio Setup Page' on this chapter. Preference Page Audio Subtitle Disc Menu Parental PBC Mp3 / Jpeg Nav Password See 'Preference Page' on the remote control.

User manual
Page 39
... on the TV and confirm your action by pressing OK on the top and bottom. { 16:9 } - For a full-height picture with black bars on the remote control. - Before enabling the progressive scan feature, you have connected this unit. Turn off progressive scan mode. It enables playback of a different type of disc...
... on the TV and confirm your action by pressing OK on the top and bottom. { 16:9 } - For a full-height picture with black bars on the remote control. - Before enabling the progressive scan feature, you have connected this unit. Turn off progressive scan mode. It enables playback of a different type of disc...

User manual
Page 42
Enable HDMI CEC compliant TV/devices to control each other connected devices must turn off this unit remote control can enjoy the EasyLink controls. You must be compliant with HDMI CEC. - To disable this feature, select { Off }. { System Standby } ... OK } in the disc tray). Note: If a notification message appears, confirm your TV and this feature, select { Decline }. Philips does not guarantee 100% interoperability with a single remote control. Your TV automatically switches to proceed. 42 Your TV and other with all the HDMI CEC compliant devices. Note: However, press...
Enable HDMI CEC compliant TV/devices to control each other connected devices must turn off this unit remote control can enjoy the EasyLink controls. You must be compliant with HDMI CEC. - To disable this feature, select { Off }. { System Standby } ... OK } in the disc tray). Note: If a notification message appears, confirm your TV and this feature, select { Decline }. Philips does not guarantee 100% interoperability with a single remote control. Your TV automatically switches to proceed. 42 Your TV and other with all the HDMI CEC compliant devices. Note: However, press...


