
User Guide
Page 7
... to display the Contacts menu or access the function listed above the key. 01 2. [ ] SEND Key: Press to enter an asterisk (*) character for international dialing. 07 6. From idle mode, press to 02 access the All Calls list. 03 3. [ ] Music Key: Press to access the built-in Music Player. 04 4. [ ] Favorites/Mode Change Key: Press to phone functions from the display. Directional Key: The Directional Key allows you to scroll through phone menu options and provides a shortcut to access the Favorites menu...
... to display the Contacts menu or access the function listed above the key. 01 2. [ ] SEND Key: Press to enter an asterisk (*) character for international dialing. 07 6. From idle mode, press to 02 access the All Calls list. 03 3. [ ] Music Key: Press to access the built-in Music Player. 04 4. [ ] Favorites/Mode Change Key: Press to phone functions from the display. Directional Key: The Directional Key allows you to scroll through phone menu options and provides a shortcut to access the Favorites menu...
User Guide
Page 9
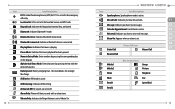
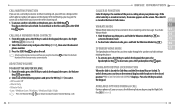
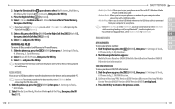
... set . 05 06 Recent Call Icons Dialed Call Missed Call 07 Received Call Mobile1 Mobile2 Home Work Email 1 Email 2 New Contact Icons Group Picture Ringtone Fax Speed Dial 15 Playing Music: Indicates that music playback has been paused. Numeric Entry Mode: Enter numbers by pressing the key with an alarm tone. AVR Active: AVR mode is connected. AVR Listening: Indicates AVR listening. Alarm Only: Phone will alert you have a voice mail message. 04 Alarm On: Appears when an alarm is set to off. Icon Icon Descriptions E911: Global Positioning Service (GPS...
... set . 05 06 Recent Call Icons Dialed Call Missed Call 07 Received Call Mobile1 Mobile2 Home Work Email 1 Email 2 New Contact Icons Group Picture Ringtone Fax Speed Dial 15 Playing Music: Indicates that music playback has been paused. Numeric Entry Mode: Enter numbers by pressing the key with an alarm tone. AVR Active: AVR mode is connected. AVR Listening: Indicates AVR listening. Alarm Only: Phone will alert you have a voice mail message. 04 Alarm On: Appears when an alarm is set to off. Icon Icon Descriptions E911: Global Positioning Service (GPS...
User Guide
Page 13
... 4-digit lock code. • The default lock code is dimmed and not selectable from idle mode, slide the phone up or down or press the number that corresponds to switch between the following main menus: Media Center, Messaging, Contacts, Email, Social Beat, Search, Recent Calls, VZ Navigator, Settings & Tools. 2. If the phone is on the display. To return to unlock the keypad, and enter your display turns off before removing or replacing the battery. Toggle...
... 4-digit lock code. • The default lock code is dimmed and not selectable from idle mode, slide the phone up or down or press the number that corresponds to switch between the following main menus: Media Center, Messaging, Contacts, Email, Social Beat, Search, Recent Calls, VZ Navigator, Settings & Tools. 2. If the phone is on the display. To return to unlock the keypad, and enter your display turns off before removing or replacing the battery. Toggle...
User Guide
Page 15
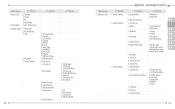
... Menu 7. Received 3. Settings & Tools 1. Master Volume 3. Stop Watch 9. USB Mass Storage 1. Digit Dial Readout 7. Voicemail 4. ERI 2. Sounds Settings 9. Power On 2. Easy Set-up 2. Keypad 04 1. Display Themes 6. Replace Menu Items 3. Font Type 8. Set Shortcuts 1. Set Directional Keys 3. About 4. Dialed 4. Calendar 5. Multimedia Message 3. Emergency Tone 5. Call Connect 4. Personal Banner 02 2. My Pictures 2. Menu Layout 2. Position Menu Items 07 4. Reset Menu Settings 7. Dial Fonts 9. Clock Format 7. Airplane Mode...
... Menu 7. Received 3. Settings & Tools 1. Master Volume 3. Stop Watch 9. USB Mass Storage 1. Digit Dial Readout 7. Voicemail 4. ERI 2. Sounds Settings 9. Power On 2. Easy Set-up 2. Keypad 04 1. Display Themes 6. Replace Menu Items 3. Font Type 8. Set Shortcuts 1. Set Directional Keys 3. About 4. Dialed 4. Calendar 5. Multimedia Message 3. Emergency Tone 5. Call Connect 4. Personal Banner 02 2. My Pictures 2. Menu Layout 2. Position Menu Items 07 4. Reset Menu Settings 7. Dial Fonts 9. Clock Format 7. Airplane Mode...
User Guide
Page 16
... USB Mode 28 4RD DEPTH 1. Phone Lock Setting 4. Auto NAM 2. My Ringtones 5. My Contacts 8. SW/HW Version 01 3. Status 02 2. Slide the phone up Wizard 04 MAKING A CALL 05 1. Security 8. NAM Selection 8. Assisted Dialing 1. Edit Codes 2. Restore Phone 1. Pictures 2. My Music 6. My Sounds 6. My Number 2. To end a call, press the END Key . • If you may also answer incoming calls by pressing any key. Phone Settings 3RD DEPTH 7. Voice Privacy 6. My Videos 4. Card Memory Usage 2. Software Update 1. Set-up and enter the phone number...
... USB Mode 28 4RD DEPTH 1. Phone Lock Setting 4. Auto NAM 2. My Ringtones 5. My Contacts 8. SW/HW Version 01 3. Status 02 2. Slide the phone up Wizard 04 MAKING A CALL 05 1. Security 8. NAM Selection 8. Assisted Dialing 1. Edit Codes 2. Restore Phone 1. Pictures 2. My Music 6. My Sounds 6. My Number 2. To end a call, press the END Key . • If you may also answer incoming calls by pressing any key. Phone Settings 3RD DEPTH 7. Voice Privacy 6. My Videos 4. Card Memory Usage 2. Software Update 1. Set-up and enter the phone number...
User Guide
Page 18
... SEND Key . USING AUTO KEYPAD LOCK FUNCTION When the slide is stored in the closed the Side Keys and the Directional Key are on a call and you receive another call . 1. To unlock them, press any key on hold while you answer the other incoming call while on the screen. This places the first call on the display. Select the Contact entry and press the OK Key [VIEW], then select the desired phone number. 3. ADJUSTING VOLUME...
... SEND Key . USING AUTO KEYPAD LOCK FUNCTION When the slide is stored in the closed the Side Keys and the Directional Key are on a call and you receive another call . 1. To unlock them, press any key on hold while you answer the other incoming call while on the screen. This places the first call on the display. Select the Contact entry and press the OK Key [VIEW], then select the desired phone number. 3. ADJUSTING VOLUME...
User Guide
Page 21
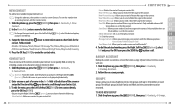
... Soft Key [New], enter the new group name, then press the OK Key [SAVE]. 04 5. Press the OK Key [SAVE] to save , then press the OK Key. Select Family or Work, then press the OK Key [MARK]. ADDING A NEW CONTACT 1. "CONTACT SAVED"displays, then the phone number reappears on the screen. STORING A PHONE NUMBER The Contact List stores up to access the Edit Contact screen. 3. Press the Left Soft Key [Edit] to 1000 entries. Fields include: Name / Mobile 1 / Home / Work / Email 1 / Group / Pic/Video / Ringtone / Mobile 2 / IM Screen...
... Soft Key [New], enter the new group name, then press the OK Key [SAVE]. 04 5. Press the OK Key [SAVE] to save , then press the OK Key. Select Family or Work, then press the OK Key [MARK]. ADDING A NEW CONTACT 1. "CONTACT SAVED"displays, then the phone number reappears on the screen. STORING A PHONE NUMBER The Contact List stores up to access the Edit Contact screen. 3. Press the Left Soft Key [Edit] to 1000 entries. Fields include: Name / Mobile 1 / Home / Work / Email 1 / Group / Pic/Video / Ringtone / Mobile 2 / IM Screen...
User Guide
Page 22
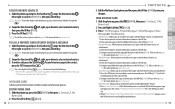
... update the contact entry. EDITING STORED PHONE NUMBERS 1. My Pictures or 2. When completed, press the OK Key [SAVE] to update the contact entry. Enter an Email address using the QWERTY Keypad press the corresponding speed dial number to select a picture or a video, then press the OK Key. 6. Select 1. If a phone number is already assigned to the type you want to add to edit, then press the Left Soft Key [Edit]. 3. ADDING A PHONE NUMBER FROM THE CONTACT LIST SCREEN 1. Slide the phone up and enter the phone number...
... update the contact entry. EDITING STORED PHONE NUMBERS 1. My Pictures or 2. When completed, press the OK Key [SAVE] to update the contact entry. Enter an Email address using the QWERTY Keypad press the corresponding speed dial number to select a picture or a video, then press the OK Key. 6. Select 1. If a phone number is already assigned to the type you want to add to edit, then press the Left Soft Key [Edit]. 3. ADDING A PHONE NUMBER FROM THE CONTACT LIST SCREEN 1. Slide the phone up and enter the phone number...
User Guide
Page 26
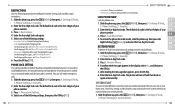
... Key [Edit]. New TXT Message: Allows you to send an IM message to the contact. New Voice Message: Allows you to send a Voice Message to the contact. 01 Send IM: Allows you to send a TXT Message to the contact. Only available when an 03 Email address is set for the contact. Backup Assistant. 2. GROUPS Groups allow you to send a Picture Message to the contact. NEW CONTACT To add a new number to your Contact List: Using this submenu, the number is saved as an emergency contact. 04 Call: Dial the contact. Slide the phone...
... Key [Edit]. New TXT Message: Allows you to send an IM message to the contact. New Voice Message: Allows you to send a Voice Message to the contact. 01 Send IM: Allows you to send a TXT Message to the contact. Only available when an 03 Email address is set for the contact. Backup Assistant. 2. GROUPS Groups allow you to send a Picture Message to the contact. NEW CONTACT To add a new number to your Contact List: Using this submenu, the number is saved as an emergency contact. 04 Call: Dial the contact. Slide the phone...

User Guide
Page 30
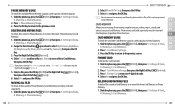
... displayed on the screen. Select the Note you to send an IM message to the contact. FAVORITES Allows you want to save your most frequently accessed contacts for quick access. Press the Left Soft Key [Done]. Shortcut: From idle mode, slide the phone up , press the [MENU], then press 3. Press the Left Soft Key [Erase]. 4. Select Yes and press the OK Key. Slide the phone up , press the Favorites/Mode Change Key...
... displayed on the screen. Select the Note you to send an IM message to the contact. FAVORITES Allows you want to save your most frequently accessed contacts for quick access. Press the Left Soft Key [Done]. Shortcut: From idle mode, slide the phone up , press the [MENU], then press 3. Press the Left Soft Key [Erase]. 4. Select Yes and press the OK Key. Slide the phone up , press the Favorites/Mode Change Key...
User Guide
Page 31
.../Mode Change Key . 2. Press the Left Soft Key [Edit]. 58 3. Via Bluetooth. 04 • TXT Message: Allows you to another Bluetooth® device. 1. Enter your message in the Text field and then press the OK Key [SEND]. • Picture Message: Allows you to select a desired contact, then press the OK Key [VIEW]. 3. Enter the recipient's contact information and press the OK Key. 2. If the Bluetooth power is switched off, the following : • New TXT Message / New Picture Message / New Video Message / New Voice Message / Set/Remove Speed Dial / Call / Send IM. TO EDIT...
.../Mode Change Key . 2. Press the Left Soft Key [Edit]. 58 3. Via Bluetooth. 04 • TXT Message: Allows you to another Bluetooth® device. 1. Enter your message in the Text field and then press the OK Key [SEND]. • Picture Message: Allows you to select a desired contact, then press the OK Key [VIEW]. 3. Enter the recipient's contact information and press the OK Key. 2. If the Bluetooth power is switched off, the following : • New TXT Message / New Picture Message / New Video Message / New Voice Message / Set/Remove Speed Dial / Call / Send IM. TO EDIT...

User Guide
Page 45
...; Incoming Security: Sets permissions for connecting an incoming device. • Service Discovery: Searches for the services that allows the handset to locate, establish and register a 1-to-1 connection with the following message will appear in Contacts to a selected device. 1. Select the desired option and press the OK Key to send name cards stored in the ADD NEW DEVICE menu. Settings & Tools, 4. Enter the passkey, then press the OK Key. Settings & Tools, 04 4. If you to access...
...; Incoming Security: Sets permissions for connecting an incoming device. • Service Discovery: Searches for the services that allows the handset to locate, establish and register a 1-to-1 connection with the following message will appear in Contacts to a selected device. 1. Select the desired option and press the OK Key to send name cards stored in the ADD NEW DEVICE menu. Settings & Tools, 4. Enter the passkey, then press the OK Key. Settings & Tools, 04 4. If you to access...

User Guide
Page 46
... send videos to be turned on automatically. 4. Use the QWERTY Keypad to the next setting. 89 DISCOVERY MODE To set Auto Pair Handsfree On/Off: 06 1. Settings & Tools, 4. Slide the phone up , press the [MENU], then press 9. Bluetooth. 01 2. Select one of the following profiles, then press the OK Key [VIEW]. 03 Headset / Handsfree / Stereo / Phonebook Access / Object Push / File 04 Transfer AUTO PAIR HANDSFREE 05 To set whether your device...
... send videos to be turned on automatically. 4. Use the QWERTY Keypad to the next setting. 89 DISCOVERY MODE To set Auto Pair Handsfree On/Off: 06 1. Settings & Tools, 4. Slide the phone up , press the [MENU], then press 9. Bluetooth. 01 2. Select one of the following profiles, then press the OK Key [VIEW]. 03 Headset / Handsfree / Stereo / Phonebook Access / Object Push / File 04 Transfer AUTO PAIR HANDSFREE 05 To set whether your device...

User Guide
Page 48
...; Software Update: Alerts you when a software update is available. 3. Select one of the following options, then press the OK Key. • ERI: The Enhanced Roaming Indicator (ERI) feature displays a text banner on the display screen informing the handset user of the three Alert options to turn the Device Connect On or Off: 1. Settings & Tools, 5. Sounds Settings, 0. Select Music, Simple, Beep or Off, then press the OK Key [SET]. DISPLAY SETTINGS Allows you enter a phone number...
...; Software Update: Alerts you when a software update is available. 3. Select one of the following options, then press the OK Key. • ERI: The Enhanced Roaming Indicator (ERI) feature displays a text banner on the display screen informing the handset user of the three Alert options to turn the Device Connect On or Off: 1. Settings & Tools, 5. Sounds Settings, 0. Select Music, Simple, Beep or Off, then press the OK Key [SET]. DISPLAY SETTINGS Allows you enter a phone number...
User Guide
Page 53
...set your phone number. 3. Lock Mode prevents the unauthorized use of your phone to search or roam on another network when you want to their initial defaults: 1. Phone Settings, 7. The default lock code is the last 4 digits of the following settings: • Location Setting: Unlock Setting/Lock Setting. • Calls: Incoming Calls/Outgoing Calls. LOCK PHONE NOW Lock the phone now. 01 1. Slide the phone up , press the [MENU], then press 9. Settings & Tools, 02 7. Phone Settings, 7. Press 4. Enter the four-digit lock code. SYSTEM SELECT You can still make emergency calls...
...set your phone number. 3. Lock Mode prevents the unauthorized use of your phone to search or roam on another network when you want to their initial defaults: 1. Phone Settings, 7. The default lock code is the last 4 digits of the following settings: • Location Setting: Unlock Setting/Lock Setting. • Calls: Incoming Calls/Outgoing Calls. LOCK PHONE NOW Lock the phone now. 01 1. Slide the phone up , press the [MENU], then press 9. Settings & Tools, 02 7. Phone Settings, 7. Press 4. Enter the four-digit lock code. SYSTEM SELECT You can still make emergency calls...
User Guide
Page 56
... total capacity: 1. Settings & Tools, 0. DELETING AND MOVING FILES To delete files stored in Card Memory or to move all files saved in Phone Memory or to move a file to Phone Memory: 1. Card Memory. 109 Select 1. Press 1. Card Memory Usage. 3. FORMAT CARD To format the card inserted: 1. Press 1. Press 1. DELETING AND MOVING FILES To delete files stored in Phone Memory to Card Memory (memory card sold separately) must be inserted 03 into the phone to manage the memory usage for pictures, videos, music, sounds and contacts on your 4-digit lock code. 4. Move to...
... total capacity: 1. Settings & Tools, 0. DELETING AND MOVING FILES To delete files stored in Card Memory or to move all files saved in Phone Memory or to move a file to Phone Memory: 1. Card Memory. 109 Select 1. Press 1. Card Memory Usage. 3. FORMAT CARD To format the card inserted: 1. Press 1. Press 1. DELETING AND MOVING FILES To delete files stored in Phone Memory to Card Memory (memory card sold separately) must be inserted 03 into the phone to manage the memory usage for pictures, videos, music, sounds and contacts on your 4-digit lock code. 4. Move to...
User Guide
Page 57
... receiving/making a call, using Bluetooth®, transferring data, etc. 03 • To use a USB data cable to select USB Mode whenever the USB data cable is set for USB Mode. 04 PHONE INFO 05 MY NUMBER 06 To view your computer when connecting with a USB data cable. • Ask On Plug: Allows you can select 1. Select Media Sync Mode, Modem Mode or Ask On Plug, then press the OK Key [SET]. 110 • Media Sync Mode: Allows you to sync your phone music files with PC's Windows Media Player...
... receiving/making a call, using Bluetooth®, transferring data, etc. 03 • To use a USB data cable to select USB Mode whenever the USB data cable is set for USB Mode. 04 PHONE INFO 05 MY NUMBER 06 To view your computer when connecting with a USB data cable. • Ask On Plug: Allows you can select 1. Select Media Sync Mode, Modem Mode or Ask On Plug, then press the OK Key [SET]. 110 • Media Sync Mode: Allows you to sync your phone music files with PC's Windows Media Player...

User Guide
Page 60
... new ringtones. Erase: Deletes the selected ringtone from your phone. 2. Lock/Unlock: Locks or unlocks the ringtone. 4. Select one of 04 the following: All Messages / TXT Message / Pic/Video/Voice Msg / Voicemail 05 4. Press the Right Soft Key [Options] to access the following options and press the OK Key. • All Songs: Allows you to view or play your songs by albums. 117 Slide the phone up , press the [MENU], then press 1. Media Center, 2. Music & Tones...
... new ringtones. Erase: Deletes the selected ringtone from your phone. 2. Lock/Unlock: Locks or unlocks the ringtone. 4. Select one of 04 the following: All Messages / TXT Message / Pic/Video/Voice Msg / Voicemail 05 4. Press the Right Soft Key [Options] to access the following options and press the OK Key. • All Songs: Allows you to view or play your songs by albums. 117 Slide the phone up , press the [MENU], then press 1. Media Center, 2. Music & Tones...

User Guide
Page 69
... the Contact List. 2. Messaging, 1. New 01 Message. 02 2. To Contacts: Save the number or email address to the Contact List that you have entered in the To filed. 5. From Contacts, then press the OK Key. VIDEO MESSAGE 1. Messaging, 1. Press 3. Recent Calls: Search for a group stored in the Groups menu. 4. Under Name Card, press the Left Soft Key [Add], select 1. Press the OK Key to start recording a voice memo, then press the OK Key [STOP] 03 to send the video message. Under Text, input your Online...
... the Contact List. 2. Messaging, 1. New 01 Message. 02 2. To Contacts: Save the number or email address to the Contact List that you have entered in the To filed. 5. From Contacts, then press the OK Key. VIDEO MESSAGE 1. Messaging, 1. Press 3. Recent Calls: Search for a group stored in the Groups menu. 4. Under Name Card, press the Left Soft Key [Add], select 1. Press the OK Key to start recording a voice memo, then press the OK Key [STOP] 03 to send the video message. Under Text, input your Online...

User Guide
Page 74
... oldest message will be deleted from the Inbox once full. • WL Messenger • Yahoo!® LAUNCHING MOBILE IM 1. Select Mobile Email or Mobile Web Mail, then press the OK Key. • Mobile Email: Connects to Mobile Web via WAP Browser. 3. For example, if Abc mode is full. 1. Follow the on -screen prompts. Chat. 2. To access message settings: 1. Select By Time or By Contacts, then press the OK Key. 01 • By Time: Sorts received...
... oldest message will be deleted from the Inbox once full. • WL Messenger • Yahoo!® LAUNCHING MOBILE IM 1. Select Mobile Email or Mobile Web Mail, then press the OK Key. • Mobile Email: Connects to Mobile Web via WAP Browser. 3. For example, if Abc mode is full. 1. Follow the on -screen prompts. Chat. 2. To access message settings: 1. Select By Time or By Contacts, then press the OK Key. 01 • By Time: Sorts received...


