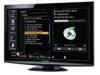
26" Lcd Tv
Page 3
... ControlTM 32 Lock 38 Editing and Setting Channels 40 Closed Caption 42 Input Labels 43 Using Timer 44 Recommended AV Connections 45 Viewing Advanced FAQs, etc. and other factory default settings could result in greater energy consumption beyond levels that meet ENERGY STAR qualifications. Ratings List for Lock 46 Technical Information 47 Care and Cleaning 51 FAQ 52 Specifications 54 Limited Warranty (for U. Quick Start Guide Enjoy rich multimedia...
... ControlTM 32 Lock 38 Editing and Setting Channels 40 Closed Caption 42 Input Labels 43 Using Timer 44 Recommended AV Connections 45 Viewing Advanced FAQs, etc. and other factory default settings could result in greater energy consumption beyond levels that meet ENERGY STAR qualifications. Ratings List for Lock 46 Technical Information 47 Care and Cleaning 51 FAQ 52 Specifications 54 Limited Warranty (for U. Quick Start Guide Enjoy rich multimedia...
26" Lcd Tv
Page 4
... touch dangerous voltage points or short out parts that important operating and servicing instructions are not sure of the type of the polarized or grounding-type plug. If you are in a fire or electric shock. The lightning flash with the cart, stand, tripod, bracket or table specified by placing the LCD TV on the marking label. A grounding type plug has two blades and a third grounding...
... touch dangerous voltage points or short out parts that important operating and servicing instructions are not sure of the type of the polarized or grounding-type plug. If you are in a fire or electric shock. The lightning flash with the cart, stand, tripod, bracket or table specified by placing the LCD TV on the marking label. A grounding type plug has two blades and a third grounding...

26" Lcd Tv
Page 6
... and television sets. • Don't place flat panel displays on furniture that can easily be used as steps, such as UL, CSA, ETL). • Follow all . Some wall mounts are not designed to be mounted to follow the following safety guidelines: TUNE INTO SAFETY: • One size does NOT fit all instructions supplied by curious children. Flat panel displays can become excited while watching a program, especially...
... and television sets. • Don't place flat panel displays on furniture that can easily be used as steps, such as UL, CSA, ETL). • Follow all . Some wall mounts are not designed to be mounted to follow the following safety guidelines: TUNE INTO SAFETY: • One size does NOT fit all instructions supplied by curious children. Flat panel displays can become excited while watching a program, especially...

26" Lcd Tv
Page 10
....panasonic.ca 10 If using a Cable Box, set the TV channel to enjoy viewing their programming. To connect the antenna terminal and Cable Box VHF/UHF Antenna AC 110-127 V 60 Hz Cable TV or Back of HDMI or • Component Video cable. (p. 13) To view high-definition programming select the correct video input. (p. 22) Note Not all the other connections.) (If no Cable Box) or ANTENNA Cable In DIO ANT IN ANT OUT Cable Box •Cable Box/Cable You need to subscribe to a cable TV service...
....panasonic.ca 10 If using a Cable Box, set the TV channel to enjoy viewing their programming. To connect the antenna terminal and Cable Box VHF/UHF Antenna AC 110-127 V 60 Hz Cable TV or Back of HDMI or • Component Video cable. (p. 13) To view high-definition programming select the correct video input. (p. 22) Note Not all the other connections.) (If no Cable Box) or ANTENNA Cable In DIO ANT IN ANT OUT Cable Box •Cable Box/Cable You need to subscribe to a cable TV service...

26" Lcd Tv
Page 16
...: Scans Digital channels only Confirm registered channels program Apply l Caption ... Yes ok If OK is connected to a TV input. Set the Input labels First time setup Language Clock ANT/Cable setup Input labels next select Label: [BLANK] SKIP/VCR/DVD/ CABLE/SATELLITE/DVR/GAME/ AUX/RECEIVER/COMPUTER/ Blu-ray/CAMERA/DVD REC/ HOME THTR/MONITOR/MEDIA CTR/MEDIA EXT/OTHER Input labels Component HDMI 1 HDMI 2 HDMI 3 GAME or Video 1 Video 2 PC (example: TC-L37X1) select set Video 2 PC GAME G A A Select OK RETURN G ABC → abc Y Delete Switches Input mode...
...: Scans Digital channels only Confirm registered channels program Apply l Caption ... Yes ok If OK is connected to a TV input. Set the Input labels First time setup Language Clock ANT/Cable setup Input labels next select Label: [BLANK] SKIP/VCR/DVD/ CABLE/SATELLITE/DVR/GAME/ AUX/RECEIVER/COMPUTER/ Blu-ray/CAMERA/DVD REC/ HOME THTR/MONITOR/MEDIA CTR/MEDIA EXT/OTHER Input labels Component HDMI 1 HDMI 2 HDMI 3 GAME or Video 1 Video 2 PC (example: TC-L37X1) select set Video 2 PC GAME G A A Select OK RETURN G ABC → abc Y Delete Switches Input mode...
26" Lcd Tv
Page 22
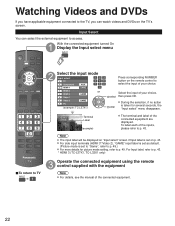
..." input label is set as default. (Picture mode is set to "Game", refer to TV Select the input mode Input select 1 TV 2 Component AUX 3 HDMI 1 GAME 4 HDMI 2 or 5 HDMI 3 GAME 6 Video 1 7 Video 2 GAME 8 PC (example: TC-L37X1) Press corresponding NUMBER button on "Input select" screen if Input label is set on the TV's screen. enter During the selection, if no action is taken for picture mode setting, refer to p. 43. * HDMI 3 (TC-L37X1, TC-L32X1 only) Operate the connected equipment using the remote control supplied with the equipment Note For details, see the manual...
..." input label is set as default. (Picture mode is set to "Game", refer to TV Select the input mode Input select 1 TV 2 Component AUX 3 HDMI 1 GAME 4 HDMI 2 or 5 HDMI 3 GAME 6 Video 1 7 Video 2 GAME 8 PC (example: TC-L37X1) Press corresponding NUMBER button on "Input select" screen if Input label is set on the TV's screen. enter During the selection, if no action is taken for picture mode setting, refer to p. 43. * HDMI 3 (TC-L37X1, TC-L32X1 only) Operate the connected equipment using the remote control supplied with the equipment Note For details, see the manual...

26" Lcd Tv
Page 23
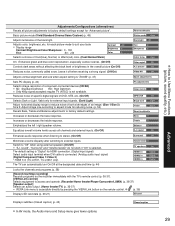
... Power off link Yes Stand-by power save No Auto power stand-by No Default speakers TV select ■Press to return to the previous screen Select "On" (default is connected or standard HDMI equipment (non- VIERA LinkTM Setting If you connect equipment that has the "HDAVI Control" function to a TV using these functions, you need to set "VIERA Link" setting to p. 32-37. Display menu Viewing Watching Videos and DVDs Select "Setup" Menu Picture AVIuEdRioA Link SD card Closed caption Setup...
... Power off link Yes Stand-by power save No Auto power stand-by No Default speakers TV select ■Press to return to the previous screen Select "On" (default is connected or standard HDMI equipment (non- VIERA LinkTM Setting If you connect equipment that has the "HDAVI Control" function to a TV using these functions, you need to set "VIERA Link" setting to p. 32-37. Display menu Viewing Watching Videos and DVDs Select "Setup" Menu Picture AVIuEdRioA Link SD card Closed caption Setup...
26" Lcd Tv
Page 29
... Digital Digital Digital Locks the channels and programs (p. 38) [Record now/Stop recording] Records programs on the recorder immediately with the TV's remote control (p. 36-37). [VIERA Link control] Selects equipment to factory default settings except for HDMI connection. (Digital input signal) Select audio input terminal when DVI cable is accessible directly by pressing the VIERA Link button on the remote control. (p. 36) Displays SD card data (p. 20-21) SD card Displays subtitles (Closed caption) (p. 42) Closed caption In AV mode, the Audio menu and Setup menu...
... Digital Digital Digital Locks the channels and programs (p. 38) [Record now/Stop recording] Records programs on the recorder immediately with the TV's remote control (p. 36-37). [VIERA Link control] Selects equipment to factory default settings except for HDMI connection. (Digital input signal) Select audio input terminal when DVI cable is accessible directly by pressing the VIERA Link button on the remote control. (p. 36) Displays SD card data (p. 20-21) SD card Displays subtitles (Closed caption) (p. 42) Closed caption In AV mode, the Audio menu and Setup menu...

26" Lcd Tv
Page 30
... input signal) Select "Setup" Menu next Picture Audio Timer Lock VIERA Link SD card Closed caption Setup select Select the item Setup 1/2 Channel surf mode All Language Clock ANT/Cable setup Input labels next select Setup ECO/energy saving VIERA Link settings Language Clock ANT/Cable setup Input labels VIERA Link Power on link Power off link Stand-by power save Auto power stand-by Default speakers Power save No signal for 10 minutes No activity for 3 hours Display Sub Menu SUB MENU Select the item Setup...
... input signal) Select "Setup" Menu next Picture Audio Timer Lock VIERA Link SD card Closed caption Setup select Select the item Setup 1/2 Channel surf mode All Language Clock ANT/Cable setup Input labels next select Setup ECO/energy saving VIERA Link settings Language Clock ANT/Cable setup Input labels VIERA Link Power on link Power off link Stand-by power save Auto power stand-by Default speakers Power save No signal for 10 minutes No activity for 3 hours Display Sub Menu SUB MENU Select the item Setup...
26" Lcd Tv
Page 31
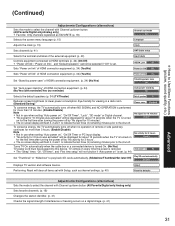
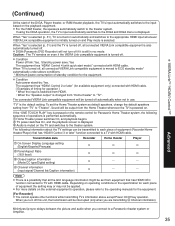
... first time after turning the power off by "No signal for 10 minutes". The on ", "On/Off Timer", "Lock", "SD mode" or Digital channel. •• "No signal for 10 minutes was activated" will clear all items set . (p. 44) Power save No Set "Auto power stand-by" of HDMI connection equipment. (p. 34) (No/Yes (with reminder)/Yes (no operation of remote or side panel key continues for more than 3 hours. (Enable/Disable...
... first time after turning the power off by "No signal for 10 minutes". The on ", "On/Off Timer", "Lock", "SD mode" or Digital channel. •• "No signal for 10 minutes was activated" will clear all items set . (p. 44) Power save No Set "Auto power stand-by" of HDMI connection equipment. (p. 34) (No/Yes (with reminder)/Yes (no operation of remote or side panel key continues for more than 3 hours. (Enable/Disable...
26" Lcd Tv
Page 32
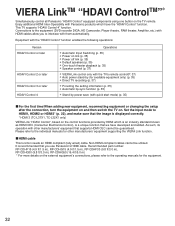
... connection, turn the equipment on and then switch the TV on link (p. 35) • Power off link (p. 35) • Default speakers (p. 35) • One-touch theater playback (p. 35) •• Speaker control (p. 37) VIERA Link control only with them automatically. Set the input mode to the operating manuals for other manufacturers' equipment that the image is displayed correctly. * HDMI 3 (TC-L37X1, TC-L32X1 only) VIERA Link "HDAVI Control", based on the TV remote. Recommended part number...
... connection, turn the equipment on and then switch the TV on link (p. 35) • Power off link (p. 35) • Default speakers (p. 35) • One-touch theater playback (p. 35) •• Speaker control (p. 37) VIERA Link control only with them automatically. Set the input mode to the operating manuals for other manufacturers' equipment that the image is displayed correctly. * HDMI 3 (TC-L37X1, TC-L32X1 only) VIERA Link "HDAVI Control", based on the TV remote. Recommended part number...
26" Lcd Tv
Page 33
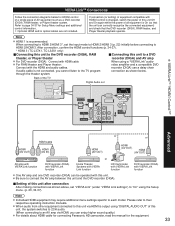
... such as shown below for Setup Menu settings and additional control information. • Optional HDMI and/or optical cables are not included. When audio from other equipment connected to this unit, the system switches to 2CH audio. (When connecting to the TV program connection as a DVD recorder (DIGA), RAM theater, or Player theater system. If connection (or setting) of equipment compatible with HDAVI control is changed, switch the power of this unit Off and...
... such as shown below for Setup Menu settings and additional control information. • Optional HDMI and/or optical cables are not included. When audio from other equipment connected to this unit, the system switches to 2CH audio. (When connecting to the TV program connection as a DVD recorder (DIGA), RAM theater, or Player theater system. If connection (or setting) of equipment compatible with HDAVI control is changed, switch the power of this unit Off and...

26" Lcd Tv
Page 34
..." Display menu Select "Setup" Menu Picture AVIuEdRioA Link SD card Closed caption Setup select next Select "VIERA Link settings" Setup 2/2 VIERA Link settings ECO/energy saving Advanced setup About select next Select "VIERA Link" VIERA Link settings VIERA Link On Power on link Yes Power off link Yes Stand-by power save No Auto power stand-by No Default speakers TV select Automatic Input Switching Power on link Power off link Stand-by power save (for "HDAVI Control 4" (with quick start mode)) Auto power stand...
..." Display menu Select "Setup" Menu Picture AVIuEdRioA Link SD card Closed caption Setup select next Select "VIERA Link settings" Setup 2/2 VIERA Link settings ECO/energy saving Advanced setup About select next Select "VIERA Link" VIERA Link settings VIERA Link On Power on link Yes Power off link Yes Stand-by power save No Auto power stand-by No Default speakers TV select Automatic Input Switching Power on link Power off link Stand-by power save (for "HDAVI Control 4" (with quick start mode)) Auto power stand...
26" Lcd Tv
Page 35
... whenever the TV is powered on the remote control for each piece of timing for the equipment. For more details on automatically and switches to "TV". Channel information (Input signal/Channel list/Caption information) ○ --- --- When "Yes" is selected (p. 31), TV is turned on the external equipment's operation, please refer to the DIGA and DIGA menu is turned off . (Continued) VIERA LinkTM "HDAVI ControlTM" At the start mode)" connected with HDMI cable. The following...
... whenever the TV is powered on the remote control for each piece of timing for the equipment. For more details on automatically and switches to "TV". Channel information (Input signal/Channel list/Caption information) ○ --- --- When "Yes" is selected (p. 31), TV is turned on the external equipment's operation, please refer to the DIGA and DIGA menu is turned off . (Continued) VIERA LinkTM "HDAVI ControlTM" At the start mode)" connected with HDMI cable. The following...

26" Lcd Tv
Page 40
... channel settings can be changed according to defaults" in Cable Auto program Manual program Signal meter next select Set Manual program Set manually ■To reset the settings of setup menu Select "Reset to your 4-digit password with number buttons Select "YES" on the confirmation screen and press OK Signal meter Check signal strength 40 Display menu Select "Setup" Menu Picture Audio Timer Lock VIERA Link SD card Closed caption Setup next select Auto program Set automatically ■Press to exit from a menu screen Select "ANT/Cable setup" Setup 1/2 Channel surf mode...
... channel settings can be changed according to defaults" in Cable Auto program Manual program Signal meter next select Set Manual program Set manually ■To reset the settings of setup menu Select "Reset to your 4-digit password with number buttons Select "YES" on the confirmation screen and press OK Signal meter Check signal strength 40 Display menu Select "Setup" Menu Picture Audio Timer Lock VIERA Link SD card Closed caption Setup next select Auto program Set automatically ■Press to exit from a menu screen Select "ANT/Cable setup" Setup 1/2 Channel surf mode...

26" Lcd Tv
Page 43
... menu Input Labels Closed Caption Advanced ■Press to exit from a menu screen Select "Setup" Menu Picture Audio Timer Lock VIERA Link SD card Closed caption Setup Select "Input labels" Setup 1/2 Channel surf mode All Language Clock ANT/Cable setup Input labels next select next select Input labels Display labels of Connected devices Devices connected to numeric Terminals: Component/HDMI 1-3*/Video 1-2/PC * HDMI 3 (TC-L37X1, TC-L32X1 only) Label: [BLANK] SKIP/VCR/DVD/CABLE/SATELLITE/DVR/GAME/ AUX/RECEIVER/COMPUTER/Blu-ray/CAMERA/DVD REC/ HOME THTR/MONITOR/MEDIA CTR/MEDIA...
... menu Input Labels Closed Caption Advanced ■Press to exit from a menu screen Select "Setup" Menu Picture Audio Timer Lock VIERA Link SD card Closed caption Setup Select "Input labels" Setup 1/2 Channel surf mode All Language Clock ANT/Cable setup Input labels next select next select Input labels Display labels of Connected devices Devices connected to numeric Terminals: Component/HDMI 1-3*/Video 1-2/PC * HDMI 3 (TC-L37X1, TC-L32X1 only) Label: [BLANK] SKIP/VCR/DVD/CABLE/SATELLITE/DVR/GAME/ AUX/RECEIVER/COMPUTER/Blu-ray/CAMERA/DVD REC/ HOME THTR/MONITOR/MEDIA CTR/MEDIA...
26" Lcd Tv
Page 49
... "GAME" to "GAME" label. A device having no digital output terminal may operate and disable optical output. When an NTSC channel is displayed in Standby mode. Photo is selected, the output will be displayed when adjusting the volume of either "COMPONENT", "S VIDEO", or "VIDEO" to receive analog signals. Volume function will be connected to HDMI adapter cable (*2). This standard is compatible with subdued room lighting. All signals are compatible with an HDMI or DVI output terminal, such as multi channel surround. These HDMI connectors are "type A". The HDMI input...
... "GAME" to "GAME" label. A device having no digital output terminal may operate and disable optical output. When an NTSC channel is displayed in Standby mode. Photo is selected, the output will be displayed when adjusting the volume of either "COMPONENT", "S VIDEO", or "VIDEO" to receive analog signals. Volume function will be connected to HDMI adapter cable (*2). This standard is compatible with subdued room lighting. All signals are compatible with an HDMI or DVI output terminal, such as multi channel surround. These HDMI connectors are "type A". The HDMI input...

26" Lcd Tv
Page 52
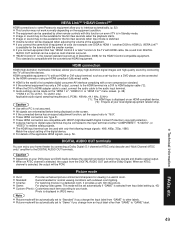
... HDMI Is the HDMI cable connected properly? (p. 33, 45) Turn Off the TV unit and equipment, then turn them On again. Recording does not start immediately Check the settings of the recorder. A clattering sound might be displayed on the top left of the screen This is weak, check the antenna and consult your local Panasonic dealer or Panasonic Service Center for digital channels. For details, read the manual...
... HDMI Is the HDMI cable connected properly? (p. 33, 45) Turn Off the TV unit and equipment, then turn them On again. Recording does not start immediately Check the settings of the recorder. A clattering sound might be displayed on the top left of the screen This is weak, check the antenna and consult your local Panasonic dealer or Panasonic Service Center for digital channels. For details, read the manual...
26" Lcd Tv
Page 53
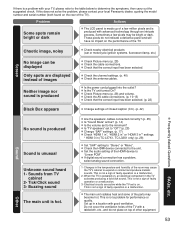
... turned On? Tick/Click sound 3- Is "TV speakers" set to "Stereo" or "Mono". Problem Actions Some spots remain bright or dark The LCD panel is unusual Unknown sound heard 1- Check the AV cable connections. (p. 10-13) Check that the correct input has been selected. Sounds from TV cabinet 2- Are the speakers' cables connected correctly? (p. 45) Is "Sound Mute" active? (p. 14) Is the volume set to "Off"? (p. 28) Change "SAP" settings. (p. 17) Check "HDMI...
... turned On? Tick/Click sound 3- Is "TV speakers" set to "Stereo" or "Mono". Problem Actions Some spots remain bright or dark The LCD panel is unusual Unknown sound heard 1- Check the AV cable connections. (p. 10-13) Check that the correct input has been selected. Sounds from TV cabinet 2- Are the speakers' cables connected correctly? (p. 45) Is "Sound Mute" active? (p. 14) Is the volume set to "Off"? (p. 28) Change "SAP" settings. (p. 17) Check "HDMI...
26" Lcd Tv
Page 55
...) Specifications PANASONIC CONSUMER ELECTRONICS COMPANY, DIVISION OF: PANASONIC CORPORATION OF NORTH AMERICA One Panasonic Way Secaucus, New Jersey 07094 Panasonic LCD Televisions Limited Warranty Limited Warranty Coverage If your product does not work properly because of a defect in a stationary and fixed location). You must carry-in your product with new or refurbished parts, or (b) replace it cover markings or retained images on the LCD panel resulting...
...) Specifications PANASONIC CONSUMER ELECTRONICS COMPANY, DIVISION OF: PANASONIC CORPORATION OF NORTH AMERICA One Panasonic Way Secaucus, New Jersey 07094 Panasonic LCD Televisions Limited Warranty Limited Warranty Coverage If your product does not work properly because of a defect in a stationary and fixed location). You must carry-in your product with new or refurbished parts, or (b) replace it cover markings or retained images on the LCD panel resulting...


