
Digital Still Cam/non Usa
Page 1
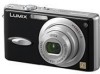
Operating Instructions Digital Camera Model No. For USA assistance, please call: 1-800-272-7033 or send e-mail to : digitalstillcam@panasonic.com For Canadian assistance, please call: 1-800-561-5505 or visit us at www.panasonic.ca VQT0R26 DMC-FX8PP Before connecting, operating or adjusting this product, please read the instructions completely.
Operating Instructions Digital Camera Model No. For USA assistance, please call: 1-800-272-7033 or send e-mail to : digitalstillcam@panasonic.com For Canadian assistance, please call: 1-800-561-5505 or visit us at www.panasonic.ca VQT0R26 DMC-FX8PP Before connecting, operating or adjusting this product, please read the instructions completely.

Digital Still Cam/non Usa
Page 2
...if battery is a trademark. • Other names, company names, and product names printed in these material for purposes other than your Digital Camera may Information for TM Li-ion information on how to recycle this opportunity to the manufacturer's instructions. Please read these Operating SHOCK HAZARD AND... in these instructions are trademarks or registered trademarks of private use may infringe copyright them handy for purchasing this Panasonic discs or other published or broadcast Digital Camera. We would like to take this battery. 2 VQT0R26 laws.
...if battery is a trademark. • Other names, company names, and product names printed in these material for purposes other than your Digital Camera may Information for TM Li-ion information on how to recycle this opportunity to the manufacturer's instructions. Please read these Operating SHOCK HAZARD AND... in these instructions are trademarks or registered trademarks of private use may infringe copyright them handy for purchasing this Panasonic discs or other published or broadcast Digital Camera. We would like to take this battery. 2 VQT0R26 laws.
Digital Still Cam/non Usa
Page 4
... wish to discard this product, please contact your local authorities or dealer and ask for the camera Information on the pictures in the card. 4 VQT0R26 Wipe it again with a mere 0.01% of the camera. It may form on the LCD monitor. Extremely high precision technology is only valid in the... day or on the LCD monitor is more than usual at first. However, as the internal temperature increases, it to the normal brightness. The camera may not be operated normally or recording of pictures may be disabled, or the lens may cause a malfunction of the pixels inactive or always lit...
... wish to discard this product, please contact your local authorities or dealer and ask for the camera Information on the pictures in the card. 4 VQT0R26 Wipe it again with a mere 0.01% of the camera. It may form on the LCD monitor. Extremely high precision technology is only valid in the... day or on the LCD monitor is more than usual at first. However, as the internal temperature increases, it to the normal brightness. The camera may not be operated normally or recording of pictures may be disabled, or the lens may cause a malfunction of the pixels inactive or always lit...

Digital Still Cam/non Usa
Page 5
...or strong a long time light sources. In case of condensation since it causes stains on the lens, fungus or malfunction. • When the camera is brought inside from an air conditioner or other is turned off and then leave it with the desiccant (silica gel). • In humid ... again after you completely use up ) Condensation takes place when the ambient temperature or humidity is changed as follows: Be careful of condensation, turn the camera off . It may cause a malfunction. damage to your eye. [Recommended temperature: • Do not press the lens strongly. 15 oC to 25 oC...
...or strong a long time light sources. In case of condensation since it causes stains on the lens, fungus or malfunction. • When the camera is brought inside from an air conditioner or other is turned off and then leave it with the desiccant (silica gel). • In humid ... again after you completely use up ) Condensation takes place when the ambient temperature or humidity is changed as follows: Be careful of condensation, turn the camera off . It may cause a malfunction. damage to your eye. [Recommended temperature: • Do not press the lens strongly. 15 oC to 25 oC...

Digital Still Cam/non Usa
Page 6
... MENU e.g.: When you to use . ∫ About illustrations of light given to use the functions or settings. 2 Convenient or helpful information for use of the camera is the amount of the cursor button In these operating instructions Please note that the description on this page. Before Use About These Operating Instructions...
... MENU e.g.: When you to use . ∫ About illustrations of light given to use the functions or settings. 2 Convenient or helpful information for use of the camera is the amount of the cursor button In these operating instructions Please note that the description on this page. Before Use About These Operating Instructions...

Digital Still Cam/non Usa
Page 8
... [FORMAT] ......... 83 Playing Back Pictures on a TV Screen ... 84 Screen Display 92 Cautions for Use 95 Message Display 97 Troubleshooting 99 Specifications 103 Digital Camera Accessory System ....... 105 Digital Camera Accessory Order Form (For USA Customers 106 Request for Service Notice (For USA Only 107 Limited Warranty (For USA Only) ......... 108 Customer Services Directory...
... [FORMAT] ......... 83 Playing Back Pictures on a TV Screen ... 84 Screen Display 92 Cautions for Use 95 Message Display 97 Troubleshooting 99 Specifications 103 Digital Camera Accessory System ....... 105 Digital Camera Accessory Order Form (For USA Customers 106 Request for Service Notice (For USA Only 107 Limited Warranty (For USA Only) ......... 108 Customer Services Directory...

Digital Still Cam/non Usa
Page 9
VFC4090 VYQ3509 9 VQT0R26 Preparation Preparation Standard Accessories Before using your camera, check the contents. 1 2 RP-SD016B 3 CGA-S005A 4 1 SD Memory Card (16 MB) (In the text, it is indicated as "Card") 2 Battery Pack (In the ...7 Strap 8 Battery Carrying Case DE-A11B 5 K1HA08CD0004 6 K1HA08CD0005 7 8 • For information about optional accessories, please refer to "Digital Camera Accessory System". (P105) • If any of the accessories are lost, please contact Panasonic's parts department at 1 800 833-9626 (For USA) or in Canada call 1 800 561-5505 for more details on...
VFC4090 VYQ3509 9 VQT0R26 Preparation Preparation Standard Accessories Before using your camera, check the contents. 1 2 RP-SD016B 3 CGA-S005A 4 1 SD Memory Card (16 MB) (In the text, it is indicated as "Card") 2 Battery Pack (In the ...7 Strap 8 Battery Carrying Case DE-A11B 5 K1HA08CD0004 6 K1HA08CD0005 7 8 • For information about optional accessories, please refer to "Digital Camera Accessory System". (P105) • If any of the accessories are lost, please contact Panasonic's parts department at 1 800 833-9626 (For USA) or in Canada call 1 800 561-5505 for more details on...

Digital Still Cam/non Usa
Page 11
...-AC5; 10 11 Preparation 12 10 Camera ON/OFF Switch (P12) 11 Zoom Lever (P36, 70) 12 Optical Image Stabilizer Button (P43) 13 Speaker (P71) 14 Microphone (P52, 67) 15 Shutter Button (P28, 52) 16 Mode Dial (P27) 13 14 15 16 AV OUT DIGITAL DC IN 21 17 18 19 20... 17 Strap Eyelet 18 Lens Barrel 19 [AV OUT/DIGITAL] Socket (P84, 86, 88) 20 [DC IN] Socket (P86, 88) • Please be sure to use a tripod, make sure the tripod is stable when the camera is connected to it . 21 Tripod Receptacle • When you use genuine Panasonic AC adaptor (DMW-AC5;
...-AC5; 10 11 Preparation 12 10 Camera ON/OFF Switch (P12) 11 Zoom Lever (P36, 70) 12 Optical Image Stabilizer Button (P43) 13 Speaker (P71) 14 Microphone (P52, 67) 15 Shutter Button (P28, 52) 16 Mode Dial (P27) 13 14 15 16 AV OUT DIGITAL DC IN 21 17 18 19 20... 17 Strap Eyelet 18 Lens Barrel 19 [AV OUT/DIGITAL] Socket (P84, 86, 88) 20 [DC IN] Socket (P86, 88) • Please be sure to use a tripod, make sure the tripod is stable when the camera is connected to it . 21 Tripod Receptacle • When you use genuine Panasonic AC adaptor (DMW-AC5;

Digital Still Cam/non Usa
Page 12
Charge the battery before use. 3 Turn the camera on to take pictures. • Set the clock. (P19) OFF ON 2 Insert the battery and the card. (P15, 16) 1 Set the mode dial to [ ]. 2 Press ... the mode dial to [ ]. 2 Select the picture you want to record and playback pictures with the camera. For each operation, be sure to refer to the corresponding pages. 1 Charge the battery. (P13) • When the camera is shipped, the battery is the overview of the procedure to view. (P46) 12 VQT0R26 Quick...
Charge the battery before use. 3 Turn the camera on to take pictures. • Set the clock. (P19) OFF ON 2 Insert the battery and the card. (P15, 16) 1 Set the mode dial to [ ]. 2 Press ... the mode dial to [ ]. 2 Select the picture you want to record and playback pictures with the camera. For each operation, be sure to refer to the corresponding pages. 1 Charge the battery. (P13) • When the camera is shipped, the battery is the overview of the procedure to view. (P46) 12 VQT0R26 Quick...

Digital Still Cam/non Usa
Page 13
... battery. 3 Detach the battery after charging is completed. 2 Connect the charger to the electrical outlet. • After charging is not charged. The camera also becomes warm during charge. However, it is not a malfunction. • The battery is exhausted when it is exhausted. • Use the ...dedicated charger and battery. • Charge the battery with the Charger When the camera is shipped, the battery is completed, be sure to disconnect the charger from the electrical outlet. • The battery becomes warm after being charged...
... battery. 3 Detach the battery after charging is completed. 2 Connect the charger to the electrical outlet. • After charging is not charged. The camera also becomes warm during charge. However, it is not a malfunction. • The battery is exhausted when it is exhausted. • Use the ...dedicated charger and battery. • Charge the battery with the Charger When the camera is shipped, the battery is completed, be sure to disconnect the charger from the electrical outlet. • The battery becomes warm after being charged...
Digital Still Cam/non Usa
Page 14
...162; • Using the supplied SD Memory Card (16 MB). • Using the supplied battery. • Recording starts 30 seconds after the camera is an abbreviation of recordable pictures decreases. [e.g., when taking pictures every 2 minutes: about 1 second cycles. In this case, disconnect the charger ...status indicator blinks.) • Recharge the battery or replace it again. If the [CHARGE] indicator still blinks even if you use the camera along with full flash every other recording. • Rotating the zoom lever towards Tele to 95 oF). (Battery temperature should be temporarily...
...162; • Using the supplied SD Memory Card (16 MB). • Using the supplied battery. • Recording starts 30 seconds after the camera is an abbreviation of recordable pictures decreases. [e.g., when taking pictures every 2 minutes: about 1 second cycles. In this case, disconnect the charger ...status indicator blinks.) • Recharge the battery or replace it again. If the [CHARGE] indicator still blinks even if you use the camera along with full flash every other recording. • Rotating the zoom lever towards Tele to 95 oF). (Battery temperature should be temporarily...

Digital Still Cam/non Usa
Page 15
... remove the card and the battery while the card is being accessed. The data on the card may not be using the camera for the camera. Do not use genuine Panasonic batteries (CGA-S005A). 2 Insert: Insert the charged battery fully paying attention to the direction of arrow. OPEN LOCK • If you will...
... remove the card and the battery while the card is being accessed. The data on the card may not be using the camera for the camera. Do not use genuine Panasonic batteries (CGA-S005A). 2 Insert: Insert the charged battery fully paying attention to the direction of arrow. OPEN LOCK • If you will...

Digital Still Cam/non Usa
Page 16
... Slide the release lever to the direction of arrow. Remove: Push the card until it clicks. Preparation Inserting/Removing the Card • Check that the camera is turned off and that the lens is retracted. 1 Slide the release lever to the direction of arrow, and open the card/battery door. •...; Check the direction of the card. • Do not touch the connection terminals on . • We recommend using Panasonic's SD Memory Card. (Use only genuine SD cards with an SD Logo.) 2 Insert: Insert the card fully with the label side facing the front of...
... Slide the release lever to the direction of arrow. Remove: Push the card until it clicks. Preparation Inserting/Removing the Card • Check that the camera is turned off and that the lens is retracted. 1 Slide the release lever to the direction of arrow, and open the card/battery door. •...; Check the direction of the card. • Do not touch the connection terminals on . • We recommend using Panasonic's SD Memory Card. (Use only genuine SD cards with an SD Logo.) 2 Insert: Insert the card fully with the label side facing the front of...

Digital Still Cam/non Usa
Page 17
...functions become available.) On this unit, you can use SD Memory Cards of the following website. When a MultiMediaCard is used, the performance of the camera or a defective card. • Do not format the card on your PC periodically (P86). The reading/writing speed of children to prevent swallowing...damaged or lost due to electromagnetic waves, static electricity, breakdown of certain features may be slightly slower than an SD Memory Card. http://panasonic.co.jp/pavc/global/cs (This Site is English only.) • This unit supports SD Memory Cards formatted in FAT12 system and FAT16...
...functions become available.) On this unit, you can use SD Memory Cards of the following website. When a MultiMediaCard is used, the performance of the camera or a defective card. • Do not format the card on your PC periodically (P86). The reading/writing speed of children to prevent swallowing...damaged or lost due to electromagnetic waves, static electricity, breakdown of certain features may be slightly slower than an SD Memory Card. http://panasonic.co.jp/pavc/global/cs (This Site is English only.) • This unit supports SD Memory Cards formatted in FAT12 system and FAT16...

Digital Still Cam/non Usa
Page 19
... setting. • Check if the clock setting is correct, after about 5 seconds. The 24-hour system is used. • When you turn the camera on, the following screen appears. 2 Select [M/D/Y], [D/M/Y] or [Y/M/D]. Preparation Setting Date/Time (Clock Set) ∫ Initial setting The clock is not set ...the year from 2000 to P77. 19 VQT0R26 Turn the camera on . • When a fully charged battery has been inserted for at least 3 months even if the battery is removed. (The storing time may...
... setting. • Check if the clock setting is correct, after about 5 seconds. The 24-hour system is used. • When you turn the camera on, the following screen appears. 2 Select [M/D/Y], [D/M/Y] or [Y/M/D]. Preparation Setting Date/Time (Clock Set) ∫ Initial setting The clock is not set ...the year from 2000 to P77. 19 VQT0R26 Turn the camera on . • When a fully charged battery has been inserted for at least 3 months even if the battery is removed. (The storing time may...

Digital Still Cam/non Usa
Page 20
... POWER SAVE ECO ECONOMY BEEP SELECT SET EXIT MENU Be sure to press 1 at the end to P21- 23 for each menu item.) 1 Turn the camera on the mode selected with the mode dial (P27). OFF SELECT EXIT MENU • To forward or reverse the menu screen rotate the zoom lever...
... POWER SAVE ECO ECONOMY BEEP SELECT SET EXIT MENU Be sure to press 1 at the end to P21- 23 for each menu item.) 1 Turn the camera on the mode selected with the mode dial (P27). OFF SELECT EXIT MENU • To forward or reverse the menu screen rotate the zoom lever...
Digital Still Cam/non Usa
Page 21
... is set to [ON]. [POWER SAVE] [1MIN.]/[2MIN.]/[5MIN.]/[10MIN.]: The power save mode is activated (the camera is automatically turned off and on to save the battery life) if the camera has not been used for the time selected on the setting. [OFF]: The power save mode is enlarged 4 ...times and appears for about 1 second. Then it is not activated. • Press the shutter button halfway or turn the camera off to cancel the power save mode is useful for confirming focus. Preparation [MONITOR] Adjust the brightness of the LCD monitor in 7 steps. • ...
... is set to [ON]. [POWER SAVE] [1MIN.]/[2MIN.]/[5MIN.]/[10MIN.]: The power save mode is activated (the camera is automatically turned off and on to save the battery life) if the camera has not been used for the time selected on the setting. [OFF]: The power save mode is enlarged 4 ...times and appears for about 1 second. Then it is not activated. • Press the shutter button halfway or turn the camera off to cancel the power save mode is useful for confirming focus. Preparation [MONITOR] Adjust the brightness of the LCD monitor in 7 steps. • ...
Digital Still Cam/non Usa
Page 22
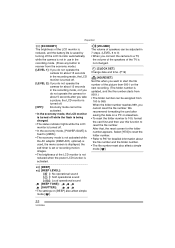
...updated, and the file number starts from 0001.) • The folder number can be adjusted in 7 steps. (LEVEL 6 to 0) • When you connect the camera to a TV, the volume of the speakers of the TV is not changed. [CLOCK SET] Change date and time. (P19) [NO.RESET] Set this function... the economy mode, [POWER SAVE] is fixed to P87 for the folder number appears. When the folder number reaches 999, you do not operate the camera for about the file number and the folder number. • The file number reset also affects simple mode [ ]. [BEEP] [BEEP LEVEL]: [ ]: No operational sound [ ]:...
...updated, and the file number starts from 0001.) • The folder number can be adjusted in 7 steps. (LEVEL 6 to 0) • When you connect the camera to a TV, the volume of the speakers of the TV is not changed. [CLOCK SET] Change date and time. (P19) [NO.RESET] Set this function... the economy mode, [POWER SAVE] is fixed to P87 for the folder number appears. When the folder number reaches 999, you do not operate the camera for about the file number and the folder number. • The file number reset also affects simple mode [ ]. [BEEP] [BEEP LEVEL]: [ ]: No operational sound [ ]:...

Digital Still Cam/non Usa
Page 23
.... [PAL]: Video output is set to PAL system. [SCENE MENU] [AUTO]: Scene menu appears automatically when setting the mode dial to scene mode and the camera is operated in the scene mode currently selected. Select the desired scene mode. [OFF]: Scene menu does not appear when setting the mode dial to...
.... [PAL]: Video output is set to PAL system. [SCENE MENU] [AUTO]: Scene menu appears automatically when setting the mode dial to scene mode and the camera is operated in the scene mode currently selected. Select the desired scene mode. [OFF]: Scene menu does not appear when setting the mode dial to...

Digital Still Cam/non Usa
Page 26
...1.2005 • When you to the right, the picture is over exposed. C When the values are concentrated to get the best performance from the camera. Preparation ∫ Histogram Example of histogram • A histogram is a graph that displays brightness along the horizontal axis (black to white) and the ...and shutter speed are available, especially in those situations where automatic exposure may not match each other . • The histogram in the camera does not match the one displayed in image editing software used with the flash or in dark places, the histogram is displayed in ...
...1.2005 • When you to the right, the picture is over exposed. C When the values are concentrated to get the best performance from the camera. Preparation ∫ Histogram Example of histogram • A histogram is a graph that displays brightness along the horizontal axis (black to white) and the ...and shutter speed are available, especially in those situations where automatic exposure may not match each other . • The histogram in the camera does not match the one displayed in image editing software used with the flash or in dark places, the histogram is displayed in ...


