Brochure
Page 3
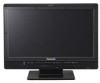
... camera system. • H Shift Function: Shifts horizontally the image of 3D images*2 displayed with the product. or right-eye image. - 3D Series FULL HD BT-3DL2550 This 647.7 mm (25.5 inches) LCD video monitor offers 3D compatibility in this signal type. • Side-by -side type). Connector: SDI 1 SDI 2 VIDEO YPBPR/RGB DVI-D SYNC/HD VD AUDIO PIN GPI RS-232C HEADPHONE Power: AC DC Xpol®*1 Polarizing Filter and...
... camera system. • H Shift Function: Shifts horizontally the image of 3D images*2 displayed with the product. or right-eye image. - 3D Series FULL HD BT-3DL2550 This 647.7 mm (25.5 inches) LCD video monitor offers 3D compatibility in this signal type. • Side-by -side type). Connector: SDI 1 SDI 2 VIDEO YPBPR/RGB DVI-D SYNC/HD VD AUDIO PIN GPI RS-232C HEADPHONE Power: AC DC Xpol®*1 Polarizing Filter and...
Brochure
Page 4
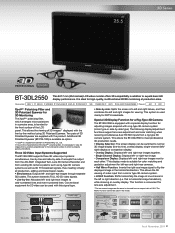
... using the optional accessories (rack mount: BT-MA1710G, wall mount: BT-WMA17G). The monitor can be mounted in 60 Hz. It accurately reproduces colors that can also be displayed by menu bottom. 0.8 BT-LH2550 D-Cinema Adobe 0.6 ITU-709 0.4 0.2 0.00.0 0.2 0.4 0.6 0.8 BT-LH2550 Color Space Modes Color Space Comparison (Simulation): The top part shows the color space when set to the input signal. LH Series Wide Color Space FULL HD BT-LH2550 This compact 647.7 mm (25.5 inches) monitor...
... using the optional accessories (rack mount: BT-MA1710G, wall mount: BT-WMA17G). The monitor can be mounted in 60 Hz. It accurately reproduces colors that can also be displayed by menu bottom. 0.8 BT-LH2550 D-Cinema Adobe 0.6 ITU-709 0.4 0.2 0.00.0 0.2 0.4 0.6 0.8 BT-LH2550 Color Space Modes Color Space Comparison (Simulation): The top part shows the color space when set to the input signal. LH Series Wide Color Space FULL HD BT-LH2550 This compact 647.7 mm (25.5 inches) monitor...

Brochure
Page 5
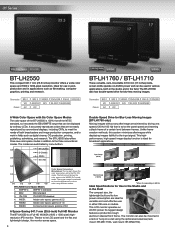
...-in an easily visible red. Color temperature can be selected from a 3D camera, the BT-LH910G helps you switch the left-eye and right-eye images automatically or manually. • COLOR: The Color function combines left -eye and right-eye images. LH Series WXGA L E D BT-LH910G NEW This high-resolution, high brightness and high contrast 228.6-mm (9-inch) monitor meets the production and broadcasting needs of conventional small...
...-in an easily visible red. Color temperature can be selected from a 3D camera, the BT-LH910G helps you switch the left-eye and right-eye images automatically or manually. • COLOR: The Color function combines left -eye and right-eye images. LH Series WXGA L E D BT-LH910G NEW This high-resolution, high brightness and high contrast 228.6-mm (9-inch) monitor meets the production and broadcasting needs of conventional small...
Brochure
Page 6
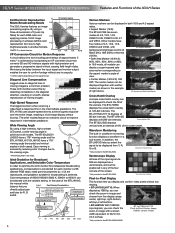
... Hatch ON The BT-3DL2550 displays vertical lines at 120-dot intervals. Minimizing the delay between the input signal and monitor output enables the user to optimize the LCD monitor for professional broadcasting applications, compensation is conducted for each panel Errors Corrected 100 Gamma curve --> power of the 3D/LH Series Faithful Color Reproduction y Meets Broadcasting Needs 0.8 Chromatic Gamut The 3D/LH series features an image processing engine...
... Hatch ON The BT-3DL2550 displays vertical lines at 120-dot intervals. Minimizing the delay between the input signal and monitor output enables the user to optimize the LCD monitor for professional broadcasting applications, compensation is conducted for each panel Errors Corrected 100 Gamma curve --> power of the 3D/LH Series Faithful Color Reproduction y Meets Broadcasting Needs 0.8 Chromatic Gamut The 3D/LH series features an image processing engine...
Brochure
Page 7
... 2D mode. Aluminum diecast frame (BT-LH1760/LH1710) External Remote Compatibility The standard RS-232C (9-pin) and GPI (9-pin) remote input terminals allow the monitor to be used to individual user needs. * Assignable functions vary depending on BT-3DL2550/LH2550) 2-Input Split-Screen Function The BT-3DL2500/LH2550 simultaneously displays two images side-by the BT-LH910G. Wall Mounting The optional wall mounting hardware (optional BT-WMA17G or BT-WMA26G) allows wall mounting of video shot...
... 2D mode. Aluminum diecast frame (BT-LH1760/LH1710) External Remote Compatibility The standard RS-232C (9-pin) and GPI (9-pin) remote input terminals allow the monitor to be used to individual user needs. * Assignable functions vary depending on BT-3DL2550/LH2550) 2-Input Split-Screen Function The BT-3DL2500/LH2550 simultaneously displays two images side-by the BT-LH910G. Wall Mounting The optional wall mounting hardware (optional BT-WMA17G or BT-WMA26G) allows wall mounting of video shot...
Brochure
Page 8
... backlight uses a mercury-free, low-power-consuming LED for Full-HD (1920 x 1080) display. The BT-L2150 has a wide-screen panel with a 16:9 aspect ratio for reduced environmental impact. L Series 21.5 15.4 FULL HD L E D BT-L2150 546.1 mm (21.5 inches) NEW LCD Video Monitor WXGA L E D BT-L1500 391.2 mm (15.4 inches) NEW LCD Video Monitor Developed focusing on basic features, such as a high-resolution, high-contrast LCD panel and two standard HD SDI input systems, these LCD monitors...
... backlight uses a mercury-free, low-power-consuming LED for Full-HD (1920 x 1080) display. The BT-L2150 has a wide-screen panel with a 16:9 aspect ratio for reduced environmental impact. L Series 21.5 15.4 FULL HD L E D BT-L2150 546.1 mm (21.5 inches) NEW LCD Video Monitor WXGA L E D BT-L1500 391.2 mm (15.4 inches) NEW LCD Video Monitor Developed focusing on basic features, such as a high-resolution, high-contrast LCD panel and two standard HD SDI input systems, these LCD monitors...
Brochure
Page 9
... for Power switch, menu operation and sound level adjustment. Component/Composite Inputs Equipped with an HDMI terminal, such as BD/DVD players. It allows high-quality digital connection of a wide range of digital HD products with component (Y/PB/PR) input, composite video input and analog audio (L/R) input. Key Lock Function The Key Lock function disables the front panel operation/control functions, except for broadcast applications cuts out red and green signals from low to high brightness levels...
... for Power switch, menu operation and sound level adjustment. Component/Composite Inputs Equipped with an HDMI terminal, such as BD/DVD players. It allows high-quality digital connection of a wide range of digital HD products with component (Y/PB/PR) input, composite video input and analog audio (L/R) input. Key Lock Function The Key Lock function disables the front panel operation/control functions, except for broadcast applications cuts out red and green signals from low to high brightness levels...
Brochure
Page 12
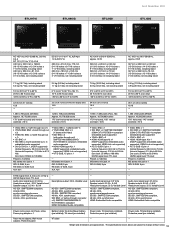
Specifications BT-3DL2550 25.5 BT-LH2550 25.5 BT-LH1760 17 GENERAL Power Requirement: Dimensions (WxHxD): Weight: Operating Temperature: Operating Humidity: Storage Temperature: LCD PANEL Panel Size: Aspect Ratio: Double Speed Drive: (100Hz/120Hz) Resolution: Display Colors: Viewing Angle: CONNECTORS Video Input/Output: DC 24 V 4.5 A, DC 5 V 0.03 A AC adapter In: 100 V to 240 V, 50/60 Hz, 1.6 A to 0.6 A 599 mm x 440 mm x 220 mm (23-5/8 inches x 17-3/8 inches x 8-11/16 inches), including stand 599...
Specifications BT-3DL2550 25.5 BT-LH2550 25.5 BT-LH1760 17 GENERAL Power Requirement: Dimensions (WxHxD): Weight: Operating Temperature: Operating Humidity: Storage Temperature: LCD PANEL Panel Size: Aspect Ratio: Double Speed Drive: (100Hz/120Hz) Resolution: Display Colors: Viewing Angle: CONNECTORS Video Input/Output: DC 24 V 4.5 A, DC 5 V 0.03 A AC adapter In: 100 V to 240 V, 50/60 Hz, 1.6 A to 0.6 A 599 mm x 440 mm x 220 mm (23-5/8 inches x 17-3/8 inches x 8-11/16 inches), including stand 599...
Brochure
Page 13
...to change without notice. 12 Audio input signal level: 0.5 Vrms Speaker output: 0.5 W + 0.5 W Head phone output: 32 Ω, Variable Level HD SDI : SMPTE299M compliant, 48 kHz, 8CH, synchronous/asynchronous SD SDI : SMPTE272M compliant, 48 kHz, 4CH, synchronous HDMI: Embedded Audio compatible Power cord, power cord hook, screw Power plug adaptor x 1 Rack mount adaptor, Wall mount adaptor, Protective panel Battery holder for Anton/Bauer battery (pre installed), Tilt stand (pre installed) VF cable Power code, Tilt stand (pre installed), Protective panel (pre installed) - The specifications...
...to change without notice. 12 Audio input signal level: 0.5 Vrms Speaker output: 0.5 W + 0.5 W Head phone output: 32 Ω, Variable Level HD SDI : SMPTE299M compliant, 48 kHz, 8CH, synchronous/asynchronous SD SDI : SMPTE272M compliant, 48 kHz, 4CH, synchronous HDMI: Embedded Audio compatible Power cord, power cord hook, screw Power plug adaptor x 1 Rack mount adaptor, Wall mount adaptor, Protective panel Battery holder for Anton/Bauer battery (pre installed), Tilt stand (pre installed) VF cable Power code, Tilt stand (pre installed), Protective panel (pre installed) - The specifications...
Operating Instructions
Page 4
...keep the tilt stand screws and protective panel screws out of the reach of Turkey. 4 CAUTION: Excessive sound pressure from the AC receptacle. EEE Complies with the equipment must have three cores and be earthed. For your safety, if you are not exposed to the risk of fire or shock hazard, do not remove covers. No user serviceable parts... or shock hazard and annoying interference, use the recommended accessories only. CAUTION: The mains plug of fatalities. Wrongly wired extension cords are a major cause of the power supply cord shall remain readily operable. CAUTION: To...
...keep the tilt stand screws and protective panel screws out of the reach of Turkey. 4 CAUTION: Excessive sound pressure from the AC receptacle. EEE Complies with the equipment must have three cores and be earthed. For your safety, if you are not exposed to the risk of fire or shock hazard, do not remove covers. No user serviceable parts... or shock hazard and annoying interference, use the recommended accessories only. CAUTION: The mains plug of fatalities. Wrongly wired extension cords are a major cause of the power supply cord shall remain readily operable. CAUTION: To...
Operating Instructions
Page 6
... are recommended for analog video signals. • Audio signal connecting cables If your apparatus supports AES/EBU serial digital audio signals, use a cable with a ferrite core. • If your apparatus is supplied with ferrite core(s), they must be connected to the apparatus. • The purchaser/user is compliant with the apparatus being used for high-frequency applications, as peripheral equipment to the DVI signal terminal, use cables designed for SDI (Serial Digital Interface). Read this manual. 3.
... are recommended for analog video signals. • Audio signal connecting cables If your apparatus supports AES/EBU serial digital audio signals, use a cable with a ferrite core. • If your apparatus is supplied with ferrite core(s), they must be connected to the apparatus. • The purchaser/user is compliant with the apparatus being used for high-frequency applications, as peripheral equipment to the DVI signal terminal, use cables designed for SDI (Serial Digital Interface). Read this manual. 3.
Operating Instructions
Page 7
... for Use • The LCD monitor is covered by displaying normal video for a while.) • The response speed and brightness of liquid crystal vary with a hard cloth, or rubbing it vigorously will impair its characteristics and lower image quality. • In an environment exposed to drastic temperature fluctuations, condensation may be removed by a protective panel to protect it . • Some video images...
... for Use • The LCD monitor is covered by displaying normal video for a while.) • The response speed and brightness of liquid crystal vary with a hard cloth, or rubbing it vigorously will impair its characteristics and lower image quality. • In an environment exposed to drastic temperature fluctuations, condensation may be removed by a protective panel to protect it . • Some video images...
Operating Instructions
Page 8
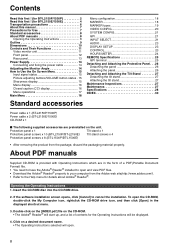
... to the Help menu for Use 7 Standard accessories 8 About PDF manuals 8 Opening the Operating Instructions 8 Outline 9 Dimensions 10 Controls and Their Functions 11 Video monitor unit 11 Front panel 12 Rear panel 13 Power Supply 14 Connecting and fixing the power cable 14 Adjusting the Monitor Angle 14 How to Use the On Screen Menu 15 Input signal status 15 Picture adjusting buttons/VOLUME button status . 15 Sharpness display 15 Menu display 16 Closed caption (CC) display 16 Menu operations 17 Main Menu 18 Menu configuration 18...
... to the Help menu for Use 7 Standard accessories 8 About PDF manuals 8 Opening the Operating Instructions 8 Outline 9 Dimensions 10 Controls and Their Functions 11 Video monitor unit 11 Front panel 12 Rear panel 13 Power Supply 14 Connecting and fixing the power cable 14 Adjusting the Monitor Angle 14 How to Use the On Screen Menu 15 Input signal status 15 Picture adjusting buttons/VOLUME button status . 15 Sharpness display 15 Menu display 16 Closed caption (CC) display 16 Menu operations 17 Main Menu 18 Menu configuration 18...
Operating Instructions
Page 9
...) remote input terminal enables operation from the video signal. • Audio monitoring function Allows you to set the white balance at either color temperature. • Blue-only function This function removes the red and green components from an external. • Tilt stand Monitor stand comes with both 16:9 and 4:3 aspect ratio. • Selectable color temperature Works with tilt adjustment as standard. Each color LED can be turned on the front. Outline Designed especially for best viewing...
...) remote input terminal enables operation from the video signal. • Audio monitoring function Allows you to set the white balance at either color temperature. • Blue-only function This function removes the red and green components from an external. • Tilt stand Monitor stand comes with both 16:9 and 4:3 aspect ratio. • Selectable color temperature Works with tilt adjustment as standard. Each color LED can be turned on the front. Outline Designed especially for best viewing...
Operating Instructions
Page 12
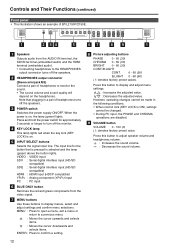
... monitor. Press this button to display menus, select and adjust settings and confirm menu selections. HEADPHONES output connector (Stereo mini-jack M3) Connect a pair of headphones to adjust speaker volume and headphones volume. : Increases the sound volume. : Decreases the sound volume. INPUT SELECT buttons Selects the signal input line. Press and hold the power switch for the button that plugging in the following conditions. • When control lock (KEY LOCK is selected and the lamp (green) above the button lights. MENU buttons Use...
... monitor. Press this button to display menus, select and adjust settings and confirm menu selections. HEADPHONES output connector (Stereo mini-jack M3) Connect a pair of headphones to adjust speaker volume and headphones volume. : Increases the sound volume. : Decreases the sound volume. INPUT SELECT buttons Selects the signal input line. Press and hold the power switch for the button that plugging in the following conditions. • When control lock (KEY LOCK is selected and the lamp (green) above the button lights. MENU buttons Use...
Operating Instructions
Page 14
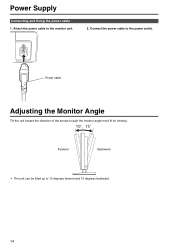
Connect the power cable to 10 degrees forward and 15 degrees backward. 14 Power cable Adjusting the Monitor Angle Tilt the unit toward the direction of the arrows to gain the monitor angle most fit for viewing. ヒパc ヒブc Forward Backward • The unit can be tilted up to the power outlet. Attach the power cable to the monitor unit. 2. Power Supply Connecting and fixing the power cable 1.
Connect the power cable to 10 degrees forward and 15 degrees backward. 14 Power cable Adjusting the Monitor Angle Tilt the unit toward the direction of the arrows to gain the monitor angle most fit for viewing. ヒパc ヒブc Forward Backward • The unit can be tilted up to the power outlet. Attach the power cable to the monitor unit. 2. Power Supply Connecting and fixing the power cable 1.
Operating Instructions
Page 20
... selected input signal is selected in the INPUT SELECT menu (Jpage 21). *2 The following sharpness values are available and the settings for GREEN. Adjusts the BIAS elements for BLUE. Resets GAIN RED - Sub menu GAMMA SELECT*1 Setting 2.2 2.35 COLOR TEMP. Selects the gamma 2.2 curve. Sub menu Setting COLOR TEMP.*4 D93 D65 GAIN RED*5 GAIN GREEN*5 GAIN BLUE*5 BIAS RED*5 BIAS GREEN*5 BIAS BLUE*5 RESET 0 - 1023 (Factory defaults are color temperature values.) • These are SHARPNESS MODE: LOW...
... selected input signal is selected in the INPUT SELECT menu (Jpage 21). *2 The following sharpness values are available and the settings for GREEN. Adjusts the BIAS elements for BLUE. Resets GAIN RED - Sub menu GAMMA SELECT*1 Setting 2.2 2.35 COLOR TEMP. Selects the gamma 2.2 curve. Sub menu Setting COLOR TEMP.*4 D93 D65 GAIN RED*5 GAIN GREEN*5 GAIN BLUE*5 BIAS RED*5 BIAS GREEN*5 BIAS BLUE*5 RESET 0 - 1023 (Factory defaults are color temperature values.) • These are SHARPNESS MODE: LOW...
Operating Instructions
Page 21
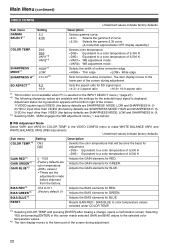
...Sub menu Setting Description CONT./BACK. Adjusts the B.LIGHT (backlight). Enables POWER DOWN. *1 Factory default setting for the BT-L2150P/1500P. *2 Factory default setting for input signal status (on-screen menu). Description Selects NTSC setup level. POWER DOWN OFF Selects whether monitor power shuts off (POWER DOWN) when no setup signal. Adjust as required by GPI CONTROL. Sets the studio standard color shade. Adjusts the CONT. (contrast). Not displayed. Displayed for a preset period of the monitor to the 7.5 % setup level to suit the black level...
...Sub menu Setting Description CONT./BACK. Adjusts the B.LIGHT (backlight). Enables POWER DOWN. *1 Factory default setting for the BT-L2150P/1500P. *2 Factory default setting for input signal status (on-screen menu). Description Selects NTSC setup level. POWER DOWN OFF Selects whether monitor power shuts off (POWER DOWN) when no setup signal. Adjust as required by GPI CONTROL. Sets the studio standard color shade. Adjusts the CONT. (contrast). Not displayed. Displayed for a preset period of the monitor to the 7.5 % setup level to suit the black level...
Operating Instructions
Page 23
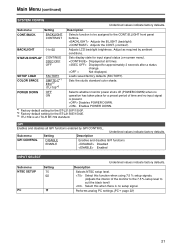
Sub menu Setting Description INPUT SELECT AUTO ANALOG Selects speaker and headphones output. CH8 CH5 - Selects the closed captions display. Enables front panel operation Disables the front panel operations other than POWER switch, MENU buttons (MENU, , , ENTER), or VOLUME button *4 Only KEY LOCK is enabled when the key lock is on the front panel: analog (AUDIO IN terminal) Analog (AUDIO IN terminal) EMBEDDED SELECT*1 CH7 - The KEY LOCK lamp on the front panel is engaged. DISPLAY SETUP Underlined values...
Sub menu Setting Description INPUT SELECT AUTO ANALOG Selects speaker and headphones output. CH8 CH5 - Selects the closed captions display. Enables front panel operation Disables the front panel operations other than POWER switch, MENU buttons (MENU, , , ENTER), or VOLUME button *4 Only KEY LOCK is enabled when the key lock is on the front panel: analog (AUDIO IN terminal) Analog (AUDIO IN terminal) EMBEDDED SELECT*1 CH7 - The KEY LOCK lamp on the front panel is engaged. DISPLAY SETUP Underlined values...
Operating Instructions
Page 30
... 22 Picture adjusting buttons 12, 15 POWER DOWN 21 Power Supply 14 POWER switch 12 Protective panel 26 R REMOTE 25 RESET 20, 22 S Safe area marker 19 SD ASPECT 20 SDI IN (HD/SD) terminals 13 SETUP LOAD 21 Sharpness 15 SHARPNESS H 20 SHARPNESS MODE 20 Speakers 12 Specifications 28 STATUS DISPLAY 21 SYSTEM CONFIG 21 T Tilt stand 27 V VIDEO CONFIG 20 VIDEO IN terminal 13 VOLUME button 12, 15 V-POSITION 22 W WB adjustment mode...
... 22 Picture adjusting buttons 12, 15 POWER DOWN 21 Power Supply 14 POWER switch 12 Protective panel 26 R REMOTE 25 RESET 20, 22 S Safe area marker 19 SD ASPECT 20 SDI IN (HD/SD) terminals 13 SETUP LOAD 21 Sharpness 15 SHARPNESS H 20 SHARPNESS MODE 20 Speakers 12 Specifications 28 STATUS DISPLAY 21 SYSTEM CONFIG 21 T Tilt stand 27 V VIDEO CONFIG 20 VIDEO IN terminal 13 VOLUME button 12, 15 V-POSITION 22 W WB adjustment mode...


