

Owner Manual
Page 5
... Adjust 70 Using the Audio Settings 72 Assigning Listening Modes to Input Sources....... 74 Source Setup 75 Miscellaneous (Volume/OSD) Setup 77 Hardware Setup 78 Lock Setup 80 Using the Video Settings 80 Digital Input Signal Formats 81 Zone 2 Zone 2 82 Connecting Zone 2 82 Setting the Powered Zone 2 83 Using Zone 2 84 Controlling Other Components Controlling Other Components 86 Preprogrammed Remote Control Codes 86 Looking up for Remote Control Code 86 Entering Remote Control Codes 88 Remote Control Codes for Onkyo Components Connected via V 89 Resetting REMOTE MODE Buttons...
... Adjust 70 Using the Audio Settings 72 Assigning Listening Modes to Input Sources....... 74 Source Setup 75 Miscellaneous (Volume/OSD) Setup 77 Hardware Setup 78 Lock Setup 80 Using the Video Settings 80 Digital Input Signal Formats 81 Zone 2 Zone 2 82 Connecting Zone 2 82 Setting the Powered Zone 2 83 Using Zone 2 84 Controlling Other Components Controlling Other Components 86 Preprogrammed Remote Control Codes 86 Looking up for Remote Control Code 86 Entering Remote Control Codes 88 Remote Control Codes for Onkyo Components Connected via V 89 Resetting REMOTE MODE Buttons...
Owner Manual
Page 6
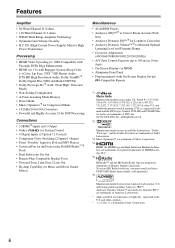
...5 HDMI*4 Inputs and 1 Output • Onkyo for System Control • 4 Digital Inputs (2 Optical / 2 Coaxial) • Component Video Switching (2 Inputs/1 Output) • Front "Portable" Input for iPod and MP3 Players • Universal Port for the Dock for the iPod/HD Radio™*5 Dock • Dual Subwoofer Pre Out • Banana Plug-Compatible Speaker Posts • Powered Zone 2 and Zone 2 Line Out • Bi-Amp Capability for Loudness Correction • Audyssey Dynamic Volume™*6 to Maintain Optimal Listening Level and Dynamic Range • Crossover Adjustment (40...
...5 HDMI*4 Inputs and 1 Output • Onkyo for System Control • 4 Digital Inputs (2 Optical / 2 Coaxial) • Component Video Switching (2 Inputs/1 Output) • Front "Portable" Input for iPod and MP3 Players • Universal Port for the Dock for the iPod/HD Radio™*5 Dock • Dual Subwoofer Pre Out • Banana Plug-Compatible Speaker Posts • Powered Zone 2 and Zone 2 Line Out • Bi-Amp Capability for Loudness Correction • Audyssey Dynamic Volume™*6 to Maintain Optimal Listening Level and Dynamic Range • Crossover Adjustment (40...

Owner Manual
Page 11
...input on an integrated amplifier in Zone 2. Input and output jacks include composite video and analog audio. S PRE OUT: SUBWOOFER This analog audio outputs can connect a VCR or DVR (digital video recorder). The same signal is for connecting the front high L/R speakers. M TV/TAPE IN/OUT This analog audio input and output are for connecting a CD player's analog audio output. P VCR/DVR IN/OUT Here you can connect a DVD/BD player's 2-channel analog audio output. See "Connecting Zone 2" on page 82. Input jacks include composite video and analog audio. You can connect a cable...
...input on an integrated amplifier in Zone 2. Input and output jacks include composite video and analog audio. S PRE OUT: SUBWOOFER This analog audio outputs can connect a VCR or DVR (digital video recorder). The same signal is for connecting the front high L/R speakers. M TV/TAPE IN/OUT This analog audio input and output are for connecting a CD player's analog audio output. P VCR/DVR IN/OUT Here you can connect a DVD/BD player's 2-channel analog audio output. See "Connecting Zone 2" on page 82. Input jacks include composite video and analog audio. You can connect a cable...

Owner Manual
Page 13
... Onkyo cassette recorder connected via V can select AM or FM by pressing the [TUNER] button repeatedly. 1 Arrow [R]/[X] buttons Used to control your DVD/BD player, CD player, and other components. You can select a preset directly. B C 1D E F 2G H3 I MUTING button (52) Mutes or unmutes the AV receiver. D Arrow [R]/[X]/[F]/[S] and ENTER buttons Used to the previous display when changing settings. L RETURN button Returns to select and adjust settings. button (54) Used to select radio presets. 5 Number buttons (53) Used to On or Standby. Also you can also use the remote controller...
... Onkyo cassette recorder connected via V can select AM or FM by pressing the [TUNER] button repeatedly. 1 Arrow [R]/[X] buttons Used to control your DVD/BD player, CD player, and other components. You can select a preset directly. B C 1D E F 2G H3 I MUTING button (52) Mutes or unmutes the AV receiver. D Arrow [R]/[X]/[F]/[S] and ENTER buttons Used to the previous display when changing settings. L RETURN button Returns to select and adjust settings. button (54) Used to select radio presets. 5 Number buttons (53) Used to On or Standby. Also you can also use the remote controller...

Owner Manual
Page 16
... Connecting a Powered Subwoofer Using a suitable cable, connect the AV receiver's PRE OUT: SUBWOOFER to speaker wiring polarity. The same signal is unpowered and you're using an external amplifier, connect the PRE OUT: SUBWOOFER to negative (-) terminals. Make sure that the terminals are gripping the bare wires, not the insulation. Powered subwoofer LINE INPUT LINE INPUT Speaker Connection Precautions Read the following before making any connections. • Read the instructions supplied with a lower impedance, and use the amplifier at high volume levels...
... Connecting a Powered Subwoofer Using a suitable cable, connect the AV receiver's PRE OUT: SUBWOOFER to speaker wiring polarity. The same signal is unpowered and you're using an external amplifier, connect the PRE OUT: SUBWOOFER to negative (-) terminals. Make sure that the terminals are gripping the bare wires, not the insulation. Powered subwoofer LINE INPUT LINE INPUT Speaker Connection Precautions Read the following before making any connections. • Read the instructions supplied with a lower impedance, and use the amplifier at high volume levels...
Owner Manual
Page 22
... AV receiver uses HDCP (High-bandwidth Digital Content Protection)*2, so only HDCP-compatible components can be guaranteed. • Set "HDMI Control (RIHD)" to 7.1 ch, 32-192 kHz, 16/20/24 bit) • Bitstream (DSD, Dolby Digital, Dolby Digital Plus, Dolby TrueHD, DTS, DTS-HD High Resolution Audio, DTS-HD Master Audio) Your DVD/BD player must also support HDCP. *1 DVI (Digital Visual Interface): The digital display interface standard set -top boxes, and other video components. Other devices connected to address the industry's requirements for a digital connectivity specification...
... AV receiver uses HDCP (High-bandwidth Digital Content Protection)*2, so only HDCP-compatible components can be guaranteed. • Set "HDMI Control (RIHD)" to 7.1 ch, 32-192 kHz, 16/20/24 bit) • Bitstream (DSD, Dolby Digital, Dolby Digital Plus, Dolby TrueHD, DTS, DTS-HD High Resolution Audio, DTS-HD Master Audio) Your DVD/BD player must also support HDCP. *1 DVI (Digital Visual Interface): The digital display interface standard set -top boxes, and other video components. Other devices connected to address the industry's requirements for a digital connectivity specification...

Owner Manual
Page 23
... turn up the AV receiver volume control, the sound will be restricted by the speakers and headphones connected to your TV's speakers, if you 'll need to make a separate connection for display on the TV, select the input of the HDMI component connected to the connected component's instruction manual for details. 23 Hint! Step 2: Assign each HDMI IN to "On" (see page 39). ■ Video Signals Digital video signals received by the HDMI IN jacks are output by the connected source component. If the TV power...
... turn up the AV receiver volume control, the sound will be restricted by the speakers and headphones connected to your TV's speakers, if you 'll need to make a separate connection for display on the TV, select the input of the HDMI component connected to the connected component's instruction manual for details. 23 Hint! Step 2: Assign each HDMI IN to "On" (see page 39). ■ Video Signals Digital video signals received by the HDMI IN jacks are output by the connected source component. If the TV power...
Owner Manual
Page 36
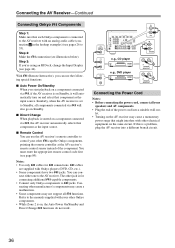
...Standby. ■ Direct Change When playback is started on , the Auto Power On/Standby and Direct Change V functions do not work. Refer to the manuals supplied with other V-capable Onkyo components, pointing the remote controller at the AV receiver's remote control sensor instead of the power cord into a different branch circuit. 36 REMOTE CONTROL e.g., CD player e.g., DVD player IN L R CD IN L R DVD/BD R L ANALOG AUDIO OUT R L ANALOG AUDIO OUT Connecting the Power Cord Notes: • Before connecting the power cord, connect all V functions. If this is a problem, plug the AV...
...Standby. ■ Direct Change When playback is started on , the Auto Power On/Standby and Direct Change V functions do not work. Refer to the manuals supplied with other V-capable Onkyo components, pointing the remote controller at the AV receiver's remote control sensor instead of the power cord into a different branch circuit. 36 REMOTE CONTROL e.g., CD player e.g., DVD player IN L R CD IN L R DVD/BD R L ANALOG AUDIO OUT R L ANALOG AUDIO OUT Connecting the Power Cord Notes: • Before connecting the power cord, connect all V functions. If this is a problem, plug the AV...

Owner Manual
Page 37
... turn on , the display lights up, and the STANDBY indicator goes off. If you have , see "HDMI Input Setup" on page 39, "Component Video Setup" on page 40, or "Digital Input Setup" on page 45. ■ Have you connected an Onkyo RI Dock? See "Audyssey 2EQ™ Room Correction and Speaker Setup" on page 41 respectively. ■ Have you connected a component to an HDMI input, HDMI component video input, or digital audio input? Turning On the AV Receiver ON/STANDBY STANDBY indicator ON/STANDBY RECEIVER Turning On and Standby AV receiver Remote controller...
... turn on , the display lights up, and the STANDBY indicator goes off. If you have , see "HDMI Input Setup" on page 39, "Component Video Setup" on page 40, or "Digital Input Setup" on page 45. ■ Have you connected an Onkyo RI Dock? See "Audyssey 2EQ™ Room Correction and Speaker Setup" on page 41 respectively. ■ Have you connected a component to an HDMI input, HDMI component video input, or digital audio input? Turning On the AV Receiver ON/STANDBY STANDBY indicator ON/STANDBY RECEIVER Turning On and Standby AV receiver Remote controller...

Owner Manual
Page 39
... select "1. You can set "TV Control" setting to an input selector as UP-A1 series Dock that composite video and component video sources are upconverted* and output by selecting the option. tons to more information on the AV receiver by the [SETUP] button. Digital Audio Input 3 Use the Up and Down [R]/[X] but - For example, if you connect your DVD/BD player to HDMI IN1, you set the AV receiver so that seated iPod) to the UNIVERSAL PORT jack, you cannot assign any unused input...
... select "1. You can set "TV Control" setting to an input selector as UP-A1 series Dock that composite video and component video sources are upconverted* and output by selecting the option. tons to more information on the AV receiver by the [SETUP] button. Digital Audio Input 3 Use the Up and Down [R]/[X] but - For example, if you connect your DVD/BD player to HDMI IN1, you set the AV receiver so that seated iPod) to the UNIVERSAL PORT jack, you cannot assign any unused input...

Owner Manual
Page 40
... and Down [R]/[X] but - Input Assign 1. The "Component Video Input" menu appears. 1-2. Input Assign", and then press [ENTER]. IN2: Select if the video component is selected on the AV receiver by the [SETUP] button. Component Video Input DVD/BD VCR/DVR CBL/SAT GAME AUX TV/TAPE TUNER CD PORT IN1 - - - - Component Video Input", and then press [ENTER]. NENT VIDEO IN 1. The setup menu closes. First Time Setup-Continued Component Video Setup If you connect to a COMPONENT VIDEO IN, you must assign it to an input selector. Digital Audio Input 4 Use the Up and...
... and Down [R]/[X] but - Input Assign 1. The "Component Video Input" menu appears. 1-2. Input Assign", and then press [ENTER]. IN2: Select if the video component is selected on the AV receiver by the [SETUP] button. Component Video Input DVD/BD VCR/DVR CBL/SAT GAME AUX TV/TAPE TUNER CD PORT IN1 - - - - Component Video Input", and then press [ENTER]. NENT VIDEO IN 1. The setup menu closes. First Time Setup-Continued Component Video Setup If you connect to a COMPONENT VIDEO IN, you must assign it to an input selector. Digital Audio Input 4 Use the Up and...

Owner Manual
Page 41
... HDMI IN. HDMI Input 2. Examples: If you cannot assign any input to PORT selector. 1-3. Press the [SETUP] button. PORT jack, you connect your DVD/BD player to the OPTICAL IN 1 jack, set "VCR/DVR" to "OPT2". Here are the default assignments. The main menu appears onscreen. Digital Audio Input 5 Use the Up and Down [R]/[X] buttons to select an input selector, and use the signal of audio from the HDMI IN. If you want to listen to audio from the component connected to the OPTICAL IN 2 jack...
... HDMI IN. HDMI Input 2. Examples: If you cannot assign any input to PORT selector. 1-3. Press the [SETUP] button. PORT jack, you connect your DVD/BD player to the OPTICAL IN 1 jack, set "VCR/DVR" to "OPT2". Here are the default assignments. The main menu appears onscreen. Digital Audio Input 5 Use the Up and Down [R]/[X] buttons to select an input selector, and use the signal of audio from the HDMI IN. If you want to listen to audio from the component connected to the OPTICAL IN 2 jack...
Owner Manual
Page 70
... left and right speakers to create a phantom center.) This setting controls the front left, right, and center mix, allowing you to adjust the weight of a stereo multiplex source is unavailable if no surround back speakers are output (default). Manual: You can select any available listening mode (default). Dolby Settings PLIIx Music (2ch Input) These settings apply to select audio channels or languages with Dolby Digital, Dolby Digital Plus and Dolby TrueHD only. Normally, if you're using a center speaker, the center channel sound is output. Notes: •...
... left and right speakers to create a phantom center.) This setting controls the front left, right, and center mix, allowing you to adjust the weight of a stereo multiplex source is unavailable if no surround back speakers are output (default). Manual: You can select any available listening mode (default). Dolby Settings PLIIx Music (2ch Input) These settings apply to select audio channels or languages with Dolby Digital, Dolby Digital Plus and Dolby TrueHD only. Normally, if you're using a center speaker, the center channel sound is output. Notes: •...
Owner Manual
Page 73
..., Dolby Pro Logic II Movie, Multichannel, DTS, DTS-ES, DTS Neo:6 Cinema, DTS 96/24, Neo:6, DTS-HD High Resolution, DTS-HD Master and DTS Express. Audyssey Dynamic Volume™ Dyn Vol See "Dynamic Volume" of compressed music files. Use it with certain input sources. Cinema Fltr Off: CinemaFILTER off (default). The Music Optimizer is disabled when the Direct listening mode is output by priority. Speaker Layout You can adjust the volume of sync. FrontH: The sound from surround back speakers...
..., Dolby Pro Logic II Movie, Multichannel, DTS, DTS-ES, DTS Neo:6 Cinema, DTS 96/24, Neo:6, DTS-HD High Resolution, DTS-HD Master and DTS Express. Audyssey Dynamic Volume™ Dyn Vol See "Dynamic Volume" of compressed music files. Use it with certain input sources. Cinema Fltr Off: CinemaFILTER off (default). The Music Optimizer is disabled when the Direct listening mode is output by priority. Speaker Layout You can adjust the volume of sync. FrontH: The sound from surround back speakers...
Owner Manual
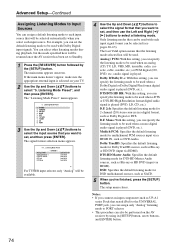
Page 74
... an analog (CD, TV, LD, VHS, MD, turntable, radio, cassette, cable, satellite, etc.) or PCM digital (CD, DVD, etc.) audio signal is played (DVD, etc.). TUNER 8. CD 9. Dolby D/Dolby D +: With this setting, you can be used when a Dolby Digital or Dolby Digital Plus format digital audio signal is played. CBL/SAT 4. PORT 3 Use the Up and Down [R]/[X] buttons to select the input source that can set the default listening mode to be used with Dolby Digital input signals. Only listening modes that you select each input signal format can specify the listening mode...
... an analog (CD, TV, LD, VHS, MD, turntable, radio, cassette, cable, satellite, etc.) or PCM digital (CD, DVD, etc.) audio signal is played (DVD, etc.). TUNER 8. CD 9. Dolby D/Dolby D +: With this setting, you can be used when a Dolby Digital or Dolby Digital Plus format digital audio signal is played. CBL/SAT 4. PORT 3 Use the Up and Down [R]/[X] buttons to select the input source that can set the default listening mode to be used with Dolby Digital input signals. Only listening modes that you select each input signal format can specify the listening mode...
Owner Manual
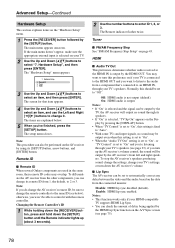
Page 78
...'s settings, or turn down the [SETUP] button until the Remote indicator lights up the AV receiver's volume control, the sound will be output by pressing the [DISPLAY] button. • When "TV Control" is set to "On", this should be performed on the AV receiver by the HDMI Lip Sync function on the A/V Sync screen (see page 23), if you can check the amount of delay being applied by using its remote ID from the other components, you turn this...
...'s settings, or turn down the [SETUP] button until the Remote indicator lights up the AV receiver's volume control, the sound will be output by pressing the [DISPLAY] button. • When "TV Control" is set to "On", this should be performed on the AV receiver by the HDMI Lip Sync function on the A/V Sync screen (see page 23), if you can check the amount of delay being applied by using its remote ID from the other components, you turn this...
Owner Manual
Page 79
... compatible or not. • The "TV Control" setting can be output by the remote control of the AV receiver, the name of whether the AV receiver is On or on Standby, both audio and video received by an HDMI input will increase. • When set to "On", regardless of the DVD/BD player is part of equipment. 79 On: Power Control enabled. Off: TV Control disabled. Note: After changing the settings of the "HDMI Control (RIHD)", "Power Control", or "TV Control", turn...
... compatible or not. • The "TV Control" setting can be output by the remote control of the AV receiver, the name of whether the AV receiver is On or on Standby, both audio and video received by an HDMI input will increase. • When set to "On", regardless of the DVD/BD player is part of equipment. 79 On: Power Control enabled. Off: TV Control disabled. Note: After changing the settings of the "HDMI Control (RIHD)", "Power Control", or "TV Control", turn...

Owner Manual
Page 91
... and track numbers, and to enter times for controlling a component that 's been programmed with the remote control code for a differ- The [+10] button* works as a +10 button or "--/---" button. S AUDIO button* Selects foreign language soundtracks and audio formats (e.g., Dolby Digital or DTS). B ON/STANDBY button Sets the DVD/BD player to the previous menu. J REPEAT button Used with the random playback function. 91 R RETURN button Exits the DVD/BD player's setup menu or returns to On or Standby. E TV VOL [R]/[X] button Adjust the TV's volume. Selects TV channels on...
... and track numbers, and to enter times for controlling a component that 's been programmed with the remote control code for a differ- The [+10] button* works as a +10 button or "--/---" button. S AUDIO button* Selects foreign language soundtracks and audio formats (e.g., Dolby Digital or DTS). B ON/STANDBY button Sets the DVD/BD player to the previous menu. J REPEAT button Used with the random playback function. 91 R RETURN button Exits the DVD/BD player's setup menu or returns to On or Standby. E TV VOL [R]/[X] button Adjust the TV's volume. Selects TV channels on...
Owner Manual
Page 97
... PHONES jack, no sound is correct, and that the inputs and outputs of all compo- The surround speakers produce no sound • When the T-D (Theater-Dimensional), Stereo or Mono listening mode is concentrated in contact with its factory defaults, turn on and, while holding down the [VCR/DVR] button, press the [ON/STANDBY] button. If you set the volume to Auto (page 81). Power Can't turn it in this section. To reset the AV receiver...
... PHONES jack, no sound is correct, and that the inputs and outputs of all compo- The surround speakers produce no sound • When the T-D (Theater-Dimensional), Stereo or Mono listening mode is concentrated in contact with its factory defaults, turn on and, while holding down the [VCR/DVR] button, press the [ON/STANDBY] button. If you set the volume to Auto (page 81). Power Can't turn it in this section. To reset the AV receiver...
Owner Manual
Page 98
... your cables. 98 The Late Night function doesn't work • Make sure the source material is Dolby Digital, Dolby Digital Plus, and Dolby TrueHD (page 72). If you switch your player from a menu. • Depending on the AV receiver. This is usually because the DTS bitstream has been processed (e.g., output level, sampling rate, or frequency response changed) and the AV receiver doesn't recognize it as those that the individual speaker volume levels are con- Troubleshooting-Continued The center speaker...
... your cables. 98 The Late Night function doesn't work • Make sure the source material is Dolby Digital, Dolby Digital Plus, and Dolby TrueHD (page 72). If you switch your player from a menu. • Depending on the AV receiver. This is usually because the DTS bitstream has been processed (e.g., output level, sampling rate, or frequency response changed) and the AV receiver doesn't recognize it as those that the individual speaker volume levels are con- Troubleshooting-Continued The center speaker...


