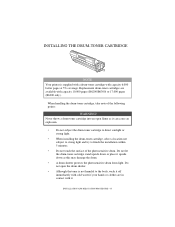
Oki Data B6200 Toner Cartridge
Related Manual Pages


Similar Questions

C330dn - Error 'check Toner Cartridge. 544:y Improper Cartridge Lock Position'
I get an error "Check Toner Cartridge. 544:Y Improper cartridge lock position" for my C330DN even th...
I get an error "Check Toner Cartridge. 544:Y Improper cartridge lock position" for my C330DN even th...
(Posted by nanimau 10 years ago)

Oki C530dn Check Toner Cartridge 544: Y Cartridge Lock Position
I need help, the printer Oki C539DN send this menssageCheck toner cartridge 544: Y Cartridge lock po...
I need help, the printer Oki C539DN send this menssageCheck toner cartridge 544: Y Cartridge lock po...
(Posted by gamalielmata 10 years ago)

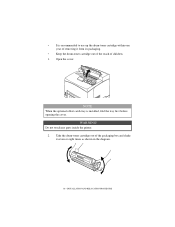
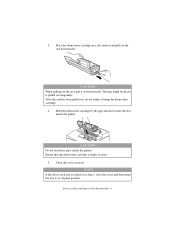
Toner Cartridge
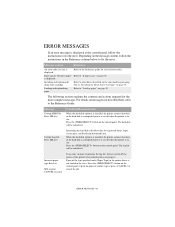
Error 547: Improper Lock Lever Position.
Printer shows Error 547. OKI B431d is new. Just about 200 Prints. What to do? Please answer in Ge...
Printer shows Error 547. OKI B431d is new. Just about 200 Prints. What to do? Please answer in Ge...
(Posted by JDK 11 years ago)

Oki B6200 After Replace Cartridge Display Keeps Show Replace Module ??
(Posted by hype 12 years ago)