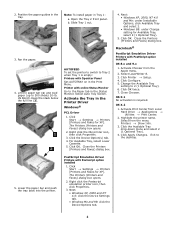
Installation Instructions: Second Paper Tray (500 Sheets)
Page 2
...Available Tray, select Lower Cassette. 5. Click OK. OS X.1 No activation is empty: Printers with online Status Monitor Go to Tray 2 when Tray 1 is required. Select from Local Hard Drive → Applications &#...Faxes) dialog box. 4. Next: • Windows XP, 2000, NT 4.0 and Me: under Installable Options, click Available Tray and select 2. • Windows 98: under Change setting for Available Tray, select... panel. The Printers (Printers and Faxes) dialog box opens. 2. Right click the Oki printer icon, then click Properties. 3. Click OK. Close the Printers (Printers and Faxes)...
...Available Tray, select Lower Cassette. 5. Click OK. OS X.1 No activation is empty: Printers with online Status Monitor Go to Tray 2 when Tray 1 is required. Select from Local Hard Drive → Applications &#...Faxes) dialog box. 4. Next: • Windows XP, 2000, NT 4.0 and Me: under Installable Options, click Available Tray and select 2. • Windows 98: under Change setting for Available Tray, select... panel. The Printers (Printers and Faxes) dialog box opens. 2. Right click the Oki printer icon, then click Properties. 3. Click OK. Close the Printers (Printers and Faxes)...
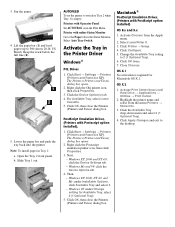
2nd Paper Tray Installation
Page 2
...4. Close Chooser. OS X.1 No activation is empty: Printers with online Status Monitor: Go to the Paper tab in the Print Menu. Click the Available Tray drop-down menu and select 2 (1 Optional Tray). 4. Activate the Tray in Tray 1: a. Then: - Windows 98: under Installable Options, click Available Tray and select 2. - OS...Apply Changes and exit to 500 sheets 20-lb. Lower the paper bar and push the tray back into the printer. Right click the Oki printer icon, then click Properties. 3. The Printers (Printers and Faxes) dialog box opens. 2. Highlight the printer name and select from...
...4. Close Chooser. OS X.1 No activation is empty: Printers with online Status Monitor: Go to the Paper tab in the Print Menu. Click the Available Tray drop-down menu and select 2 (1 Optional Tray). 4. Activate the Tray in Tray 1: a. Then: - Windows 98: under Installable Options, click Available Tray and select 2. - OS...Apply Changes and exit to 500 sheets 20-lb. Lower the paper bar and push the tray back into the printer. Right click the Oki printer icon, then click Properties. 3. The Printers (Printers and Faxes) dialog box opens. 2. Highlight the printer name and select from...
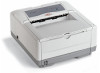
B4400 4500 4550 4600 User Guide (English)
Page 3
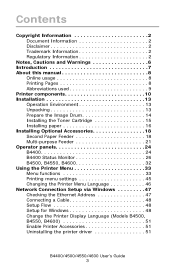
... Second Paper Feeder 18 Multi-purpose Feeder 21 Operator panels 24 B4400 24 B4400 Status Monitor 26 B4500, B4550, B4600 32 Using the Printer Menu 33 Menu functions 33 Printing menu settings 45 Changing the Printer Menu Language 46 Network Connection Setup via Windows 47 Checking the Ethernet Address 47 Connecting a Cable 48 Setup Flow...
... Second Paper Feeder 18 Multi-purpose Feeder 21 Operator panels 24 B4400 24 B4400 Status Monitor 26 B4500, B4550, B4600 32 Using the Printer Menu 33 Menu functions 33 Printing menu settings 45 Changing the Printer Menu Language 46 Network Connection Setup via Windows 47 Checking the Ethernet Address 47 Connecting a Cable 48 Setup Flow...
B4400 4500 4550 4600 User Guide (English)
Page 27
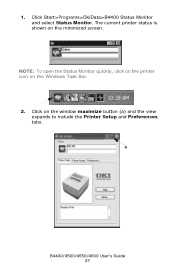
S M desktop icon.jpg 2. The current printer status is shown on the window maximize button (a) and the view expands to include the Printer Setup and Preferences tabs. Click on the minimized screen. S M Printer State tab.jpg a B4400/4500/4550/4600 User's Guide 27 B4250_SM_min.jpg NOTE: To open the Status Monitor quickly, click on the printer icon on the Windows Task Bar. Click Start>Programs>OkiData>B4400 Status Monitor and select Status Monitor. 1.
S M desktop icon.jpg 2. The current printer status is shown on the window maximize button (a) and the view expands to include the Printer Setup and Preferences tabs. Click on the minimized screen. S M Printer State tab.jpg a B4400/4500/4550/4600 User's Guide 27 B4250_SM_min.jpg NOTE: To open the Status Monitor quickly, click on the printer icon on the Windows Task Bar. Click Start>Programs>OkiData>B4400 Status Monitor and select Status Monitor. 1.
B4400 4500 4550 4600 User Guide (English)
Page 53
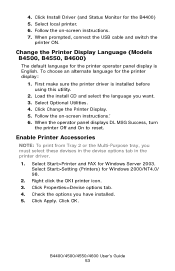
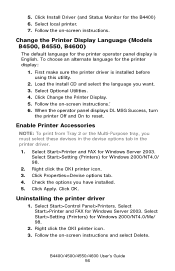
...Purpose tray, you want. 3. Click OK. Follow the on -screen instructions. 7. Select Start>Setting (Printers) for the printer display: 1. Right click the OKI printer icon. 3. Check the options you have installed. 5. Change the Printer Display Language (Models B4500, B4550, B4600) The default language for the printer ..., connect the USB cable and switch the printer ON. Click Properties>Devise options tab. 4. Select Start>Printer and FAX for the B4400) 5. Click Install Driver (and Status Monitor for Windows Server 2003. First make sure the printer driver is English.
...Purpose tray, you want. 3. Click OK. Follow the on -screen instructions. 7. Select Start>Setting (Printers) for the printer display: 1. Right click the OKI printer icon. 3. Check the options you have installed. 5. Change the Printer Display Language (Models B4500, B4550, B4600) The default language for the printer ..., connect the USB cable and switch the printer ON. Click Properties>Devise options tab. 4. Select Start>Printer and FAX for the B4400) 5. Click Install Driver (and Status Monitor for Windows Server 2003. First make sure the printer driver is English.

B4400 4500 4550 4600 User Guide (English)
Page 54
... Open Configuration button. The USB cable is available for Windows Me/98/2000/XP/Server 2003 only. No guarantee of Windows Me/98. Use a computer with a clean installation of proper operation. See "USB menu" on page 41. Connect the USB cable. B4400: Open the Status Monitor. B4400/4500/4550/4600 User's Guide 54 Confirm that USB...
... Open Configuration button. The USB cable is available for Windows Me/98/2000/XP/Server 2003 only. No guarantee of Windows Me/98. Use a computer with a clean installation of proper operation. See "USB menu" on page 41. Connect the USB cable. B4400: Open the Status Monitor. B4400/4500/4550/4600 User's Guide 54 Confirm that USB...
B4400 4500 4550 4600 User Guide (English)
Page 56
... the install CD and select the language you have installed. 5. Select Start>Setting (Printers) for the B4400) 6. Select Start>Control Panel>Printers. Click Install Driver (and Status Monitor for Windows 2000/NT4.0/ 98. 2. Select local printer. 7. Follow the on -screen instructions and select Delete.... devises in the devise options tab in the printer driver. 1. Right click the OKI printer icon. 3. Uninstalling the printer driver 1. Select Start>Setting (Printers) for Windows 2000/NT4.0/Me/ 98. 2. Right click the OKI printer icon. 3. B4400/4500/4550/4600 User's Guide 56
... the install CD and select the language you have installed. 5. Select Start>Setting (Printers) for the B4400) 6. Select Start>Control Panel>Printers. Click Install Driver (and Status Monitor for Windows 2000/NT4.0/ 98. 2. Select local printer. 7. Follow the on -screen instructions and select Delete.... devises in the devise options tab in the printer driver. 1. Right click the OKI printer icon. 3. Uninstalling the printer driver 1. Select Start>Setting (Printers) for Windows 2000/NT4.0/Me/ 98. 2. Right click the OKI printer icon. 3. B4400/4500/4550/4600 User's Guide 56
B4400 4500 4550 4600 User Guide (English)
Page 57
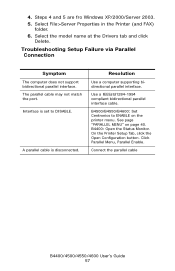
...bidirectional parallel interface cable. On the Printer Setup Tab, click the Open Configuration button. B4400: Open the Status Monitor. Resolution Use a computer supporting bidirectional parallel interface. Select the model name at the... Drivers tab and click Delete. Click Parallel Menu, Parallel Enable. B4500/B4550/B4600: Set Centronics to DISABLE. Select File>Server Properties in the Printer (and FAX) folder. 6. Interface is disconnected. Steps 4 and 5 are fro Windows...
...bidirectional parallel interface cable. On the Printer Setup Tab, click the Open Configuration button. B4400: Open the Status Monitor. Resolution Use a computer supporting bidirectional parallel interface. Select the model name at the... Drivers tab and click Delete. Click Parallel Menu, Parallel Enable. B4500/B4550/B4600: Set Centronics to DISABLE. Select File>Server Properties in the Printer (and FAX) folder. 6. Interface is disconnected. Steps 4 and 5 are fro Windows...

B4400 4500 4550 4600 User Guide (English)
Page 75
... printer driver using The Menu Installer on -screen prompts to complete your language. 3. Select your printer driver installation. Windows, and Macintosh. Insert the printer driver CD-ROM supplied with your CD-ROM drive. Accept the License Agreement. 5....in "Operator Panels".) Ensure that your options are all contained on the CD-ROM supplied with your printer. Click Install Driver (B4400: Install Driver and Status Monitor). 7. NOTE: For information specific to a network installation, see the Software Installation Guide included with your printer. The Installer screen...
... printer driver using The Menu Installer on -screen prompts to complete your language. 3. Select your printer driver installation. Windows, and Macintosh. Insert the printer driver CD-ROM supplied with your CD-ROM drive. Accept the License Agreement. 5....in "Operator Panels".) Ensure that your options are all contained on the CD-ROM supplied with your printer. Click Install Driver (B4400: Install Driver and Status Monitor). 7. NOTE: For information specific to a network installation, see the Software Installation Guide included with your printer. The Installer screen...
B4400 4500 4550 4600 User Guide (English)
Page 77
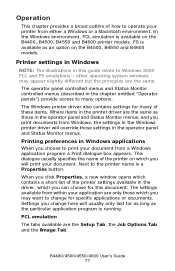
... settings in the operator panel and Status Monitor menus. The operator panel controlled menus and Status Monitor controlled menus (described in this document. The settings available from within your printer from a Windows application program a Print dialogue box appears. Settings you can choose for as long as an option on the B4400, B4500, B4550 and B4600 printer...
... settings in the operator panel and Status Monitor menus. The operator panel controlled menus and Status Monitor controlled menus (described in this document. The settings available from within your printer from a Windows application program a Print dialogue box appears. Settings you can choose for as long as an option on the B4400, B4500, B4550 and B4600 printer...


