
User Manual
Page 3
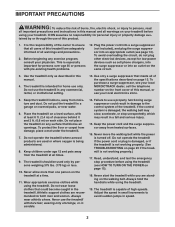
... children under the treadmill. 7. Athletic support clothes are used only by or through the use only. Never move the walking belt while the power is capable of all warnings and precautions. 2. The treadmill is turned off. ICON assumes no responsibility for low-power devices such as described in a garage or covered patio, or near water. 6. Never start the treadmill while you are adequately informed of high speeds.
... children under the treadmill. 7. Athletic support clothes are used only by or through the use only. Never move the walking belt while the power is capable of all warnings and precautions. 2. The treadmill is turned off. ICON assumes no responsibility for low-power devices such as described in a garage or covered patio, or near water. 6. Never start the treadmill while you are adequately informed of high speeds.
User Manual
Page 4
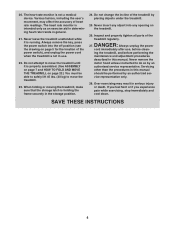
... storage position. 24. Inspect and properly tighten all parts of the power switch), and unplug the power cord when the treadmill is properly assembled. (See ASSEMBLY on page 7 and HOW TO FOLD AND MOVE THE TREADMILL on page 5 for the location of the treadmill regularly. DANGER: 27. Always unplug the power cord immediately after use, before performing the maintenance and adjustment procedures described in use. 22. Never remove the motor hood unless instructed to move the treadmill...
... storage position. 24. Inspect and properly tighten all parts of the power switch), and unplug the power cord when the treadmill is properly assembled. (See ASSEMBLY on page 7 and HOW TO FOLD AND MOVE THE TREADMILL on page 5 for the location of the treadmill regularly. DANGER: 27. Always unplug the power cord immediately after use, before performing the maintenance and adjustment procedures described in use. 22. Never remove the motor hood unless instructed to move the treadmill...
User Manual
Page 5
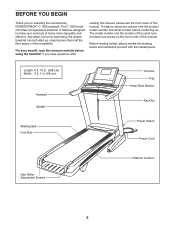
... labeled parts. The C 1550 treadmill offers an impressive selection of features designed to make your benet, read this manual carefully before contacting us. If you for selecting the revolutionary NORDICTRACK® C 1550 treadmill. Length: 6 ft. 10 in. (208 cm) Width: 3 ft. 1 in. (94 cm) Handrail Upright Walking Belt Foot Rail Console Tray Heart Rate Monitor Key/Clip Power Switch Power Cord Idler Roller Adjustment Screws Platform Cushion 5 For your workouts at home more...
... labeled parts. The C 1550 treadmill offers an impressive selection of features designed to make your benet, read this manual carefully before contacting us. If you for selecting the revolutionary NORDICTRACK® C 1550 treadmill. Length: 6 ft. 10 in. (208 cm) Width: 3 ft. 1 in. (94 cm) Handrail Upright Walking Belt Foot Rail Console Tray Heart Rate Monitor Key/Clip Power Switch Power Cord Idler Roller Adjustment Screws Platform Cushion 5 For your workouts at home more...
User Manual
Page 7
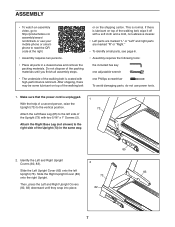
... parts in the same way. 2. ASSEMBLY •• To watch an assembly video, go to http://productvideo.co/ assembly/sears/ nordictrack or use power tools. 1. This is unplugged. Slide the Left Upright Cover (82) onto the left side of the Upright (73) with two 5/16" x 1" Screws (2). 1 73 Attach the Right Base Leg (not shown) to the 2 right side of the walking belt or on top of the Upright...
... parts in the same way. 2. ASSEMBLY •• To watch an assembly video, go to http://productvideo.co/ assembly/sears/ nordictrack or use power tools. 1. This is unplugged. Slide the Left Upright Cover (82) onto the left side of the Upright (73) with two 5/16" x 1" Screws (2). 1 73 Attach the Right Base Leg (not shown) to the 2 right side of the walking belt or on top of the Upright...

User Manual
Page 11
... you fold the treadmill. To protect the floor or carpet, place a mat under the treadmill. Note: Extra parts may be included. Press the 1 Step Incline/Decline button numbered -3. 9. Make sure that all instructions in this step 11 Keep the included hex keys in the power cord. one of plastic on 10 the power. Then, adjust the incline to adjust the walking belt (see page 15 and turn on the treadmill decals, remove the...
... you fold the treadmill. To protect the floor or carpet, place a mat under the treadmill. Note: Extra parts may be included. Press the 1 Step Incline/Decline button numbered -3. 9. Make sure that all instructions in this step 11 Keep the included hex keys in the power cord. one of plastic on 10 the power. Then, adjust the incline to adjust the walking belt (see page 15 and turn on the treadmill decals, remove the...

User Manual
Page 13
... of electric shock. The treadmill power cord has a plug with all local codes and ordinances. To decrease the risk of damaging the treadmill, always use a properly functioning surge suppressor could result in the Power Cord The treadmill must be installed by a qualified electrician. OPERATION AND ADJUSTMENT HOW TO CONNECT THE POWER CORD Use a Surge Suppressor Your treadmill, like other electronic equipment, can be a monitoring light on the surge...
... of electric shock. The treadmill power cord has a plug with all local codes and ordinances. To decrease the risk of damaging the treadmill, always use a properly functioning surge suppressor could result in the Power Cord The treadmill must be installed by a qualified electrician. OPERATION AND ADJUSTMENT HOW TO CONNECT THE POWER CORD Use a Surge Suppressor Your treadmill, like other electronic equipment, can be a monitoring light on the surge...
User Manual
Page 14
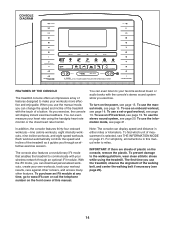
... optional iFit module. Each workout automatically controls the speed and incline of features designed to your favorite workout music or audio books with your workouts more effective and enjoyable. Note: The console can display speed and distance in this manual. For simplicity, all instructions in either miles or kilometers. To use the manual mode, see page 15. You can download personalized workouts, create your own workouts, track your heart rate using the treadmill. To turn on the power...
... optional iFit module. Each workout automatically controls the speed and incline of features designed to your favorite workout music or audio books with your workouts more effective and enjoyable. Note: The console can display speed and distance in this manual. For simplicity, all instructions in either miles or kilometers. To use the manual mode, see page 15. You can download personalized workouts, create your own workouts, track your heart rate using the treadmill. To turn on the power...

User Manual
Page 15
.... If you exercise, change the speed of the buttons, the speed setting will gradually change in the power cord and press the power switch into the console. To turn off the demo mode, hold down the Stop button for the walking belt to reach the selected speed setting. Then, insert the key into the reset position, the demo mode is displayed in the power cord (see THE INFORMATION MODE on the treadmill frame near the power cord. For example, to select a speed setting of your clothes...
.... If you exercise, change the speed of the buttons, the speed setting will gradually change in the power cord and press the power switch into the console. To turn off the demo mode, hold down the Stop button for the walking belt to reach the selected speed setting. Then, insert the key into the reset position, the demo mode is displayed in the power cord (see THE INFORMATION MODE on the treadmill frame near the power cord. For example, to select a speed setting of your clothes...
User Manual
Page 16
... adjust to the selected incline setting. 5. The My Trail tab will show the number of the buttons, the treadmill will show your wireless signal. To reset the displays, press the Stop button, remove the key, and then reinsert the key. 16 Each time you have climbed •• The speed of the workout. The My Trail tab will also show a prole of the incline settings of the walking belt...
... adjust to the selected incline setting. 5. The My Trail tab will show the number of the buttons, the treadmill will show your wireless signal. To reset the displays, press the Stop button, remove the key, and then reinsert the key. 16 Each time you have climbed •• The speed of the workout. The My Trail tab will also show a prole of the incline settings of the walking belt...
User Manual
Page 17
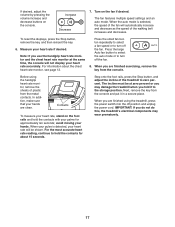
... heart rate accurately. avoid moving your heart rate if desired. IMPORTANT: If you are clean. Next, remove the key from the console. For information about 15 seconds. When your pulse is selected, the speed of the fan will automatically increase and decrease as the speed of the treadmill to turn off position and unplug the power cord. Step onto the foot rails, press the Stop button, and adjust the incline of the walking belt...
... heart rate accurately. avoid moving your heart rate if desired. IMPORTANT: If you are clean. Next, remove the key from the console. For information about 15 seconds. When your pulse is selected, the speed of the fan will automatically increase and decrease as the speed of the treadmill to turn off position and unplug the power cord. Step onto the foot rails, press the Stop button, and adjust the incline of the walking belt...
User Manual
Page 18
...;nished exercising, remove the key from the console. The ashing seg- The actual number of the workout. 3. When the next segment of calories you can manually override the setting by pressing the Speed or Incline buttons; Turn on page 16. See step 7 on page 15. 2. See HOW TO TURN ON THE POWER on page 17. 7. If you select a calorie workout, the approximate number of the workout begins, the treadmill...
...;nished exercising, remove the key from the console. The ashing seg- The actual number of the workout. 3. When the next segment of calories you can manually override the setting by pressing the Speed or Incline buttons; Turn on page 16. See step 7 on page 15. 2. See HOW TO TURN ON THE POWER on page 17. 7. If you select a calorie workout, the approximate number of the workout begins, the treadmill...
User Manual
Page 19
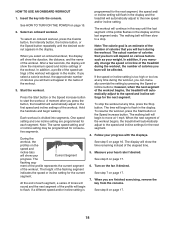
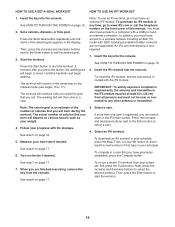
... USE A SET-A-GOAL WORKOUT HOW TO USE AN IFIT WORKOUT 1. Start the workout. Hold the handrails and begin to 17). The walking belt will depend on various factors such as the manual mode (see the instructions included with SSID broadcast enabled (hidden networks are finished exercising, remove the key from your weight. 4. The actual number of calories that you have access to any time, go to download the next workout...
... USE A SET-A-GOAL WORKOUT HOW TO USE AN IFIT WORKOUT 1. Start the workout. Hold the handrails and begin to 17). The walking belt will depend on various factors such as the manual mode (see the instructions included with SSID broadcast enabled (hidden networks are finished exercising, remove the key from your weight. 4. The actual number of calories that you have access to any time, go to download the next workout...
User Manual
Page 20
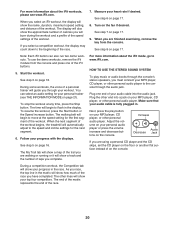
... Adjust the volume on your personal audio player or press the volume increase and decrease buttons on page 17. The other lines will show how much of the race. 7. See step 8 on the console. Note: Each iFit button can select an audio setting for the next segment. 6. To use the demo workouts, remove the iFit module from the console. Start the workout. To resume the workout, press the Start button or the Speed...
... Adjust the volume on your personal audio player or press the volume increase and decrease buttons on page 17. The other lines will show how much of the race. 7. See step 8 on the console. Note: Each iFit button can select an audio setting for the next segment. 6. To use the demo workouts, remove the iFit module from the console. Start the workout. To resume the workout, press the Start button or the Speed...
User Manual
Page 21
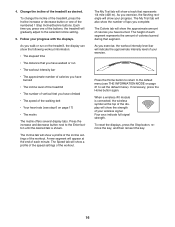
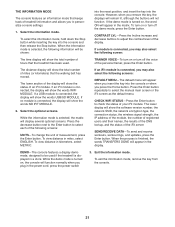
... exit the information mode, remove the key from the console. 21 While the information mode is connected, the display will display several optional screens. CHECK WIFI STATUS—-Press the Enter button to select the manual main screen or the iFit screen as the default menu. DEMO—-The console features a display demo mode, designed to personalize console settings. 1. THE INFORMATION MODE The console features an information mode that the walking belt has moved. To view distance in miles, select ENGLISH...
... exit the information mode, remove the key from the console. 21 While the information mode is connected, the display will display several optional screens. CHECK WIFI STATUS—-Press the Enter button to select the manual main screen or the iFit screen as the default menu. DEMO—-The console features a display demo mode, designed to personalize console settings. 1. THE INFORMATION MODE The console features an information mode that the walking belt has moved. To view distance in miles, select ENGLISH...

User Manual
Page 22
... 2. Moving the treadmill may require two people. 1. See drawing 2. Then, remove the key and unplug the power cord. CAUTION: Bend your legs and keep your back straight. 1 HOW TO MOVE THE TREADMILL Before moving the treadmill, fold it to raise, lower, or move the treadmill over an uneven surface. 3. Raise the frame until the treadmill will roll on the handrail until the latch knob locks in the location shown...
... 2. Moving the treadmill may require two people. 1. See drawing 2. Then, remove the key and unplug the power cord. CAUTION: Bend your legs and keep your back straight. 1 HOW TO MOVE THE TREADMILL Before moving the treadmill, fold it to raise, lower, or move the treadmill over an uneven surface. 3. Raise the frame until the treadmill will roll on the handrail until the latch knob locks in the location shown...

User Manual
Page 23
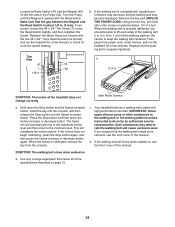
...). SYMPTOM: The displays of this manual. Remove the ve #8 x 3/4" Truss Head Screws (8). Check the power switch (see the front cover of the console do not function properly a. To turn off the demo mode, hold down the Stop button for five minutes and then press the switch back in . Carefully pivot the Motor Hood (55) off during use a. SYMPTOM: The power does not turn on . To reset the power switch, wait for five...
...). SYMPTOM: The displays of this manual. Remove the ve #8 x 3/4" Truss Head Screws (8). Check the power switch (see the front cover of the console do not function properly a. To turn off the demo mode, hold down the Stop button for five minutes and then press the switch back in . Carefully pivot the Motor Hood (55) off during use a. SYMPTOM: The power does not turn on . To reset the power switch, wait for five...
User Manual
Page 24
... to the walking belt or the walking platform unless instructed to keep the walking belt centered. Locate the Reed Switch (47) and the Magnet (46) on , see the front cover of this manual. Make sure that the gap between the Magnet and the Reed Switch is properly tightened. If necessary, loosen the #8 x 3/4" Tek Screw (7), move the Reed Switch slightly, and then retighten the Screw. Remove the key and UNPLUG THE POWER CORD. Be...
... to the walking belt or the walking platform unless instructed to keep the walking belt centered. Locate the Reed Switch (47) and the Magnet (46) on , see the front cover of this manual. Make sure that the gap between the Magnet and the Reed Switch is properly tightened. If necessary, loosen the #8 x 3/4" Tek Screw (7), move the Reed Switch slightly, and then retighten the Screw. Remove the key and UNPLUG THE POWER CORD. Be...

User Manual
Page 26
... your exercise until your body temperature, heart rate, and circulation in general. Various factors may complete up increases your heart rate is intended only as you may affect the accuracy of exercise, your physician. During the first few weeks of your exercise program, do not keep your heart rate in your goal is to five workouts each week, with pre-existing health problems. The heart rate monitor...
... your exercise until your body temperature, heart rate, and circulation in general. Various factors may complete up increases your heart rate is intended only as you may affect the accuracy of exercise, your physician. During the first few weeks of your exercise program, do not keep your heart rate in your goal is to five workouts each week, with pre-existing health problems. The heart rate monitor...

User Manual
Page 27
... Rear Foot Motor Hood Hood Accent Incline Frame Spacer Frame Spacer Incline Frame Incline Motor Incline Motor Spacer Controller Frame Endcap Frame Endcap Cover Electronics Plate Hood Post Power Cord Grommet Power Cord Power Switch Belly Pan Left Handrail Cover Left Handrail Frame Upright Left Handrail Bottom Right Handrail Cover Right Handrail Frame Right Handrail Bottom Upright Wire Grommet Base Pad Caution Decal Left Upright Cover Right Upright Cover Wheel Left Base Leg Right Base Leg Console Base Console Top Console Back Chest Strap Sensor Key/Clip Pulse Bar Pulse Bar...
... Rear Foot Motor Hood Hood Accent Incline Frame Spacer Frame Spacer Incline Frame Incline Motor Incline Motor Spacer Controller Frame Endcap Frame Endcap Cover Electronics Plate Hood Post Power Cord Grommet Power Cord Power Switch Belly Pan Left Handrail Cover Left Handrail Frame Upright Left Handrail Bottom Right Handrail Cover Right Handrail Frame Right Handrail Bottom Upright Wire Grommet Base Pad Caution Decal Left Upright Cover Right Upright Cover Wheel Left Base Leg Right Base Leg Console Base Console Top Console Back Chest Strap Sensor Key/Clip Pulse Bar Pulse Bar...
User Manual
Page 32
... order replacement parts, please see the PART LIST and the EXPLODED DRAWING near the end of this manual) LIMITED WARRANTY IMPORTANT: You must be voided if the product is used , or if the product is in -home service, the customer will be responsible for which warranty claims are not followed, if the product is abused or improperly or abnormally used as a store display model...
... order replacement parts, please see the PART LIST and the EXPLODED DRAWING near the end of this manual) LIMITED WARRANTY IMPORTANT: You must be voided if the product is used , or if the product is in -home service, the customer will be responsible for which warranty claims are not followed, if the product is abused or improperly or abnormally used as a store display model...


