
English Manual
Page 2
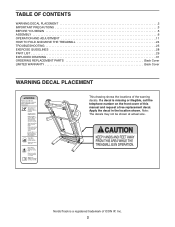
... IMPORTANT PRECAUTIONS 3 BEFORE YOU BEGIN 5 ASSEMBLY 6 OPERATION AND ADJUSTMENT 11 HOW TO FOLD AND MOVE THE TREADMILL 24 TROUBLESHOOTING 25 EXERCISE GUIDELINES 28 PART LIST 29 EXPLODED DRAWING 31 ORDERING REPLACEMENT PARTS Back Cover LIMITED WARRANTY Back Cover ...WARNING DECAL PLACEMENT This drawing shows the locations of ICON IP, Inc. 2 Apply the decal in the location shown. Note: The decals may not be shown at actual size. NordicTrack...
... IMPORTANT PRECAUTIONS 3 BEFORE YOU BEGIN 5 ASSEMBLY 6 OPERATION AND ADJUSTMENT 11 HOW TO FOLD AND MOVE THE TREADMILL 24 TROUBLESHOOTING 25 EXERCISE GUIDELINES 28 PART LIST 29 EXPLODED DRAWING 31 ORDERING REPLACEMENT PARTS Back Cover LIMITED WARRANTY Back Cover ...WARNING DECAL PLACEMENT This drawing shows the locations of ICON IP, Inc. 2 Apply the decal in the location shown. Note: The decals may not be shown at actual size. NordicTrack...

English Manual
Page 3
...floor or carpet from damage, place a mat under age 12 and pets away from the treadmill at all warnings on your treadmill before using your local NordicTrack dealer or call the telephone number on the treadmill at least 8 ft. (2.4 m) of clearance behind it and 2 ft. (0.6 m) ...covered patio, or near water. 5. Do not use the treadmill with pre-existing health problems. 2. Wear appropriate exercise clothes when using the treadmill. 3 Failure to use of the treadmill. It is not working properly. (See TROUBLESHOOTING on the same circuit. Always hold the handrails while using ...
...floor or carpet from damage, place a mat under age 12 and pets away from the treadmill at all warnings on your treadmill before using your local NordicTrack dealer or call the telephone number on the treadmill at least 8 ft. (2.4 m) of clearance behind it and 2 ft. (0.6 m) ...covered patio, or near water. 5. Do not use the treadmill with pre-existing health problems. 2. Wear appropriate exercise clothes when using the treadmill. 3 Failure to use of the treadmill. It is not working properly. (See TROUBLESHOOTING on the same circuit. Always hold the handrails while using ...
English Manual
Page 25
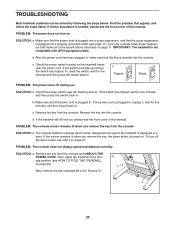
... to be solved by following the steps below. If the screen remains lit when you remove the key from the console. Then, place the treadmill in a store. b. If the switch has tripped, wait for five minutes and then press the switch back in . Check the power switch... located on page 21. To turn on page 11. Next, remove the two indicated #8 x 3/4" Screws (1). TROUBLESHOOTING Most treadmill problems can be used if the treadmill is displayed in the storage position (see page 11). b. If further assistance is needed, please see step 4 on the...
... to be solved by following the steps below. If the screen remains lit when you remove the key from the console. Then, place the treadmill in a store. b. If the switch has tripped, wait for five minutes and then press the switch back in . Check the power switch... located on page 21. To turn on page 11. Next, remove the two indicated #8 x 3/4" Screws (1). TROUBLESHOOTING Most treadmill problems can be used if the treadmill is displayed in the storage position (see page 11). b. If further assistance is needed, please see step 4 on the...
