User Guide
Page 4
... 1. Messaging 23 Write and send a text message 23 Write and send a multimedia message.... 23 Read and reply to a message 23 Nokia Xpress audio messaging 24 Flash messages 24 E-mail application 24 Instant messaging 25 Voice messages 25 Video messages 26 Info messages 26 Service commands ... dialling 20 Voice dialling 20 Options during a call 21 Make a video call 21 3. Settings 30 Profiles 30 Themes 31 Tones 31 Lights 31 Display 31 Date and time 32 My shortcuts 32 Sync and backup 32 Connectivity 33 Call 34 Phone 35 Enhancements 36 Configuration 36 Security 36 Restore...
... 1. Messaging 23 Write and send a text message 23 Write and send a multimedia message.... 23 Read and reply to a message 23 Nokia Xpress audio messaging 24 Flash messages 24 E-mail application 24 Instant messaging 25 Voice messages 25 Video messages 26 Info messages 26 Service commands ... dialling 20 Voice dialling 20 Options during a call 21 Make a video call 21 3. Settings 30 Profiles 30 Themes 31 Tones 31 Lights 31 Display 31 Date and time 32 My shortcuts 32 Sync and backup 32 Connectivity 33 Call 34 Phone 35 Enhancements 36 Configuration 36 Security 36 Restore...
User Guide
Page 7
...incoming call , scroll up or down. Q: How do to a Nokia Care point Q: What can 't I find a Bluetooth compatible device? Bluetooth connectivity Q: Why can I do I change the ringing tone? A: With the fold closed , double tap the secondary display. A: Try the following : • Check that both devices are... or other obstructions between the devices. • Check that the other device is not in your local Nokia website. A: With the fold closed , double tap the secondary display. A: Select Menu > Settings > Tones. General information 7 To save all personal data in the hidden...
...incoming call , scroll up or down. Q: How do to a Nokia Care point Q: What can 't I find a Bluetooth compatible device? Bluetooth connectivity Q: Why can I do I change the ringing tone? A: With the fold closed , double tap the secondary display. A: Try the following : • Check that both devices are... or other obstructions between the devices. • Check that the other device is not in your local Nokia website. A: With the fold closed , double tap the secondary display. A: Select Menu > Settings > Tones. General information 7 To save all personal data in the hidden...
User Guide
Page 14
... the fold manually. Connect the charger to force the fold open more. The fold swings open (2) to function properly. ■ Switch the phone on the display or before removing the battery. Keep the magnet and anchor plate clean for a PIN or a UPIN code, enter the code...
... the fold manually. Connect the charger to force the fold open more. The fold swings open (2) to function properly. ■ Switch the phone on the display or before removing the battery. Keep the magnet and anchor plate clean for a PIN or a UPIN code, enter the code...
User Guide
Page 15
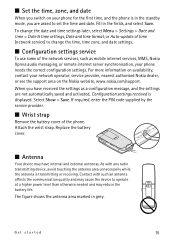
...you are not automatically saved and activated, Configuration settings received is displayed. Attach the wrist strap. Replace the battery cover. ■ Antenna Your device may have received the settings as mobile internet services, MMS, Nokia Xpress audio messaging, or remote internet server synchronisation, your phone...with such an antenna affects the communication quality and may reduce the battery life. For more information on the Nokia website, www.nokia.com/support. ■ Set the time, zone, and date When you switch on your network operator, service provider, ...
...you are not automatically saved and activated, Configuration settings received is displayed. Attach the wrist strap. Replace the battery cover. ■ Antenna Your device may have received the settings as mobile internet services, MMS, Nokia Xpress audio messaging, or remote internet server synchronisation, your phone...with such an antenna affects the communication quality and may reduce the battery life. For more information on the Nokia website, www.nokia.com/support. ■ Set the time, zone, and date When you switch on your network operator, service provider, ...
User Guide
Page 16
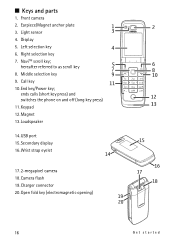
Display 5. Left selection key 6. Front camera 2. Middle selection key 9. Call key 10.End key/Power key; Earpiece/Magnet anchor plate 3. Light sensor 4. NaviTM scroll key; ends calls (short key press) and switches the phone on and off (long key press) 11.Keypad 12.Magnet 13.Loudspeaker 14.USB port 15.Secondary display 16.Wrist strap eyelet 17.2-megapixel camera 18.Camera flash 19.Charger connector 20.Open fold key (electromagnetic opening) 16 Get started Right selection key 7. hereafter referred to as scroll key 8. ■ Keys and parts 1.
Display 5. Left selection key 6. Front camera 2. Middle selection key 9. Call key 10.End key/Power key; Earpiece/Magnet anchor plate 3. Light sensor 4. NaviTM scroll key; ends calls (short key press) and switches the phone on and off (long key press) 11.Keypad 12.Magnet 13.Loudspeaker 14.USB port 15.Secondary display 16.Wrist strap eyelet 17.2-megapixel camera 18.Camera flash 19.Charger connector 20.Open fold key (electromagnetic opening) 16 Get started Right selection key 7. hereafter referred to as scroll key 8. ■ Keys and parts 1.
User Guide
Page 17
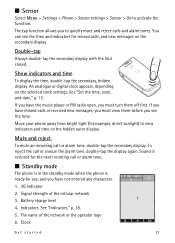
... new messages, you must turn them before you to quickly mute and reject calls and alarm tones. Show indicators and time To display the time, double-tap the secondary, hidden display. Sound is restored for the next incoming call or alarm tone. ■ Standby mode The phone is in the standby mode... Get started 17 The name of the cellular network 3. Mute and reject To mute an incoming call or snooze the alarm tone, double-tap the display again. The tap function allows you see the time and indicators for use, and you must view them off first. If you have not entered...
... new messages, you must turn them before you to quickly mute and reject calls and alarm tones. Show indicators and time To display the time, double-tap the secondary, hidden display. Sound is restored for the next incoming call or alarm tone. ■ Standby mode The phone is in the standby mode... Get started 17 The name of the cellular network 3. Mute and reject To mute an incoming call or snooze the alarm tone, double-tap the display again. The tap function allows you see the time and indicators for use, and you must view them off first. If you have not entered...
User Guide
Page 18
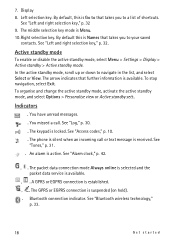
...to navigate in the list, and select Select or View. See "Access codes," p. 10. . Bluetooth connection indicator. See "Left and right selection key," p. 32. Display 8. By default this is received. Active standby mode To enable or disable the active standby mode, select Menu > Settings... > Display > Active standby > Active standby mode. Indicators . See "Log," p. 30. . See "Tones," p. 31. . The packet data connection mode Always online is selected and the ...
...to navigate in the list, and select Select or View. See "Access codes," p. 10. . Bluetooth connection indicator. See "Left and right selection key," p. 32. Display 8. By default this is received. Active standby mode To enable or disable the active standby mode, select Menu > Settings... > Display > Active standby > Active standby mode. Indicators . See "Log," p. 30. . See "Tones," p. 31. . The packet data connection mode Always online is selected and the ...
User Guide
Page 19
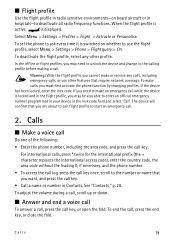
... that you are about to exit flight profile to use other profile. See "Contacts," p. 28. To set the phone to ask every time it is displayed. Calls 19 In the offline or flight profiles, you may be also able to the calling profile before making a call. Warning: With the flight profile...
... that you are about to exit flight profile to use other profile. See "Contacts," p. 28. To set the phone to ask every time it is displayed. Calls 19 In the offline or flight profiles, you may be also able to the calling profile before making a call. Warning: With the flight profile...
User Guide
Page 20
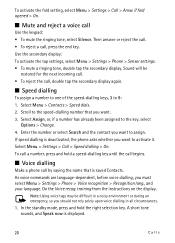
... not rely solely upon voice dialling in all circumstances. 1. training from the instructions on the display. Select Assign, or, if a number has already been assigned to 9: 1. To call , double tap the secondary display again. ■ Speed dialling To assign a number to one of the speed-dialling keys,...8226; To reject the call a number, press and hold the right selection key. Select Menu > Contacts > Speed dials. 2. If speed dialling is displayed. 20 Calls Enter the number or select Search and the contact you want to activate it. Select Menu > Settings > Call > Speed dialling > On....
... not rely solely upon voice dialling in all circumstances. 1. training from the instructions on the display. Select Assign, or, if a number has already been assigned to 9: 1. To call , double tap the secondary display again. ■ Speed dialling To assign a number to one of the speed-dialling keys,...8226; To reject the call a number, press and hold the right selection key. Select Menu > Contacts > Speed dials. 2. If speed dialling is displayed. 20 Calls Enter the number or select Search and the contact you want to activate it. Select Menu > Settings > Call > Speed dialling > On....

User Guide
Page 22
...and . Start writing the next word. 22 Write text To change from the list. The characters available depend on a built-in the dictionary. The phone displays * or the letter if it . To display the most common punctuation marks and special characters, press 1. ■ Predictive text input Predictive text input is... displayed after the word, the word you can enter text using traditional text input, and select Save. Write text You can add new words. ...
...and . Start writing the next word. 22 Write text To change from the list. The characters available depend on a built-in the dictionary. The phone displays * or the letter if it . To display the most common punctuation marks and special characters, press 1. ■ Predictive text input Predictive text input is... displayed after the word, the word you can enter text using traditional text input, and select Save. Write text You can add new words. ...
User Guide
Page 23
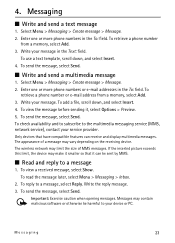
.... 4. To retrieve a phone number or e-mail address from a memory, select Add. 3. Write your message in the Text: field. Only devices that it can receive and display multimedia messages. Important: Exercise caution when opening messages. Messaging 23 Select Menu > Messaging > Create message > Message. 2. The wireless network may contain malicious software or otherwise...
.... 4. To retrieve a phone number or e-mail address from a memory, select Add. 3. Write your message in the Text: field. Only devices that it can receive and display multimedia messages. Important: Exercise caution when opening messages. Messaging 23 Select Menu > Messaging > Create message > Message. 2. The wireless network may contain malicious software or otherwise...
User Guide
Page 24
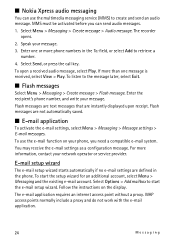
...the existing e-mail account. Follow the instructions on your message. The e-mail application requires an internet access point without a proxy. ■ Nokia Xpress audio messaging You can send audio messages. 1. MMS must be activated before you need a compatible e-mail system. To listen to retrieve...message. 3. Enter the recipient's phone number, and write your phone, you can use the e-mail function on the display. Flash messages are instantly displayed upon receipt. E-mail setup wizard The e-mail setup wizard starts automatically if no e-mail settings are defined in the...
...the existing e-mail account. Follow the instructions on your message. The e-mail application requires an internet access point without a proxy. ■ Nokia Xpress audio messaging You can send audio messages. 1. MMS must be activated before you need a compatible e-mail system. To listen to retrieve...message. 3. Enter the recipient's phone number, and write your phone, you can use the e-mail function on the display. Flash messages are instantly displayed upon receipt. E-mail setup wizard The e-mail setup wizard starts automatically if no e-mail settings are defined in the...
User Guide
Page 30
... memory, select Show > Save. to view the amount of free and used memory 6. to select how the names and numbers in contacts are displayed Name display - Settings ■ Profiles Select Menu > Settings > Profiles, the desired profile, and from the following options: Activate - When you want to... "Add contact details," p. 29. ■ Groups Select Menu > Contacts > Groups to select whether the contact's first or last name is displayed first Font size - Log To view the information on your service provider may vary, depending on network features, rounding off for the contact list ...
... memory, select Show > Save. to view the amount of free and used memory 6. to select how the names and numbers in contacts are displayed Name display - Settings ■ Profiles Select Menu > Settings > Profiles, the desired profile, and from the following options: Activate - When you want to... "Add contact details," p. 29. ■ Groups Select Menu > Contacts > Groups to select whether the contact's first or last name is displayed first Font size - Log To view the information on your service provider may vary, depending on network features, rounding off for the contact list ...
User Guide
Page 31
...and from the following options: Select theme - Standby mode settings Select Menu > Settings > Display and from the following options: Wallpaper - to be active for the standby mode Display brightness - to change the tone settings of the scroll key shortcuts in the standby mode ... can find the same settings in missed call and message notifications Settings 31 to customise the profile with different phone functions. ■ Display Display settings allow you select the highest ringing tone level, the ringing tone reaches its highest level after a few seconds. ■ Lights...
...and from the following options: Select theme - Standby mode settings Select Menu > Settings > Display and from the following options: Wallpaper - to be active for the standby mode Display brightness - to change the tone settings of the scroll key shortcuts in the standby mode ... can find the same settings in missed call and message notifications Settings 31 to customise the profile with different phone functions. ■ Display Display settings allow you select the highest ringing tone level, the ringing tone reaches its highest level after a few seconds. ■ Lights...

User Guide
Page 32
...of time (network service) to change the function assigned to the left selection key is Go to, to activate a function, select Go to display an animation and play a tone when you quick access to the scroll key, select Menu > Settings > My shortcuts > Navigation key. Transition... effects - to rearrange the functions Scroll key To assign other phone functions from the network operator depending on the display Fold animation - to add or remove a function Organise - Left and right selection key To change the clock type, time, time zone, and...
...of time (network service) to change the function assigned to the left selection key is Go to, to activate a function, select Go to display an animation and play a tone when you quick access to the scroll key, select Menu > Settings > My shortcuts > Navigation key. Transition... effects - to rearrange the functions Scroll key To assign other phone functions from the network operator depending on the display Fold animation - to add or remove a function Organise - Left and right selection key To change the clock type, time, time zone, and...
User Guide
Page 35
to the information on your phone number to briefly display the approximate duration and cost (network service) of the call after call . See "Call waiting," p. 21. To use both the UMTS and the GSM network. ... the USIM card language, select SIM language. Phone updates - The phone tries to show your phone Voice recognition - See "Speed dialling," p. 20. To set the display language of used and available phone memory Automatic keyguard - Security keyguard - You cannot access this option during an ongoing voice call - Settings 35 Answ. to...
to the information on your phone number to briefly display the approximate duration and cost (network service) of the call after call . See "Call waiting," p. 21. To use both the UMTS and the GSM network. ... the USIM card language, select SIM language. Phone updates - The phone tries to show your phone Voice recognition - See "Speed dialling," p. 20. To set the display language of used and available phone memory Automatic keyguard - Security keyguard - You cannot access this option during an ongoing voice call - Settings 35 Answ. to...
User Guide
Page 39
... clips with the built-in JPG format. 1. or, if the video function is on your service provider. ■ Print images Your phone supports Nokia XpressPrint to a compatible printer, use the same content on , scroll left or right. The phone saves the image to your phone to print images..., or to take it, select Options > Settings > Image preview time and the preview time. For more information, contact your device get corrupted. To display an image immediately after you can digitally zoom up to print and Options > Print. 10. or, if the camera function is on your device has...
... clips with the built-in JPG format. 1. or, if the video function is on your service provider. ■ Print images Your phone supports Nokia XpressPrint to a compatible printer, use the same content on , scroll left or right. The phone saves the image to your phone to print images..., or to take it, select Options > Settings > Image preview time and the preview time. For more information, contact your device get corrupted. To display an image immediately after you can digitally zoom up to print and Options > Print. 10. or, if the camera function is on your device has...

User Guide
Page 41
... current track, select and hold or . to the next track, select track, select . . change on , you want. ■ Radio The FM radio depends on the display, scroll left or right. To skip to select a saved station from the following: Stations - To save radio stations 1. Enter the name of a radio station Settings...
... current track, select and hold or . to the next track, select track, select . . change on , you want. ■ Radio The FM radio depends on the display, scroll left or right. To skip to select a saved station from the following: Stations - To save radio stations 1. Enter the name of a radio station Settings...

User Guide
Page 42
... time, and enter the alarm time. Stop the alarm The alarm sounds a tone even if the phone is set an alarm to repeat on the display, scroll left or right. To pause the recording, select . 2. To set , select On. Not all parties to store the recordings. ■ Equaliser Select Menu > Media...
... time, and enter the alarm time. Stop the alarm The alarm sounds a tone even if the phone is set an alarm to repeat on the display, scroll left or right. To pause the recording, select . 2. To set , select On. Not all parties to store the recordings. ■ Equaliser Select Menu > Media...

User Guide
Page 43
... select Auto-delete notes. otherwise, select Options > Add. To view the day notes, select View. Note alarm At the relevant time, the phone displays the note and sounds a tone, if you set for the snooze time-out, then resumes. ■ Calendar Select Menu > Organiser > Calendar. ...If you let the alarm sound for a minute or select Snooze, the alarm stops for the day, the day is displayed , to -do list. To synchronise your calendar from a PC, see "Connectivity," p. 33. Organiser 43 Make a calendar note Select Menu > Organiser > ...
... select Auto-delete notes. otherwise, select Options > Add. To view the day notes, select View. Note alarm At the relevant time, the phone displays the note and sounds a tone, if you set for the snooze time-out, then resumes. ■ Calendar Select Menu > Organiser > Calendar. ...If you let the alarm sound for a minute or select Snooze, the alarm stops for the day, the day is displayed , to -do list. To synchronise your calendar from a PC, see "Connectivity," p. 33. Organiser 43 Make a calendar note Select Menu > Organiser > ...


