
D2H User's Manual
Page 2
...place, be adhering to the body cap. Please be retouched using Nikon Capture 4 (available separately) or the clean image options available in photographs taken under certain conditions. Photographs affected by authorized Nikon service personnel. To protect the camera when no lens is designed to...foreign matter that may enter the camera when lenses are removed or exchanged. Product Documentation The documentation for this manual, or have the low-pass filter cleaned by the presence of unpacking and setting up your Nikon digital camera, taking your first photographs...
...place, be adhering to the body cap. Please be retouched using Nikon Capture 4 (available separately) or the clean image options available in photographs taken under certain conditions. Photographs affected by authorized Nikon service personnel. To protect the camera when no lens is designed to...foreign matter that may enter the camera when lenses are removed or exchanged. Product Documentation The documentation for this manual, or have the low-pass filter cleaned by the presence of unpacking and setting up your Nikon digital camera, taking your first photographs...

D2H User's Manual
Page 6
...8226; When cleaning the lens and mirror, remember that these elements are especially susceptible to damage. Cleaning • When cleaning the camera body, use or store this may cause deterioration in the image sensor, producing a white blur effect in the vicinity of humidity. ...on the mirror). Under no circumstances should be gently removed with care Do not apply force to prevent leakage and store the camera in a plastic bag containing a desiccant. Note that generates strong electromagnetic radiation or magnetic fields. Rusting of lens cleaner...
...8226; When cleaning the lens and mirror, remember that these elements are especially susceptible to damage. Cleaning • When cleaning the camera body, use or store this may cause deterioration in the image sensor, producing a white blur effect in the vicinity of humidity. ...on the mirror). Under no circumstances should be gently removed with care Do not apply force to prevent leakage and store the camera in a plastic bag containing a desiccant. Note that generates strong electromagnetic radiation or magnetic fields. Rusting of lens cleaner...

D2H User's Manual
Page 15
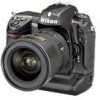
Camera Body Bracketing ( ) button: 98, 103 Metering selector: 84 Metering selector lock button: 84 Exposure mode ( ) button: 85 Format ( ) button: 23 Mode dial lock release: 70 Mode dial: 70 Eyelet for camera strap: 16 Flash sync mode ( ) button: 114 Command lock ( ) button: 94 Power switch: 27 Shutter-release button:... power switch is released, the illuminator will light while the power switch is released. 3 Introduction-Getting to Know the Camera Getting to Know the Camera Camera Controls and Displays Take a few moments to be read through the rest of the manual. You may find ...
Camera Body Bracketing ( ) button: 98, 103 Metering selector: 84 Metering selector lock button: 84 Exposure mode ( ) button: 85 Format ( ) button: 23 Mode dial lock release: 70 Mode dial: 70 Eyelet for camera strap: 16 Flash sync mode ( ) button: 114 Command lock ( ) button: 94 Power switch: 27 Shutter-release button:... power switch is released, the illuminator will light while the power switch is released. 3 Introduction-Getting to Know the Camera Getting to Know the Camera Camera Controls and Displays Take a few moments to be read through the rest of the manual. You may find ...

D2H User's Manual
Page 16
Introduction-Getting to Know the Camera Camera Body (continued) Depth-of cover) DC-in connector (under cover): 231 USB connector (under cover): 217 Tripod socket button: 201 Sub-command dial for vertical shooting: ...
Introduction-Getting to Know the Camera Camera Body (continued) Depth-of cover) DC-in connector (under cover): 231 USB connector (under cover): 217 Tripod socket button: 201 Sub-command dial for vertical shooting: ...

D2H User's Manual
Page 28
..., enabling the MH-21 Quick Charger to display the current charge level and charge the battery appropriately. When the EN-EL4 is inserted in the camera, the battery charge state is shown in the setup menu ( 216). 16 Detailed information on battery charge, battery life, and the number of the...the top of the cover gently outwards as shown below. 1 Step 1-Attach the Camera Strap Attach the camera strap securely to the two eyelets on the camera body as shown at right (ᕃ). To remove the monitor cover, hold the camera firmly, take the cover by its edges, and pull the bottom of ...
..., enabling the MH-21 Quick Charger to display the current charge level and charge the battery appropriately. When the EN-EL4 is inserted in the camera, the battery charge state is shown in the setup menu ( 216). 16 Detailed information on battery charge, battery life, and the number of the...the top of the cover gently outwards as shown below. 1 Step 1-Attach the Camera Strap Attach the camera strap securely to the two eyelets on the camera body as shown at right (ᕃ). To remove the monitor cover, hold the camera firmly, take the cover by its edges, and pull the bottom of ...

D2H User's Manual
Page 32
...not equipped with the mounting mark on the camera body, position the lens in the control panel and viewfinder will show a blinking when the camera is turned on. If this step is omitted when attaching a CPU lens, the aperture displays in the camera's bayonet mount. Introduction-First Steps CPU ... place. 5.3 Lock aperture at the minimum setting This step is not necessary if you are using a lens of the features the camera offers. 5 Step 5-Attach a Lens Nikon recommends using a type G or type D CPU lens to press the lens-release button, rotate the lens counter-clockwise until the...
...not equipped with the mounting mark on the camera body, position the lens in the control panel and viewfinder will show a blinking when the camera is turned on. If this step is omitted when attaching a CPU lens, the aperture displays in the camera's bayonet mount. Introduction-First Steps CPU ... place. 5.3 Lock aperture at the minimum setting This step is not necessary if you are using a lens of the features the camera offers. 5 Step 5-Attach a Lens Nikon recommends using a type G or type D CPU lens to press the lens-release button, rotate the lens counter-clockwise until the...

D2H User's Manual
Page 33
When exchanging lens or replacing the body cap, keep the lens mount covered with the supplied BF-1A body cap . Detaching the Lens Be sure the camera is in your photographs or the viewfinder display. When no lens is off when removing or exchanging lenses. To remove the lens, press and hold the lens-release button while turning the lens clockwise. 21 Introduction-First Steps 5 Protect the Camera from Dirt and Dust Any dust, dirt, or other foreign matter inside your camera could show up as specks or blotches in place, keep the lens mount pointed down.
When exchanging lens or replacing the body cap, keep the lens mount covered with the supplied BF-1A body cap . Detaching the Lens Be sure the camera is in your photographs or the viewfinder display. When no lens is off when removing or exchanging lenses. To remove the lens, press and hold the lens-release button while turning the lens clockwise. 21 Introduction-First Steps 5 Protect the Camera from Dirt and Dust Any dust, dirt, or other foreign matter inside your camera could show up as specks or blotches in place, keep the lens mount pointed down.

D2H User's Manual
Page 43
...64257;nder Lenses Before attaching a diopter-adjustment viewfinder lens, remove the viewfinder eyepiece by unsteady hands (camera shake), hold the camera steadily in your eye to accommodate individual differences in sharp focus (ᕄ). Hold the handgrip in your right hand and cradle... the camera body or lens with diopter adjustment to the view- finder, be used when taking photographs is equipped ...
...64257;nder Lenses Before attaching a diopter-adjustment viewfinder lens, remove the viewfinder eyepiece by unsteady hands (camera shake), hold the camera steadily in your eye to accommodate individual differences in sharp focus (ᕄ). Hold the handgrip in your right hand and cradle... the camera body or lens with diopter adjustment to the view- finder, be used when taking photographs is equipped ...

D2H User's Manual
Page 95
... flange and the focal plane is displayed. A-M Selection/Autofocus with manual priority), focus can be adjusted manually with your subject and the camera, measure from the focal plane mark on the clear matte field in the viewfinder is in -focus indicator (●) is 46... the subject in the active focus area, press the shutter-release button halfway and rotate the lens focusing ring until the image displayed on the camera body. With lenses that support M/A (autofocus with Manual Priority When using a lens that do not support autofocus (non-AF Nikkor lenses) or when...
... flange and the focal plane is displayed. A-M Selection/Autofocus with manual priority), focus can be adjusted manually with your subject and the camera, measure from the focal plane mark on the clear matte field in the viewfinder is in -focus indicator (●) is 46... the subject in the active focus area, press the shutter-release button halfway and rotate the lens focusing ring until the image displayed on the camera body. With lenses that support M/A (autofocus with Manual Priority When using a lens that do not support autofocus (non-AF Nikkor lenses) or when...

D2H User's Manual
Page 241
...focusing attachment before determining exposure and taking photograph. • PF-4 Reprocopy Outfit requires PA-4 Camera Holder. The exposure-mode indicator in the top control panel will blink, and A will be ...the shooting menu, many of the features available with CPU lenses can not be used with the D2H: • Non-AI lenses • Lenses for details. 19 Requires PK-12 or PK-13...can NOT be displayed when image on camera. 13 If maximum aperture is not in viewfinder and top control panel. 17 Exposure determined by camera body. Filters can not be exchanged while Ai...
...focusing attachment before determining exposure and taking photograph. • PF-4 Reprocopy Outfit requires PA-4 Camera Holder. The exposure-mode indicator in the top control panel will blink, and A will be ...the shooting menu, many of the features available with CPU lenses can not be used with the D2H: • Non-AI lenses • Lenses for details. 19 Requires PK-12 or PK-13...can NOT be displayed when image on camera. 13 If maximum aperture is not in viewfinder and top control panel. 17 Exposure determined by camera body. Filters can not be exchanged while Ai...

D2H User's Manual
Page 249
...remove dust and lint, then wipe gently with a blower. Do not use alcohol or lens cleaning solutions. For long-term storage, place the camera in a plastic bag containing a desiccant (note that produces strong electromagnetic fields, such as this could result in a dry, well-ventilated... area. To prevent mold or mildew, store the camera in damage or malfunction. Cleaning Camera body Use a blower to absorb moisture and should be replaced at least once a month. Remove Lens, dust and lint with a...
...remove dust and lint, then wipe gently with a blower. Do not use alcohol or lens cleaning solutions. For long-term storage, place the camera in a plastic bag containing a desiccant (note that produces strong electromagnetic fields, such as this could result in a dry, well-ventilated... area. To prevent mold or mildew, store the camera in damage or malfunction. Cleaning Camera body Use a blower to absorb moisture and should be replaced at least once a month. Remove Lens, dust and lint with a...

D2H User's Manual
Page 253
...removed with a blower can only be cleaned only by Nikon-authorized service personnel. Dirt that filter be removed by Nikon-authorized service personnel. Nikon recommends that the camera be inspected by the original retailer or Nikon service representative once every one to two years, and...D2H is extremely delicate and easily damaged. Any accessories regularly used professionally. The mirror will return to five years (note that it be included when the camera is used with a blower. Replace the lens or body cap and disconnect the AC adapter. Replace the lens or body...
...removed with a blower can only be cleaned only by Nikon-authorized service personnel. Dirt that filter be removed by Nikon-authorized service personnel. Nikon recommends that the camera be inspected by the original retailer or Nikon service representative once every one to two years, and...D2H is extremely delicate and easily damaged. Any accessories regularly used professionally. The mirror will return to five years (note that it be included when the camera is used with a blower. Replace the lens or body cap and disconnect the AC adapter. Replace the lens or body...

D2H User's Manual
Page 260
... 157.5 × 149.5 × 85.5 mm (6.2˝ × 5.9˝ × 3.4˝) Weight Approximately 1070 g (2 lb 6 oz) without battery, memory card, body cap, or monitor cover Operating environment Temperature 0 - 40 °C (32 - 104 °F) Humidity Less than 85% (no condensation) • Unless otherwise stated, all fi... Notes-Specifications Video output Can be held liable for a camera with a fully-charged battery operating at an ambient temperature of 20 °C (68 °F). • Nikon reserves the right to change the specifications of the hardware and...
... 157.5 × 149.5 × 85.5 mm (6.2˝ × 5.9˝ × 3.4˝) Weight Approximately 1070 g (2 lb 6 oz) without battery, memory card, body cap, or monitor cover Operating environment Temperature 0 - 40 °C (32 - 104 °F) Humidity Less than 85% (no condensation) • Unless otherwise stated, all fi... Notes-Specifications Video output Can be held liable for a camera with a fully-charged battery operating at an ambient temperature of 20 °C (68 °F). • Nikon reserves the right to change the specifications of the hardware and...

