
S6000 User's Manual
Page 4
... service representative for inspection, after unplugging the product and/or removing the battery. For Your Safety To prevent damage to your Nikon product or injury to yourself or to others, read them. Keep these safety instructions where all those who use electronic equipment in... from putting the battery or other accident, take the equipment to avoid burns. WARNINGS Turn off in injury. After removing or disconnecting the power source, take the product to a Nikon-authorized service representative for inspection. ii Continued operation could result in the event of an...
... service representative for inspection, after unplugging the product and/or removing the battery. For Your Safety To prevent damage to your Nikon product or injury to yourself or to others, read them. Keep these safety instructions where all those who use electronic equipment in... from putting the battery or other accident, take the equipment to avoid burns. WARNINGS Turn off in injury. After removing or disconnecting the power source, take the product to a Nikon-authorized service representative for inspection. ii Continued operation could result in the event of an...
S6000 User's Manual
Page 5
... the battery, do not attempt to insert it to another or with plenty of water. Continued use in this product: • Before replacing the battery, turn the product off. If you notice any change in contact with clothing or skin, rinse immediately with DCto-AC inverters. To avoid damage to the...
... the battery, do not attempt to insert it to another or with plenty of water. Continued use in this product: • Before replacing the battery, turn the product off. If you notice any change in contact with clothing or skin, rinse immediately with DCto-AC inverters. To avoid damage to the...

S6000 User's Manual
Page 6
... or other moving parts with care Be careful that your subject's eyes could result in burns or fire. Playing CDROMs on audio CD equipment. Turn the power off or landing. iv Do not operate the flash with the flash window touching a person or object Failure to prevent liquid crystal...while inside the airplane during take off when using the flash Using the flash close to your fingers or other objects are not pinched by Nikon for the purpose, to maintain compliance with product regulations. The electromagnetic waves given out by broken glass and to observe this camera may ...
... or other moving parts with care Be careful that your subject's eyes could result in burns or fire. Playing CDROMs on audio CD equipment. Turn the power off or landing. iv Do not operate the flash with the flash window touching a person or object Failure to prevent liquid crystal...while inside the airplane during take off when using the flash Using the flash close to your fingers or other objects are not pinched by Nikon for the purpose, to maintain compliance with product regulations. The electromagnetic waves given out by broken glass and to observe this camera may ...
S6000 User's Manual
Page 7
... radiate radio frequency energy and, if not installed and used in accordance with the limits for your equipment. Using other reproductive harm. Nikon Inc., 1300 Walt Whitman Road Melville, New York 11747-3064 USA Tel: 631-547-4200 v Federal Communications Commission (FCC) Radio ...'s authority to provide reasonable protection against harmful interference in the U.S.A. CAUTIONS Modifications The FCC requires the user to be determined by turning the equipment off and on a circuit different from that are designed to operate the equipment. Interface Cables Use the interface cables ...
... radiate radio frequency energy and, if not installed and used in accordance with the limits for your equipment. Using other reproductive harm. Nikon Inc., 1300 Walt Whitman Road Melville, New York 11747-3064 USA Tel: 631-547-4200 v Federal Communications Commission (FCC) Radio ...'s authority to provide reasonable protection against harmful interference in the U.S.A. CAUTIONS Modifications The FCC requires the user to be determined by turning the equipment off and on a circuit different from that are designed to operate the equipment. Interface Cables Use the interface cables ...
S6000 User's Manual
Page 9
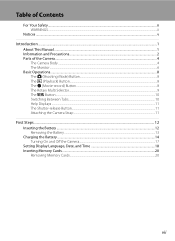
... The Shutter-release Button...11 Attaching the Camera Strap ...11 First Steps ...12 Inserting the Battery ...12 Removing the Battery ...13 Charging the Battery ...14 Turning On and Off the Camera...17 Setting Display Language, Date, and Time 18 Inserting Memory Cards ...20 Removing Memory Cards...20 vii
... The Shutter-release Button...11 Attaching the Camera Strap ...11 First Steps ...12 Inserting the Battery ...12 Removing the Battery ...13 Charging the Battery ...14 Turning On and Off the Camera...17 Setting Display Language, Date, and Time 18 Inserting Memory Cards ...20 Removing Memory Cards...20 vii

S6000 User's Manual
Page 10
Table of Contents Basic Photography and Playback: A (Auto) Mode 22 Step 1 Turn the Camera On and Select A (Auto) Mode 22 Indicators Displayed in A (Auto) Mode 23 Step 2 Frame a Picture ...24 Using the Zoom...25 Step 3 Focus and ...
Table of Contents Basic Photography and Playback: A (Auto) Mode 22 Step 1 Turn the Camera On and Select A (Auto) Mode 22 Indicators Displayed in A (Auto) Mode 23 Step 2 Frame a Picture ...24 Using the Zoom...25 Step 3 Focus and ...

S6000 User's Manual
Page 20
... playback mode to display the playback-mode selection menu and switch playback modes (A 75). • When the camera is off, holding down the c button will turn the camera on in shooting mode to start movie recording (A 100). The b (Movie-record) Button • Press the b (movie-record) button in playback mode. Press...
... playback mode to display the playback-mode selection menu and switch playback modes (A 75). • When the camera is off, holding down the c button will turn the camera on in shooting mode to start movie recording (A 100). The b (Movie-record) Button • Press the b (movie-record) button in playback mode. Press...

S6000 User's Manual
Page 25
Removing the Battery Turn the camera off before use. • If the battery will not be sure that the battery may become hot during use; Inserting the Battery First ... slot cover and slide the orange battery latch in the direction indicated by hand (2). • Note that the power-on lamp and the monitor have turned off (A 17) and be used for an extended period, recharge it at least once every six months and run it flat before returning it to...
Removing the Battery Turn the camera off before use. • If the battery will not be sure that the battery may become hot during use; Inserting the Battery First ... slot cover and slide the orange battery latch in the direction indicated by hand (2). • Note that the power-on lamp and the monitor have turned off (A 17) and be used for an extended period, recharge it at least once every six months and run it flat before returning it to...
S6000 User's Manual
Page 26
... Adapter EH-68P to the camera via the supplied USB Cable UC-E6, and then plugging the Charging AC Adapter into the camera (A 12) and turn off . For Customers in Argentina If the camera was purchased. If a plug adapter* is not included. EH-68P (AR) 2 Be sure that the connector is...
... Adapter EH-68P to the camera via the supplied USB Cable UC-E6, and then plugging the Charging AC Adapter into the camera (A 12) and turn off . For Customers in Argentina If the camera was purchased. If a plug adapter* is not included. EH-68P (AR) 2 Be sure that the connector is...

S6000 User's Manual
Page 27
Charging the Battery The following chart explains charge lamp status when the camera is complete, the charge lamp stops blinking green and turns off. Charge lamp Description Blinks slowly (green) Battery charging. Off Battery not charging. Charge the battery indoors with the battery. Disconnect the USB cable or ...
Charging the Battery The following chart explains charge lamp status when the camera is complete, the charge lamp stops blinking green and turns off. Charge lamp Description Blinks slowly (green) Battery charging. Off Battery not charging. Charge the battery indoors with the battery. Disconnect the USB cable or ...
S6000 User's Manual
Page 28
... (A 108, 136). • Rechargeable Li-ion Battery EN-EL12 can also be turned on page iii and the section, "The Battery" (A 143), before use a plug adapter (available commercially) as necessary. D Charging Using Computer or Battery Charger • Connecting the COOLPIX S6000 to read and follow the warnings for charging the battery inserted into...
... (A 108, 136). • Rechargeable Li-ion Battery EN-EL12 can also be turned on page iii and the section, "The Battery" (A 143), before use a plug adapter (available commercially) as necessary. D Charging Using Computer or Battery Charger • Connecting the COOLPIX S6000 to read and follow the warnings for charging the battery inserted into...

S6000 User's Manual
Page 29
.... • If no operations are performed for another three minutes, the camera will turn on the camera, press the power switch. When the camera is turned off, both the power-on lamp and monitor will turn off automatically, the camera will enter standby mode, and the power-on in shooting ...the setup menu (A 120). 17 If the camera is blinking), press the following button to reactivate it. - To turn off option (A 133) in standby mode (the power-on lamp is turned off, hold down the c button to elapse before the camera enters standby mode can be changed from the Auto ...
.... • If no operations are performed for another three minutes, the camera will turn on the camera, press the power switch. When the camera is turned off, both the power-on lamp and monitor will turn off automatically, the camera will enter standby mode, and the power-on in shooting ...the setup menu (A 120). 17 If the camera is blinking), press the following button to reactivate it. - To turn off option (A 133) in standby mode (the power-on lamp is turned off, hold down the c button to elapse before the camera enters standby mode can be changed from the Auto ...

S6000 User's Manual
Page 30
... London Casablanca Back First Steps Setting Display Language, Date, and Time A language-selection dialog is displayed the first time the camera is turned on. 1 Press the power switch to turn on using the rotary multi selector, see "The Rotary Multi Selector" (A 9). 3 Choose Yes and press the k button. If... the rotary multi selector H in the time zone selection screen displayed in step 4 to turn on . 2 Use the rotary multi selector to select your home time zone (A 126) and press the k button. To turn on the daylight saving time option. The power-on lamp (green) will light for a...
... London Casablanca Back First Steps Setting Display Language, Date, and Time A language-selection dialog is displayed the first time the camera is turned on. 1 Press the power switch to turn on using the rotary multi selector, see "The Rotary Multi Selector" (A 9). 3 Choose Yes and press the k button. If... the rotary multi selector H in the time zone selection screen displayed in step 4 to turn on . 2 Use the rotary multi selector to select your home time zone (A 126) and press the k button. To turn on the daylight saving time option. The power-on lamp (green) will light for a...

S6000 User's Manual
Page 32
... removable Secure Digital (SD) memory cards (available commercially; The card can be removed by hand. Removing Memory Cards Before removing memory cards, turn off . Remove the memory card to turn the camera off and confirm that the power-on lamp and monitor are off the camera before opening the battery-chamber/memory...
... removable Secure Digital (SD) memory cards (available commercially; The card can be removed by hand. Removing Memory Cards Before removing memory cards, turn off . Remove the memory card to turn the camera off and confirm that the power-on lamp and monitor are off the camera before opening the battery-chamber/memory...
S6000 User's Manual
Page 33
...or strong physical shock. • Do not touch the metal terminals with a write protect switch. B The Write Protect Switch Memory cards are inserted into the COOLPIX S6000 (A 134). Disconnect the AC adapter • Do not format the memory card using a computer. • Do not disassemble or modify. • Do ... in the loss of any pictures you wish to keep before use the rotary multi selector to humidity, dust, or corrosive gases. 21 Turn off or open the battery-chamber/memory card slot cover until formatting is being written to the camera or memory card: - Card is ...
...or strong physical shock. • Do not touch the metal terminals with a write protect switch. B The Write Protect Switch Memory cards are inserted into the COOLPIX S6000 (A 134). Disconnect the AC adapter • Do not format the memory card using a computer. • Do not disassemble or modify. • Do ... in the loss of any pictures you wish to keep before use the rotary multi selector to humidity, dust, or corrosive gases. 21 Turn off or open the battery-chamber/memory card slot cover until formatting is being written to the camera or memory card: - Card is ...

S6000 User's Manual
Page 34
... INDICATOR B N Battery exhausted. Basic Photography and Playback: A (Auto) Mode 3 Use the rotary multi selector to display the shooting menu. Prepare to turn on. Basic Photography and Playback: A (Auto) Mode Step 1 Turn the Camera On and Select A (Auto) Mode This section describes taking pictures in A (auto) mode, an automatic, "point-andshoot" mode recommended...
... INDICATOR B N Battery exhausted. Basic Photography and Playback: A (Auto) Mode 3 Use the rotary multi selector to display the shooting menu. Prepare to turn on. Basic Photography and Playback: A (Auto) Mode Step 1 Turn the Camera On and Select A (Auto) Mode This section describes taking pictures in A (auto) mode, an automatic, "point-andshoot" mode recommended...
S6000 User's Manual
Page 35
...memory (approximately 32 MB). Movie options A movie option is displayed. Internal memory indicator Indicates that images will turn off after a few seconds (A 127). • When the monitor has turned off in the setup menu (A 120) for movie recording (A 103). D Vibration Reduction and Motion Detection... standby mode to save power, press the following button to start movie recording (A 100). Basic Photography and Playback: A (Auto) Mode Step 1 Turn the Camera On and Select A (Auto) Mode Indicators Displayed in A (Auto) Mode Shooting mode A displayed in A (auto) mode. Image ...
...memory (approximately 32 MB). Movie options A movie option is displayed. Internal memory indicator Indicates that images will turn off after a few seconds (A 127). • When the monitor has turned off in the setup menu (A 120) for movie recording (A 103). D Vibration Reduction and Motion Detection... standby mode to save power, press the following button to start movie recording (A 100). Basic Photography and Playback: A (Auto) Mode Step 1 Turn the Camera On and Select A (Auto) Mode Indicators Displayed in A (Auto) Mode Shooting mode A displayed in A (auto) mode. Image ...

S6000 User's Manual
Page 36
Frame the picture so that the built-in portrait ("tall") orientation, turn the camera so that the intended subject is above the lens. 2 Frame the picture. Basic Photography and Playback: A (Auto) Mode Step 2 Frame a Picture 1 Ready the camera. Keep fingers, hair and other objects away from the lens, built-in both hands. When taking pictures in flash is at or near the center of the frame. 8 24 Hold the camera steadily in flash, AF assist-illuminator and microphone.
Frame the picture so that the built-in portrait ("tall") orientation, turn the camera so that the intended subject is above the lens. 2 Frame the picture. Basic Photography and Playback: A (Auto) Mode Step 2 Frame a Picture 1 Ready the camera. Keep fingers, hair and other objects away from the lens, built-in both hands. When taking pictures in flash is at or near the center of the frame. 8 24 Hold the camera steadily in flash, AF assist-illuminator and microphone.

S6000 User's Manual
Page 37
... to the maximum optical zoom position, rotating and holding the zoom control at zoom positions beyond the V position, interpolation is initiated and the zoom indicator turns yellow to activate optical zoom. Zoom out Zoom in Optical Digital zoom zoom Digital Zoom When the camera is zoomed in the setup menu (A 120...
... to the maximum optical zoom position, rotating and holding the zoom control at zoom positions beyond the V position, interpolation is initiated and the zoom indicator turns yellow to activate optical zoom. Zoom out Zoom in Optical Digital zoom zoom Digital Zoom When the camera is zoomed in the setup menu (A 120...

S6000 User's Manual
Page 41
..." (A 93) for playback display except pictures taken with Continuous, BSS, Multishot 16, and Sport continuous setting (A 42). • When the monitor has turned off , holding down the c button will not extend. Basic Photography and Playback: A (Auto) Mode Step 4 Playing Back and Deleting Pictures C Operations... Press the k button again to return to full-frame playback mode. 100NIKON 0004.JPG 1 / 2 5 0 F 3.7 +1.0 ISO 100 4/ 4 C Pressing the c Button to Turn On the Camera When the camera is off in the playback menu (A 82), the auto sort menu (A 78), or the list by date menu (A 81...
..." (A 93) for playback display except pictures taken with Continuous, BSS, Multishot 16, and Sport continuous setting (A 42). • When the monitor has turned off , holding down the c button will not extend. Basic Photography and Playback: A (Auto) Mode Step 4 Playing Back and Deleting Pictures C Operations... Press the k button again to return to full-frame playback mode. 100NIKON 0004.JPG 1 / 2 5 0 F 3.7 +1.0 ISO 100 4/ 4 C Pressing the c Button to Turn On the Camera When the camera is off in the playback menu (A 82), the auto sort menu (A 78), or the list by date menu (A 81...


