Reference Manual
Page 15
... Time 18 Step 1 Turn the Camera On 22 Turning the Camera On and Off 23 Step 2 Select a Shooting Mode 24 Available Shooting Modes 25 Step 3 Frame a Picture 26 Using the Zoom 27 Step 4 Focus and Shoot 28 The Shutter-release Button 29 Step 5 Play Back Images 30 Step 6 Delete Images 32...
... Time 18 Step 1 Turn the Camera On 22 Turning the Camera On and Off 23 Step 2 Select a Shooting Mode 24 Available Shooting Modes 25 Step 3 Frame a Picture 26 Using the Zoom 27 Step 4 Focus and Shoot 28 The Shutter-release Button 29 Step 5 Play Back Images 30 Step 6 Delete Images 32...

Reference Manual
Page 31
The Basics of Shooting and Playback The Basics of Shooting and Playback Preparation Preparation 1 Insert the Batteries 14 Preparation 2 Insert a Memory Card 16 Preparation 3 Set the Display Language, Date, and Time 18 Shooting Step 1 Turn the Camera On 22 Step 2 Select a Shooting Mode 24 Step 3 Frame a Picture ...26 Step 4 Focus and Shoot...28 Playback Step 5 Play Back Images ...30 Step 6 Delete Images...32 13
The Basics of Shooting and Playback The Basics of Shooting and Playback Preparation Preparation 1 Insert the Batteries 14 Preparation 2 Insert a Memory Card 16 Preparation 3 Set the Display Language, Date, and Time 18 Shooting Step 1 Turn the Camera On 22 Step 2 Select a Shooting Mode 24 Step 3 Frame a Picture ...26 Step 4 Focus and Shoot...28 Playback Step 5 Play Back Images ...30 Step 6 Delete Images...32 13

Reference Manual
Page 43
... an effect, first display the shooting-mode selection menu and then press the multi selector K. F Smart portrait (A 48) When the camera detects a smiling face, you frame a picture. Available Shooting Modes G Easy auto mode (A 36) The camera automatically selects the optimum scene mode when you can take .
... an effect, first display the shooting-mode selection menu and then press the multi selector K. F Smart portrait (A 48) When the camera detects a smiling face, you frame a picture. Available Shooting Modes G Easy auto mode (A 36) The camera automatically selects the optimum scene mode when you can take .

Reference Manual
Page 44
Shooting mode icon 29m 0s 860 26 Step 3 Frame a Picture 1 Hold the camera steady. • Keep fingers, hair, the camera strap, and other objects away from the lens, flash, AF-assist illuminator, and microphone. The Basics of Shooting and Playback 2 Frame the picture. • Aim the camera at the desired subject. • When the camera determines the scene mode, the shooting mode icon changes (A 36).
Shooting mode icon 29m 0s 860 26 Step 3 Frame a Picture 1 Hold the camera steady. • Keep fingers, hair, the camera strap, and other objects away from the lens, flash, AF-assist illuminator, and microphone. The Basics of Shooting and Playback 2 Frame the picture. • Aim the camera at the desired subject. • When the camera determines the scene mode, the shooting mode icon changes (A 36).

Reference Manual
Page 46
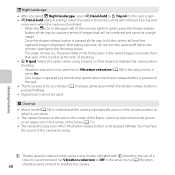
... green. • When no faces are using digital zoom, the camera focuses on the subject in the center of the frame and the focus area is not displayed. The Basics of the frame. When the camera has focused, the focus area glows green. 1 / 2 5 0 F 3.3 1 / 2 5 0 F 3.3 • When you are detected: ...The camera focuses on the face framed by the yellow double border (focus area). This indicates that the camera is pressed halfway, the focus area or focus indicator may flash in the ...
... green. • When no faces are using digital zoom, the camera focuses on the subject in the center of the frame and the focus area is not displayed. The Basics of the frame. When the camera has focused, the focus area glows green. 1 / 2 5 0 F 3.3 1 / 2 5 0 F 3.3 • When you are detected: ...The camera focuses on the face framed by the yellow double border (focus area). This indicates that the camera is pressed halfway, the focus area or focus indicator may flash in the ...

Reference Manual
Page 48
JPG 4/ 4 Current image number/ total number of images The Basics of images. • To return to play back images saved in full-frame playback mode. 2 Use the multi selector to select an image to display. • Display the previous image: H or J • Display the next image: I or K c (playback) ...
JPG 4/ 4 Current image number/ total number of images The Basics of images. • To return to play back images saved in full-frame playback mode. 2 Use the multi selector to select an image to display. • Display the previous image: H or J • Display the next image: I or K c (playback) ...

Reference Manual
Page 51
... deleted, and then press H to display y. • To undo the selection, press I to remove y. • Rotate the zoom control (A 2) to g (i) to switch back to full-frame playback or f (h) to confirm the selection. • A confirmation dialog is displayed.
... deleted, and then press H to display y. • To undo the selection, press I to remove y. • Rotate the zoom control (A 2) to g (i) to switch back to full-frame playback or f (h) to confirm the selection. • A confirmation dialog is displayed.

Reference Manual
Page 54
... features. ➝ "Features That Can Be Set Using the Multi Selector" (A 52), "Default Settings" (A 61) • Features that can be set by the camera, you frame a picture. Enter shooting mode M A (shooting mode) button M G (easy auto) mode M k button Automatic Scene Selection The camera automatically selects one of the following scenes when you...
... features. ➝ "Features That Can Be Set Using the Multi Selector" (A 52), "Default Settings" (A 61) • Features that can be set by the camera, you frame a picture. Enter shooting mode M A (shooting mode) button M G (easy auto) mode M k button Automatic Scene Selection The camera automatically selects one of the following scenes when you...

Reference Manual
Page 56
... not pressed halfway. O: Shutter speed is pressed halfway. d Sports • The camera focuses on the subject in each series. • The frame rate with continuous shooting may hear the sound of the frame. • Digital zoom cannot be used , or shooting condition. Set Vibration reduction to Off in the center of the... frame. • If you continue to hold the shutter-release button all the way down, up to about 4 images are detected, the camera focuses on the ...
... not pressed halfway. O: Shutter speed is pressed halfway. d Sports • The camera focuses on the subject in each series. • The frame rate with continuous shooting may hear the sound of the frame. • Digital zoom cannot be used , or shooting condition. Set Vibration reduction to Off in the center of the... frame. • If you continue to hold the shutter-release button all the way down, up to about 4 images are detected, the camera focuses on the ...

Reference Manual
Page 57
Z Beach • The camera focuses on the area in the center of the frame. • As images are detected, the camera focuses on the area in the center of the frame. i Dusk/dawn O • The focus area or focus indicator (A 9) always glows green when the shutter-release button...the camera. h Sunset O • The camera focuses on the area in the center of the frame. • Digital zoom cannot be used. Set Vibration reduction to Off in the center of the frame. e Night portrait O • The flash always fires. Shooting Features 39 Raise the flash before shooting...
Z Beach • The camera focuses on the area in the center of the frame. • As images are detected, the camera focuses on the area in the center of the frame. i Dusk/dawn O • The focus area or focus indicator (A 9) always glows green when the shutter-release button...the camera. h Sunset O • The camera focuses on the area in the center of the frame. • Digital zoom cannot be used. Set Vibration reduction to Off in the center of the frame. e Night portrait O • The flash always fires. Shooting Features 39 Raise the flash before shooting...
Reference Manual
Page 58
... the monitor at the time of shooting. • Z Tripod: Select this option to produce shots with O; You may hear the sound of the frame (A 71). • The camera focuses even when the shutter-release button is not pressed halfway. Once the shutter-release button is set to capture ... . - After taking a picture, do not turn the camera off before the monitor switches to stabilize the camera when shooting. - The angle of the frame. Set Vibration reduction to Off in the setup menu is pressed all the way to On. - Shooting Features O: Shutter speed is reduced when using a tripod...
... the monitor at the time of shooting. • Z Tripod: Select this option to produce shots with O; You may hear the sound of the frame (A 71). • The camera focuses even when the shutter-release button is not pressed halfway. Once the shutter-release button is set to capture ... . - After taking a picture, do not turn the camera off before the monitor switches to stabilize the camera when shooting. - The angle of the frame. Set Vibration reduction to Off in the setup menu is pressed all the way to On. - Shooting Features O: Shutter speed is reduced when using a tripod...

Reference Manual
Page 59
... camera focuses on the right. Shooting Features n Black and white copy • The camera focuses on the area in the center of up to frame the picture on the area in the center of the camera 860 focusing. Use focus lock to 10 images while the shutter-release button is... the multi selector H or I. m Fireworks show O • Shutter speed is automatically selected and saved (best shot selector). You may hear the sound of the frame (A 71). 29m 0s • The camera focuses even when the shutter-release button is turned off. • The camera focuses on an object not in...
... camera focuses on the right. Shooting Features n Black and white copy • The camera focuses on the area in the center of up to frame the picture on the area in the center of the camera 860 focusing. Use focus lock to 10 images while the shutter-release button is... the multi selector H or I. m Fireworks show O • Shutter speed is automatically selected and saved (best shot selector). You may hear the sound of the frame (A 71). 29m 0s • The camera focuses even when the shutter-release button is turned off. • The camera focuses on an object not in...

Reference Manual
Page 60
Shooting automatically ends when the camera captures the specified shooting range. • The camera focuses on the area in the center of the frame when shooting starts. • The zoom position is displayed in fullframe playback mode, the image scrolls automatically. ➝ "Using Easy Panorama (...on the printer's settings. p Easy panorama • You can take a panorama picture simply by moving the camera in the center of the frame. Raise the flash before shooting. • The camera focuses on the printer. 42 See the documentation provided with the printer or consult a digital...
Shooting automatically ends when the camera captures the specified shooting range. • The camera focuses on the area in the center of the frame when shooting starts. • The zoom position is displayed in fullframe playback mode, the image scrolls automatically. ➝ "Using Easy Panorama (...on the printer's settings. p Easy panorama • You can take a panorama picture simply by moving the camera in the center of the frame. Raise the flash before shooting. • The camera focuses on the printer. 42 See the documentation provided with the printer or consult a digital...

Reference Manual
Page 61
...release the shutter automatically, even if a pet's face is full. If the camera detects a person's face and a pet's face in the center of the frame. 29m 0s 860 B Notes About Pet Portrait • Digital zoom cannot be used. • Depending on the distance of the subject from the camera, ... shooting with Pet portrait auto release, press the multi selector J (n) to set to shoot manually, the camera captures about 1.9 fps (when Image mode is framed by a double border and the others by a border. 43 O Pet portrait • When you aim the camera at the face of a dog or cat...
...release the shutter automatically, even if a pet's face is full. If the camera detects a person's face and a pet's face in the center of the frame. 29m 0s 860 B Notes About Pet Portrait • Digital zoom cannot be used. • Depending on the distance of the subject from the camera, ... shooting with Pet portrait auto release, press the multi selector J (n) to set to shoot manually, the camera captures about 1.9 fps (when Image mode is framed by a double border and the others by a border. 43 O Pet portrait • When you aim the camera at the face of a dog or cat...

Reference Manual
Page 62
... second image when it detects that the subject is aligned with the guide. • The camera focuses on the area in the center of the frame for each eye to simulate a 3D image on a 3D-compatible TV or monitor. • After taking the first picture by pressing the shutter-release button... cancels the shooting even when you align the guide with the guide on the monitor. • The angle of view (i.e., the area visible in the frame) seen in the Guide saved image is narrower than that seen in the monitor at the time of shooting. • Images captured in this mode...
... second image when it detects that the subject is aligned with the guide. • The camera focuses on the area in the center of the frame for each eye to simulate a 3D image on a 3D-compatible TV or monitor. • After taking the first picture by pressing the shutter-release button... cancels the shooting even when you align the guide with the guide on the monitor. • The angle of view (i.e., the area visible in the frame) seen in the Guide saved image is narrower than that seen in the monitor at the time of shooting. • Images captured in this mode...

Reference Manual
Page 64
... of the following four effects are available. Softens the image by adding a slight blur to cancel color selection, then change settings for any of the frame. • When Selective color is displayed. Self-timer (A 56) - Flash mode (A 53) - Enter shooting mode M A (shooting mode) button M G (third icon from the slider. Gives the...
... of the following four effects are available. Softens the image by adding a slight blur to cancel color selection, then change settings for any of the frame. • When Selective color is displayed. Self-timer (A 56) - Flash mode (A 53) - Enter shooting mode M A (shooting mode) button M G (third icon from the slider. Gives the...

Reference Manual
Page 66
Enter shooting mode M A (shooting mode) button M F Smart portrait mode M k button 1 Frame the picture. • Raise the flash when using it detects a smiling face. 3 Shooting ends. • To cancel smile detection and stop shooting, perform any of ...; "Using Face Detection" (A 67) 2 Wait for the subject to smile. Do not press the shutter-release button. • If the camera detects that the face framed by the double border is smiling, it automatically releases the shutter (Smile timer; Press the A button and select a different shooting mode. 48 You can take...
Enter shooting mode M A (shooting mode) button M F Smart portrait mode M k button 1 Frame the picture. • Raise the flash when using it detects a smiling face. 3 Shooting ends. • To cancel smile detection and stop shooting, perform any of ...; "Using Face Detection" (A 67) 2 Wait for the subject to smile. Do not press the shutter-release button. • If the camera detects that the face framed by the double border is smiling, it automatically releases the shutter (Smile timer; Press the A button and select a different shooting mode. 48 You can take...

Reference Manual
Page 67
... Smart Portrait Mode • Digital zoom cannot be used with other operations are detected, the camera focuses on the subject in the center of the frame. C When the Self-timer Lamp Flashes When using the multi selector (A 52) ➝ Flash mode (A 53), self-timer (A 56), and exposure compensation (A 60) • Features...
... Smart Portrait Mode • Digital zoom cannot be used with other operations are detected, the camera focuses on the subject in the center of the frame. C When the Self-timer Lamp Flashes When using the multi selector (A 52) ➝ Flash mode (A 53), self-timer (A 56), and exposure compensation (A 60) • Features...

Reference Manual
Page 69
...) button M A (auto) mode M k button • You can be used with other functions (A 65). 51 Settings can change how the camera selects the area of the frame to the camera. ➝ "Target Finding AF" (A 69) Changing A (Auto) Mode Settings • Features that can be set by pressing the d button ➝ Features That...
...) button M A (auto) mode M k button • You can be used with other functions (A 65). 51 Settings can change how the camera selects the area of the frame to the camera. ➝ "Target Finding AF" (A 69) Changing A (Auto) Mode Settings • Features that can be set by pressing the d button ➝ Features That...

Reference Manual
Page 74
The self-timer cannot be in the picture you want to be used. 3 Frame the picture and then press the shutter-release button halfway. • Focus and exposure are taking, or when you are set. The self-timer is ...
The self-timer cannot be in the picture you want to be used. 3 Frame the picture and then press the shutter-release button halfway. • Focus and exposure are taking, or when you are set. The self-timer is ...


