Reference Manual
Page 6
...Notes and Index." • In this manual, the product names "COOLPIX L26" and "COOLPIX L25" may sometimes be abbreviated as "L26" and "L25." • SD, SDHC, and SDXC memory cards are referred to as the "default setting." • The names of menu items displayed in the camera monitor... pages containing relevant information; Illustrations and text displays for COOLPIX L26. Introduction Other Information • Symbols and Conventions To make it easier to as "memory cards" in this manual. • The setting at the time of buttons or messages displayed on a computer monitor appear...
...Notes and Index." • In this manual, the product names "COOLPIX L26" and "COOLPIX L25" may sometimes be abbreviated as "L26" and "L25." • SD, SDHC, and SDXC memory cards are referred to as the "default setting." • The names of menu items displayed in the camera monitor... pages containing relevant information; Illustrations and text displays for COOLPIX L26. Introduction Other Information • Symbols and Conventions To make it easier to as "memory cards" in this manual. • The setting at the time of buttons or messages displayed on a computer monitor appear...

Reference Manual
Page 17
...10 Applicable Batteries 10 Preparation 2 Insert a Memory Card.......... 13 Internal Memory and Memory Cards......... 14 Approved Memory Cards 15 Preparation 3 Set the Display Language, Date, and Time 16 Step 1 Turn the Camera On and Select Shooting Mode 20 Turning the Camera On and Off 21 Step 2 Frame a Picture... Smart Portrait Menu 45 Using Skin Softening 46 A (Auto) Mode 47 Changing A (Auto) Mode Settings 47 Options Available in the Auto Shooting Menu 48 Features That Can Be Set Using the Multi Selector 49 Available Features 49 Using the Flash (Flash Modes 50 Using the Self-timer...
...10 Applicable Batteries 10 Preparation 2 Insert a Memory Card.......... 13 Internal Memory and Memory Cards......... 14 Approved Memory Cards 15 Preparation 3 Set the Display Language, Date, and Time 16 Step 1 Turn the Camera On and Select Shooting Mode 20 Turning the Camera On and Off 21 Step 2 Frame a Picture... Smart Portrait Menu 45 Using Skin Softening 46 A (Auto) Mode 47 Changing A (Auto) Mode Settings 47 Options Available in the Auto Shooting Menu 48 Features That Can Be Set Using the Multi Selector 49 Available Features 49 Using the Flash (Flash Modes 50 Using the Self-timer...

Reference Manual
Page 19
... The Movie Menu E38 Movie Options E38 Autofocus Mode (L26 Only E39 The Setup Menu E40 Welcome Screen E40 Time Zone and Date E41 Monitor Settings E45 Print Date (Imprinting Date and Time)... E47 Electronic VR E48 Motion Detection E50 AF Assist (L26 Only E51 Sound Settings E52 Auto Off E53 Format Memory/Format Card E54...
... The Movie Menu E38 Movie Options E38 Autofocus Mode (L26 Only E39 The Setup Menu E40 Welcome Screen E40 Time Zone and Date E41 Monitor Settings E45 Print Date (Imprinting Date and Time)... E47 Electronic VR E48 Motion Detection E50 AF Assist (L26 Only E51 Sound Settings E52 Auto Off E53 Format Memory/Format Card E54...

Reference Manual
Page 29
The Basics of Shooting and Playback The Basics of Shooting and Playback Preparation Preparation 1 Insert the Batteries 10 Preparation 2 Insert a Memory Card 13 Preparation 3 Set the Display Language, Date, and Time 16 Shooting Step 1 Turn the Camera On and Select Shooting Mode 20 Step 2 Frame a Picture ...23 Step 3 Focus and Shoot...26 Playback Step 4 Play Back Images ...29 Step 5 Delete Images...31 9
The Basics of Shooting and Playback The Basics of Shooting and Playback Preparation Preparation 1 Insert the Batteries 10 Preparation 2 Insert a Memory Card 13 Preparation 3 Set the Display Language, Date, and Time 16 Shooting Step 1 Turn the Camera On and Select Shooting Mode 20 Step 2 Frame a Picture ...23 Step 3 Focus and Shoot...26 Playback Step 4 Play Back Images ...29 Step 5 Delete Images...31 9

Reference Manual
Page 36
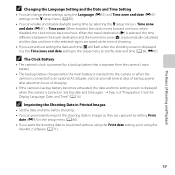
... Yes and press the k button. Cancel Time zone and date Choose time zone and set date and time? The Basics of Shooting and Playback Preparation 3 Set the Display Language, Date, and Time When the camera is turned on for the first time, the language-selection screen and the date and time setting screen for the camera clock are displayed...
... Yes and press the k button. Cancel Time zone and date Choose time zone and set date and time? The Basics of Shooting and Playback Preparation 3 Set the Display Language, Date, and Time When the camera is turned on for the first time, the language-selection screen and the date and time setting screen for the camera clock are displayed...

Reference Manual
Page 37
...I to select the date format and press the k button. Yes No 17 When the daylight saving time function is enabled, W is displayed at the top of Shooting and Playback 6 Press H, I, J, or K to set the date and time, and press the k button. • Select an item: Press K or J (changes between...D, M, Y, hour, and minute). • Edit the date and time: Press H or I. • Confirm the setting: Select the minute setting and press the k button. 7 Press H or I to select Yes and press the k button. 4 Press J or K to select your home time zone and press the k button. • Press H to enable ...
...I to select the date format and press the k button. Yes No 17 When the daylight saving time function is enabled, W is displayed at the top of Shooting and Playback 6 Press H, I, J, or K to set the date and time, and press the k button. • Select an item: Press K or J (changes between...D, M, Y, hour, and minute). • Edit the date and time: Press H or I. • Confirm the setting: Select the minute setting and press the k button. 7 Press H or I to select Yes and press the k button. 4 Press J or K to select your home time zone and press the k button. • Press H to enable ...
Reference Manual
Page 39
... exit without using the Print date setting, print using the Language (E55) and Time zone and date (E41) settings in the setup menu to set the date and time (A 86, E41). The Basics of Shooting and Playback C Changing the Language Setting and the Date and Time Setting • You can change these settings using the ViewNX 2 software (A 71). 19...
... exit without using the Print date setting, print using the Language (E55) and Time zone and date (E41) settings in the setup menu to set the date and time (A 86, E41). The Basics of Shooting and Playback C Changing the Language Setting and the Date and Time Setting • You can change these settings using the ViewNX 2 software (A 71). 19...

Reference Manual
Page 42
... off , the camera will enter standby mode, and the power-on if you perform any of Shooting and Playback 22 Camera turns off. • The time that elapses before the camera enters standby mode can be changed using shooting mode or playback mode. While the camera is in about 30 seconds... when you are performed for approximately another three minutes, the camera will flash. If no operations are using the Auto off setting in the setup menu (A 86). • By default, the camera enters standby mode in standby mode, the monitor turns back on lamp will turn ...
... off , the camera will enter standby mode, and the power-on if you perform any of Shooting and Playback 22 Camera turns off. • The time that elapses before the camera enters standby mode can be changed using shooting mode or playback mode. While the camera is in about 30 seconds... when you are performed for approximately another three minutes, the camera will flash. If no operations are using the Auto off setting in the setup menu (A 86). • By default, the camera enters standby mode in standby mode, the monitor turns back on lamp will turn ...

Reference Manual
Page 47
... button halfway, press the shutter-release button the rest of exposures remaining or the remaining recording time flashes while images or movies are being saved. The Shutter-release Button Press halfway Press all the way To set focus and exposure (shutter speed and aperture value), press the shutter-release button halfway, stopping...
... button halfway, press the shutter-release button the rest of exposures remaining or the remaining recording time flashes while images or movies are being saved. The Shutter-release Button Press halfway Press all the way To set focus and exposure (shutter speed and aperture value), press the shutter-release button halfway, stopping...

Reference Manual
Page 62
... P 4608×3456 (for L26) or i 3648×2736 (for L25). • When the camera detects a face, a double border (focus area) is set to take more than one at a time. - Continuous: When a face is focused on, the camera captures three images continuously at the center of about 1.2 fps when Image ...may be used. • Depending on the distance of the pet from the camera, the speed of about 1.2 fps when Image mode is set to P 4608×3456 (for L26) or i 3648×2736 (for L25). • Press the multi selector J (n) to five pets can release the shutter by single ...
... P 4608×3456 (for L26) or i 3648×2736 (for L25). • When the camera detects a face, a double border (focus area) is set to take more than one at a time. - Continuous: When a face is focused on, the camera captures three images continuously at the center of about 1.2 fps when Image ...may be used. • Depending on the distance of the pet from the camera, the speed of about 1.2 fps when Image mode is set to P 4608×3456 (for L26) or i 3648×2736 (for L25). • Press the multi selector J (n) to five pets can release the shutter by single ...

Reference Manual
Page 65
... size and image quality used with other shot is saved. When On is selected, the camera automatically releases the shutter twice each time a picture is Off. The default setting is taken. Select smart portrait mode (A 43) M d button M F tab Smart portrait Image mode Skin softening Smile timer ...Blink proof Option Image mode Skin softening Smile timer Blink proof Description A Allows you change the image mode 60 setting, the new setting is applied to all shooting modes. The flash cannot be used when saving images (A 60). Make the skin tones in human...
... size and image quality used with other shot is saved. When On is selected, the camera automatically releases the shutter twice each time a picture is Off. The default setting is taken. Select smart portrait mode (A 43) M d button M F tab Smart portrait Image mode Skin softening Smile timer ...Blink proof Option Image mode Skin softening Smile timer Blink proof Description A Allows you change the image mode 60 setting, the new setting is applied to all shooting modes. The flash cannot be used when saving images (A 60). Make the skin tones in human...

Reference Manual
Page 68
...to select the combination of images. The available settings are Single (default setting), Continuous, BSS, and Multi-shot 16. Allows you to change the color tones of images at the time of shooting. The available settings are Standard color (default setting), Vivid color, Black-and-white, Sepia, ...and Cyanotype. A 60 E24 E27 E28 Shooting Features C Features That Cannot Be Used Simultaneously 48 Some settings cannot be changed. Allows you...
...to select the combination of images. The available settings are Single (default setting), Continuous, BSS, and Multi-shot 16. Allows you to change the color tones of images at the time of shooting. The available settings are Standard color (default setting), Vivid color, Black-and-white, Sepia, ...and Cyanotype. A 60 E24 E27 E28 Shooting Features C Features That Cannot Be Used Simultaneously 48 Some settings cannot be changed. Allows you...

Reference Manual
Page 72
... fired, there is a slight lag between when the shutter-release button is pressed and when the shutter is released. • More time than usual is required to save images. • Red-eye reduction may be processed to reduce red-eye before the main flash, ... the red-eye effect. Shooting Features C The Flash Mode Setting • The setting varies with the shooting mode. ➝ "Available Features" (A 49) ➝ "Default Settings" (A 58) • Some settings cannot be used with other functions (A 62). • The flash mode setting applied in A (auto) mode is saved in all situations...
... fired, there is a slight lag between when the shutter-release button is pressed and when the shutter is released. • More time than usual is required to save images. • Red-eye reduction may be processed to reduce red-eye before the main flash, ... the red-eye effect. Shooting Features C The Flash Mode Setting • The setting varies with the shooting mode. ➝ "Available Features" (A 49) ➝ "Default Settings" (A 58) • Some settings cannot be used with other functions (A 62). • The flash mode setting applied in A (auto) mode is saved in all situations...

Reference Manual
Page 88
...card, you to select which saved images are edited and saved as separate files. E35 Creates a small copy of l 4608×2592 for L26 and l 3584×2016 for display on Web pages or e-mail E9 attachments. E29 Allows you can configure the following functions by pressing the... is useful for creating copies for L25 cannot be edited, and the same editing feature cannot be applied multiple times. For example, images captured at an Image mode (A 60) setting of the current image. Playback Features 68 Features Available in Playback Mode (Playback Menu) When viewing images in ...
...card, you to select which saved images are edited and saved as separate files. E35 Creates a small copy of l 4608×2592 for L26 and l 3584×2016 for display on Web pages or e-mail E9 attachments. E29 Allows you can configure the following functions by pressing the... is useful for creating copies for L25 cannot be edited, and the same editing feature cannot be applied multiple times. For example, images captured at an Image mode (A 60) setting of the current image. Playback Features 68 Features Available in Playback Mode (Playback Menu) When viewing images in ...

Reference Manual
Page 99
... of 6 or faster are used. • The optical zoom magnification ratio cannot be damaged. Set Autofocus mode in the center of the frame, press the b (e movie-record) button to ...digital zoom turns off. • The sounds of zoom control operation, autofocus lens drive movement (L26 only), and aperture operation when brightness changes may be recorded with movies. B Notes About Autofocus ...Autofocus may become warm when shooting movies for an extended period of time or when the camera is not a malfunction. Do not open the batterychamber/memory card slot ...
... of 6 or faster are used. • The optical zoom magnification ratio cannot be damaged. Set Autofocus mode in the center of the frame, press the b (e movie-record) button to ...digital zoom turns off. • The sounds of zoom control operation, autofocus lens drive movement (L26 only), and aperture operation when brightness changes may be recorded with movies. B Notes About Autofocus ...Autofocus may become warm when shooting movies for an extended period of time or when the camera is not a malfunction. Do not open the batterychamber/memory card slot ...

Reference Manual
Page 100
...4 GB and the maximum movie length for the current shooting mode are approximate. Confirm settings before starting movie recording. • The self-timer (A 53) can be used. C Functions Available with movie recording. Set the self-timer and press the b (e movie-record) button to start recording ...applied with Movie Recording • The exposure compensation, white balance, and color options settings for a single movie is 29 minutes, even when there is enabled, movies of recording time available for longer recording. The maximum movie length may vary depending on the memory card...
...4 GB and the maximum movie length for the current shooting mode are approximate. Confirm settings before starting movie recording. • The self-timer (A 53) can be used. C Functions Available with movie recording. Set the self-timer and press the b (e movie-record) button to start recording ...applied with Movie Recording • The exposure compensation, white balance, and color options settings for a single movie is 29 minutes, even when there is enabled, movies of recording time available for longer recording. The maximum movie length may vary depending on the memory card...

Reference Manual
Page 101
...using the camera's internal memory), the default setting is selected, the sound of the camera focusing from being recorded, select A Single AF. When B Full-time AF is m VGA (640×480). A E38 E39 81 When B Full-time AF is locked when movie recording begins. ...VGA (640×480), and W QVGA (320×240). Movie Movie options Autofocus mode Option Movie options Autofocus mode (L26 only) Description The following settings can be heard in recorded movies. When A Single AF (default setting) is selected, focus is selected, the camera focuses continuously while recording.
...using the camera's internal memory), the default setting is selected, the sound of the camera focusing from being recorded, select A Single AF. When B Full-time AF is m VGA (640×480). A E38 E39 81 When B Full-time AF is locked when movie recording begins. ...VGA (640×480), and W QVGA (320×240). Movie Movie options Autofocus mode Option Movie options Autofocus mode (L26 only) Description The following settings can be heard in recorded movies. When A Single AF (default setting) is selected, focus is selected, the camera focuses continuously while recording.

Reference Manual
Page 105
General Camera Setup General Camera Setup This chapter describes the various settings that can be adjusted in the Reference Section (E40). 85 Set up Welcome screen Time zone and date Monitor settings Print date 15m 0s Electronic VR 970 Motion detection AF assist For further details about each setting, refer to "The Setup Menu" in the z setup menu.
General Camera Setup General Camera Setup This chapter describes the various settings that can be adjusted in the Reference Section (E40). 85 Set up Welcome screen Time zone and date Monitor settings Print date 15m 0s Electronic VR 970 Motion detection AF assist For further details about each setting, refer to "The Setup Menu" in the z setup menu.

Reference Manual
Page 106
...to select the electronic vibration reduction setting used when shooting still images. E51 Allows you to adjust sound settings. E40 Allows you to set whether or not the camera automatically increases the shutter speed to set the amount of time that passes before the monitor turns...display and monitor brightness settings. Set up Welcome screen Time zone and date Monitor settings Print date Electronic VR Motion detection AF assist Option Welcome screen Time zone and date Monitor settings Print date Electronic VR Motion detection AF assist (L26 only) Sound settings Auto off to ...
...to select the electronic vibration reduction setting used when shooting still images. E51 Allows you to adjust sound settings. E40 Allows you to set whether or not the camera automatically increases the shutter speed to set the amount of time that passes before the monitor turns...display and monitor brightness settings. Set up Welcome screen Time zone and date Monitor settings Print date Electronic VR Motion detection AF assist Option Welcome screen Time zone and date Monitor settings Print date Electronic VR Motion detection AF assist (L26 only) Sound settings Auto off to ...
Reference Manual
Page 185
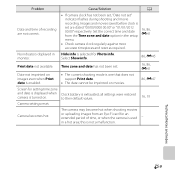
... camera clock regularly against more accurate timepieces and reset as required. 16, 86, E41 No indicators displayed in a hot area; this is used - Set the correct time and date from an Eye-Fi card for an extended period of recording are dated "00/00/0000 00:00" or "01/01/2012..., 19 Camera becomes hot. Technical Notes and Index F9 monitor. Clock battery is selected for setting time zone and date is displayed when camera is set are not correct. • If camera clock has not been set, "Date not set . 16, 86, E41 Date not imprinted on images even when Print date is enabled. ...
... camera clock regularly against more accurate timepieces and reset as required. 16, 86, E41 No indicators displayed in a hot area; this is used - Set the correct time and date from an Eye-Fi card for an extended period of recording are dated "00/00/0000 00:00" or "01/01/2012..., 19 Camera becomes hot. Technical Notes and Index F9 monitor. Clock battery is selected for setting time zone and date is displayed when camera is set are not correct. • If camera clock has not been set, "Date not set . 16, 86, E41 Date not imprinted on images even when Print date is enabled. ...


