M3 Series Hardware Manual
Page 5
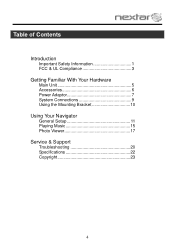
Table of Contents Introduction Important Safety Information 1 FCC & UL Compliance 3 Getting Familiar With Your Hardware Main Unit 5 Accessories 6 Power Adaptor 7 System Connections 9 Using the Mounting Bracket 10 Using Your Navigator General Setup 11 Playing Music 15 Photo Viewer 17 Service & Support Troubleshooting 20 Specifications 22 Copyright 23 4
Table of Contents Introduction Important Safety Information 1 FCC & UL Compliance 3 Getting Familiar With Your Hardware Main Unit 5 Accessories 6 Power Adaptor 7 System Connections 9 Using the Mounting Bracket 10 Using Your Navigator General Setup 11 Playing Music 15 Photo Viewer 17 Service & Support Troubleshooting 20 Specifications 22 Copyright 23 4
M3 Series Hardware Manual
Page 12
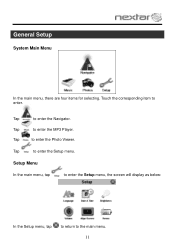
Tap to enter the Setup menu. Tap to enter the Photo Viewer. Touch the corresponding item to enter the MP3 Player. Tap to enter. Tap to the main menu. 11 Setup Menu In the main menu, tap to enter the Setup menu, the screen will display as below: In the Setup menu, tap to return to enter the Navigator. General Setup System Main Menu In the main menu, there are four items for selecting.
Tap to enter the Setup menu. Tap to enter the Photo Viewer. Touch the corresponding item to enter the MP3 Player. Tap to enter. Tap to the main menu. 11 Setup Menu In the main menu, tap to enter the Setup menu, the screen will display as below: In the Setup menu, tap to return to enter the Navigator. General Setup System Main Menu In the main menu, there are four items for selecting.
M3 Series Hardware Manual
Page 13
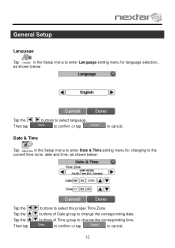
General Setup Language Tap in the Setup menu to enter Date & Time setting menu for language selection, as shown below : Tap the , Then tap buttons to cancel. buttons of Date group to change the corresponding date. to confirm or tap to select language. Date & Time Tap in the Setup menu to enter Language setting menu for changing to the current time zone, date and time, as shown below : Tap the Tap the Tap the Then tap buttons to cancel. 12 buttons of Time group to change the corresponding time. to confirm or tap to select the proper Time Zone.
General Setup Language Tap in the Setup menu to enter Date & Time setting menu for language selection, as shown below : Tap the , Then tap buttons to cancel. buttons of Date group to change the corresponding date. to confirm or tap to select language. Date & Time Tap in the Setup menu to enter Language setting menu for changing to the current time zone, date and time, as shown below : Tap the Tap the Tap the Then tap buttons to cancel. 12 buttons of Time group to change the corresponding time. to confirm or tap to select the proper Time Zone.

M3 Series Hardware Manual
Page 14
to cancel. General Setup Brightness Tap in the Setup menu to enter Volume settings menu for backlight adjustment, as shown below : Tap , to darken or increase the brightness of the display. to confirm or tap 13 to increase the volume. Volume Tap in the Setup menu to enter Brightness setting menu for volume adjustment, as shown below : Tap the Tap the Then tap to cancel. After setting, tap to confirm or tap to decrease the volume.
to cancel. General Setup Brightness Tap in the Setup menu to enter Volume settings menu for backlight adjustment, as shown below : Tap , to darken or increase the brightness of the display. to confirm or tap 13 to increase the volume. Volume Tap in the Setup menu to enter Brightness setting menu for volume adjustment, as shown below : Tap the Tap the Then tap to cancel. After setting, tap to confirm or tap to decrease the volume.

M3 Series Hardware Manual
Page 15
... screen on the final step, the new settings will indicate "Charging". 14 Repeat each time to complete the calibration process. Power Tap in the Setup menu to align the screen, as shown below . When the battery is being charged, the Battery Status will be stored and you are between ...0% and 100%, where 0% means the battery power has run out completely, and 100% represents a full battery power. General Setup Align Screen Tap in the Setup menu to enter Power menu, as shown below : The Power menu displays the unit's battery status. The values are returned to the ...
... screen on the final step, the new settings will indicate "Charging". 14 Repeat each time to complete the calibration process. Power Tap in the Setup menu to align the screen, as shown below . When the battery is being charged, the Battery Status will be stored and you are between ...0% and 100%, where 0% means the battery power has run out completely, and 100% represents a full battery power. General Setup Align Screen Tap in the Setup menu to enter Power menu, as shown below : The Power menu displays the unit's battery status. The values are returned to the ...